
On this page:
Surface Difference Wizard - Page 1
Surface Difference Wizard - Page 2

Surface Difference Wizard - Page 3
.png?cb=29ac3d0f79d9235b04a8088d312a5967)
Surface Difference Wizard - Page 4
Surface Difference Wizard - Page 5
How to Start
-
Scene Objects Dock → Right-Click on Object → Operations → Surface Difference
-
Scene Objects Dock → Operations → Surface Difference
What it Does
The Surface Difference wizard is used to initiate several kinds of surface-surface and surface-plane queries.
General Description
Object types that can be queried are selectable through page 1 and page 2 of the wizard, and the type of query to be applied is selected via the query type radio buttons on page 3. The selected query is applied to the specified data objects, and the scope of the query is specified on page 4 of the wizard. By default, the query is applied to the common or intersection area of both input surfaces. However, a polygon can be used to constrain the query scope to within a certain area. A polygon can be loaded from the current polygon selection in the Main Visualization Window by selecting the Use Polygon Selection radial button. Alternately, a polygon can be loaded from an XY text file by selecting the Load Polygon from File radial button.
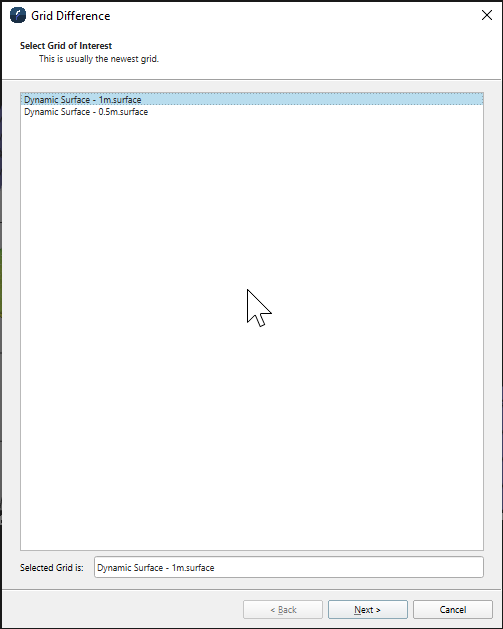
Page 1
Select the first surface or surface layer
from the list of available surfaces for the difference operation. Click Next to proceed to the next page of the wizard or Cancel to cancel the operation.
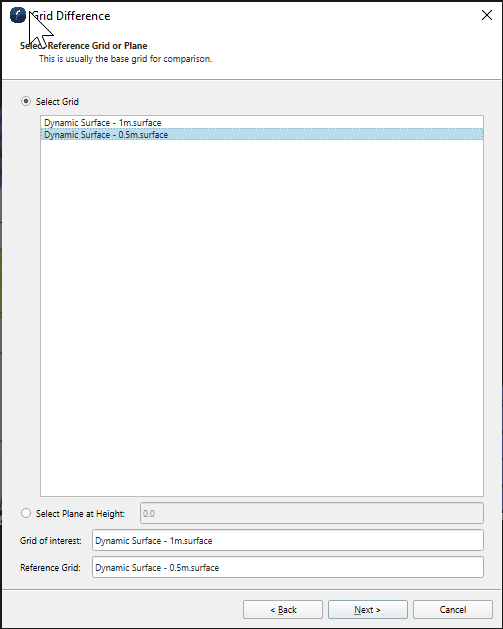
Page 2
Select the second surface or surface layer
for the difference operation. Alternatively you can choose to use a plane at a specified height for the second surface. Click Next to proceed to the next page, Back to return to the previous page of the wizard or Cancel to cancel the operation.
Page 3
Select which data to use for the difference operation. Click Next to proceed to the next page, Back to return to the previous page of the wizard or Cancel to cancel the operation.
Page 4
Select the constraints of the difference operation. You can optionally specify a Z-Range that you want to force the difference surface to have. The main purpose of this is you want to do multiple surface differences one can optionally guarantee each resulting surface has the same difference range which is particularly useful if one wants to show the difference histogram in the next page to make comparative histogram plots. If one chooses to force the difference range any resulting difference cells outside the specified range will be clipped out. Click Next to proceed to the next page, Back to return to the previous page of the wizard or Cancel to cancel the operation.
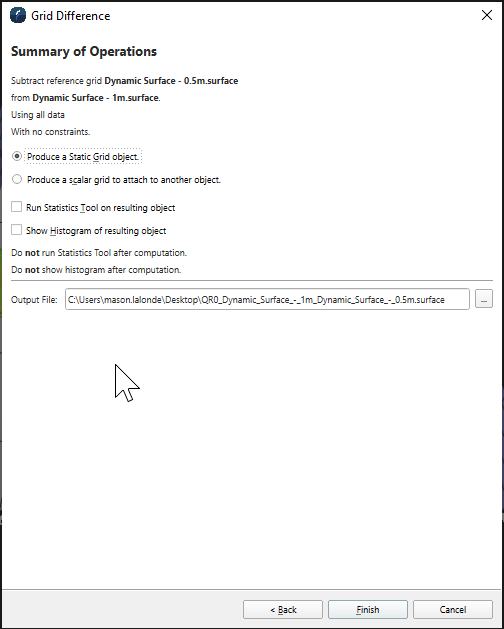
Page 5
Review the selected options for the difference operation. Click Finish to proceed or Cancel cancel the operation. When complete, a Fledermaus static surface will be added to the project representing the results of the surface difference operation. Assuming they are selected one will also see the statistics for the surface difference and/or a resulting histogram of the difference.