
Overview
The Import Gridded Data wizard gives a step-by-step method for importing a grid into Fledermaus that is stored in an external format.
The steps through the wizard are as follows:
-
Load a gridded file to import.
-
Select the file type from the list. Usually, the system detects the type of file being loaded and selects an appropriate file type. If the system does not select the correct file type, it is possible to change the type to one of the supported types.
-
There may be one or more steps specific to the type of data being imported in order to specify parameters for the import, such as the special Z value used for data nulls.
-
The coordinate system of the data may be entered on the Input Coordinate System page. If the data already contains a coordinate system recognized by Fledermaus, it will already be filled in. It is possible to change this setting if it is not suitable.
-
The Grid Information page will be shown with the data dimensions, bounds of the data and the cell size.
-
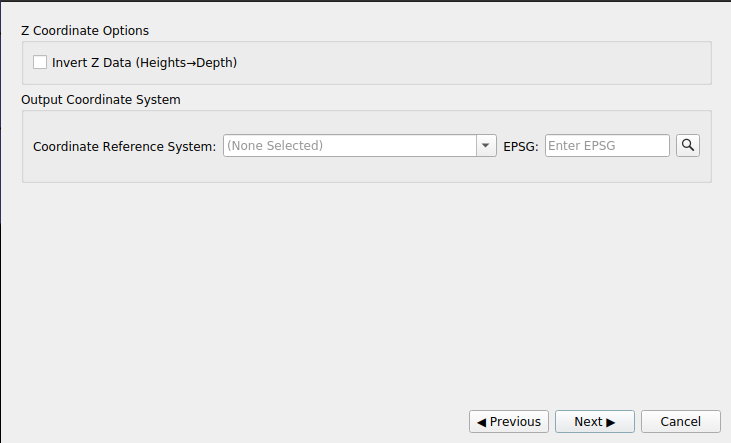
On the next page, the Z coordinate options and output coordinate system used by Fledermaus may be set.
-
Finally, the output type, scalar or surface, may be selected, the output filename and colormap may be selected and the shade parameters set to the default or by a shade parameter file.
Any of the steps after selecting the file may be reviewed at any time by using the Previous and Next buttons. Complete the import by clicking Finish. The operation can be cancelled at any time by clicking Cancel.
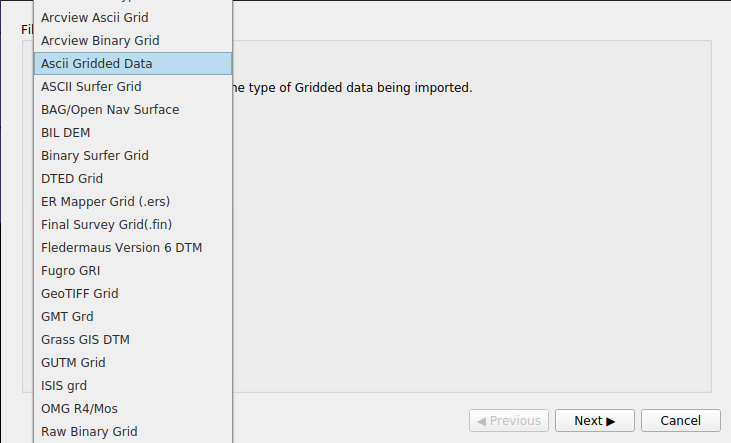
The following formats are recognized:
-
Arcview Ascii Grid
-
Arcview Binary Grid
-
Ascii Gridded Data
-
ASCII Surfer Grid
-
BAG/Open Nav Surface
-
BIL DEM
-
Binary Surfer Grid
-
DTED Grid
-
ER Mapper Grid (.ers)
-
Final Survey Grid (.fin)
-
Fledermaus Version 6 DTM
-
Fugro GRI
-
GeoTIFF Grid
-
GMT Grid
-
Grass GIS DTM
-
GUTM Grid
-
ISIS Grid
-
OMG R4/Mos
-
Raw Binary Grid
-
USGS DEM
ASCII Import Grid
File Type
The Import Grid Wizard for ASCII data detects the file type automatically and selects it. If your data is not automatically detected, it can be selected manually. Similarly, if your data is detected incorrectly, the correct file type may be selected. Click Next to continue to the next screen.
Parsing Information
For ASCII data, the next screen prompts for the data type, XYZ or Z Variable and some parsing information. The No Data value may be entered and the number of header lines to skip, if any, may be entered.
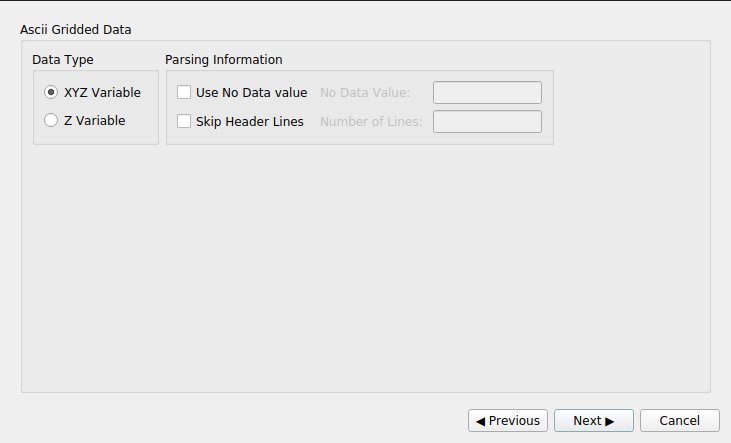
There are two different screens possible for ASCII gridded data after this screen. One is the field mapping for XYZ data, the other is for Z only data.
ASCII XYZ Parsing Page
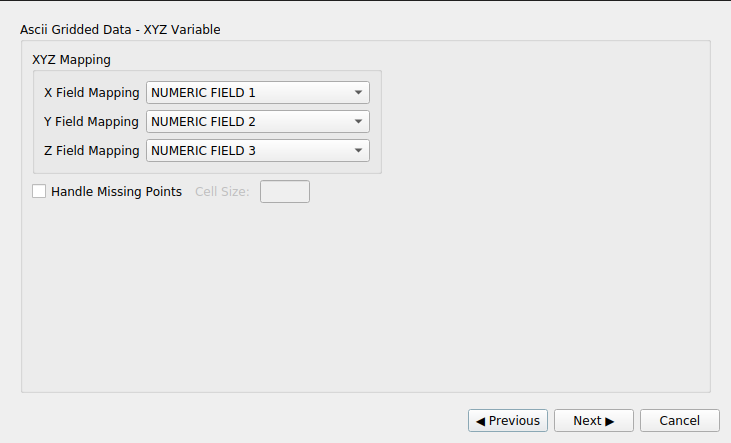
Use this page to enter the field in the ASCII file that corresponds to the X, Y and Z fields. The default mapping sets the first field in to X, the second field to Y and the third field to Z. Set the order to match your file.
If there are data nulls in the file, where there is no entry in the input for a particular grid cell, select Handle Missing Points and specify the cell size. Fledermaus will make a best effort if this field is not specified.
ASCII Z Parsing Page
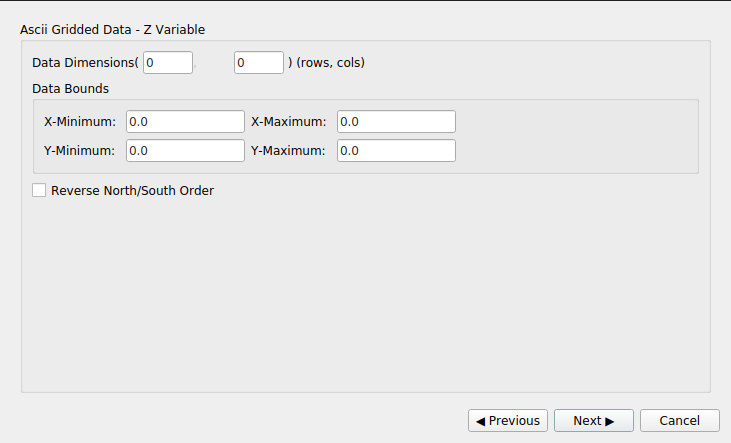
Use this page to specify the dimensions of the grid (rows and columns) and the data bounds.
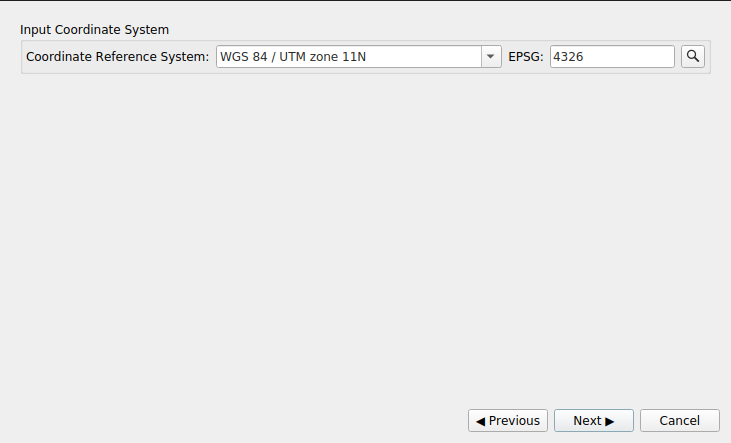
Input Coordinate Reference System
Enter the CRS for the input data. In this case, UTM zone 11N was selected manually. For some formats, the correct CRS will be selected automatically.
Grid Information
The grid information will be displayed on this page. It is possible to review the data dimensions in rows and columns, the bounds and the cell size to determine if the information makes sense for the input data. If not, the input parameters can be reviewed by clicking Previous until the page with incorrect information can be identified and corrected.
For example, if range of the X and Y data indicates that a geographic CRS such as WGS 84 should be selected instead of a UTM projection, it is possible to go back and change the CRS.
Output Coordinate System
The output coordinate system can be selected here. Often, the same coordinate system used for input is used here, but it is possible to reproject data from the input coordinate system to a different one. This may be because the scene coordinate system used in Fledermaus is different from the input data. If the imported data does not have the same CRS as the scene, it will not display in Fledermaus. It is possible to reproject data to the scene CRS in Fledermaus later, if that is desired.
The Z data may also be inverted, so that positive values of Z represent depths, for example.
Final Settings
The final page lists options to select the output type, filename, colormap and shade parameters. The default filename has the same base name as the input filename, with the extension changed to .surface for a surface or .scalar for a scalar grid. The colormap may be changed to any of the system colormaps or a colormap created with the colormap editor. Shade parameters may be loaded from a file with shade parameters.