
Preferences Dialog
How to Start
-
Main Menu Bar → File → Preferences

Preferences Dialog from File Menu
What it Does
This dialog is used to modify application preferences.
General Description
Preferences are used across all projects created by Fledermaus. They are not project specific. There are 4 preference tabs which are described below. The tab bar across the top of the dialog shows the available preference groups. Selecting a tab will display its controls. There are also a number of buttons along the bottom of the dialog. The OK button applies all of the changed preferences and hides the dialog from view. The Cancel button dismisses the dialog without saving any changes. The Apply button sets all changed preferences without hiding the dialog box. The Reset button will reset the preferences to their default (starting) values.
General Preferences
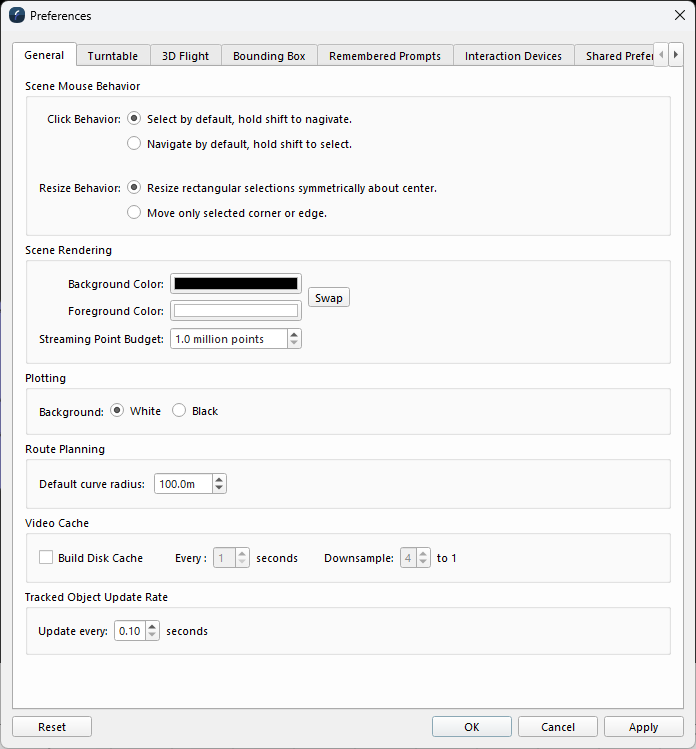
The General preference tab is a miscellaneous collection of settings that do not fit in any other group.
General Preferences Tab
Scene Mouse Behavior
Click Behavior
Some user workflows prefer scene navigation by default for any mouse interaction. Some user workflows prefer original mouse behavior. You can change the mouse navigation behavior of Fledermaus by changing this option.
The Selected by Default option allows mouse interaction with the scene to perform the operations allowed by the selected mode. For example, in Rectangular Select mode, if you left-click-drag over a grid in the scene, you will create a selection area. Doing this in another location will create a new selection area. If you want to navigate within the scene, you have to hold down the SHIFT key.
The Navigate by Default option will navigate the scene with any mouse interaction for any selected mode. In order to use the capabilities of the selected mode, you must hold down the SHIFT key. For example, if you are in Area Select mode, you must hold down the SHIFT key to select a new area.
Resize Behavior
For Rectangular and Free/Fixed Slice Select modes you can resize the selections by clicking and dragging one of the corner or edge “handles” (dots), changing this option changes how the other sides of the selection change as you drag.
The Resize rectangular selections symmetrically about center option changes all sides and corners such that the center of the selection stays fixed.
The Move only selected corner or edge option will only modify the corner or edge being dragged, which will adjust the center of the selection but leave the opposite edge or corner fixed.
Scene Rendering
The Background Color and Foreground Color options allows you to change the colors of the 4D Scene. Simply click on the button go get the color picker dialog show below. Use the Swap button to swap the foreground and background color.
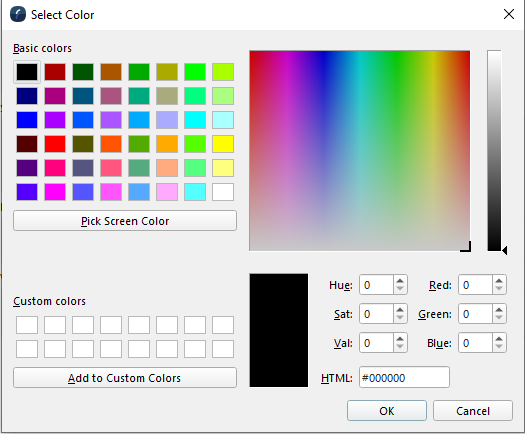
Select Color Dialog
The Streaming Point Budget option sets the maximum number of points rendered by Point Cloud objects. Increasing this value will allow Streamed Points to display more detail at the cost of performance. This can be set to anything between 1 million and 1 billion points.
Plotting
You can change the background color of all plot based widgets to either black or white. When you switch colors, the grid line color will also invert so that the lines are visible.
Video Cache
A video cache can be used when you are working with video files attached to a scene. It is especially useful when working with large 4K video files. When turned on and used with a project when one adds video sources it will make a series of smaller images behind the scenes to make scrolling in time much faster then it otherwise would be. One can select the time interval to create the cached imagery and an amount to down sample them which is useful when dealing with 4K or other large video files.
Turntable Preferences
This tab contains options to customize the 3D Turntable View.

Turntable Preferences Tab
Widget Options
The Show Rotation Scrollbars checkbox toggles the visibility of the rings on the ends of the turntable widget's arms which are used to control rotation.
The Show Rulers checkbox toggles the visibility of distance marks and labels along the turntable widget's arms.
The Show Angles checkbox toggles the visibility of pitch and yaw angle labels near the ends of the turntable widget's arms.
3D Flight Preferences
This tab contains the calibration parameters used to customize the 3D flight interaction mode.
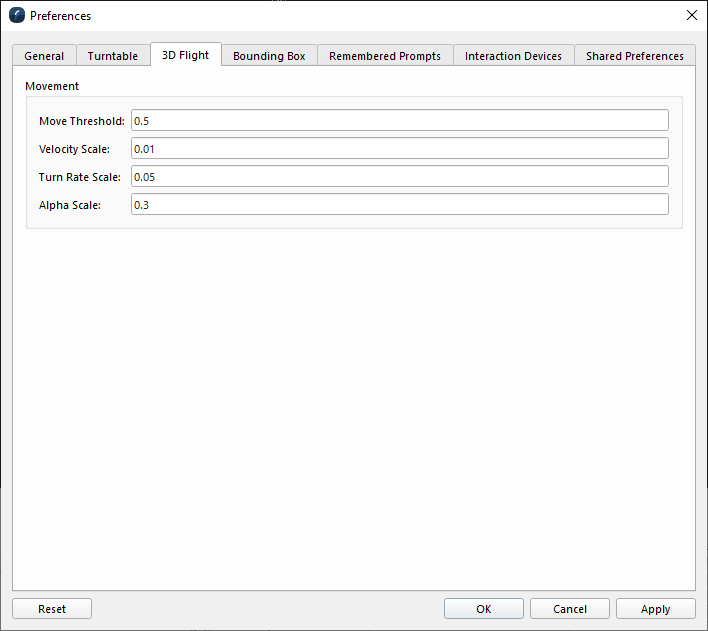
3D Flight Preferences Tab
There are four input fields that allow control of the sensitivity of the 3D flight algorithm. Control values are changed by entering a new value in the appropriate text field.
-
The Move Threshold is the distance, in centimeters, you must move the 3D device before flying will begin.
-
The Velocity Scale affects the speed with which you travel through the 3D world. Similarly.
-
The Turn Rate Scale affects the speed with which you turn in the 3D world.
-
The Alpha Scale affects the increase in turn rate with increases in speed. Generally you will not need to change this last parameter.
Bounding Box Preferences
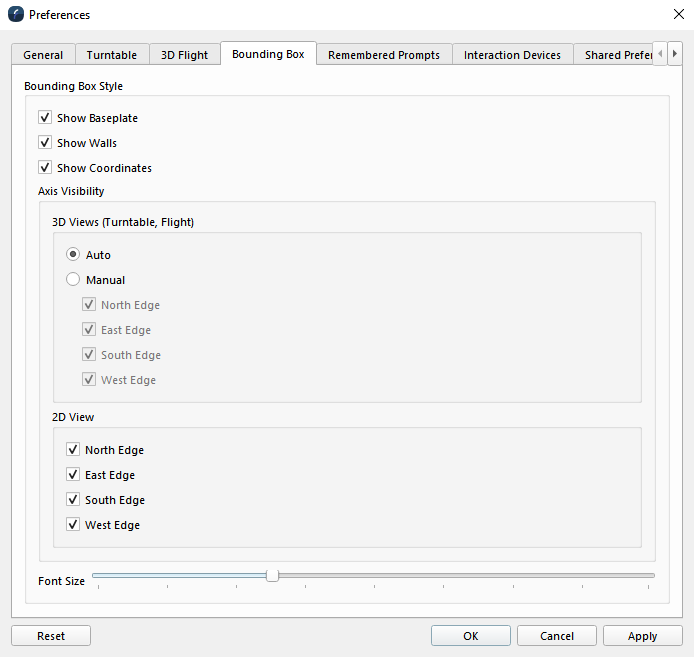
This tab contains options to customize the scene bounding box.
Bounding Box Tab
Bounding Box Style
Here you can choose which parts of the bounding box will be displayed in the scene.
If Show Coordinates is checked, then the axes of the bounding box will show coordinate labels based on the Axis Visibility settings. These settings are separate for the 3D view modes (Turntable and Flight mode) and the 2D view mode. For the 3D view modes you can choose to have the bounding box automatically show only the labels on the axes closest to the camera, or control the axis visibility manually. For the 2D view mode only manual visibility is available.
The Font Size slider let you customize the size of the coordinate labels along the edges of the bounding box.
Note that if Show Baseplate or Show Walls are unchecked, the labels on the corresponding part of the bounding box will not appear, regardless of whether Show Coordinates is checked or not.
Remembered Prompts Preferences
Part of Fledermaus' Dynamic Workflow is to prompt the user with questions about the next logical step in the process.
In addition to the prompt bar, many message boxes with Fledermaus also have Don't ask again or Don't show this message again check boxes. These work the exact same way and are also shown in the Remembered Prompts table.
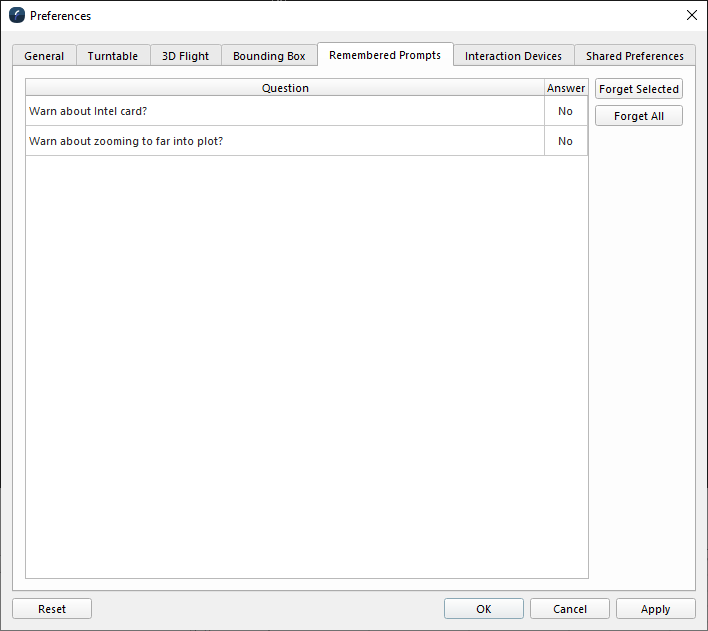
Remembered Prompts Preferences Tab
Interaction Device Preferences
The Interaction Devices preference tab is used to configure hardware devices used to interact with the 3D scene such as the Connexion SpaceNavigator, and the Patriot Bat. In order to configure a device you must first add it be selecting a supported device from the Select Device drop down menu. Current the SpaceNavigator and Patriot Bat are supported devices. After selecting the device click Add Device to add it to the list of configured devices. Once a device has been added if you click the device name you will see any device specific options to the right in the selected device setup area. You can remove a device by selecting it in the list and clicking the Remove Selected Device button. Once you click Apply or Ok for the preferences any configured devices will appear on the right hand side of the Fledermaus status bar.
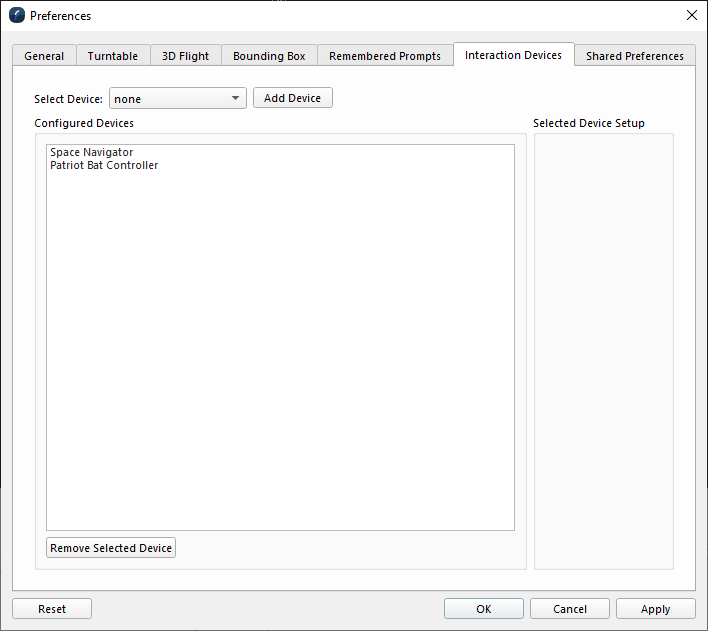
Interaction Device Preferences Tab
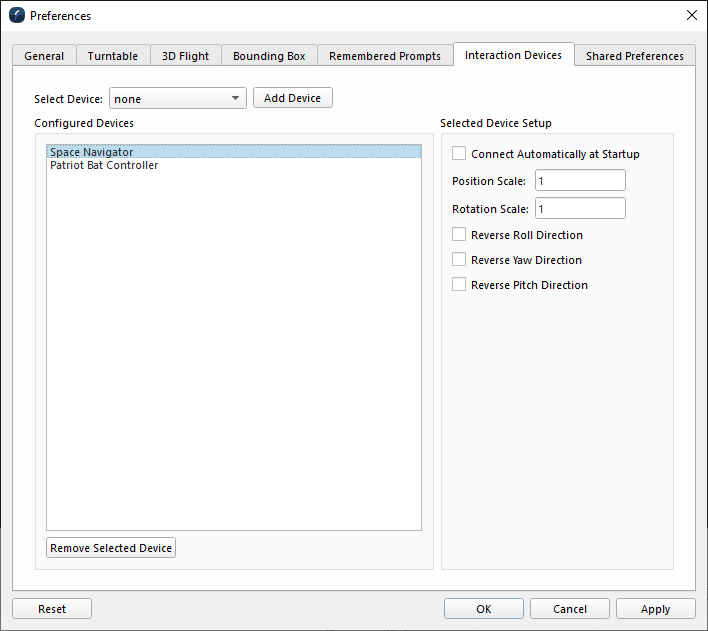
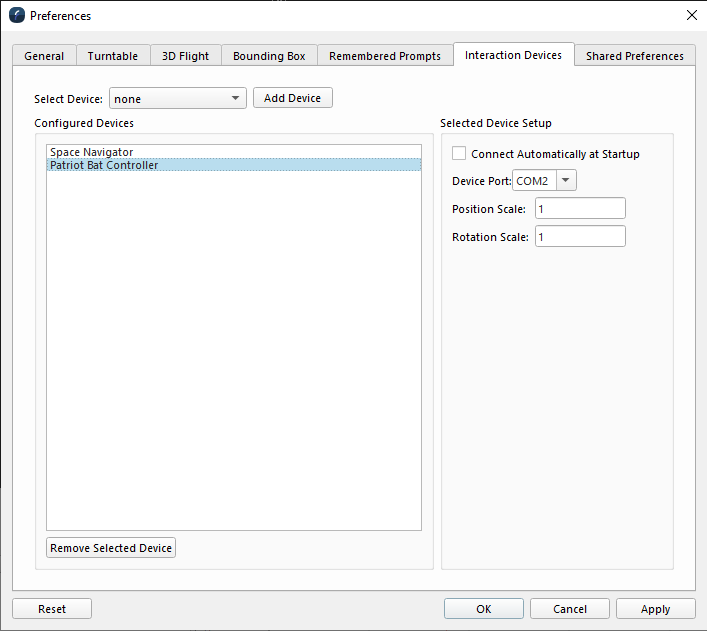
The device setup parameters available will depend on the device being configured as shown below for the SpaceNavigator and the Patriot device. The Connect Automatically at Startup when checks attempt to connect and activate the device whenever fm8 is started. When un-checked the device will appear in the status bar but you will need to connect it whenever you want to use the device. The Patriot device needs to be connected to the computer via a Keyspan USB (or similar) device to connect the Bat's serial port to the computer. The position and rotation scale factors are used to adjust the calibration of the device to make the system move more or less as you move the device and controls how the device feels when moving or rotating the 3D scene. See the Fledermaus status bar documentation for details about managing the configured devices.
|
|
|---|
Interaction Device Setup Options
Shared Preferences
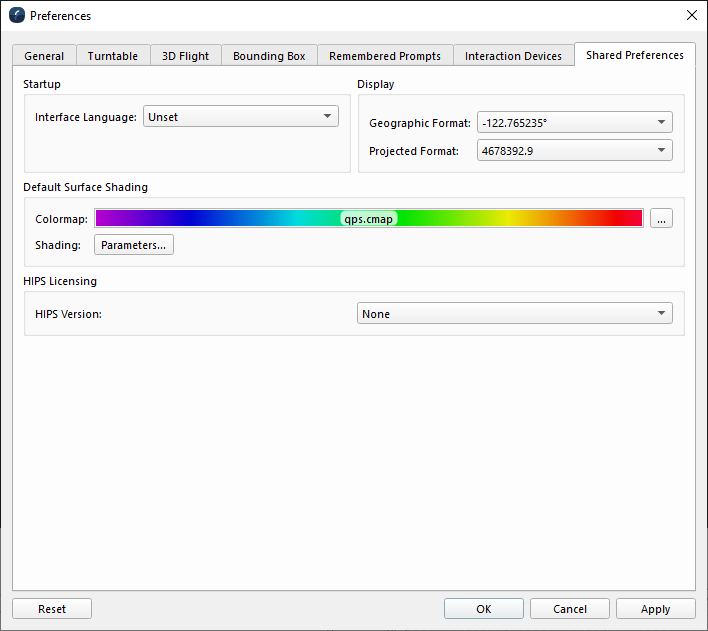
Shared Preferences Tab
Startup
The Interface Language combo box allows you to select the language to be used by the user experience when Fledermaus is restarted. This list will increase over time and new language packs will be available from the download section of Fledermaus.
Display
These options change how geographic or projected coordinates are viewed in dialogs and the Status Bar.
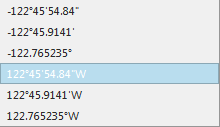
Geographic Options
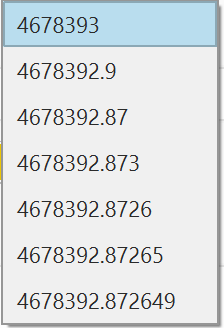
Projected Options
Default Surface Shading
Please see sections Shading Parameters Dialog and Select Colormap Dialog for more information on this section. These options are used whenever creating Dynamic or Static surfaces in Fledermaus.
HIPS Licensing
The HIPS Version dropdown box allows you to specify whether you are using a HIPS 9 or 11 license. This is used when importing HDCS data.
When the HIPS Version is set to 9, the HIPS License Path field allows you to specify the HIPS license file, which is typically located in the System folder of the CARIS installation path.
When the HIPS Version is set to 11, the HIPS License Host field allows you to specify the HIPS 11 license string - either the license server's hostname for a server license, or "no-net" for a HIPS 11 local license.
The Test HIPS Licensing button performs a license check based on the parameters specified in the HIPS Version and HIPS License Path/Host fields.
Return to the File menu.