
Import Model Dialog
How to Start
-
Import Menu → Import Model
What It Does
Selecting the the Import Model option from the Imports menu will ask for a 3D model file to be loaded in one of the supported 3D formats. Once selected the model's data will be processed and the Import Model dialog will be displayed to finish the import process. Most of the options in the dialog are interpret the model correctly and help position the model within the current 3D scene.
General Description
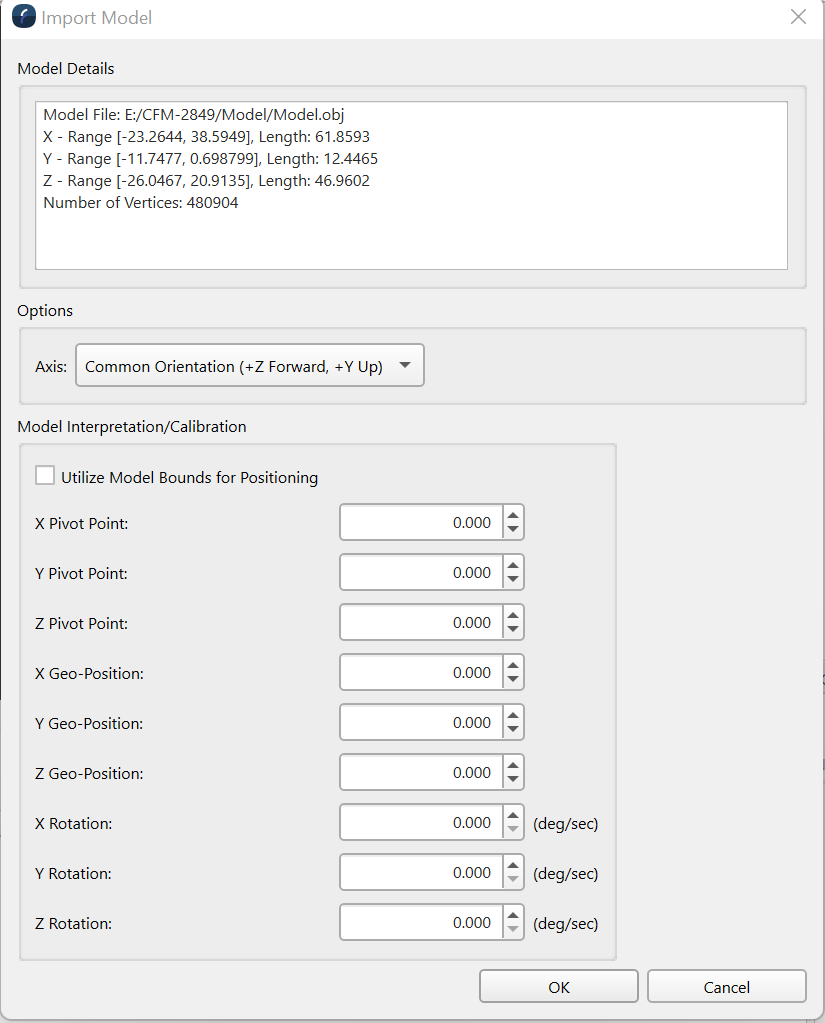
At the top of the dialog some basic information about the model file being read is shown. Most models are designed near the cartesian origin of (0.0, 0.0, 0.0) and the length of the model along each axis is shown. You can also see how many triangle vertices make up the model. The Axis option controls how the model is brought into the scene. Many models have a positive Z forward and positive Y up but some such as those that come for the common open source Blender applications have a positive Y forward and positive Z up axis configuration. The current axis options include:
-
Fledermaus/Blender (+Y Forward, +Z up)
-
Common Orientation (+Z Forward, +Y up)
Depending on the format the default axis will be selected but you can change it if you like. If the model comes in the wrong way in the scene it can be transformed later if needed. The remaining options in the dialog are used to control how the model is placed into the 3D scene.
It is uncommon but if you happen to have a model that is already geo-positioned and it coordinates are in the same coordinate space as the scene then one can just click the Utilize Model Bounds for Positioning and the model will be placed based on its bounds. However this is rarely the case. Normally models are designed so that to place in a 3D scene you move it's (0, 0, 0) coordinate to the desired geospatial location thus geo-positioning the model. The X Geo-Position, Y Geo-Position, and Z Geo-Position are the fields used to place the model. This sets the offset to translate the model into the 3D scene. You can place the model based on a different non zero model coordinate by entering values in the X, Y, and Z pivot points. Then this point will be the point moved to the specified geo-position. The X, Y, and Z rotation rates are special options for models that one want's to have continually rotate in the scene. For example the blades of a windmill.