
Storage
The following provides a brief overview of data Storage.
Data is captured in various formats.
Various options are available for automatic selection and storage.
Not all of these data types are pertinent to dredging operations, e.g. XTF.
|
Storage |
|
|---|---|
|
|
File in which the raw system data is stored as well as the settings as defined in the Database Setup program.
|
|
|
Corrected elevation/depth data stored in grid cells.
Option to store attribute data for each cell: mean, maximum, minimum, hit count, 95% confidence level, date, and quality flag. |
|
|
Corrected elevation/depth data stored as points (X/Y/Z) in various formats including *.qpd, *.pts (various formats). Each stored point can carry multiple flags based on various criteria:
|
|
|
Various automated options including: splitting of data files, line selection, line heading, data recording, line selection and headings of lines. |
|
|
Log data to a separate ASCII file.
Generic ASCII data logger system was created in the Database Setup program. |


Much more detailed descriptions are available here:
-
In the Controller's Help pages
-
In the Knowledge Base under Session Setup - Storage.
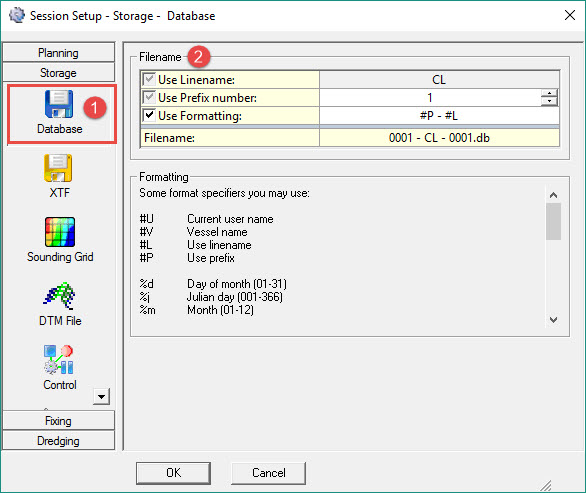
Database (DB File)
Storage parameters for raw data are displayed on this page.
Raw data will always be stored during recording; it is not possible to switch this off.


|
Filename |
|
|---|---|
|
Use Linename |
Select whether or not to use the line name as storage name for the raw data.
|
|
Use Prefix number |
A prefix number (0001) is added to the storage name.
|
|
Use Formatting |
When enabled enter a custom storage file name.
|
|
Filename |
This line shows the file name as it will be stored.
|
|
Formatting |
|
|
Format specifiers |
Use these codes to define the line name.
|
Return to top of page.
Return to BHD - Session Settings.
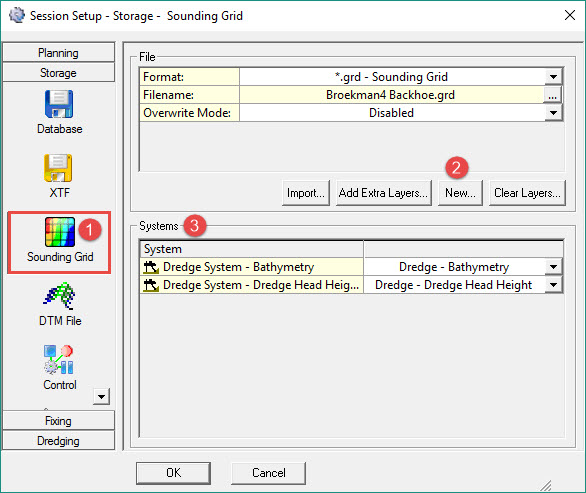
Sounding Grid (GRD)
A sounding grid file must be created before any gridded depths can be stored.
This can be done either in the Processing Manager program, in the Sounding Grid Utility or directly in the Session Setup by clicking on the "New" button.
Any grid file used must be copied to the folder “\Griddata” of the current QINSy project.
This section assumes a sounding grid has been made and any design and/or pre-dredging depth data has been imported.
Please refer to Sounding Grid Preparation and Importing Design Model for further details.


|
File |
|
|---|---|
|
Format |
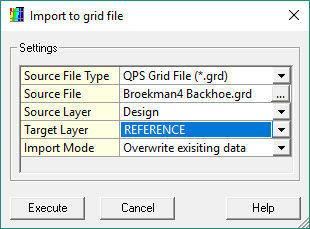
First select a "*.grd - Sounding Grid" format from the pull down menu. |
|
Filename |
Press the browse button and select the appropriate grid file in the standard MSWindows selection window. |
|
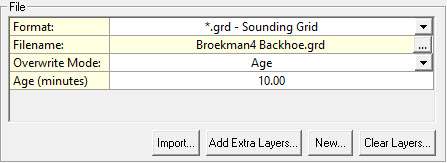
Overwrite Mode |
This parameter is only shown when the Date attribute has been enabled during grid creation for one or more of the layers.
|
|
New |
Refer to Sounding Grid Preparation. In our example a new grid is created with layers for:
|
|
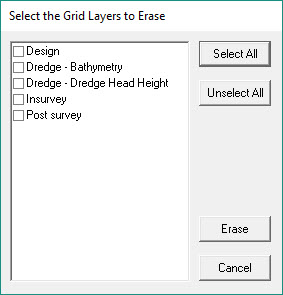
Clear Layers |
If necessary erase all data from one or more selected layer(s) in the currently selected sounding grid file. |
|
Import |
If necessary import data (points file or another grid file) into alayer the currently selected sounding grid file.
|

Return to top of page.
Return to BHD - Session Settings.
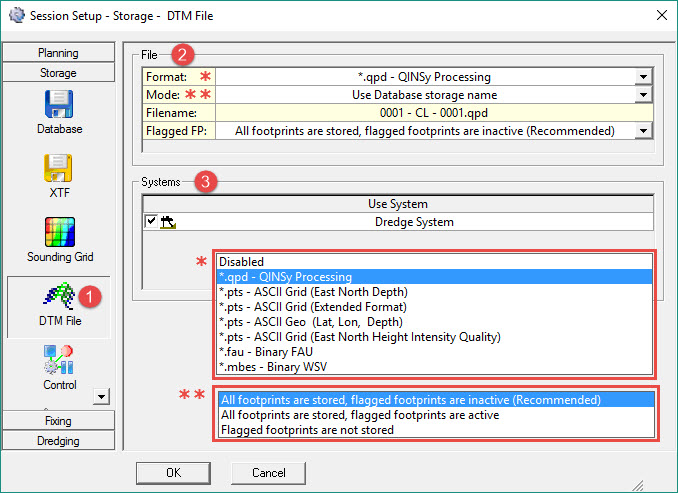
DTM File
DTM data is motion and heading corrected geo-referenced footprint data, i.e. deepest bucket penetration.
File contents reflect the amount of dredging done.
The DTM data can be stored in several formats, ready to import into external processing software (Validator, Qimera, Fledermaus), or other third party programs (Terramodel, CARIS, Cyclone, etc.) for volume computations.
Depending on the situation, the active Sounding Grid layer may be sufficient for volume calculations, without resort to the DTM surface created with these files.
|
File |
|
|---|---|
|
Format |
Select the format to use for storage of DTM data. Refer to Storage - DTM File for format descriptions. The proprietary *.qpd - QINSy Processing is the recommended format because it can be imported into the Validator, Qimera or Fledermaus for further processing, analyzing and/or publishing.
|
|
Mode |
The mode determines the name of the storage file:
|
|
Filename |
A file name preview. |
|
FlaggedFP (footprint) |
If you chose Format '*.qpd - QINSy Processing' this extra line appears. Select one of three options:
|
|
Systems |
|
|---|---|
|
Use System |
Activate the Dredging system(s) to use in the generation of the DTM file. |
|
Layer name |
Not applicable. |
Return to top of page.
Return to BHD - Session Settings.
Control
Use these options to keep control of the recording and storage of data.
Backhoe dredging is more likely to be controlled by the Eventing System which can be configured to start, pause and stop recording.
Still it may be necessary/useful to set up some up some of the controls here, especially storage database splitting options.

It is a good idea to split these files to a size that can be more easily handled by the processing software.
When the limit is reached during recording a new database is automatically opened and logging switches to the new database.
The first database is then closed, ensuring no loss of data.
The first database has "- 0001.db" in the name, the second "- 0002.db", etc.
Make selections and enter parameter values as follows:
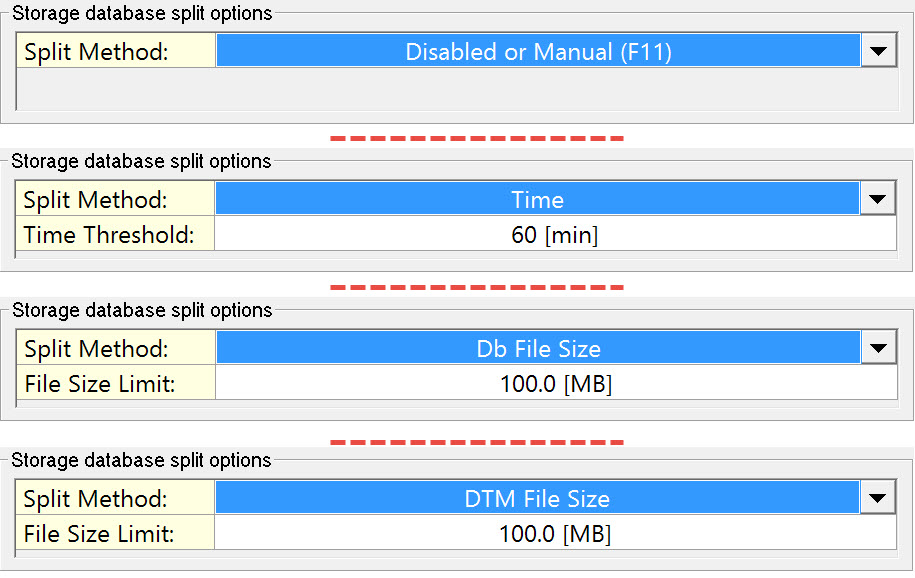
Note: For Manual splitting press F11 during the recording session. Updating continuously, DB and DTM file sizes are displayed in the Controller.
|
Automatic Line Selection |
|
|---|---|
|
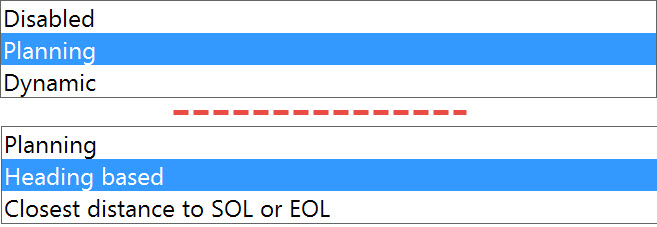
Selection Method |
|
|
Line Bearing |
|

|
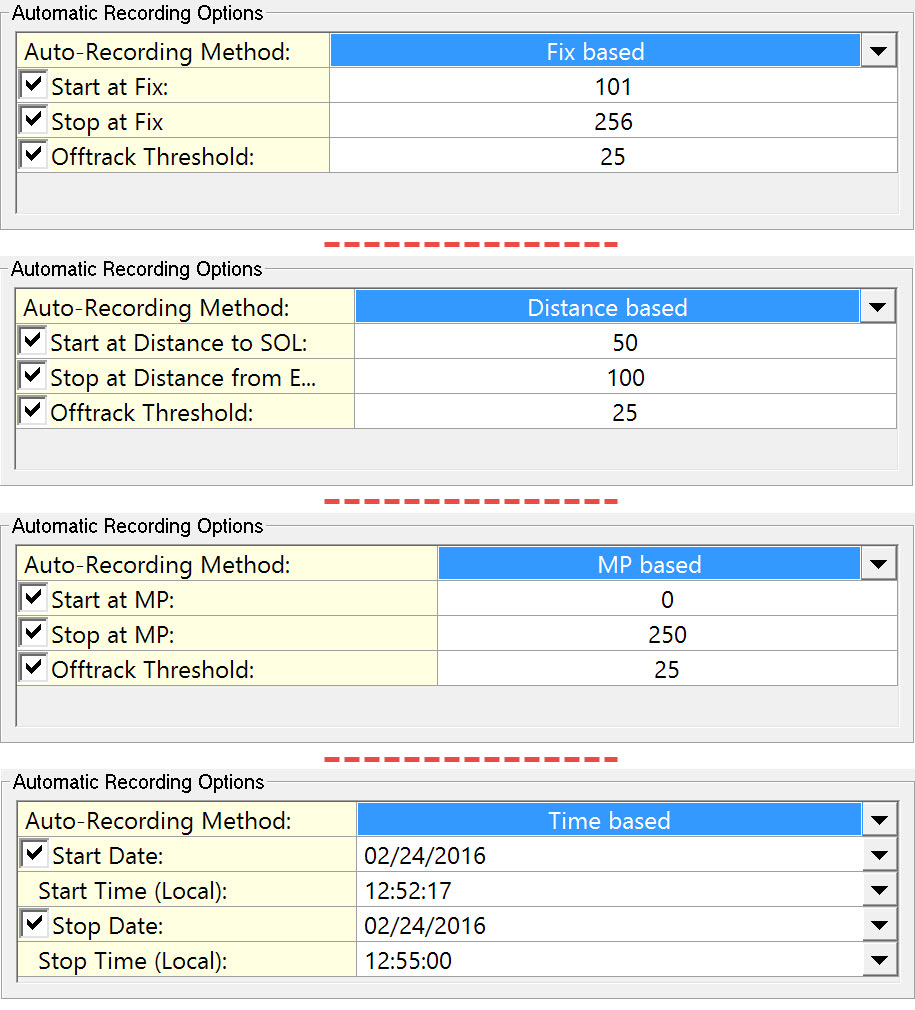
Automatic Recording Options |
|
|---|---|
|
Auto-Recording Method |
|
|
Offtrack Threshold |
If the recording vessel strays more than the distance entered here, recording is paused until the vessel re-enters the Offtrack corridor.
|
|
Wait before next line |
To accommodate the helmsman's steering time enter how long the software should wait before selecting the next line.
|
|
Start at Distance to SOL |
Enter how far before the Start of Line recording should take place. Leave the value at zero when you want recording to start at the beginning of the line.
|
|
Stop at Distance from EOL |
Enter how far after the End of Line recording should take place. Leave the value at zero when you want recording to stop at the end of the line.
|
|
Start/Stop at MP |
Enter how far along the main line recording should start and stop. |
|
Start/Stop Date |
Enter a date manually or select one from the drop down menu. |
|
Start/Stop Time (Local) |
Enter a time manually or change it with the up/down arrows in the drop down menu. |

In the Alert Display storage can be automatically paused when an alert arises.
For example, storage is paused if the positioning system quality is outside a specified limit, or if data from a particular sensor fails.
Once the alert is OK again, storage / recording can be set to automatically resume.

Return to top of page.
Return to BHD - Session Settings.
Log File
Storing to Log File is only available when a Generic ASCII Data Logger system was created in the template database (Database Setup program).
To set up this output system please refer to and and .
Log Files can only be written during Online data acquisition and not when Replaying *.DB files.
The file can contain, amongst numerous other items, settings of all used systems and nodes, raw or corrected observations, and all results data.
These items are stored in a XML file located in the \Project Folder\Settings\LogFile folder.
A complete definition of every item is provided in .
All selected items are arranged in any user-defined format desired.
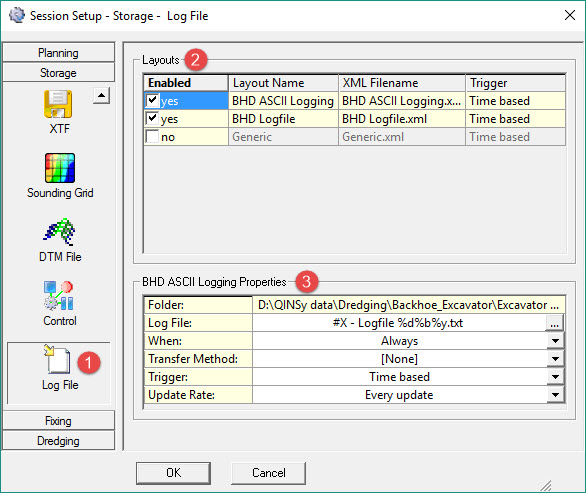
The XML files listed are those made using the Generic Layout Editor to define the data content and format, and resident in the \Project Folder\Settings\LogFile folder.
|
LogFiles Properties |
|
|---|---|
|
Folder |
Location of the file highlighted in the top pane. |
|
Log File |
Use the browse When the same logfile name is selected for multiple layouts, all data are stored in one and the same file.
|
|
When |
Always - Log continuously.
|
|
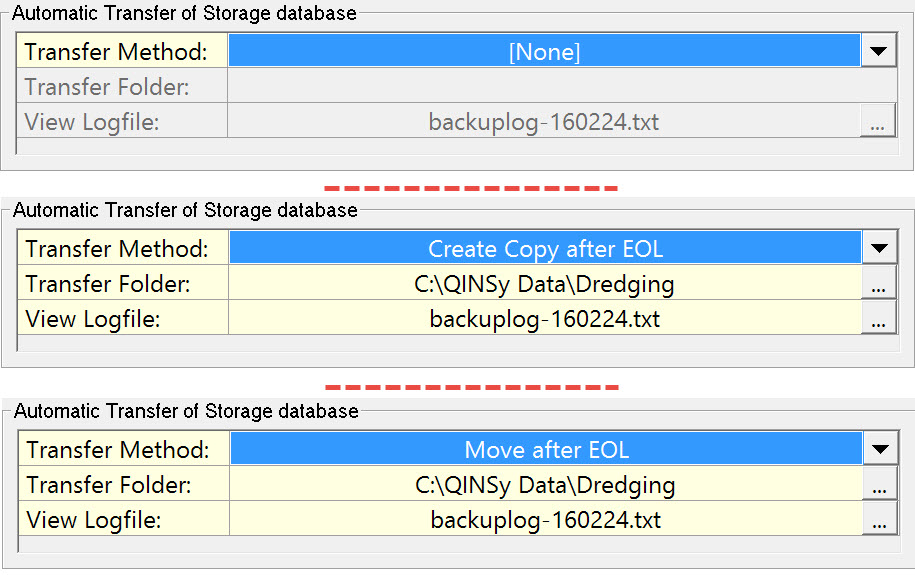
Transfer Method |
None - none of the log files will be copied and/or moved to another folder.
|
|
Trigger |
Data logging is based on one of these trigger methods: Time based - Every time there is an update in data, this will be logged.
|
|
System |
When data logging is 'System Based', an additional selection line appears in which the triggering system is chosen from a list of all the systems defined in the template database. |
|
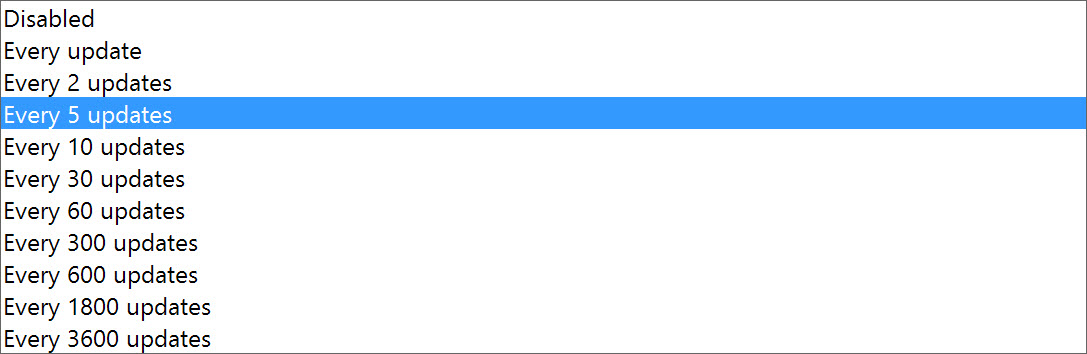
Update Rate |
Choose how often data are logged to file:
|
|
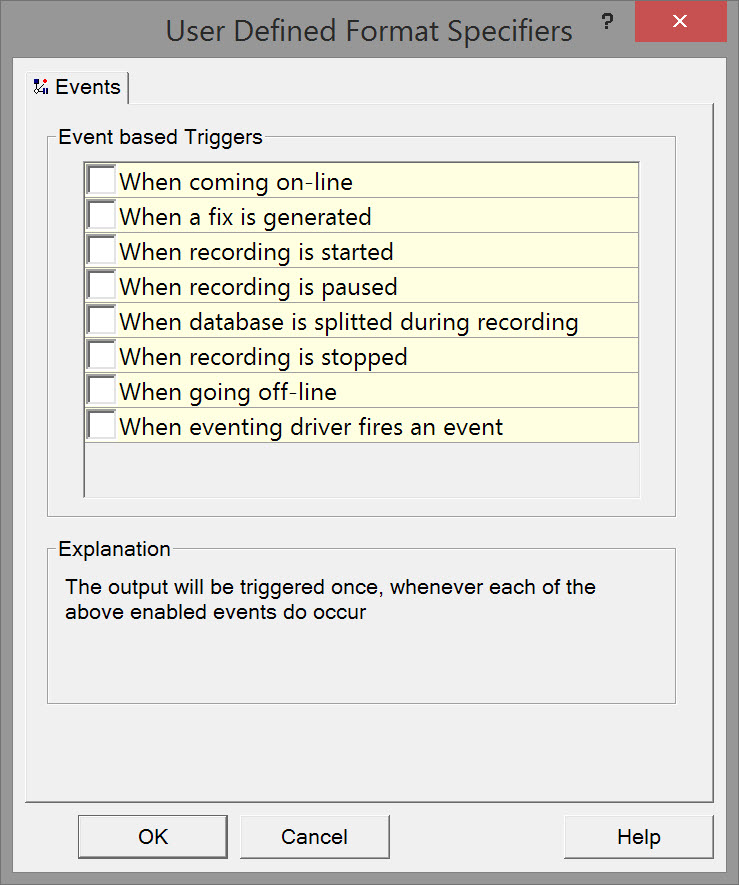
Events |
When data logging is ' Event based' choose which events to use as logging triggers.
|


Return to top of page.
Return to BHD - Session Settings.