
FMGIS Bathymetry Quick Start Guide
With this Quick Start Guide, we will demonstrate exporting bathymetric information from a PFM. The guide assumes that you have a pre-existing Fledermaus scene with a PFM SD object loaded.
Step 1 – Creating the Workspace
The first thing to do when working with ArcGIS data is to create a workspace object that will give you proper connectivity to the workspace. When licensed properly, the Fledermaus Create menu will have the additional option Connect to ArcGIS Workspace as shown in the figure below.
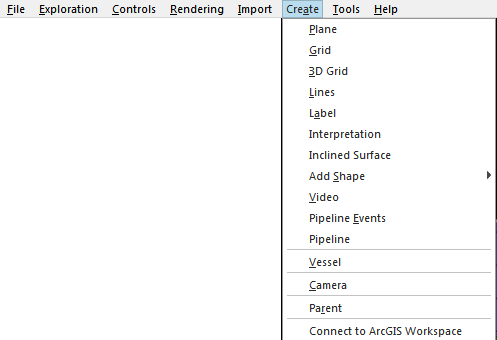
Create Menu
After clicking Connect to ArcGIS Workspace, a new Dialog will pop-up asking to Create/Open an ArcGIS Connection. Select Connect or Create, the type of Database or Connection and enter a Path to the database to either connect to an existing workspace or create a new workspace. Fledermaus can only connect to, not create, an ArcSDE workspace. Creation of these types of workspaces is done using the ArcGIS tools, typically ArcCatalog®.
An Arc Workspace can contain both spatial and non-spatial information. It can be configured as a file system, a local database or a remote database. Fledermaus allows four types of workspace connections. These are the Folder, File, Personal and ArcSDE workspaces. The Folder workspace is used for standard file system folders that contain shape or raster files. The File workspace is an ArcGIS .GDB file and is considered a local database. The Personal workspace is a Microsoft Access .MDB file also considered to be a local database. The ArcSDE workspace provides connectivity to a local or remote SQL-based database such as SqlExpress, SqlServer and Oracle.
A local file-based geodatabase will be used as an example.
To Connect to an existing File Geodatabase: Select the Connect to an existing ESRI Geodatabase radio button and select File Geodatabase radio button. You will be presented with a File Save dialog to select the path to your existing database. After clicking "OK" Fledermaus will first check the ArcGIS Licence on your machine and will then automatically connect to the File Geodatabase.
To Create a File Geodatabase: Select the Create a New ESRI Geodatabase radio button and select File Geodatabase radio button. You will be presented with a File Save dialog to select the path and create a name for the new database. After clicking "OK" Fledermaus will first check the ArcGIS Licence on your machine and will then automatically connect to the new File Geodatabase. An important note is that the local File database creates a folder with the name mydbname.gdb. You should never alter the contents of this folder as these are the files that the geodatabase engine sets up.
Once the database has been created and the connection is successful, you will have a new SD Arc Workspace object that when selected will display the new connection in the Features group on the attribute panel, as shown in the Arc Workspace Attribute Panel below. The root of this tree is always the database name. As you add features to the database from Fledermaus, you will see these features appear in the tree view.
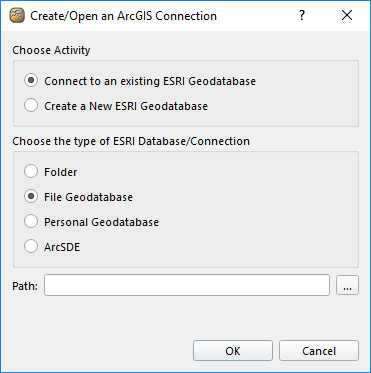
Create/Open an ArcGIS Connection
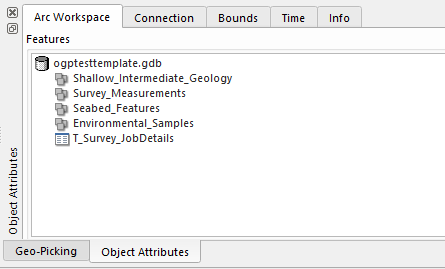
Arc Workspace Attribute Panel
The Connection Tab
The connection tab will show the path to the currently selected Arc Workspace. It also has a button to Disconnect or Connect to the Arc Workspace. Fledermaus will remember the connection state of the Arc Workspace as long as the scene is saved after toggling the Connect or Disconnect button. For example, if the Arc Workspace is connected, the button will show the Disconnect option. If you decide to Disconnect and save your scene, the next time the scene is open, you will need to Connect to the Arc Workspace to see the contents of the geodatabase and transfer files. If the scene was closed while still connected to the Arc Workspace, Fledermaus will try to auto-connect back to the geodatabase the next time the scene is loaded and you click on the Arc Workspace object.
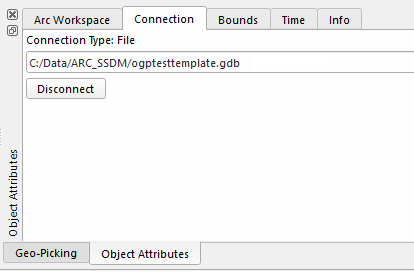
Arc Workspace Connection Tab
For more information on creating the different types of workspaces, see section Creating ArcGIS Workspaces.
Step 2 – Transferring Fledermaus Data to ArcGIS
Every SD object within a Fledermaus scene that is "ArcGIS Aware" will have an ArcGIS button on the attribute panel that allows you to move data from Fledermaus to ArcGIS. The currently supported set of SD objects includes GeoImage, Interpretation, Lines, PFM, Points, Scalar, and Surface. For more on transferring these types, see section Transferring Data to ArcGIS.
Select the PFM object that you have in your scene. The attribute panel should look like the one shown in the PFM Attribute Panel figure below. Be sure to extract a selection or the entire PFM from the Coverage Map. Also note that some of the objects you transfer are controlled by the type of surface you are currently viewing, as listed under Surface Display Options. For example, if you are viewing the Shallow Edited Surface, that is the surface that will be transferred if you choose bathymetric raster as a transfer option.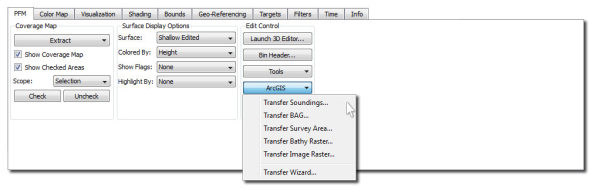
PFM Attribute Panel
The ArcGIS button located under Edit Control will pop-up a menu that will allow you to transfer individual components of the PFM to your workspace or transfer all of the available items at once using a wizard. The available object types include soundings, BAG, survey area, bathymetry raster and sun illuminated image raster.
Transfer Soundings
If you select Transfer Soundings from the ArcGIS pop-up menu, you will launch the dialog shown in the PFM Attribute Panel figure below.![]()
Transfer Soundings
This dialog is very similar to the one accessed from the Tools button with the exception that you are not exporting to a disk file. To see more on how this dialog operates, please see Fledermaus Tools Menu in the Fledermaus Reference Manual.
For our example, assume that the plotted sounding selection filter has been run at a chart scale of 5000:1. So in the ArcGIS Soundings Transfer dialog we select the entire PFM, accepted soundings only and the plotted soundings option. After you hit the OK button, Fledermaus will launch the ArcGIS Transfer Options dialog as shown in the figure Transfer Options.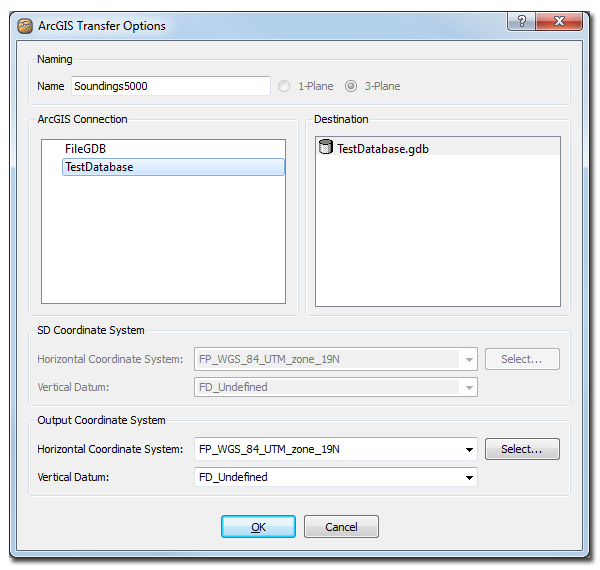
Transfer Options
In this dialog you first select a name for your new object. This name must be unique to the database and contain no spaces. Next you select which ArcGIS connection you will be targeting for the transfer. When you select the workspace, the Destination tree view will show you the layout of that workspace. You must then select the Destination of the transfer within the workspace. Depending on the object type, this will be the root object node, an ArcGIS Feature Dataset or Raster Catalog. Finally, you can change the coordinate system of the transfer. This allows you to re-project data during the transfer into ArcGIS. After you have filled out the dialog, click the OK button and the soundings will be transferred. When complete, you will see the new object reflected in the tree view of your connection as shown in the figure ArcGIS Transfer Complete.
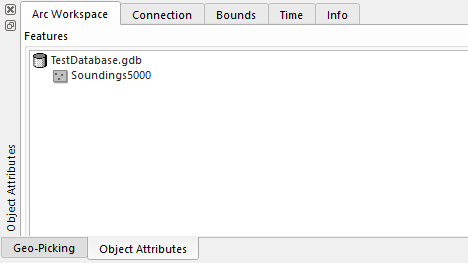
ArcGIS Transfer Complete
If we open ArcCatalog, we can browse to our workspace and see that the data has been transferred as shown in the ArcCatalog Soundings figure.
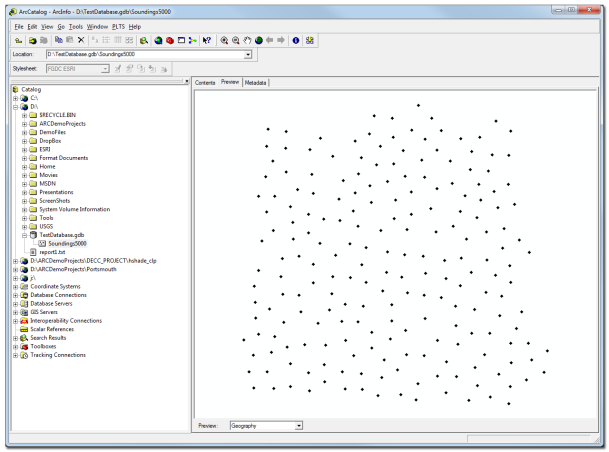
ArcCatalog Soundings
If you select Table from the Preview combo box of ArcCatalog, you will notice that the soundings are transferred as Z-enabled Point objects with the additional attributes of Depth and Mask. The depth attribute is a repeat of the Z value from the point and the mask attribute is the flag mask from the PFM.
Transfer BAG
If your PFM has a Cube surface, you can transfer the Bathy Attributed Grid (BAG) as a set of attributed Z-enabled points to your workspace. See Editing CUBE Hypotheses for more on CUBE surfaces. The additional attribute in this case will be uncertainty. When you select Transfer Bag from the pop-up menu of the ArcGIS button, you will get the same Transfer Options dialog as shown above.
Transfer Survey Area
You can transfer the survey area of a PFM to ArcGIS as a polygonal object with holes (the holes being where there is a data holiday/no data). The ability to account for holes in the data ensures that the Shape_Area that is reflected in the attribute table of the object represents the correct computed area of coverage for the PFM. This area is a planar computation is does not account for surface variation. When you select Transfer Survey Area from the pop-up menu of the ArcGIS button, you will get the same Transfer Options dialog shown above. If you refresh your connection in ArcCatalog after transfer, you will see the survey area polygon as shown in the Survey Area Polygon figure below.
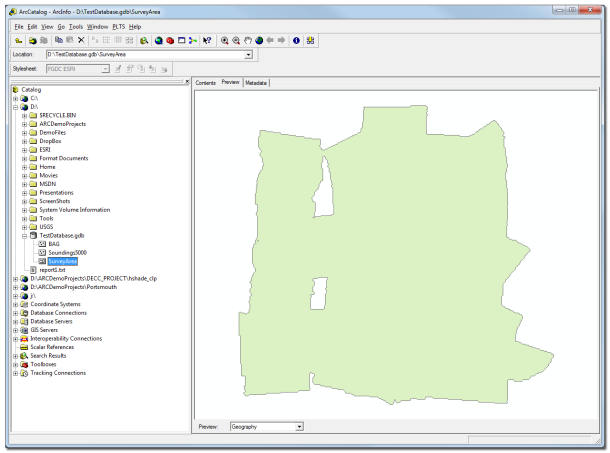
Survey Area Polygon
If you switch ArcCatalog to Table view, you will see a single entry with the appropriate computed shape length and shape area. The shape length is the length of all boundaries in the polygon. The area is the computed area in square meters of the object.
Transfer Bathymetry Raster
This option will transfer the currently extracted PFM surface as a single band ArcGIS raster object. The single band will contain floating point values of the bathymetry. When you select Transfer Bathy Raster from the pop-up menu of the ArcGIS button, you will get the same Transfer Options dialog shown in the Transfer Options figure above. If you refresh our connection in ArcCatalog after transfer, you will see the bathy raster as shown in Bathymetry Raster figure below.
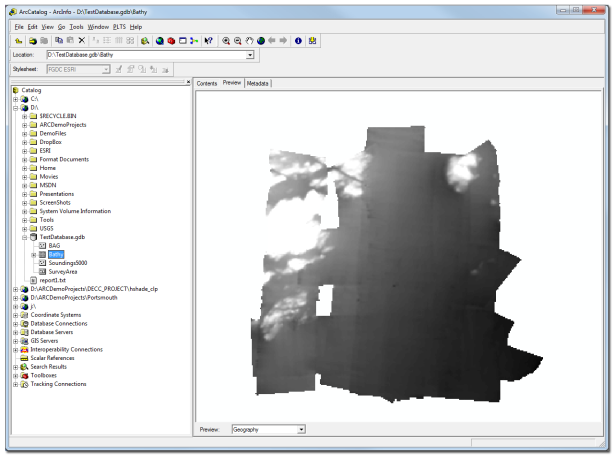
Bathymetry Raster
Transfer Bathymetry Image
This option will transfer the currently extracted PFM surface as a sun-illuminated 3-band ArcGIS raster object. The three bands will contain RGB values of the sun-illuminated image. When you select Transfer Image Raster from the pop-up menu of the ArcGIS button, you will get the same as shown above in the Transfer Options dialog. If you refresh your connection in ArcCatalog after transfer, we will see the bathy image raster as shown in Image Raster figure.
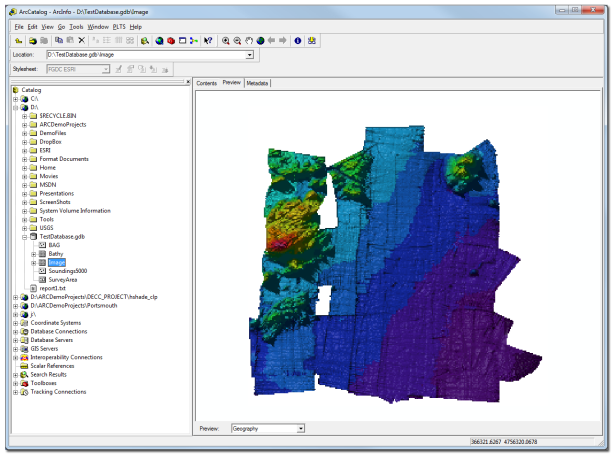
Image Raster
After all of these individual transfers, your workspace attribute panel will reflect all of the recent workspace additions as shown below.
![]()
Workspace Using Individual Transfers
Transfer Wizard
Another way to transfer data from a PFM is to use the Transfer Wizard option from the ArcGIS pop-up menu. This will allow you to transfer all selected object types at once as shown below.
![]()
PFM Transfer Wizard
The name that you use will be used as a prefix for all of the objects. For example, our Plotted Soundings object will be named Test_Plotted. Our BAG object will be named Test_BAG. For this demonstration, the Feature Soundings option is de-selected as this PFM has no tagged features. If you leave this object selected and there is nothing to transfer, Fledermaus will simply not attempt to transfer that object type. After completion your workspace connection will be updated to show the transferred objects as seen below.

Image Raster
Step 3 – Loading ArcGIS Data to a Fledermaus Scene
Data can be transferred to a Fledermaus scene in a very simple manner. The current object types available for transfer include ArcGIS feature class objects where the geometry type is Point, Multipoint, Line, Polyline or Polygon. You can also transfer raster dataset objects with 1-4 bands of data. For more information on loading data from ArcGIS into a Fledermaus scene, see Loading Data from ArcGIS.
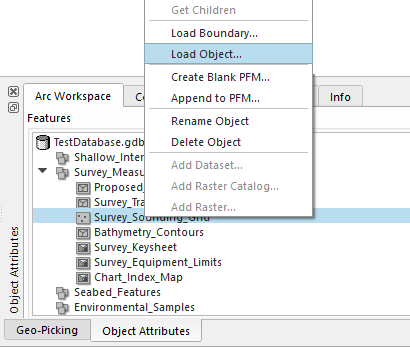
Workspace Context Menu
To load ArcGIS data into a Fledermaus scene, right click on the object in the tree view of the connected workspace to get the context menu as shown above in the Workspace Context Menu figure.
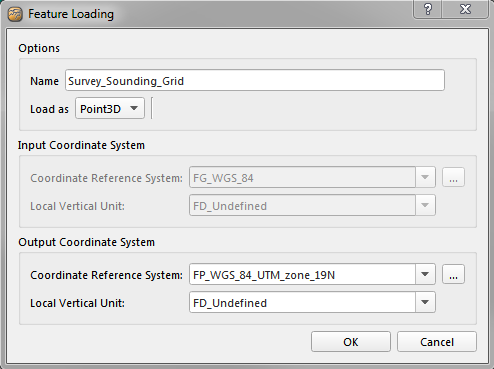
Load Feature to Scene Dialog
If the Load to Scene option is selected, this object will be loaded to your Fledermaus scene. Depending on the object type, the Feature Loading dialog will allow you to change the type of SD you will create. The configuration for loading a Point feature class is shown in the figure above.
The default name of the object is the name of the feature in the ArcGIS workspace. You can enter a name for your object and select the Output Coordinate System if necessary.
Once you are done, click the OK button and the ArcGIS feature class will be loaded into your Fledermaus scene.