
Loading Data from ArcGIS
This section describes how to load ArcGIS data into a Fledermaus scene. Fledermaus currently supports loading ArcGIS Raster Dataset and Feature Class objects of certain geometry types. When an object type is recognized as loadable in Fledermaus, the Load Object or Load Boundary menu option of the workspace context menu will be active as shown below in Load Object. This menu option will launch the Feature Loading or Raster Loading dialog as described in the following sections. Load Boundary will load the XY bounding box of the Feature class and draw a white bounding box.

Load Object
Feature Loading
ArcGIS feature class objects can be loaded into Fledermaus if they are Point, Multipoint, Line, Polyline or Polygon geometry types. The geometry type will determine the options for loading the data as a particular SD object.
Point Geometry
ArcGIS feature classes containing Point geometry can be loaded directly into Fledermaus with their attributes. When Load to Scene is selected from the tree view context menu, it will launch the Feature Loading dialog as shown in the Point Loading Options figure below. The default name will be the name of the feature in the ArcGIS workspace. You can enter a name for the SD object that will appear in your Fledermaus scene. For some objects you can also change the SD type using the Load As combo-box. In the case of Point geometry features, they can only be loaded as SD Point objects.
You can also change the output coordinate system so that the points get re-projected on their way into the scene.
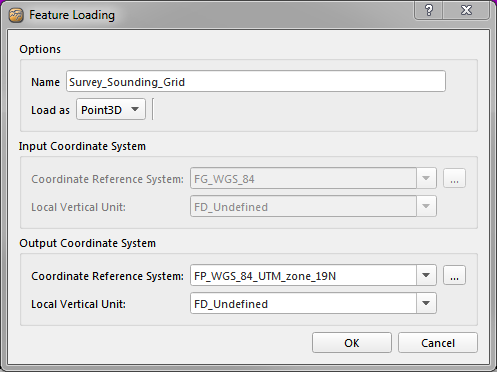
Point Loading Options
Line & Polyline Geometry
Line and Polyline geometries are load to Fledermaus scenes as SD Line objects.
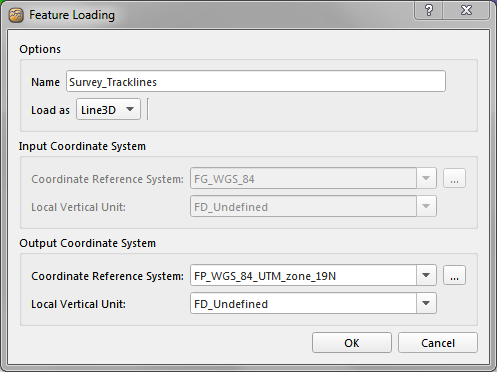
Line & Polyline Loading Options
After the line load is complete, we can see the new SD object loaded in Fledermaus as shown below.
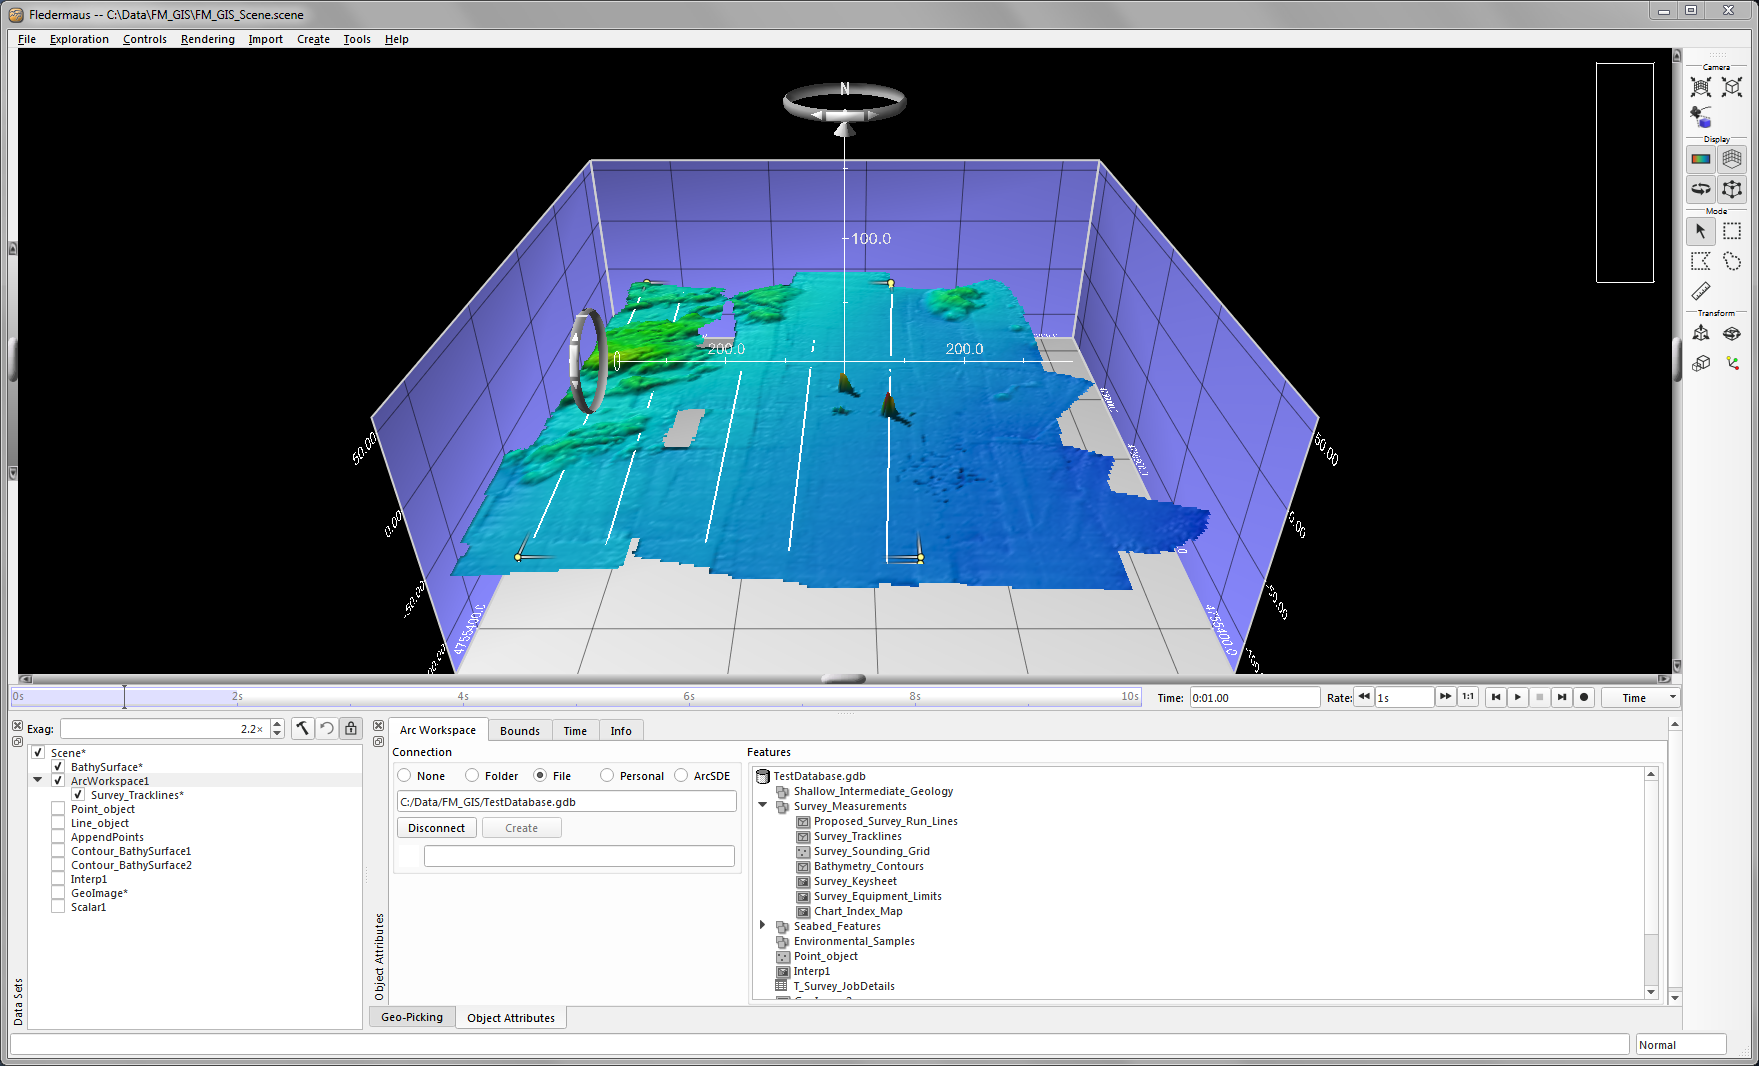
Lines Loaded to Scene
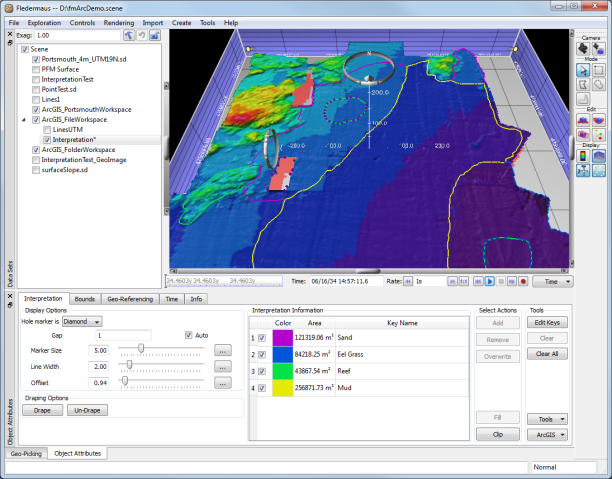
Polygon Geometry
Polygon geometry objects are loaded as SD Line or SD Interpretation objects. Use the Load As combo-box to select which type. If the feature has sub-type information, the default for the load is an SD Interpretation object as shown below.
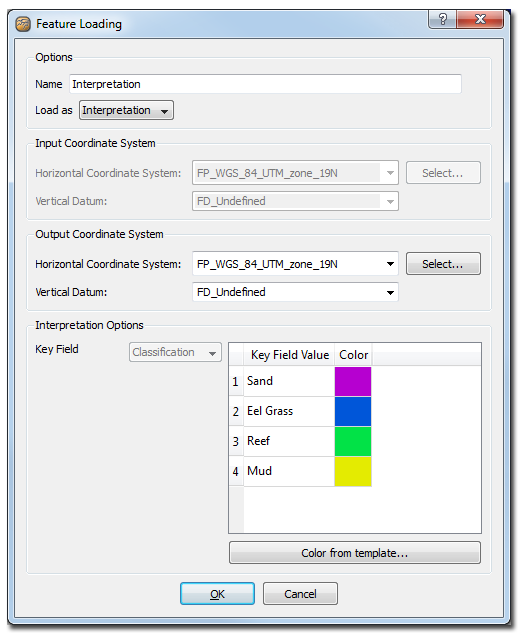
Polygon Load as Interpretation
The color values are randomly chosen from a default color map as the workspace does not expose color information. At this point you can double-click on the color and the standard color picker dialog will launch allowing you to change the color. An alternative method is to use the Color from template... button which will allow you to select an SD Interpretation object from your file system to use as a template. The feature loader will attempt to match the key field names to the ones in the template. If a match is found, the color will be changed to the color saved in the template.
After the line load is complete, we can see the new SD object loaded in Fledermaus as shown below.
Interpretation Loaded to Scene
Raster Loading
ArcGIS raster dataset objects can be loaded into Fledermaus as a number of SD object types depending on the number of bands that the raster contains. If the raster is 3 or 4-Band, it can be loaded to Fledermaus as an SD GeoImage. If it has a single band, it can be loaded as an SD GeoImage (Image), SD Scalar (Scalar), or SD Surface (Surface). As shown in the figure below, use the Load as option on the Raster Loading Dialog to select which object type to load. With a single band raster, you also have the opportunity to invert (negate) the value that is stored in the raster. For example, if your workspace raster has bathymetry stored as positive down, you need to invert these values so that they will match the coordinate space of Fledermaus which is –Z down.

Raster Loading
Other Workspace Operations
There are other operations that you can perform on a workspace when using the right-click menu from the Features tree view. These are described in the following sections.
Create Blank PFM
The Create Blank PFM option shown below is used to build a PFM without adding any initial data files. Please see Build PFM in the DMagic section for details on using this wizard. The major difference to the wizard as described in the Build PFM section is that the coordinate system and the bounds will be automatically set by the spatial reference of the ArcGIS object you selected in the workspace tree view.
![]()
Create Blank PFM
For our example, we will use points that were previously transferred to our ArcGIS workspace. The first page of the wizard is shown below, and is primarily for setup of the PFM file name. If you would like to create a CUBE surface when the PFM is generated, turn that on here as well.
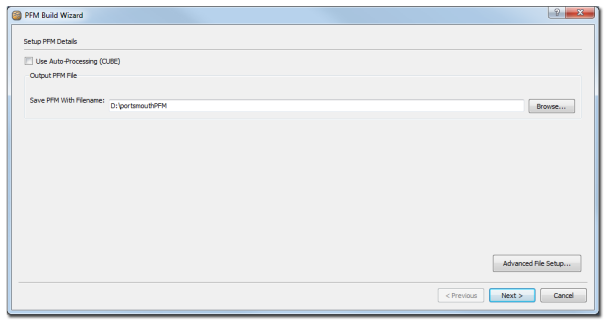
Create Blank PFM Wizard – Page 1
The second page of the wizard is for assigning the spatial reference for the PFM that is created.

Create Blank PFM Wizard – Page 2
The third page sets up the X and Y bounds of your PFM. These values are set by default to the workspace object that you right-clicked on.
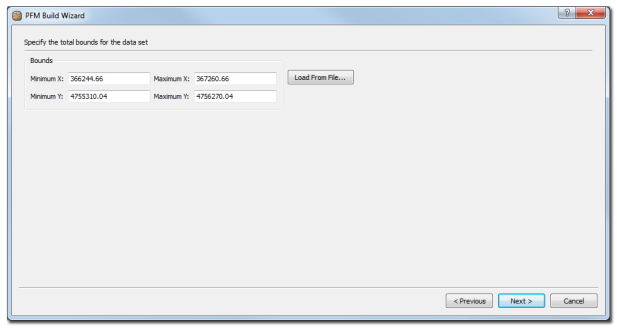
Create Blank PFM Wizard – Page 3
The fourth page of the wizard sets the minimum and maximum depth range of your PFM. These values are set by default to the workspace object that you right-clicked on. It also sets the bin size, vertical reference and CUBE parameters if CUBE processing was enabled on page 1 of the wizard.
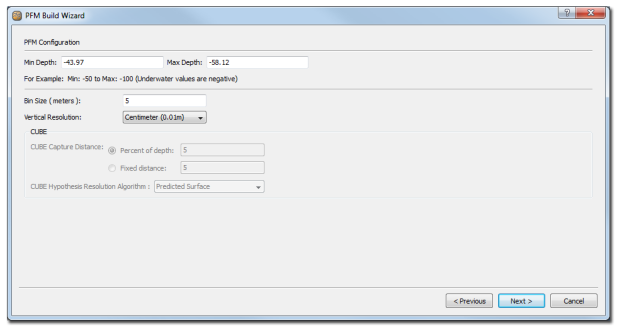
Create Blank PFM Wizard – Page 4
The fifth page of the wizard allows you to set custom attributes for your PFM. When appending data to this PFM, you can map fields from your ArcGIS feature to these custom attributes.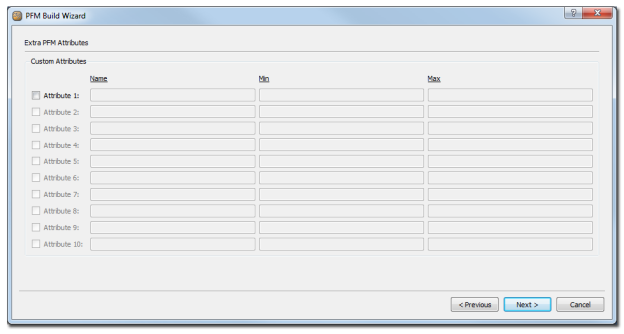
Create Blank PFM Wizard – Page 5
The sixth and final page of the wizard allows you to set custom flags for your PFM. When appending data to this PFM, you can map fields from your ArcGIS feature to these custom flags. When you click Finish, the blank PFM object will be created and added to your scene.
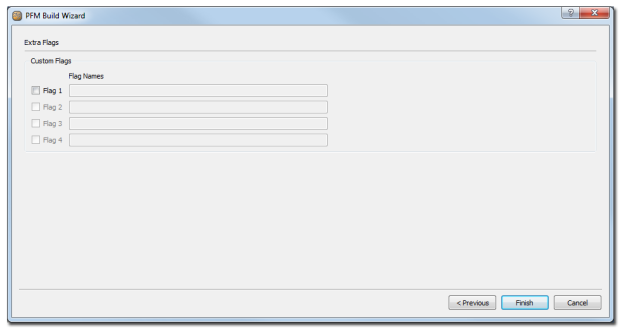
Create Blank PFM Wizard – Page 6
Append to PFM
The Append to PFM option allows you to append soundings from an ArcGIS workspace object to a PFM that is currently loaded in your scene.
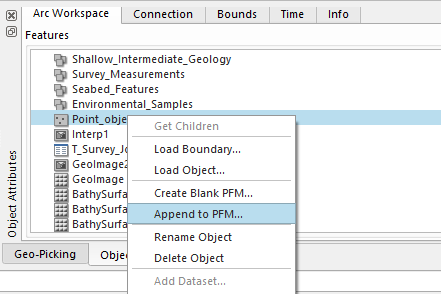
Append to PFM
This option will launch the Select PFM dialog as shown in the Select PFM figure. After you have selected the PFM, the PFM Append Wizard will be launched.
The first page of the wizard show in the PFM Append Wizard – Page 1 figure allows you to change the selected PFM. The second page of the wizard shown in the PFM Append Wizard – Page 2 figure allows you to determine how the ArcGIS feature fields are mapped to the corresponding PFM fields, attributes and flags. The final page of the wizard shown in the PFM Append Wizard – Page 3 figure allows you to set any custom filters. Please see Build PFM in the DMagic section for details on setting custom filters.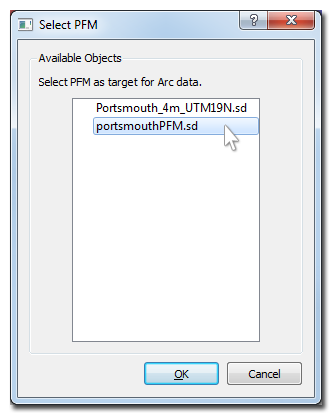
Select PFM
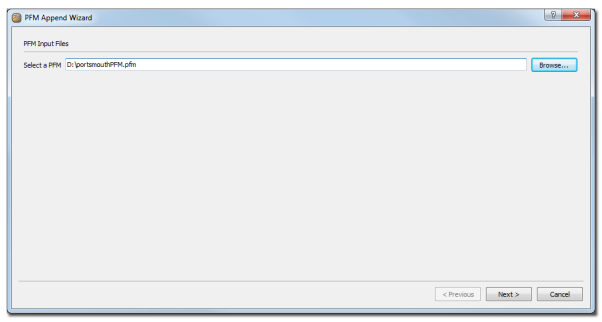
PFM Append Wizard – Page 1
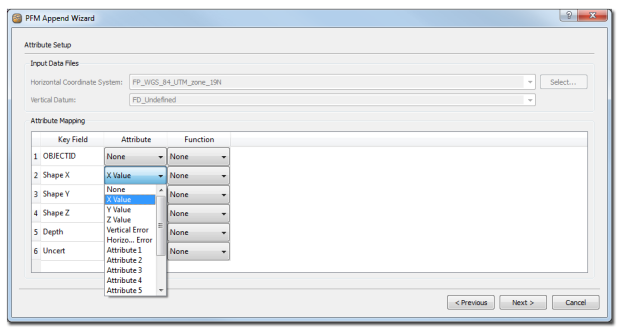
PFM Append Wizard – Page 2
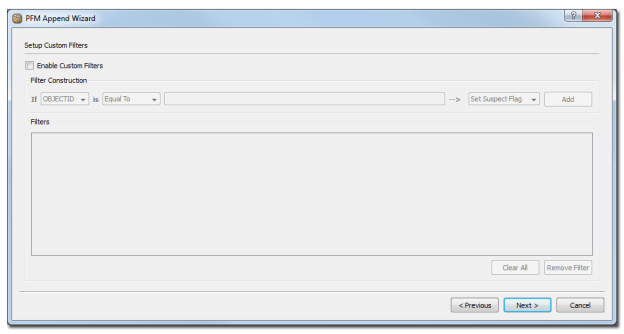
PFM Append Wizard – Page 3
Once the PFM append operation is complete, your PFM object in the Fledermaus scene will update to show the new coverage map as shown below.
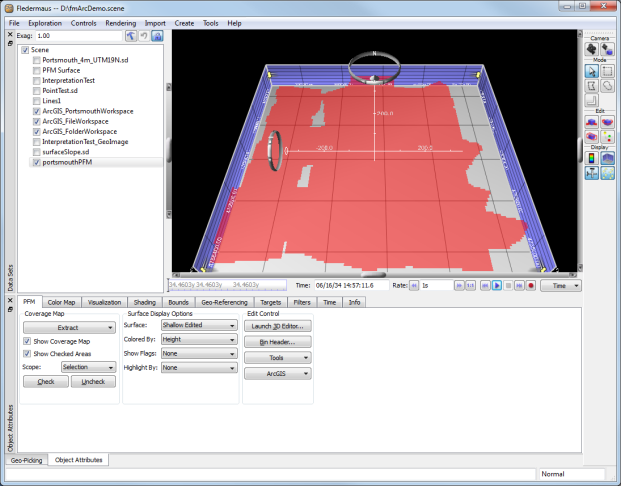
PFM Append Coverage Map
Rename Object
The Rename Object option of the workspace context menu allows you to rename a specific feature class. Certain feature classes, such as graph or network feature classes, will have the Rename Object option disabled.
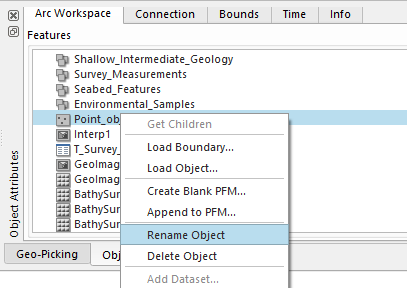
Rename Object
Delete Object
The Delete Object option of the workspace context menu allows you to delete a workspace object in your geodatabase. Occasionally the object will not be able to be deleted due to a lock by another viewing application. If this is the case, Fledermaus will return an error that the deletion could not be accomplished. Certain feature classes such as network and topology feature classes will have the Delete Object option disabled.
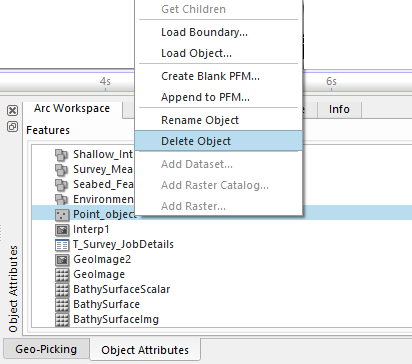
Delete Object
Add Dataset
The Add Dataset option will create a new ArcGIS feature dataset object. This option is only available from the root node of the tree view. When selected, it will launch a text entry dialog for you to name your feature dataset.
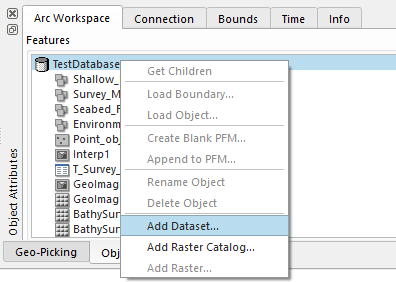
Add Dataset
If you click OK, it will then launch a coordinate system edit dialog as shown below. All objects added to this feature dataset in the future must have the same coordinate system.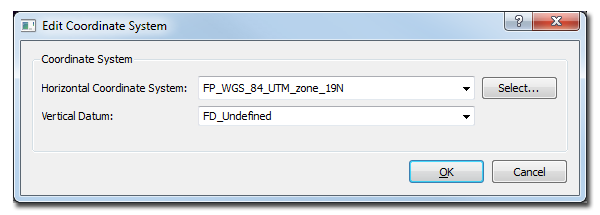
Feature Dataset Coordinates
You can now use this dataset as a destination when transferring data from Fledermaus to ArcGIS as shown in the Feature Dataset Transfer Destination figure. In this example, we are transferring plotted soundings from a PFM that were generated at a chart scale of 5000:1 to our newly created sounding feature. Once the transfer is complete, we can see the new node added as a child of the feature dataset as shown in the Feature Dataset Tree View figure.

Feature Dataset Transfer Destination
Feature Dataset Tree View
Add Raster Catalog
The Add Raster Catalog option will create a new ArcGIS raster catalog object. When selected, it will launch a text entry dialog for you to name your raster catalog.
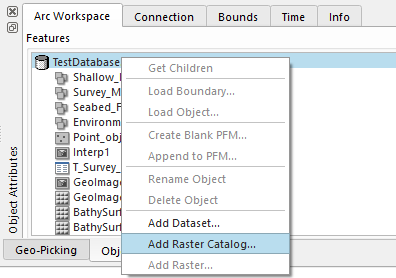
Image Raster
If you click OK, it will then launch a coordinate system edit dialog as shown below. All objects added to this raster catalog in the future must have the same coordinate system.
Raster Catalog Coordinates
You can now use this catalog as a destination when transferring raster data from Fledermaus to ArcGIS as shown in the Raster Catalog Transfer Destination figure below. You can also use the Add Raster option to add raster objects from another workspace, such as a folder-based workspace. When transferring a new raster, Fledermaus will create a raster object at the root level and then add an entry to the raster catalog as shown in the Raster Catalog Tree View figure below.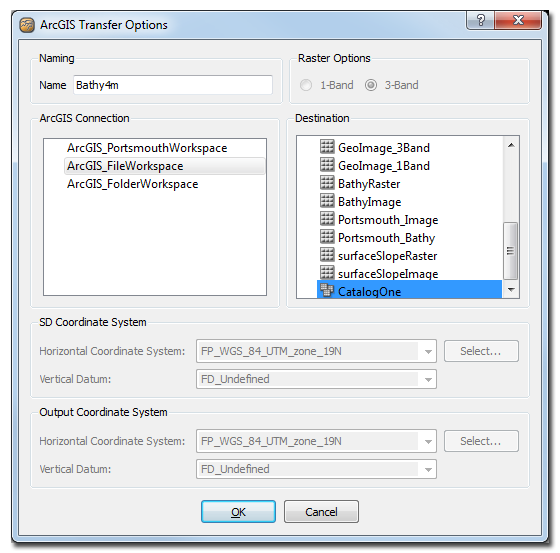
Raster Catalog Transfer Destination
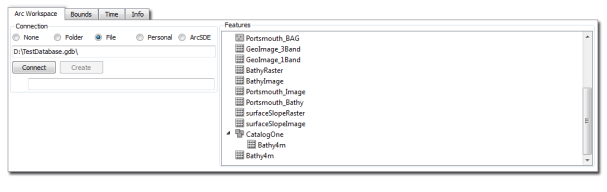
Raster Catalog Tree View
Add Raster
The Add Raster option allows you to add raster entries in a raster catalog. The raster objects can be in any of your connected workspace objects. When selected, it launches the transfer wizard so that you can select the raster object to insert as shown in the Add Raster to Catalog figure. In this example we are selecting a raster contained in a folder-based workspace. Once complete, we can see the raster entry in the catalog of our file-based workspace as shown in the Raster Catalog Entry figure below.
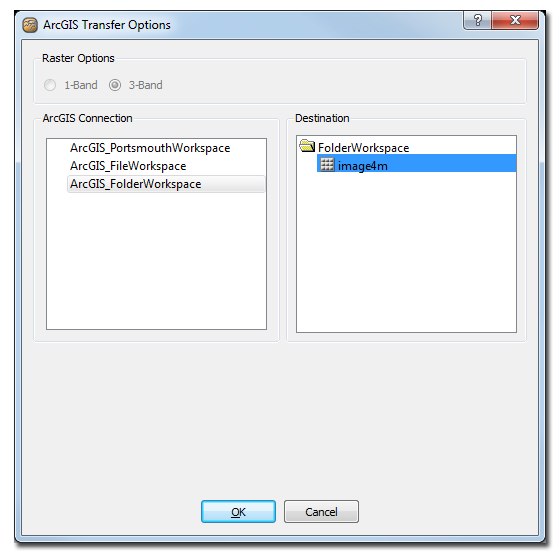
Add Raster to Catalog
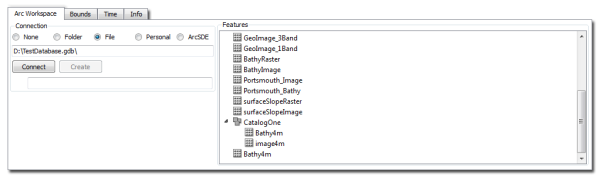
Raster Catalog Entry