
Transferring Data to ArcGIS
This section describes how to transfer data from a Fledermaus scene to ArcGIS. Each SD object in a Fledermaus scene that is 'ArcGIS Aware' will have an ArcGIS button on the attribute panel. This will contain the pop-up menu with options for transferring your data to an ArcGIS workspace. Transfer of specific SD types is detailed in the following sections.
Transferring data to ArcGIS requires a connected workspace. Be sure that the intended target workspace is in a connected state. The root icon will display with a red "X" when disconnected as shown in the Disconnected Workspace figure below. If a Feature Class is contained within a Feature Dataset it should be expanded by right clicking and Get Children before proceeding to transfer data.
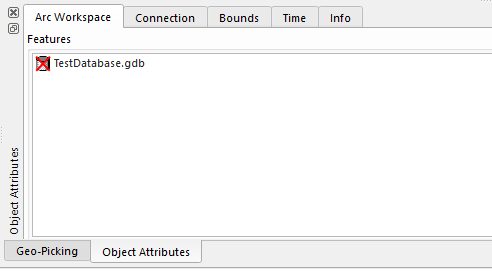
Disconnected Workspace
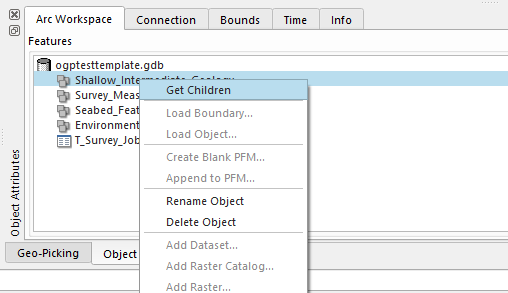
Get Children
Transfer Types
There are three types of transfers that can be done with Arc Aware objects: Add, Update, and Append. Add will create a new Feature Class in the Arc Database. Update will update an existing Feature Class with the data from the Fledermaus object. If the object in the ESRI geodatabase wasn't created in Fledermaus or has existing data that is not in Fledermaus, it is useful to first use Load Object to load the data from the ArcGIS Feature Class, edit the data in Fledermaus and use Update to transfer back to the ArcGIS Feature Class. Append will append data from the Fledermaus object to an existing Feature Class.
![]()
Add Workflow
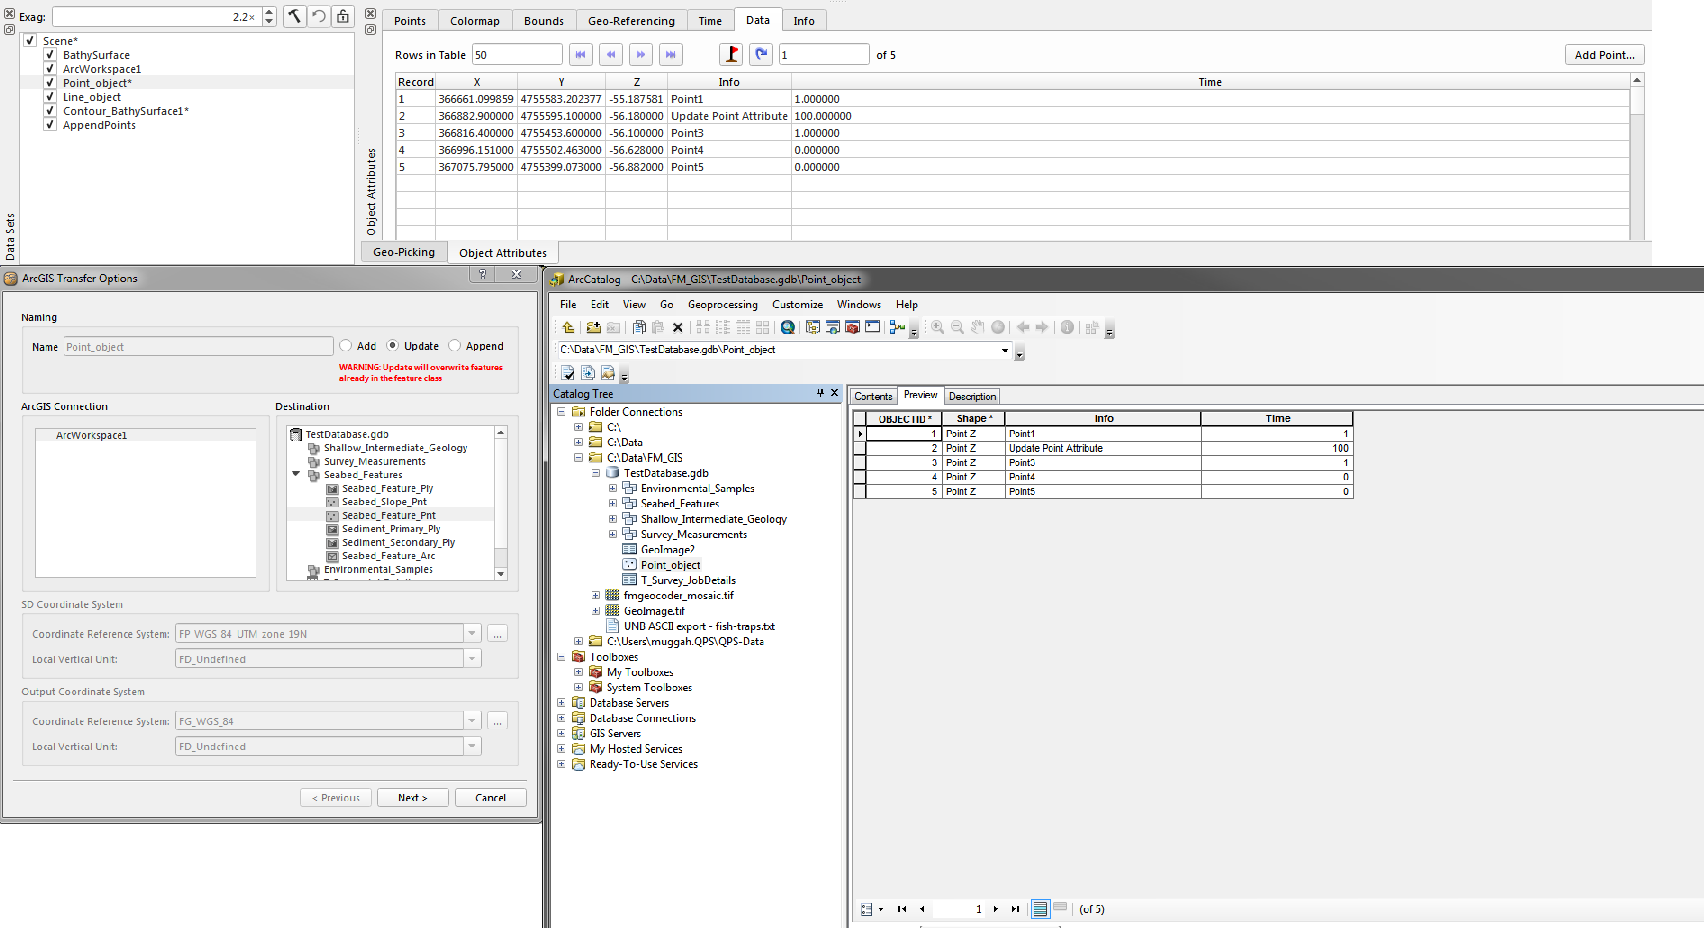
Update Workflow
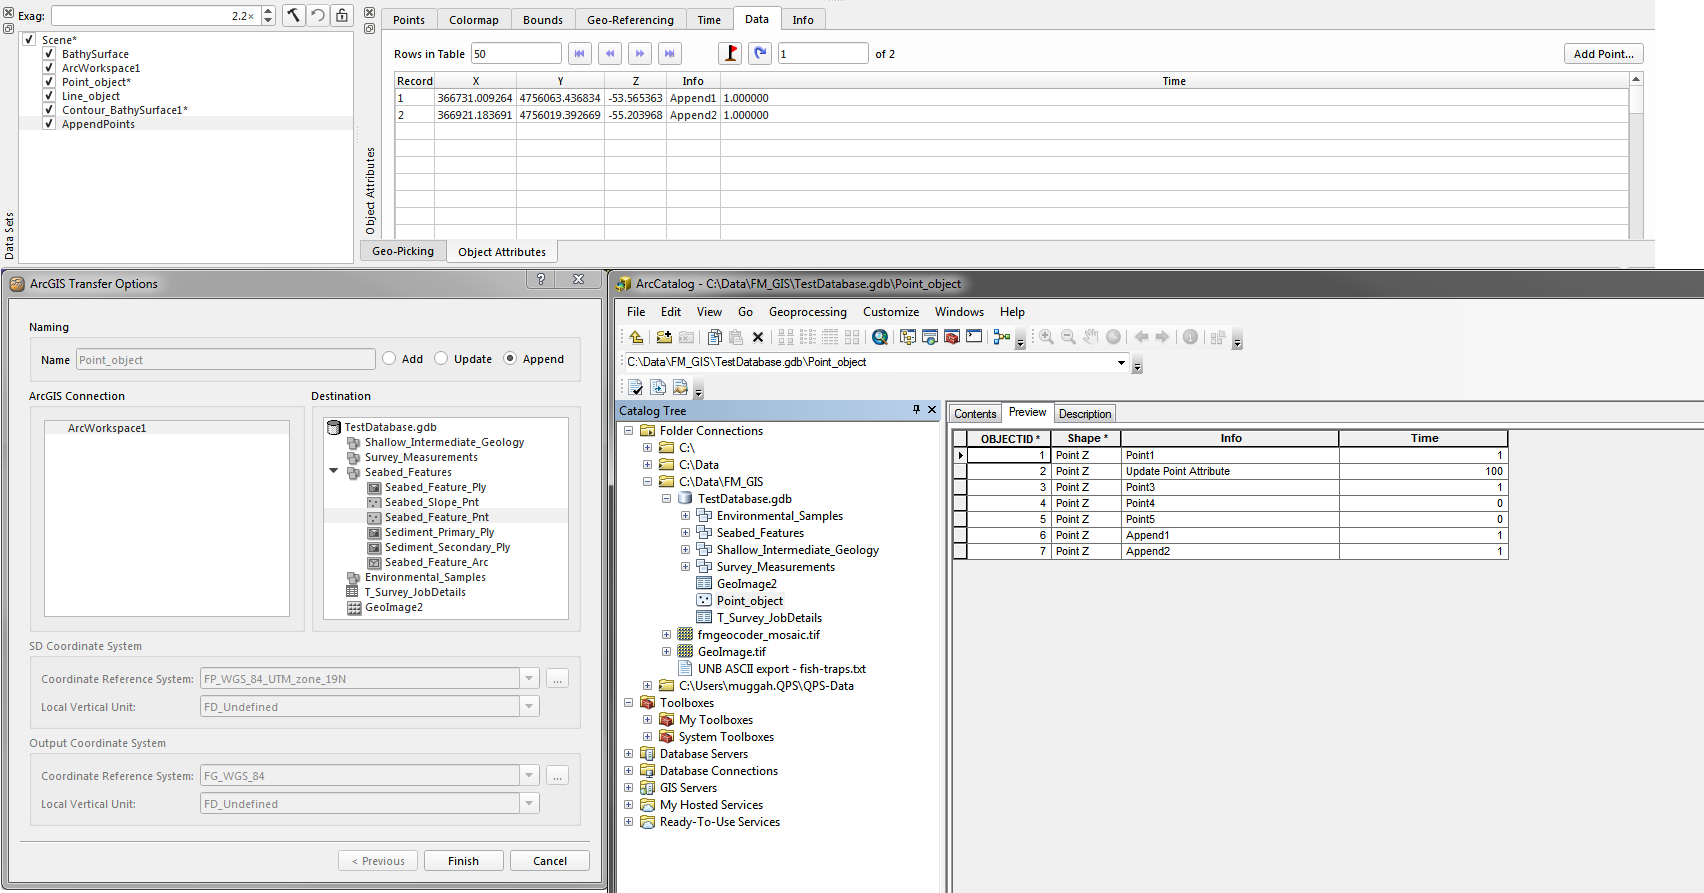
Append Workflow
SD Points
The SD Points object can be transferred to an ArcGIS feature class using the pop-up menu on the ArcGIS button of the Points attribute panel as shown below.
![]()
Points Attribute Panel
This will launch the ArcGIS Transfer Options dialog as shown below. Select an output name for the feature class which is unique to the workspace. Then select the ArcGIS connection, next the type of transfer Add, Update or Append and the destination for the transfer.
![]()
Transfer SD Points
Valid destinations for this object type include the workspace root as well as Feature Dataset objects with the same spatial reference. Finally you can select the output spatial coordinate system. Once the transfer is complete, a new node with the selected name will be added to the workspace Features tree view. A completed transfer of points to ArcGIS is shown below. In this figure you see the points as viewed in Fledermaus and ArcCatalog.
All attributes of the SD Points object are transferred as fields to the new feature class object in your ArcGIS workspace. You can view these using the Table option from the ArcCatalog Preview combo-box.
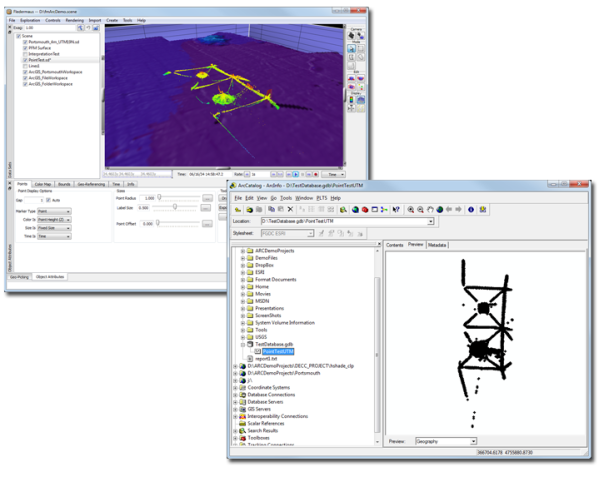
SD Point Transfer
SD Lines
The SD Lines object can be transferred to an ArcGIS feature class using the pop-up menu on the ArcGIS button of the Lines attribute panel as shown below.
![]()
Lines Attribute Panel
SD Lines can be transferred as either ArcGIS lines, ArcGIS polygons or a special transfer for ArcGIS contours. The contour transfer will populate the Depth or Elevation field with the contour interval. Use the pop-up menu option to select which geometry type to create on transfer. These choices will launch the ArcGIS Transfer Options dialog as shown below. Perform the same operation as you did for transferring points.
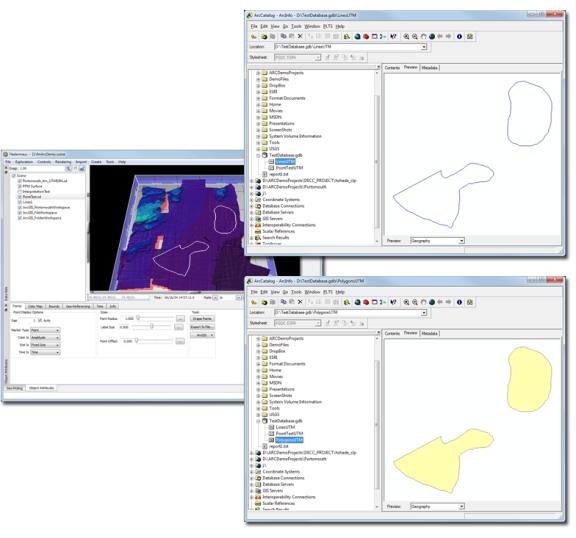
Lines Transferred as Lines or Polygons.
Once the transfer is complete, a new node with the selected name will be added to the workspace Features tree view. A completed transfer of lines to ArcGIS as lines or polygons is shown in Figure 1 32. In this figure you can see the SD lines as viewed in Fledermaus and the lines and polygons as viewed in ArcCatalog.
SD GeoImage
The SD GeoImage object can be transferred to an ArcGIS raster dataset using the pop-up menu on the ArcGIS button of the Image attribute panel as shown below. This will launch the ArcGIS Transfer Options dialog as shown above. Perform the same operation as you did for transferring points and lines.
GeoImage Attribute Panel
GeoImage Transferred as Image or Grayscale
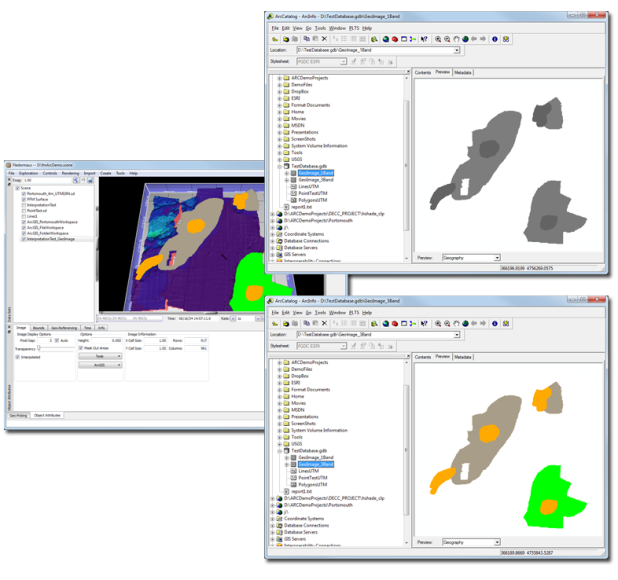
You have the additional option of selecting Grayscale or Image (RGB) raster formats. Once the transfer is complete, a new node with the selected name will be added to the workspace Features tree view. A completed transfer of the GeoImage to ArcGIS as Image or Grayscale is shown in the figure GeoImage Transferred as Image or Grayscale above. In this figure you see the GeoImage as viewed in Fledermaus, and the Image and Grayscale image raster as viewed in ArcCatalog.
SD Surface
The SD Surface object has three options when transferring to ArcGIS. You can transfer the Survey Area, Bathymetry Raster, Scalar Raster or Image Raster using the pop-up menu on the ArcGIS button of the Surface attribute panel as shown in the Surface Attribute Panel figure below.
![]()
Surface Attribute Panel
Selecting Transfer Survey Area will launch the ArcGIS Transfer Options dialog as shown in theTransfer SD Points figure above. Perform the same operation as you did for transferring points and lines. This option will transfer a single polygon object defining the boundaries and holes of the SD Surface object. You can view the computed area of the DTM by using the Table option from the preview panel of ArcCatalog. This area will be the total area of the boundary polygon minus the area of the holes.
Selecting Transfer Bathy Raster will transfer the bathymetry information to ArcGIS as a single band floating point raster.
Selecting Transfer Scalar Raster will transfer the additional scalar information to ArcGIS as a single band floating point raster.
Selecting Transfer Image Raster will transfer the sun-illuminated bathymetry image to ArcGIS as a 3-band raster. If you have backscatter draped on top of the bathymetry, this view will be transferred as the image (rather than the sun-illuminated bathymetry colored by depth).
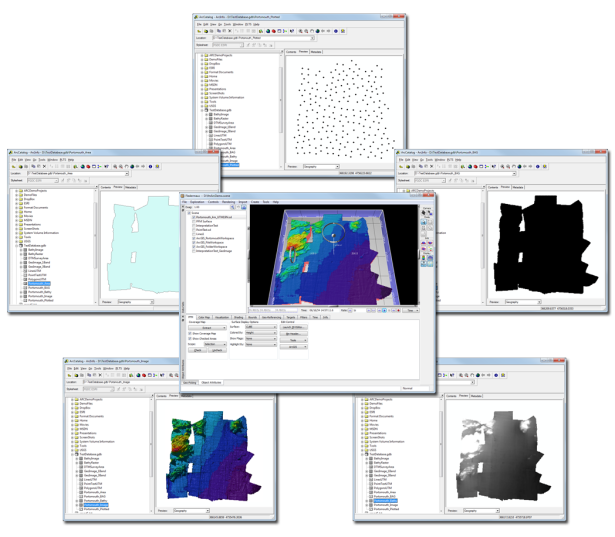
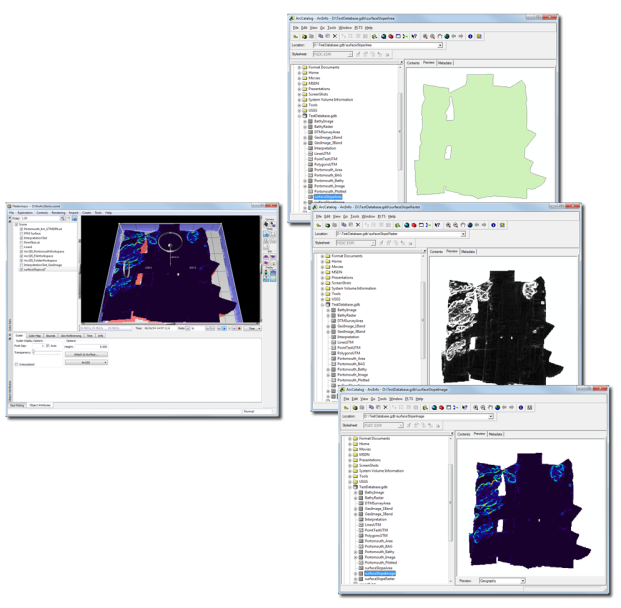
Once the transfer is complete, a new node with the selected name will be added to the workspace Features tree view. A completed transfer of the Surface as Survey Area, Bathy Raster, Scalar Raster or Image Raster is shown in the Surface Transfer figure below. In this figure you see the Surface as viewed in Fledermaus, and the survey area, bathy raster, scalar raster and image raster as viewed in ArcCatalog.
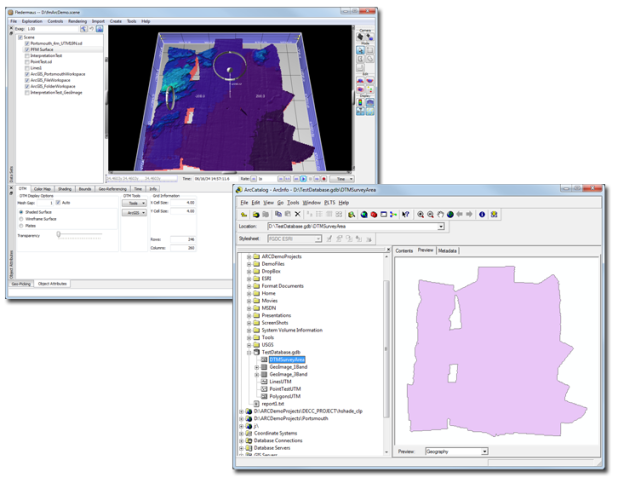
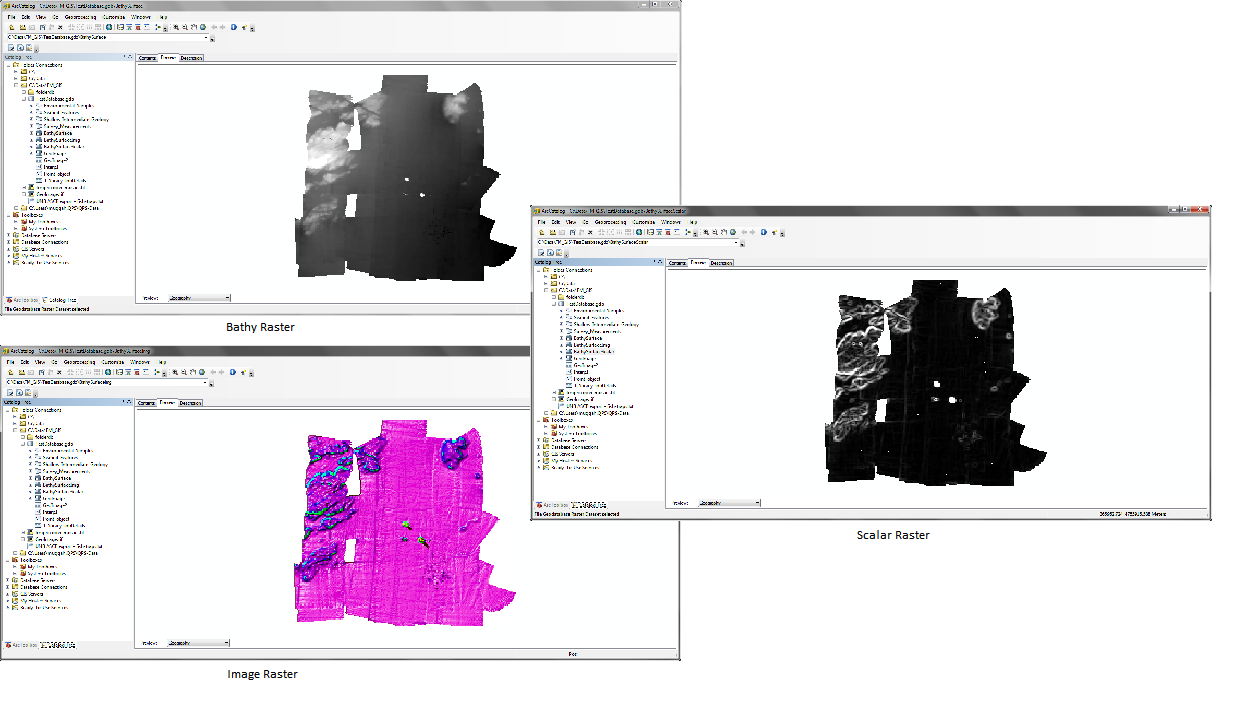
Surface Transfer
SD PFM
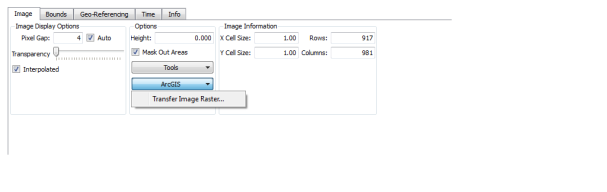
The SD PFM object has several options when transferring data to ArcGIS. You can transfer the Soundings, BAG, Survey Area, Bathymetry Raster or Image Raster using the pop-up menu on the ArcGIS button of the PFM attribute panel as shown in the Image Raster figure below. You can also do a batch transfer using the Wizard option.
![]()
Image Raster
Selecting the Transfer Soundings option will launch the ArcGIS Soundings Transfer dialog as shown in the PFM Soundings Transfer Dialog figure below. This dialog is very similar to the one accessed from the Tools button with the exception that you are not exporting to a disk file. To see more on how this dialog operates, please see section PFM Class in the Fledermaus Reference Manual.
![]()
PFM Soundings Transfer Dialog
Selecting the Transfer BAG allows you to transfer Z-enabled points with an uncertainty field. A BAG is a gridded file, and the points represent the grid node value for each cell and the associated uncertainty. Your PFM must have a Cube surface to be able to do this. The transfer is very similar to a standard point transfer with the exception that there is an additional field for the uncertainty.
Selecting the Transfer Survey Area option will transfer a single polygon object defining the boundaries and holes of the currently loaded surface of the PFM. This is similar to the survey area transfer for a Surface.
Selecting Transfer Bathy Raster will transfer the bathymetry information from the loaded surface of the PFM. Again, this is similar to the bathy raster transfer from a Surface.
Selecting Transfer Image Raster will transfer the sun-illuminated bathymetry image from the loaded surface of the PFM. This is a 3-band RGB image raster, the same as the image raster transfer from a Surface.
Selecting the Transfer Wizard will launch the ArcGIS Transfer Options dialog with the PFM Transfer Options exposed as shown in the PFM Transfer Wizard figure below. This dialog allows you to transfer all relevant PFM details at once. The feature class names will use the Name field as the prefix followed by _Plotted, _Feature, _Area, _BAG, _Bathy, and _Image. Note that Plotted soundings require that you have run a plotted soundings selection filter. Feature soundings require that you have run a feature soundings selection filter. The BAG transfer requires that your PFM have a Cube surface.
![]()
PFM Transfer Wizard
Once the transfers are complete, new nodes with the selected names will be added to the workspace Features tree view. A completed transfer of the PFM as Soundings, BAG, Survey Area, Bathy Raster or Image Raster is shown in the PFM Transfer figure. In this figure you see the PFM in Fledermaus and the plotted soundings, BAG, survey area, bathy raster and image raster as viewed in ArcCatalog.
PFM Transfer
Interpretation
The SD Interpretation object can be transferred to an ArcGIS feature class using the pop-up menu on the ArcGIS button of the Interpretation attribute panel as shown below.
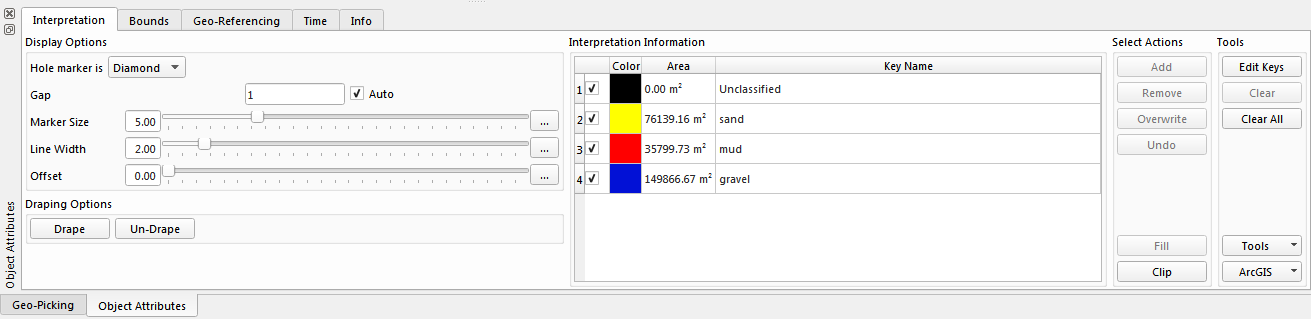
Interpretation Attribute Panel
This will launch the ArcGIS Transfer Options as shown below. Perform the same operation as you did for transferring points and lines. The only difference with this operation is selecting Grouped (Multipart) or not. Selecting Grouped (Multipart) will group all features together according to the Key Name field in Fledermaus. If the Grouped (Multipart) is not selected, the export will be singlepart, meaning each object will have it's own record table entry when transferring to the ArcGIS database. The data from an SD Interpretation object will create a polygon feature class in ArcGIS with appropriate sub-type information. When viewing the Table preview in ArcCatalog, the listed Shape_Area field will match the Area field shown in the Interpretation Information table of the attribute panel.
![]()
Interpretation Transfer Options
Once the transfer is complete, a new node with the selected name will be added to the workspace Features tree view. A completed transfer of Grouped (Multipart) interpretation data to ArcGIS is shown below. In this figure you see the interpreted polygons in Fledermaus, and as viewed in ArcCatalog.
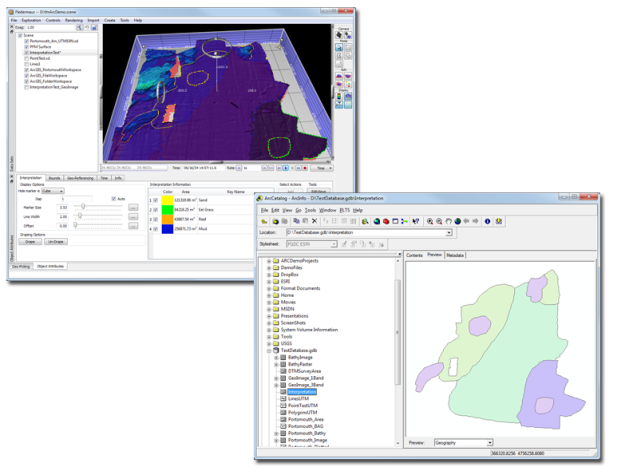
Interpretation Transfer
SD Scalar
The SD Scalar object has three options when transferring to ArcGIS. You can transfer the Survey Area, Scalar Raster or Image Raster using the pop-up menu on the ArcGIS button of the Scalar attribute panel as shown in the Scalar Attribute Panel figure below.
Selecting Transfer Survey Area will launch the ArcGIS Transfer Options dialog. Perform the same operation as you did for transferring points and lines. This option will transfer a single polygon object defining the boundaries and holes of the SD Scalar object. You can view the computed area of the Scalar by using the Table option from the preview panel of ArcCatalog. This area will be the total area of the boundary polygon minus the area for the holes.
Selecting Transfer Scalar Raster will transfer the scalar information to ArcGIS as a single band floating point raster.
Selecting Transfer Image Raster will transfer the scalar image to ArcGIS as a 3-band raster.
![]()
Scalar Attribute Panel
Once the transfer is complete, a new node with the selected name will be added to the workspace Features tree view. A completed transfer of the Scalar as Survey Area, Scalar Raster or Image Raster is shown in the Feature Tree figure below. In this figure you see the Scalar as viewed in Fledermaus and the survey area, scalar raster and image raster as viewed in ArcCatalog
Feature Tree