
Qimera 4D Scene
Qimera 4D Scene
The Qimera 4D Scene is the main window into your integrated visualization of your loaded project. The scene can contain the output products of the bathymetric processing pipeline, raw source file track lines, processed point file track lines or bounding rectangles, Static Surfaces, Dynamic Surfaces, and SD objects. The Qimera 4D Scene interaction is very similar to that found in Fledermaus with the additions of some new selection modes. This is the central window widget of the application and thus cannot be floated or hidden. The selection mode used within the 4D Scene corresponds to the selection method chosen in the Qimera 4D Scene Toolbar. In the default Explore mode, you can choose track lines and navigate around the scene. In any other cursor mode, you can navigate by using the Shift key as a modifier while clicking.
Scene Navigation
Navigation of the scene is dependent on the viewing mode. These modes are the Plan View and Turntable View.
Plan View
While in Plan View, simply Left-Click and drag to pan the scene. Moving the mouse-wheel will zoom in or out of the scene. You can also pan by using the right and lower scroll widget. Use the left scroll widget to zoom.
Turntable View
While in Turntable View, simply Left-Click and drag in the horizontal direction to rotate the scene around the current center point. Left-Click and drag in the vertical direction to tilt the scene. Center-Click on a point in the scene to change the current point of rotation. You can also use right scroll bar to move the scene up or down, the bottom scroll bar to move the scene left or right, and the left scroll bar to zoom in and out of the scene. While in this mode, you can also interact with the Navigation Widget to navigate within the scene.
Navigation Widget

The Navigation Widget can be used in Turntable View only and allows for mouse-click based navigation of the scene. Left-Click and drag on the top crown to rotate the scene about the vertical axis centered at the current point of rotation. Left-Click and drag on the left crown to rotate the scene about the horizontal axis perpendicular to the view direction. Left-Click and drag on the top arrow to increase or decrease the vertical exaggeration of the scene.
Object Visibility
Visibility of a particular scene object is controlled by the checkbox in either the Project Sources window or Project Layers window. If the object is checked, it will be visible. If not, it will be invisible.
Object Selection
While in Explore Mode, clicking on an object in the scene will select that object if it is selectable. For example, Left-Click on a track line will select that line both in the scene and in the Project Sources window. The opposite is also true, if you select in the Project Sources window, the associated track line will highlight in the scene.
Temporospatial Correlation
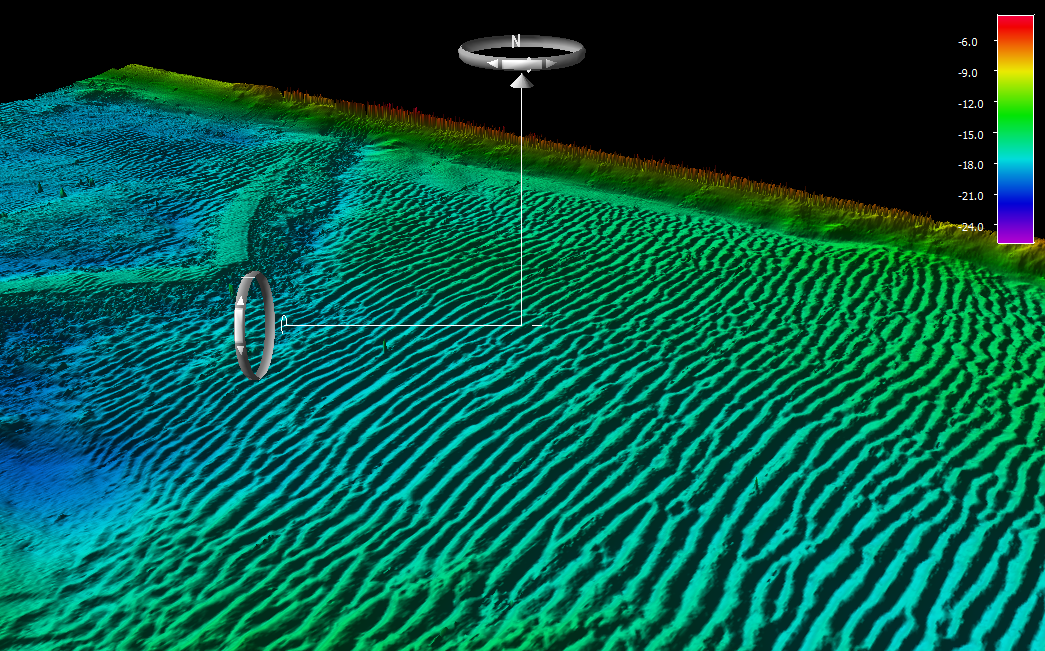
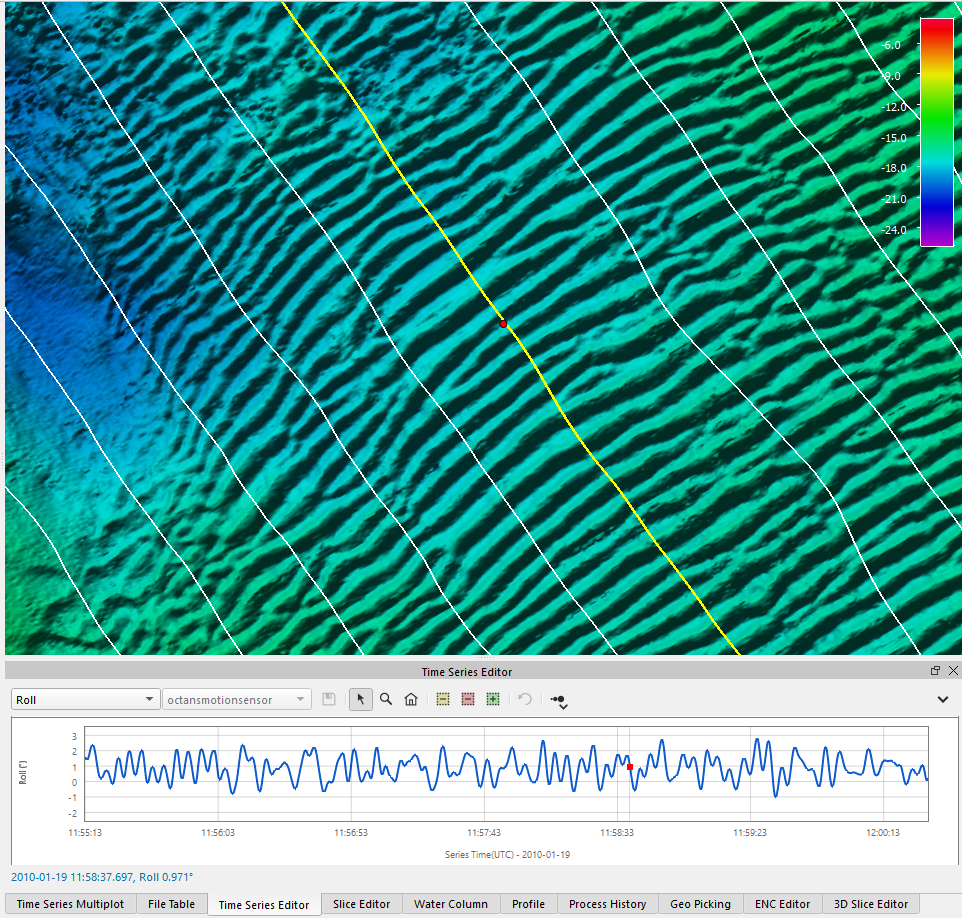
Why yes, that is a real word! The scene can show correlation between time based elements in your project and their spatial location within the scene. For example, by simply moving your mouse over the Time Series Plot Window, a correlated location is displayed in the scene by a red point on the track line, and a red point projected down to the current dynamic surface as shown below.
You can also see the correlated swath location when using the Swath Editor Window as shown below.
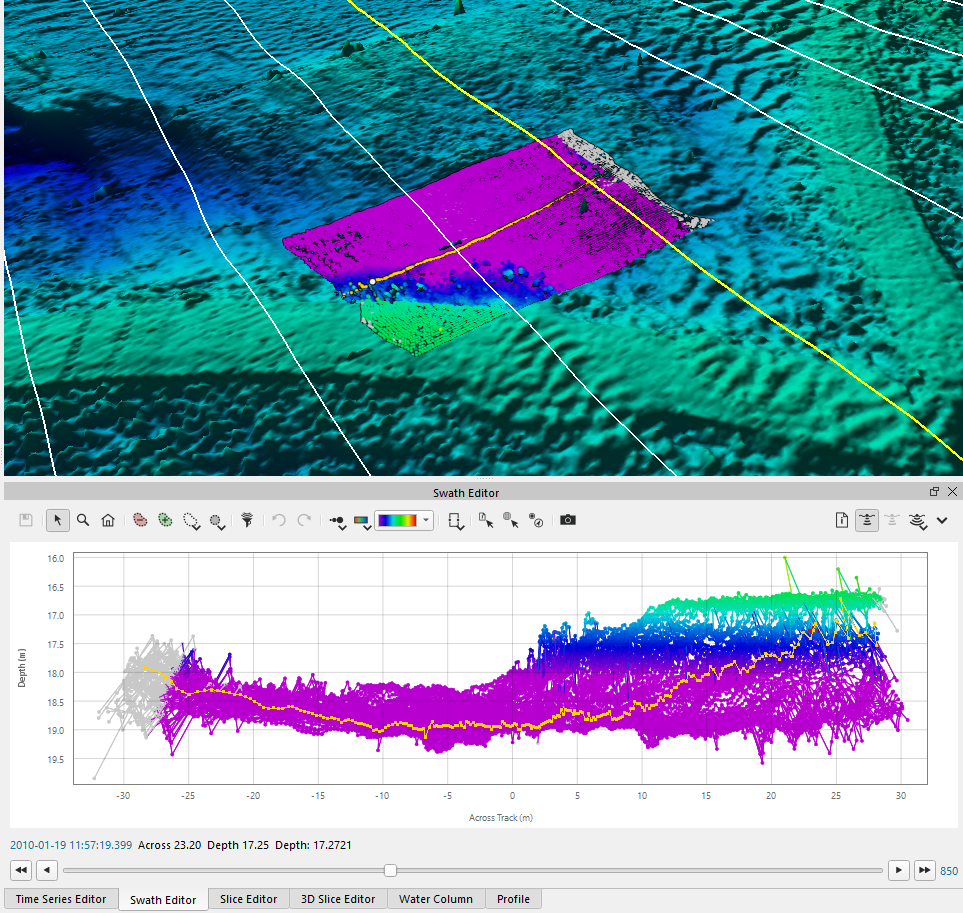
As you move along the pings in the selected track line, the 4D Scene will update to show the swath contents and location.
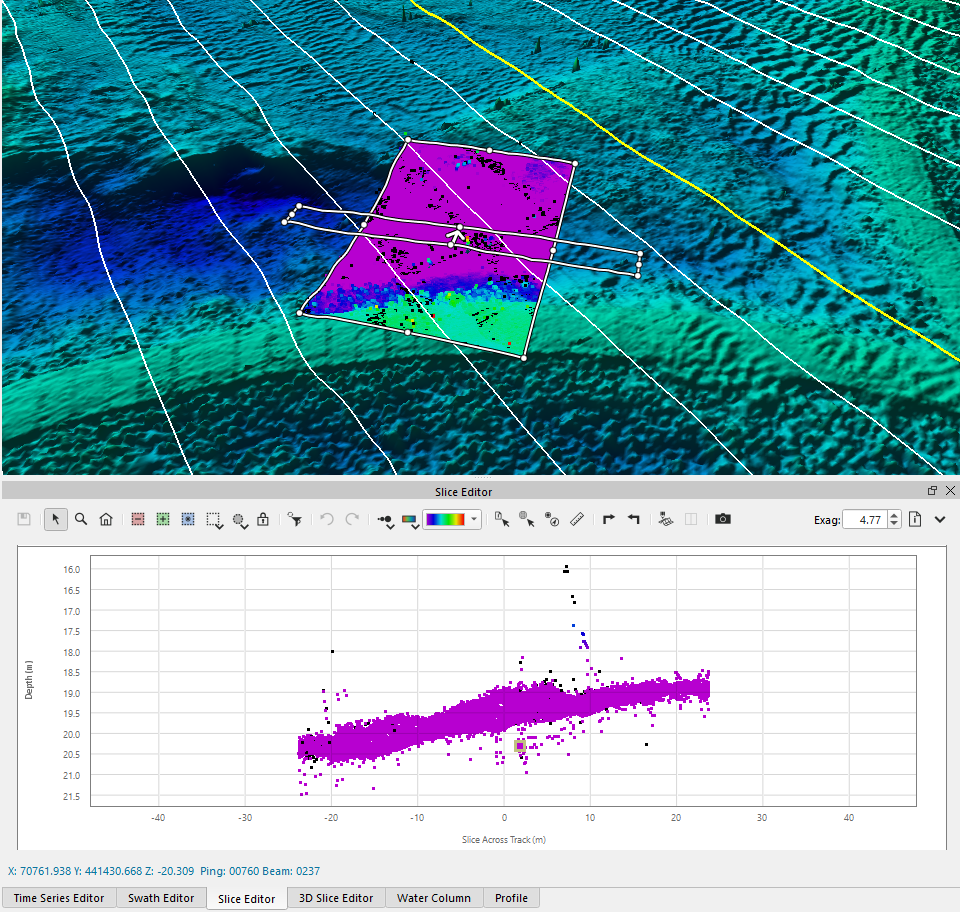
The Slice Editor also has a correlated view in the 4D Scene. As you move your selection, the scene will center on the selection if your "Auto Track" option is on.
4D Scene Context Menu
If you right click on the scene, a context menu will appear with the following options, many of which are found in other primary menus.
Edit Sub-Menu
Launch Swath Editor
This will launch the Swath Editor on the selected line. If no line is selected, Qimera will select the first processed raw sonar file line.
Launch Slice Editor
This will launch the Slice Editor on the selected Dynamic Surface using the current area selection. If no area is selected, Qimera will create a slice selection in the center of the selected Dynamic Surface.
Launch 3D Editor
This will launch the 3D Editor on the selected surface area.
Start Instant Surface Filtering Mode
This will begin instant surface editing. When the user makes a spatial selection on a Dynamic Surface, the selected Filter will be immediately applied.
Select Sub-Menu
This menu option will allow you to select a layer in the Qimera Project Layers Dock. The sub-menu will populate with the SD objects under the pick point.
Mode Sub-Menu
This menu option will allow you to select one of the primary modes in the Qimera 4D Scene Toolbar.
Zoom to Selected Objects
This button will zoom the scene such that the selected objects fits the viewable area of the window.
Zoom to Scene
This button will zoom out the current view so that all objects within the scene are viewable.
Show Object Selection Markers
Show/Hide the bounding box of the selected scene object.
Show Scene Bounds Box
Show/Hide the scene bounding box.
Show 3D Turntable Widgets
Show/Hide the Fledermaus navigation widget.
Create Line Object From Current Selection
Create an SD line object from the current selection and add it to the Qimera Project Layers Dock.
Create Route From Current Selection
Create an SD route object from the current selection and add it to the Qimera Project Layers Dock.
Create Cable/Pipe From Current Selection
Create a Cable/Pipe object from the current selection and add it to the Qimera Project Layers Dock.
Set Checked Area
See description in Qimera Dynamic Surface Menu.
Reset Checked Area
See description in Qimera Dynamic Surface Menu.
Select in Area
This will select all the Raw Sonar Files that have soundings which overlap the selected area.
Return to: Qimera Interface
Return to: Qimera Table of Contents