
How-to Work with Hypack HSX Data
This How-to describes how to add and work with Hypack HSX data in Qimera (Versions 2.0.0 and up).
On this page:
For additional information, see our Getting Started guide.
Data
The data used for this How-to is single head Reson 8125 data logged using Hypack. The data was provided by the Port of London Authority.
About Hypack HSX Data
The supported Raw Sonar Files for Hypack is a HSX file. These files are logged using HYSWEEP. HSX files are in an ASCII format and can be loaded into a text editor when troubleshooting.
HSX files are always in a projected Coordinate Reference System (CRS). The CRS of the files should be considered when being added to a project. It is important to note that the projected CRS information (which CRS was used during acquisition) is not stored in the HSX file directly and must be known and supplied by the user.
HS2 and HS2X format files are Hypack files that have had some level of processing applied to them. They are binary files and can be loaded in Qimera as Processed Point Files using the Add Processed Point Files Dialog.
Useful information about what is read from HSX files on import can be found on the Qimera Supported Data Formats page, the Add Raw Sonar Files Dialog page and the Sonar Source Data Import Capabilities page.
Licensing
The import and processing of raw data formats is dependent on licensing. To view your license coverage in Qimera, go to the Help Menu and choose Show License Manager.
How-to Bring Hypack HSX Data Into Qimera
1) After you open Qimera, the Projects Dialog will launch. Select New Project... to open the Create Project Dialog.
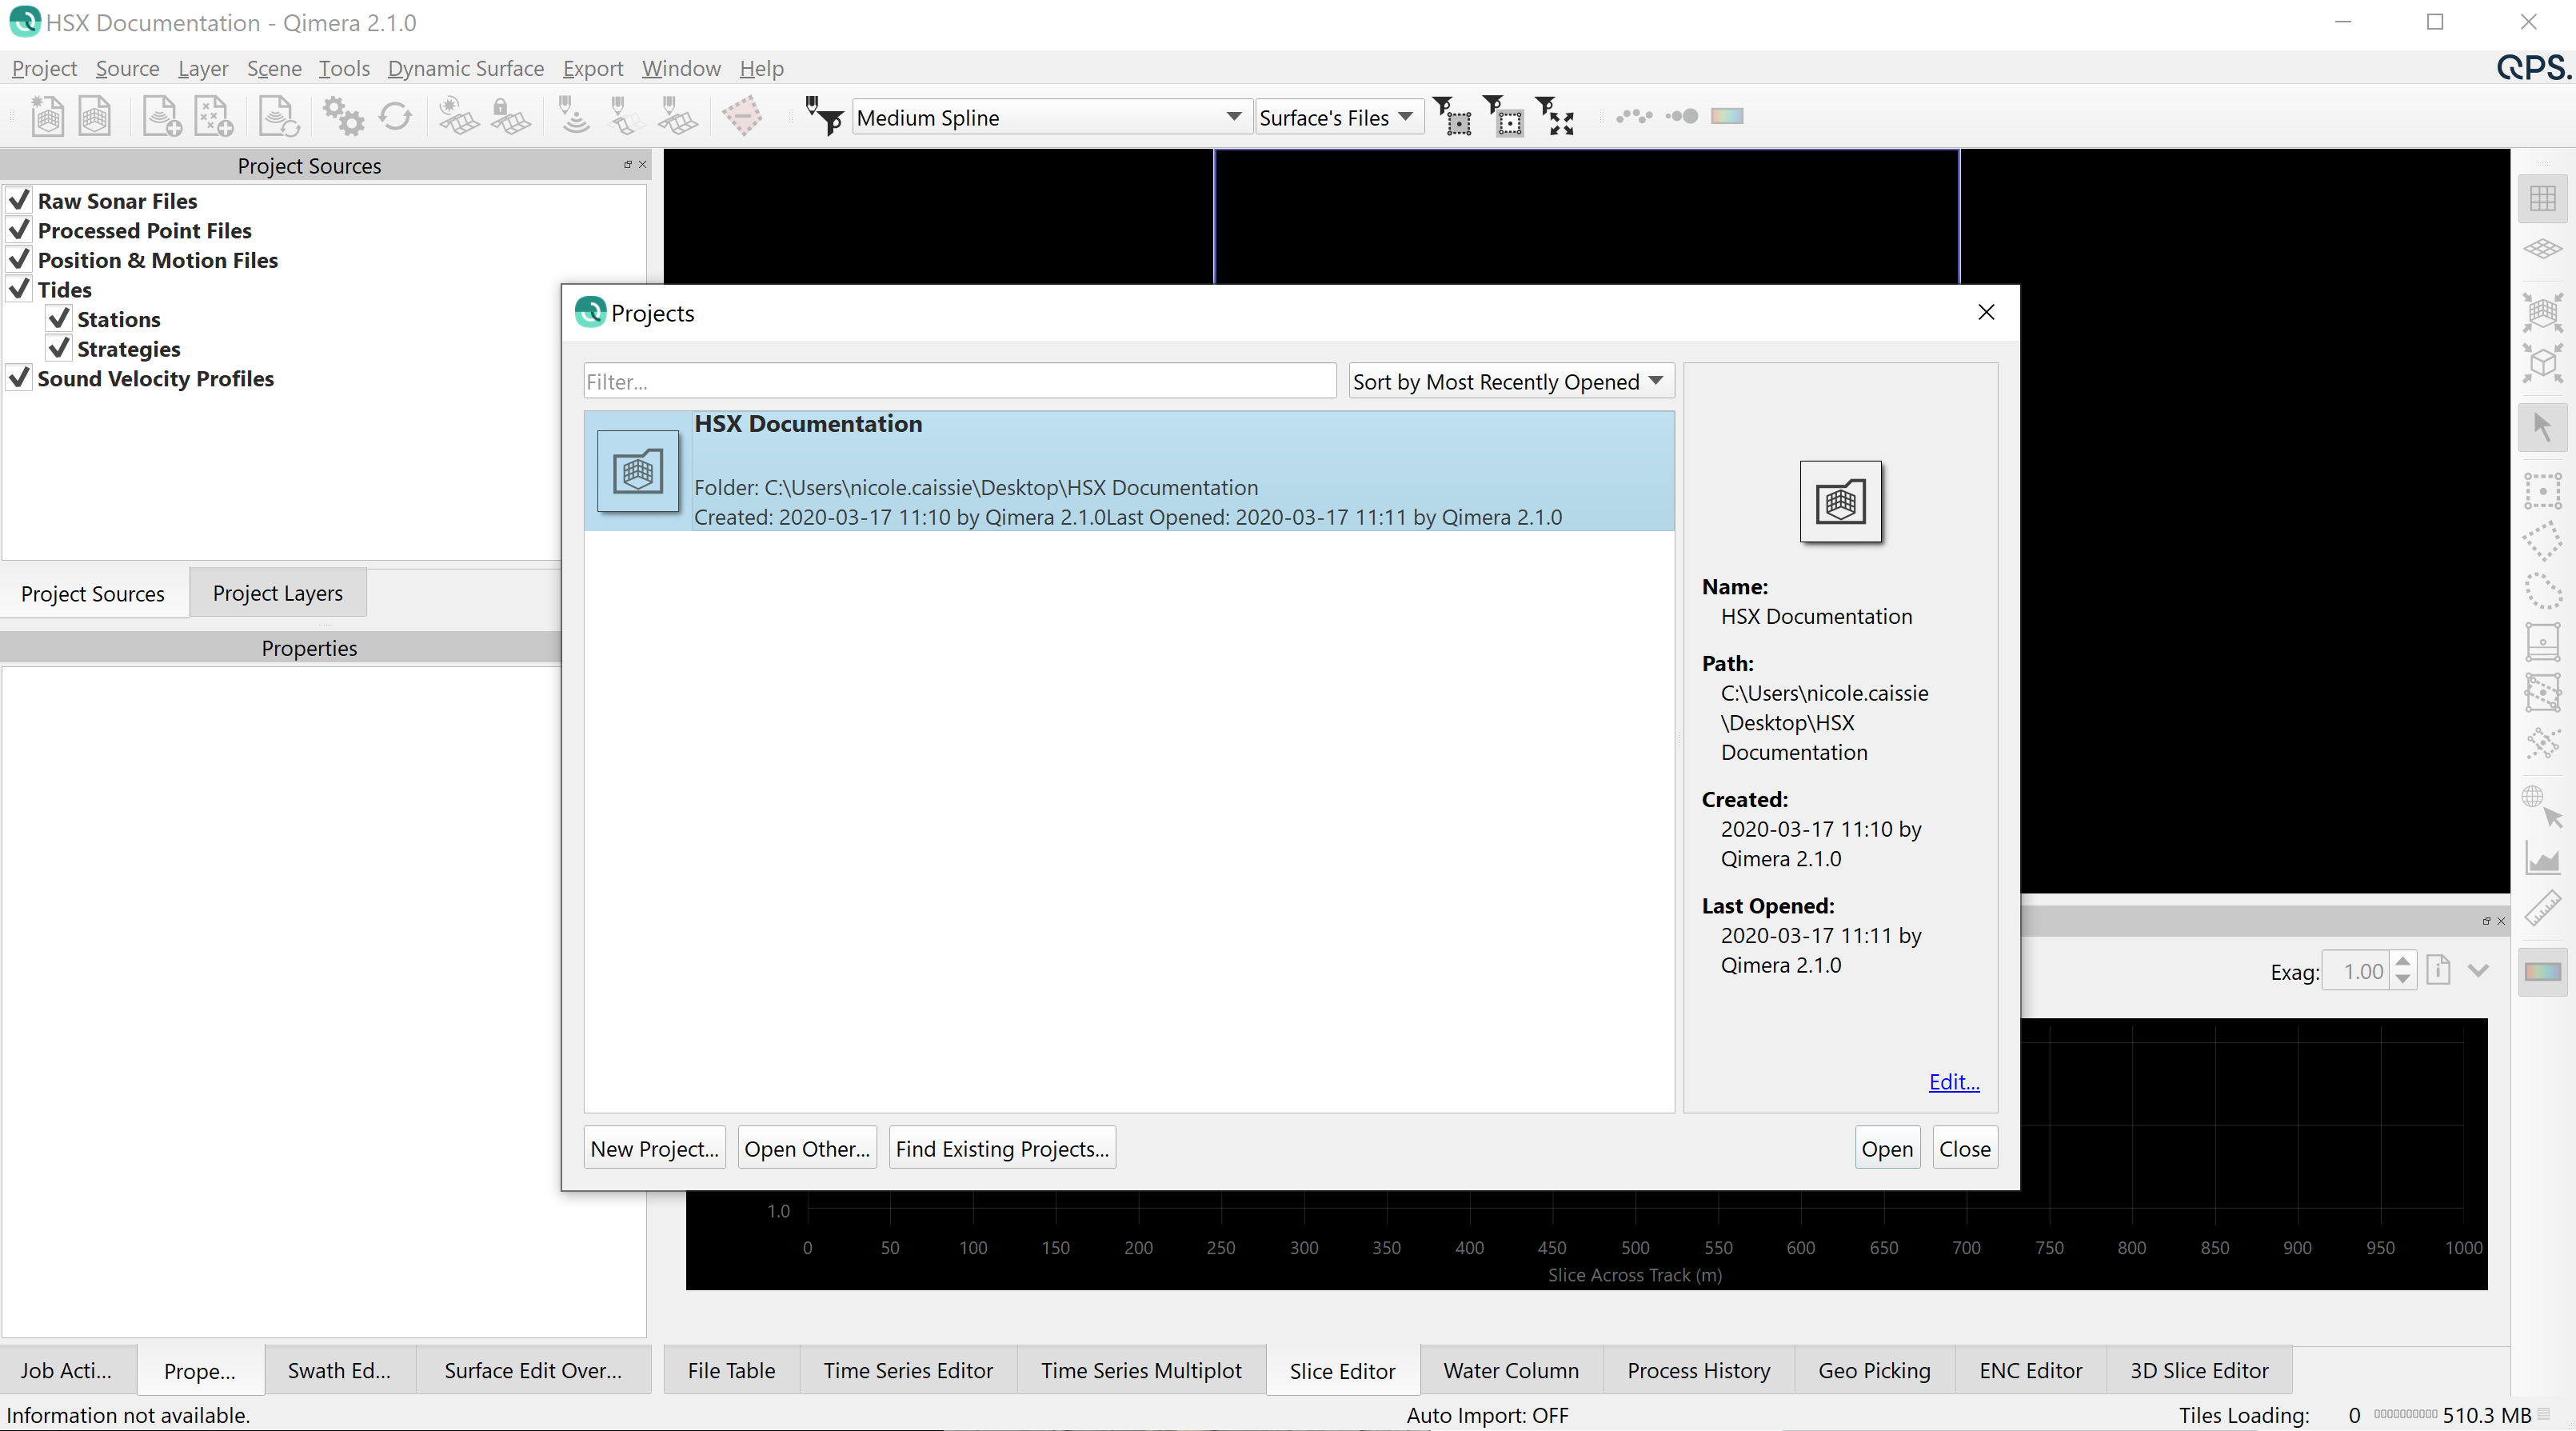
Figure 1: Qimera's Projects Dialog
Alternatively, you can create a project by clicking the Create Project Button 
2) Fill in Project Details:
- Add a project name.
- By default, the folder for your project will be in the 'C:\Users\username\QPS-Data\' directory, though you can choose another location.
- The Survey Type and Description boxes can be used to add additional notes about the project.
- Set the Project Coordinate System (CRS):
- Single Projected - If you would like to manually set the CRS from a list of pre-defined systems using the Search Coordinate System Dialog.
- Full Geodetic Configuration - If you would like your project be in a projection that is not included in the list of pre-defined CRS, you can manually enter the geodetic configuration parameters. A Geodetic Configuration consists of, at minimum, a Project CRS. Additionally, it can contain an Input Geographic CRS and a Transformation between the Project CRS and the Input Geographic CRS. You can also optionally have a Vertical CRS. This is done using the Geodetic Configuration Overview Dialog.
Coordinate Reference System
The Automatic CRS Projection is not the recommended option when importing HSX files.
Automatic CRS Projection is an option when creating a new project, however, if chosen, the CRS of the imported data will have to be entered in the Add Raw Sonar Files dialog when importing HSX files. The CRS entered during import will then become the Project CRS.
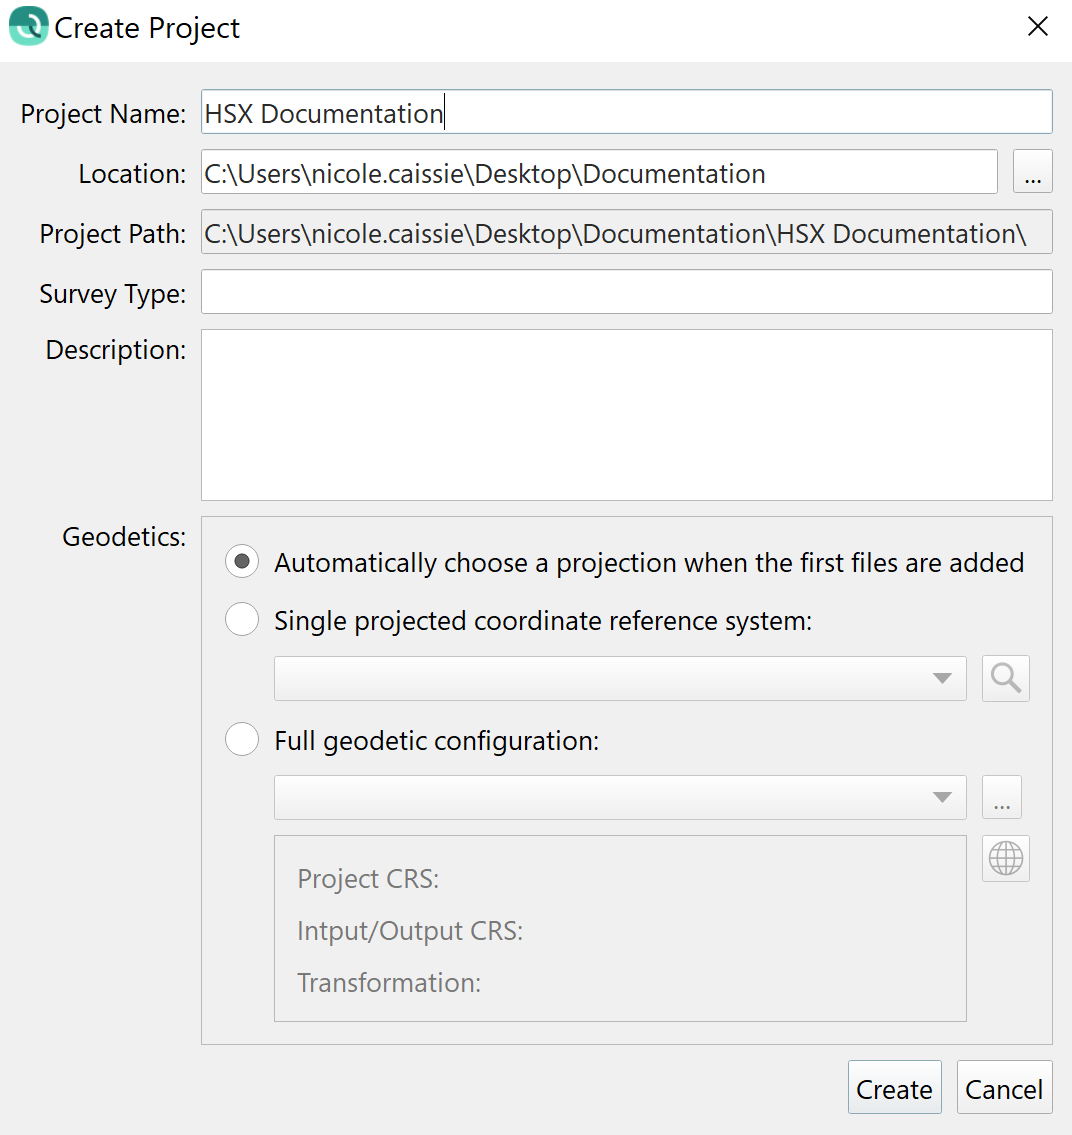
Figure 2: Create Project Dialog
3) Once the Project CRS is set, click OK to create the project. Once created, the Project Folder will contain sub-folders for storing bathymetry files in QPD format, internal metadata, extracted external source data, and products.
4) You will be prompted to add source files to your new project. Choose Add Raw Sonar Files.
Figure 3: Add Raw Sonar Files Prompt
Alternatively, you can add Raw Sonar Source Files by clicking the Add Raw Sonar File Button 
5) Use the Add Files... Button to navigate to and select your HSX files.
- If a Vessel Name is not found in the first HSX file, a Create New Vessel Dialog will launch. Add a Vessel Name and click OK to continue. A Vessel Assignment section will be added to the Add Raw Sonar Files Dialog and the Vessel Name will be automatically listed under Vessel Assignment. Qimera will create a vessel file with this name in your project. If you import data without vessel information at a later stage, you must choose the correct vessel to associate the data with since Qimera cannot determine this on its own. The sample data used in this how-to contains the vessel name information, so this step is not necessary.
- Set the Time Reference to the time zone used during acquisition.
- Set the Coordinate Reference System of the Imported Data.
- Click OK to load the files.
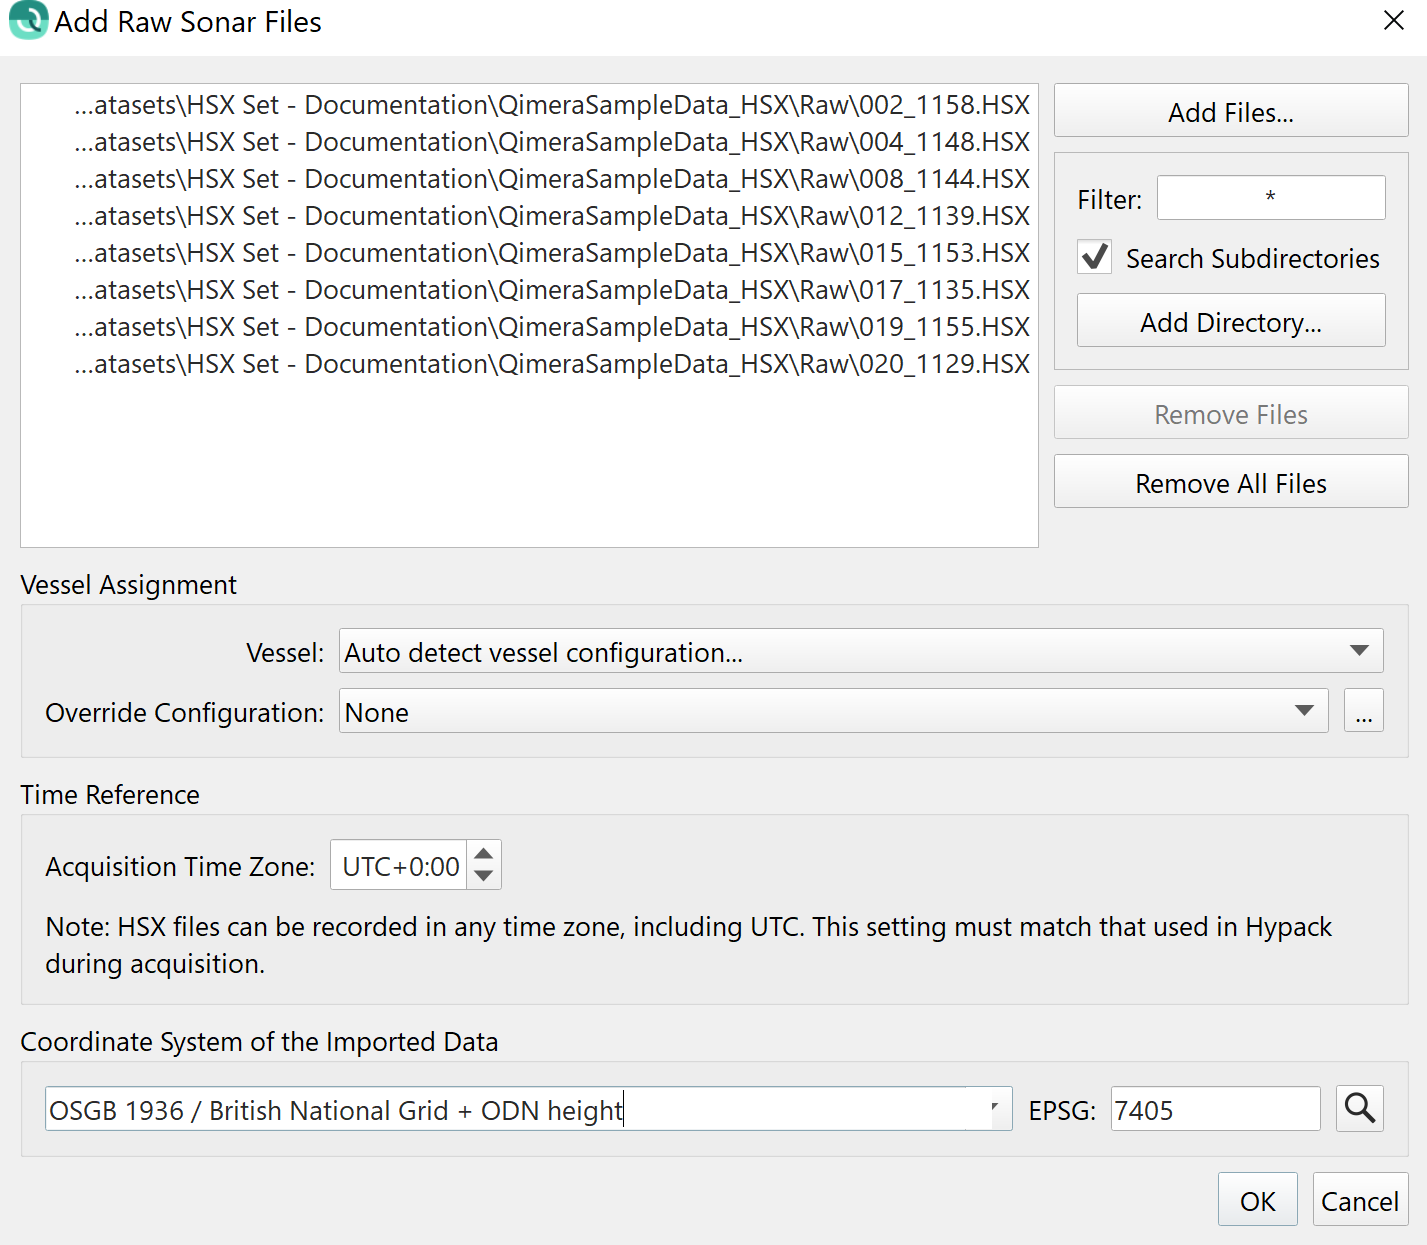
Figure 4: Add Raw Sonar Files Dialog
HSX files are always projected, however the coordinate system information of the imported data cannot be read from the file directly. Therefore, the default coordinate system in the Import Dialog (WGS 84) will never be correct and must be changed by the user. This is a design choice to prevent the user from assuming that Qimera is reading the information from the HSX files. If the user leaves the default of WGS 84, they will be warned and forced to change to a projected coordinate system.
6) Qimera will load the HSX files to the project, scanning for and extracting any available information.
Shown below are:
- Indicators showing the loading progress of each individual file in the Project Sources Dock.
- The loaded tracklines visualized in the 4D Scene.
- The overall progress of data extraction in the Job Activity Dock.
- Any warnings or errors shown in the Job Activity Dock.
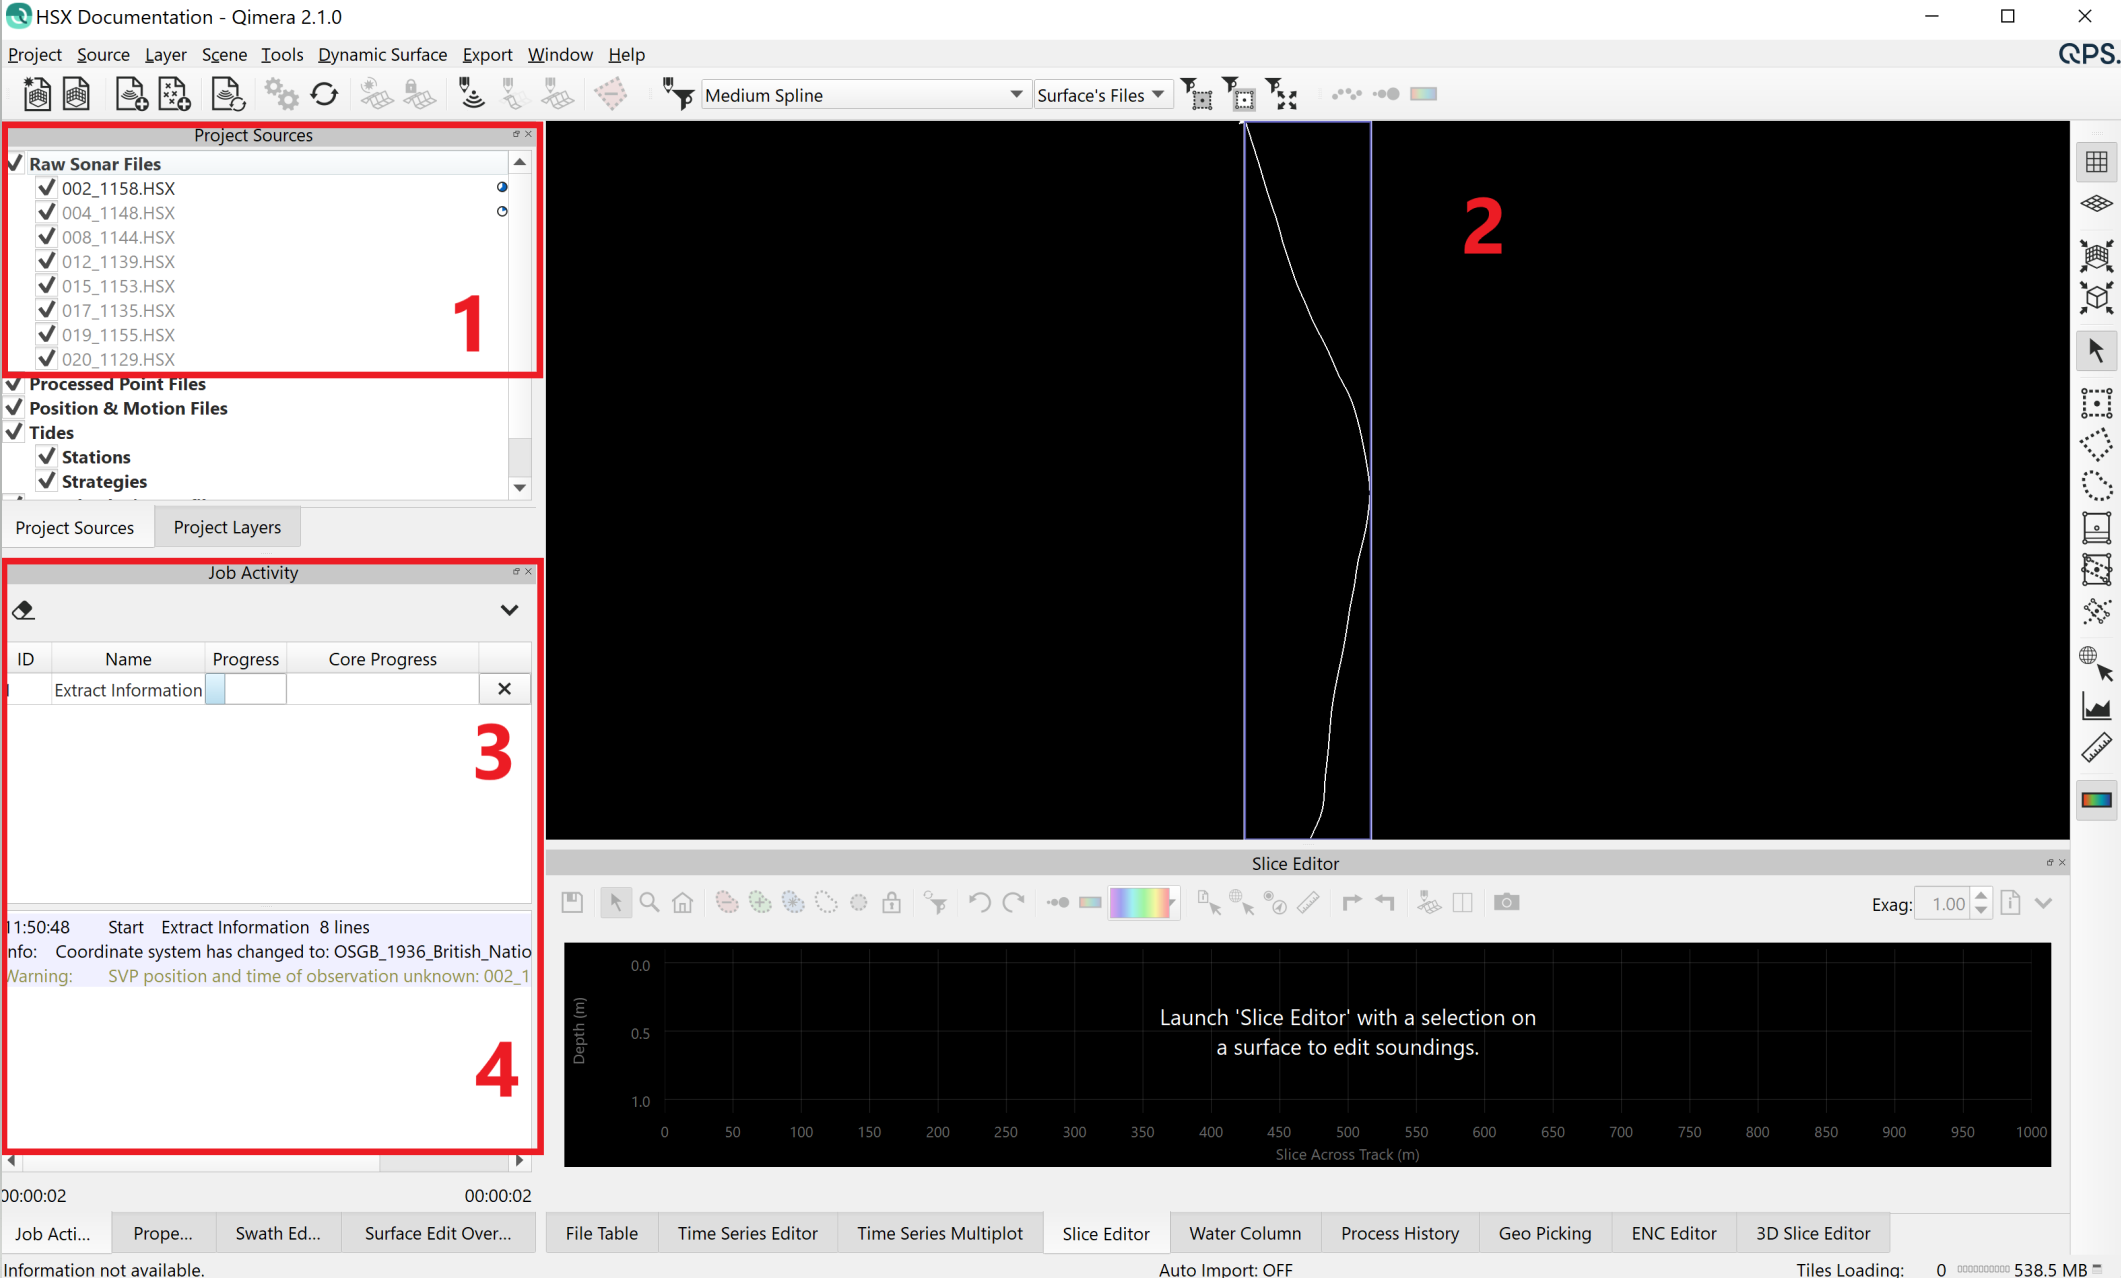
Figure 5: Information Being Extracted from the HSX Data During Load
7) As the information from the HSX files is extracted, you will see the extracted vessel information in the File Table Dock. You can review the Properties Dock to see what information was extracted for each file (make sure that you have a file selected).
Shown below are:
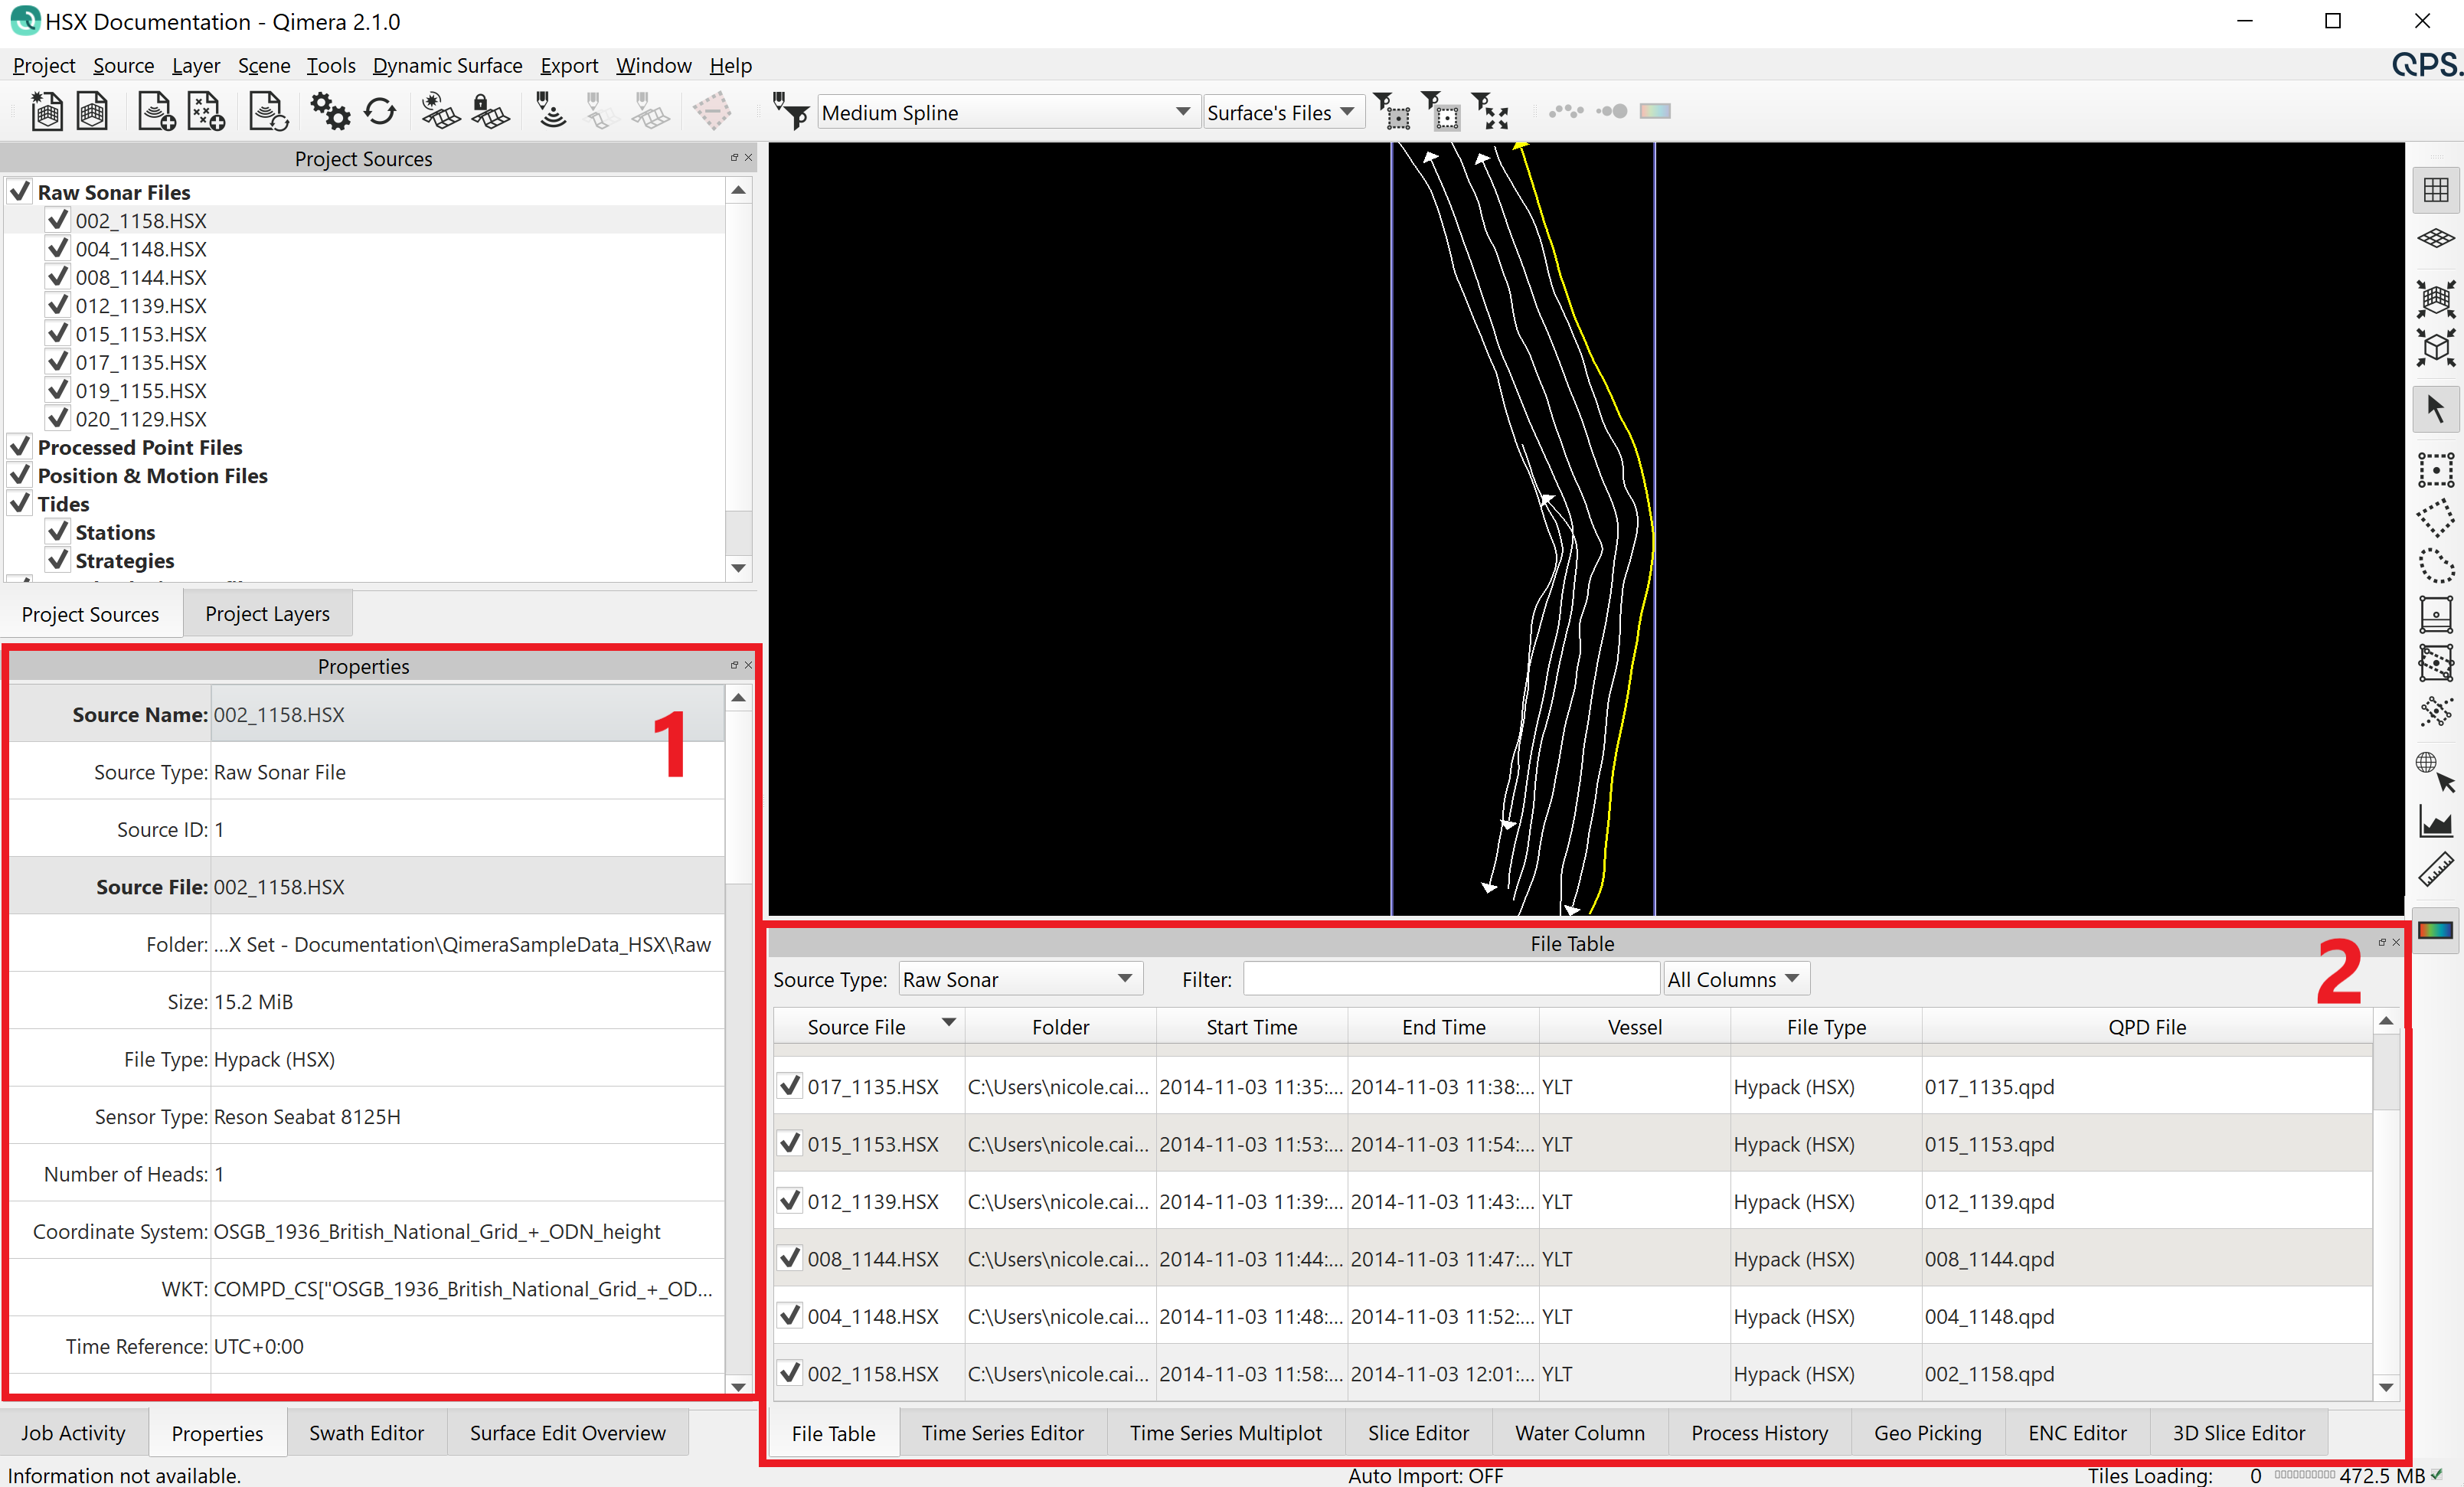
Figure 6: Imported Data Populating the Properties Dock and File Table Dock
8) For this example dataset, the Job Activity Dock displays a warning about SVP position and time. This just means that the SVP position and time were not available in the file, so Sound Velocity Processing Strategies based on location or time won't be available unless you provide this information in the SVP Editor.
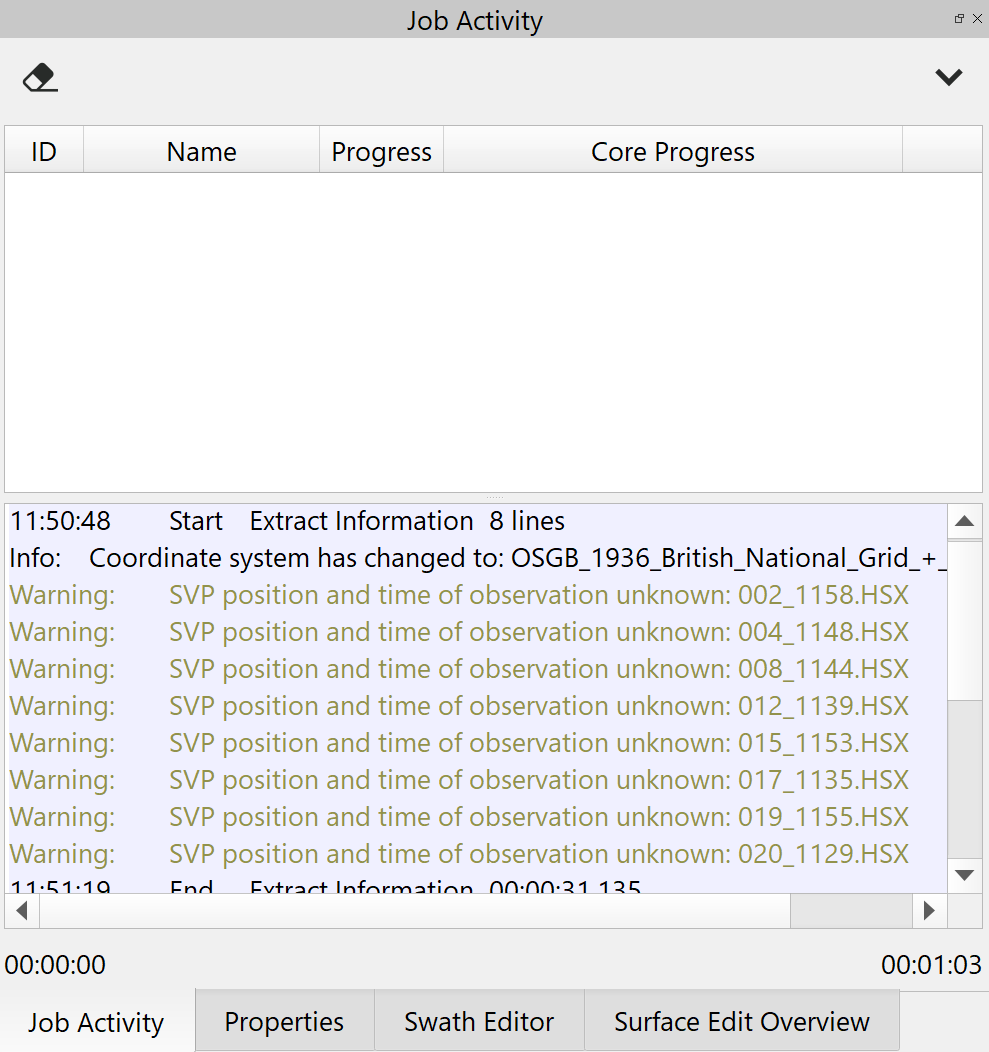
Figure 7: Job Activity Dock
Extracted information for HSX data may include:
- Raw multibeam
- Vessel configuration
- SVP
- Surface sound speed
- Orientation
Position
Tide
* The tide record in HSX files can contain tide values, GPS height, or both. If the record is populated the information will be extracted by Qimera and made available for use in vertical referencing – however there is no way for Qimera to know which value (tide, GPS height, combination) was used.
For a full list of what is extracted from each supported format, click here.
In the Properties Dock, you can see that Vessel Configuration, Position, Motion and Tide were all extracted from the file, but that there was no water column information or Beam Time Series information.
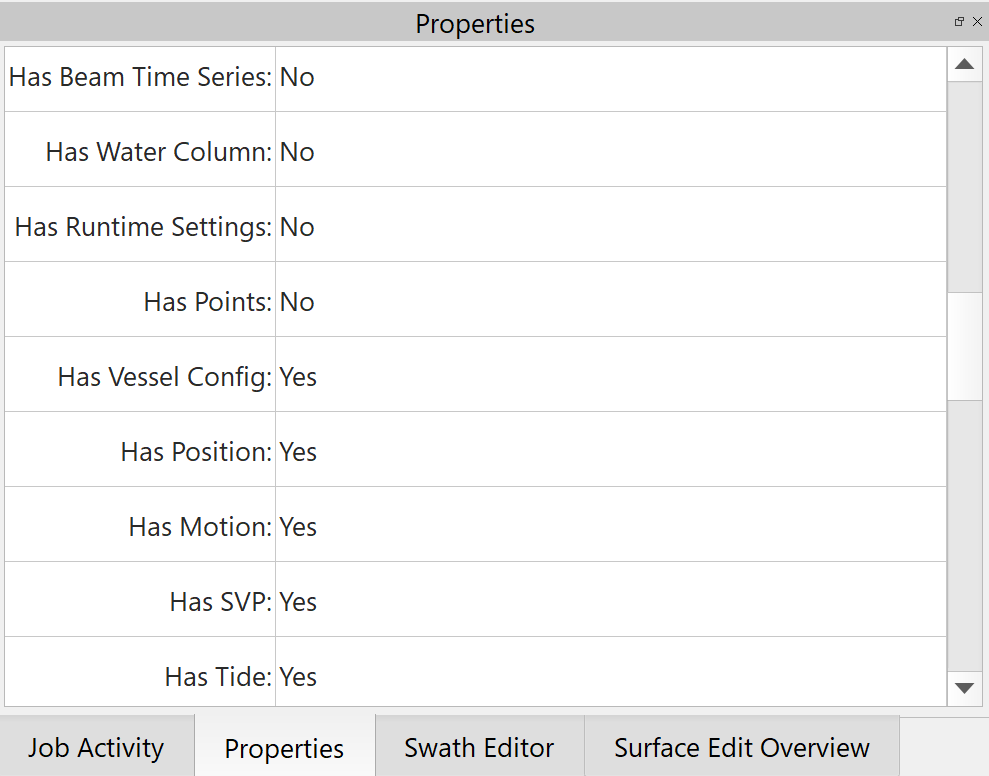
Figure 8: Properties Dock
9) As information is extracted from the HSX files, the folders in the Qimera project get populated with the information.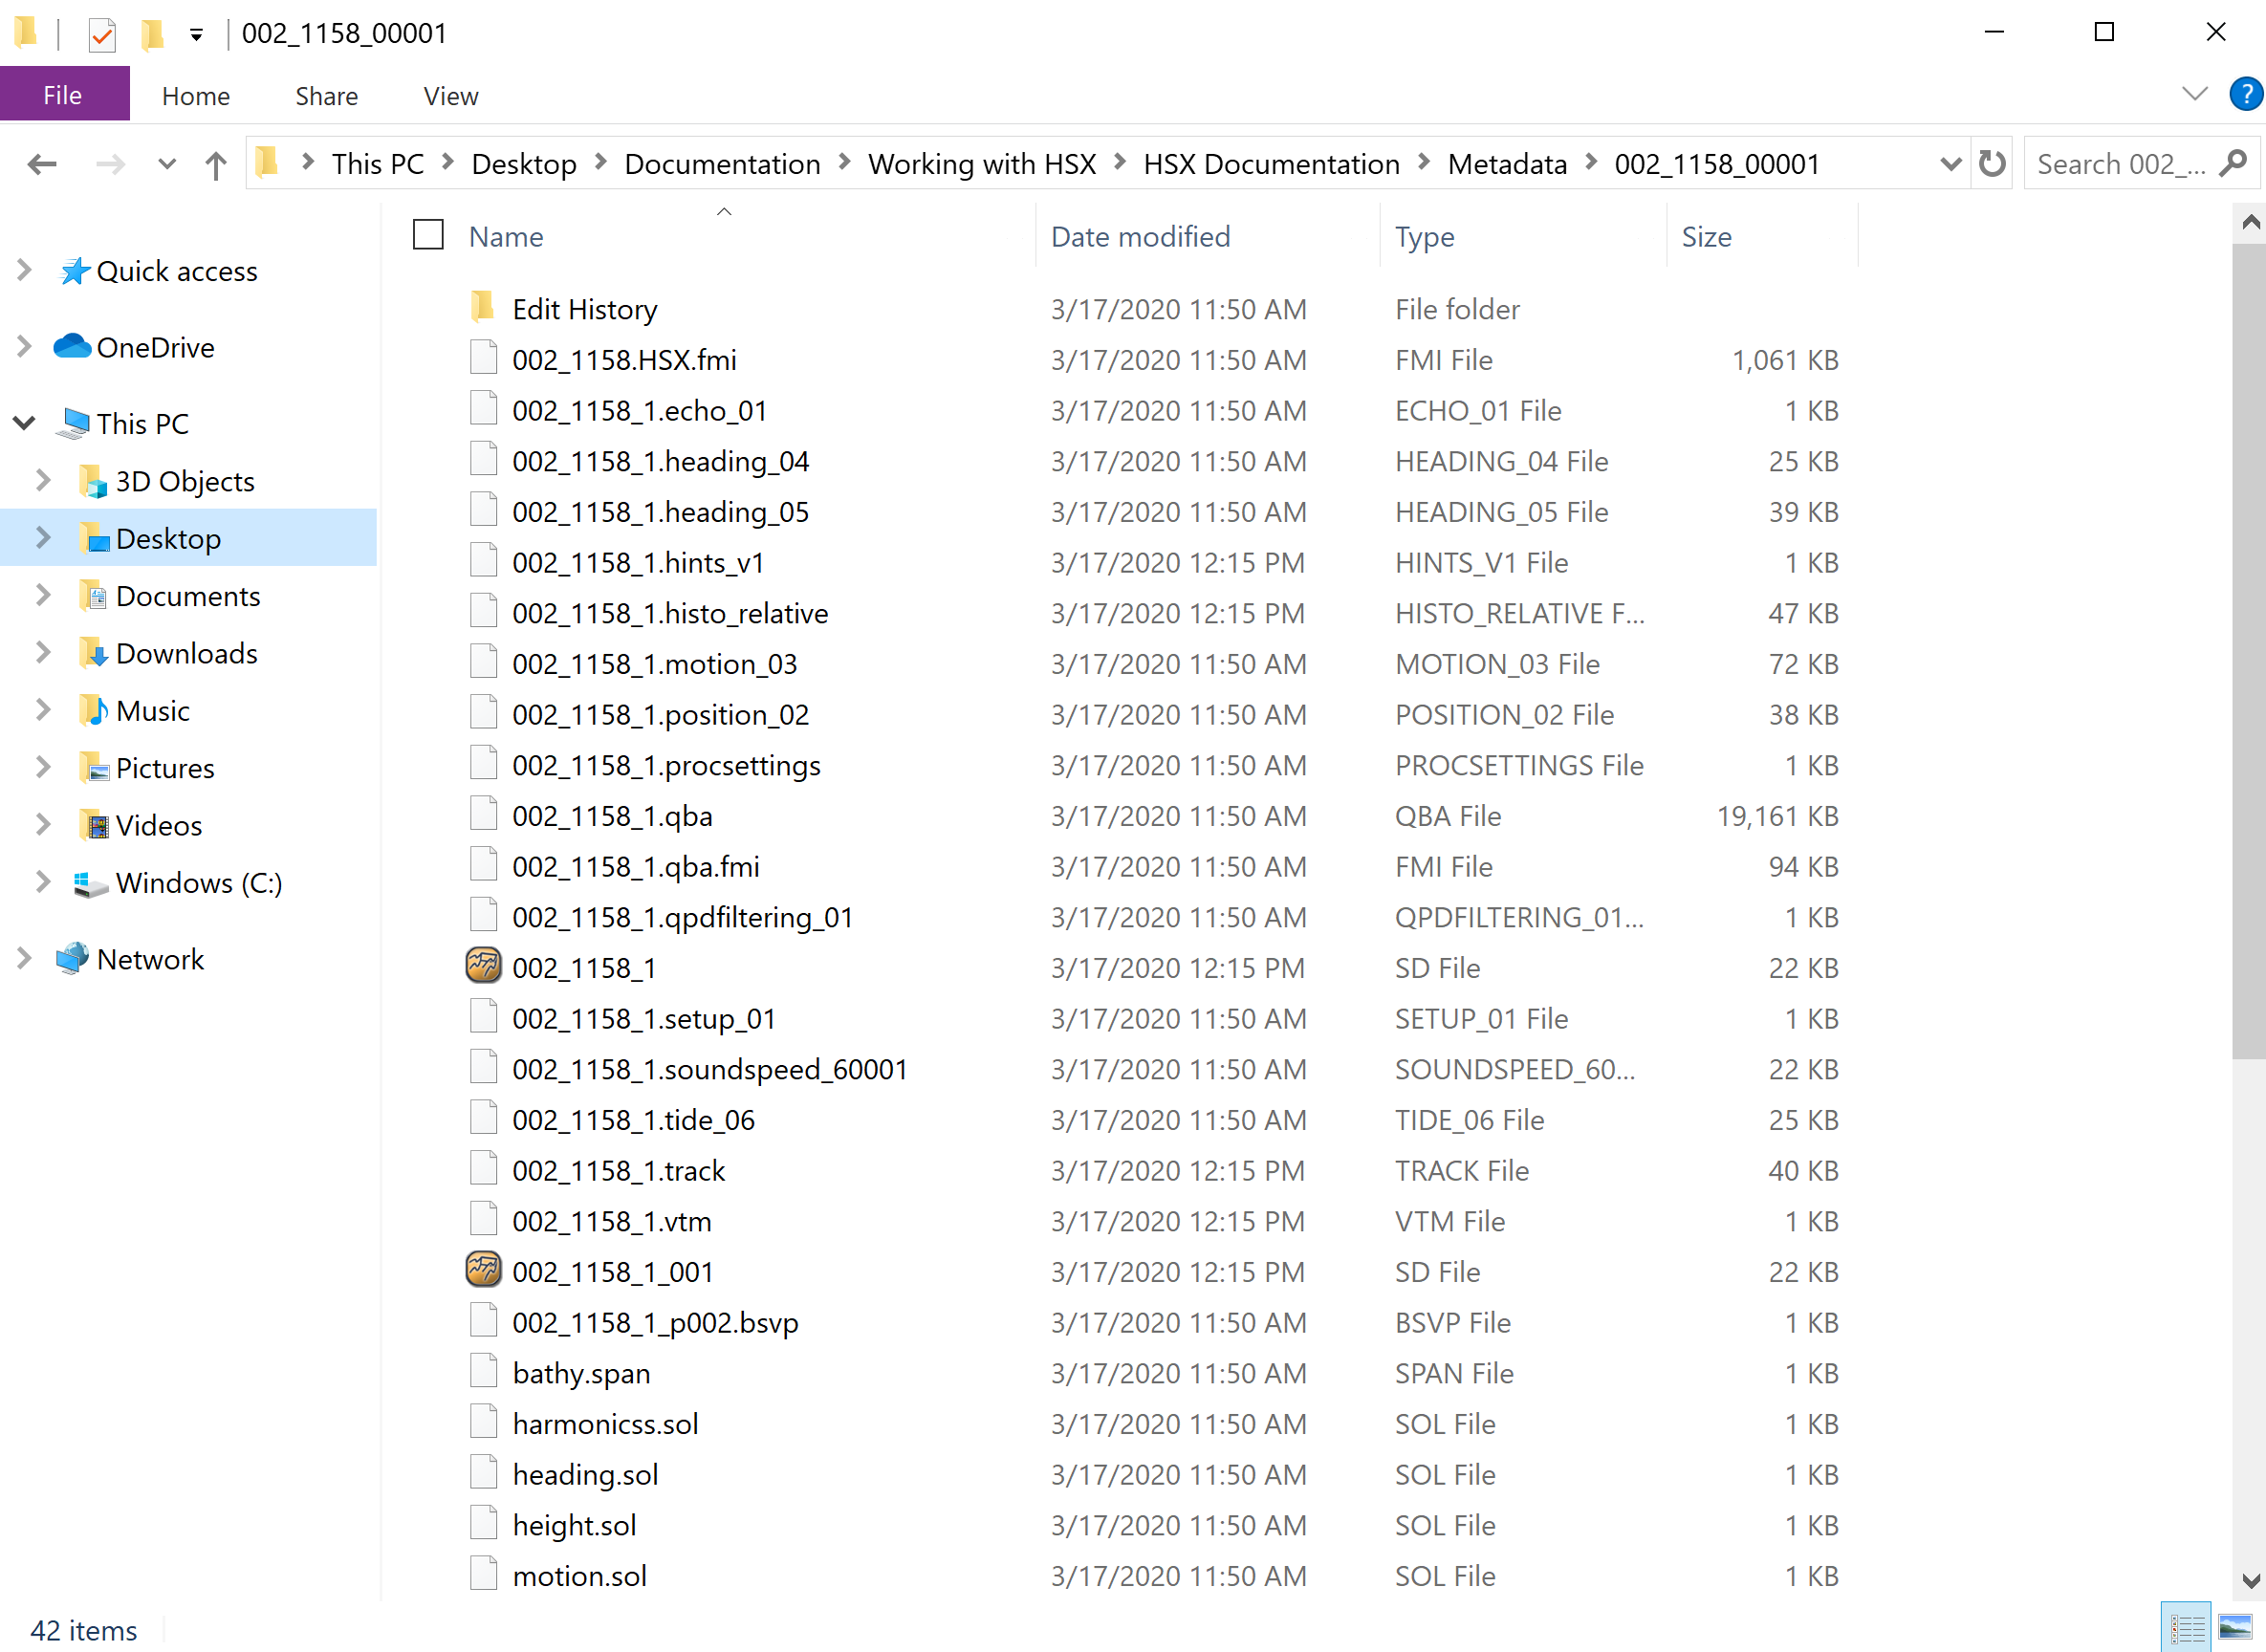
Figure 9: Extracted Information for Line 002 in the Metadata Folder

Figure 10: Extracted SVP Information in the SVP Folder
Visualizing a File in Qimera
Checking a file ON or OFF in the Project Sources Dock controls the visibility of the trackline.
Checking a file ON or OFF does not effect which files are used in surface creation and processing routines.

Figure 11: File Checked ON in Project Sources Dock

Figure 12: File Checked OFF in Project Sources Dock
Selecting a File in Qimera
For files to be used in a processing routine (such as Surface Creation), they can be checked ON or OFF, but they must also be selected.
Files can be selected by clicking on the file name or trackline with the mouse (use SHIFT-click or CTRL-click to select multiple files), or by selecting the parent directory above the files in the Project Sources Dock. The parent directory in Figure 13 is "Raw Sonar Files."
In this example, only lines 0002 & 0003 are selected.

Figure 13: Files Selected in Project Sources Dock
This is a key part of Qimera's workflow. For an overview of the Qimera user interface, click here.
Note: When lines have just been added to your project and you are prompted to do a process, all of the lines that were added will automatically be included in that process.