Context menu of Sound Velocity Profiles → SVP Editor
What it Does
The SVP Editor is used to create and edit sound velocity profiles.
General Description
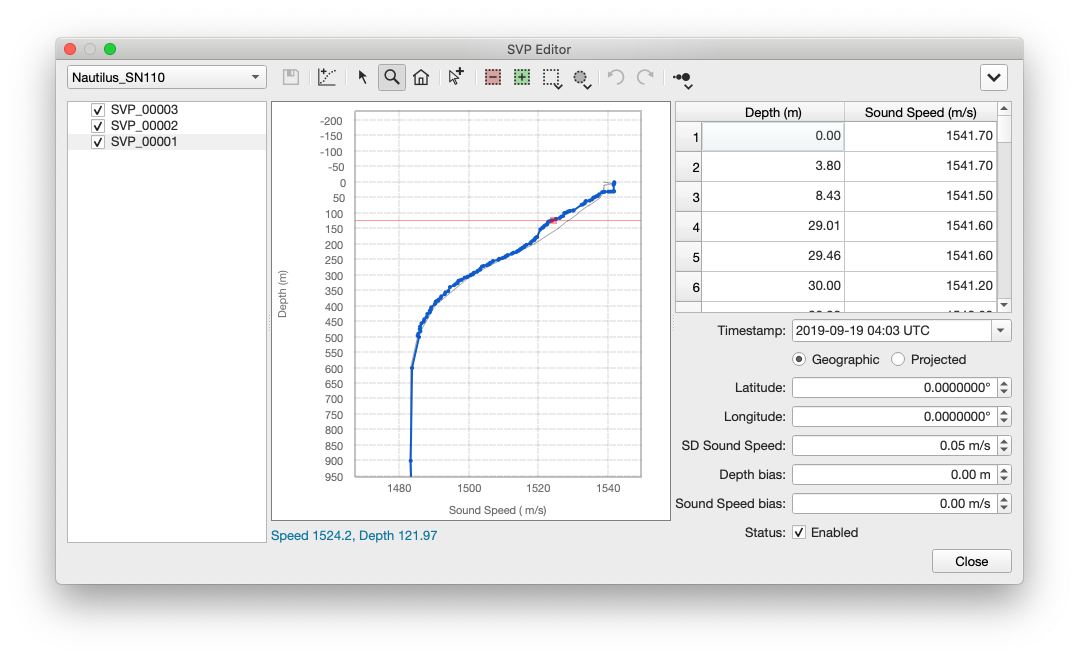
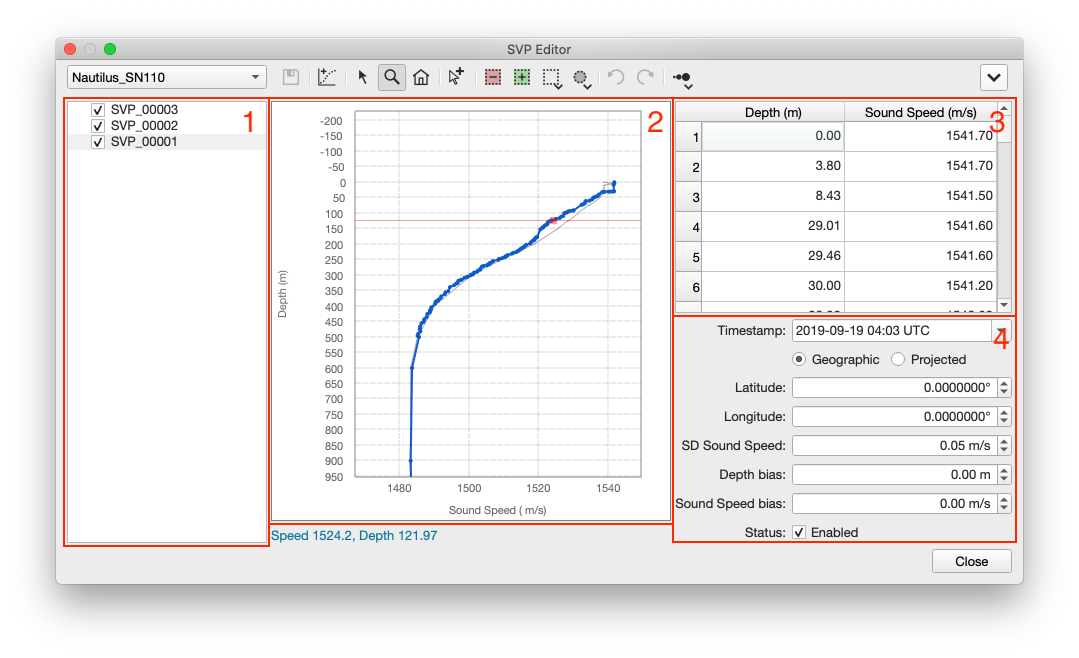
Qimera provides a sound velocity profile (SVP) editor that allows you to edit the SVP information that is extracted from your Raw Sonar Files or from SVP data files that you've imported into your project. The editor consists of a toolbar along the top that controls the interaction mode. The left most panel is a list of SVP files in your project; selecting in this list will update the SVP plot in the middle of the editor. The data from the selected profile is also shown in a text table on the right side of the editor and this allows you to modify the entries. The date/time and position of the SVP are shown in the bottom right corner, along with the estimated sensor uncertainty. The date/time and position (displayed in Geographic or Projected coordinates) enable spatial and time based lookup algorithms in the Processing Settings configuration dialog. The date/time and position of SVP items are populated for the incoming file formats that support this. For data formats that do not record this information, the position will be set to zero and the date/time will be set to January 1st, 1970. If you make any modifications to an SVP, Qimera's Dynamic Workflow Engine will determine which raw sonar files need reprocessing and mark them accordingly in the project tree view.
Toolbar
Combo box
The combo box at the left side of the Toolbar allows you to choose the SVP data for a particular vessel. Currently, the display is limited to show the SVP data from a single vessel at a time.
Save Button
This will save any edits made to the SVP data. Again, saving edits will trigger a reaction from the Dynamic Workflow engine. When you save an edit to an SVP, Qimera will create a copy of the original and will display this as a set of revision versions indented below the SVP item in the list view. Each edit session will create a new revision. Qimera will also identify all raw sonar files that require reprocessing due to your changes.
New SVP Button
The new SVP button will allow you to create a new SVP item for that currently selected vessel. You will be presented with a dialog that will prompt you for a name and acquisition date/time. After this step, your new SVP will appear in the SVP list window and it will be given two initial depth/velocity entries covering a depth range from 0 meters to 12,000 meters with a constant sound speed of 1500 m/s. You can graphically add points in the SVP plot or you can edit, add or remove entries in the table view. After creating a new SVP profile, you may need to modify the SVP Selection Strategy in the Processing Configuration Dialog.
Explore Mode
This is the primary exploration mode of the tool. As you move your cursor over the plot, the label in the lower left of the window will update to show the interpolated sound speed and depth of the point in the SVP that is closest to your mouse position.
Zoom Mode
When in zoom mode, simply click and drag an area of the plot to zoom into. Or simply single click a location to zoom in a bit on it. ALT-click a location to zoom out a bit. Or hit the Home button on the keyboard to return to the full extents of the data. At any time, you can SHIFT-Click to drag the plot to a new location. This is especially useful when you are zoomed in.
Zoom Out Button
If you have zoomed into an area of the plot, this button will zoom out to the extents of the current set of SVPs.
Add Entry Button
The add entry button allows you to add a depth/velocity entry graphically by clicking in the SVP plot window. A new entry will be inserted at the appropriate location in the table view. Once a point is added to the SVP, it cannot be moved graphically, it can only be edited manually in the table view. It can be selected as invalid/valid just like any other point, however.
Reject Selection
This button places the cursor in Reject Selection mode. Holding down the CTRL key will invert the mode between Reject and Accept. Use the selection style and selection area drop down buttons to modify the selection style.
Accept Selection
This button places the cursor in Reject Selection mode. Holding down the CTRL key will invert the mode between Reject and Accept. Use the selection style and selection area drop down buttons to modify the selection style.
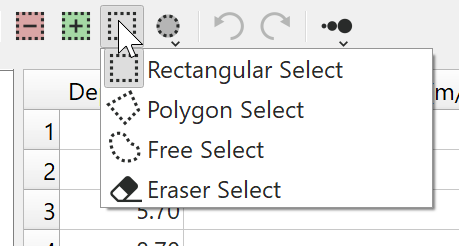
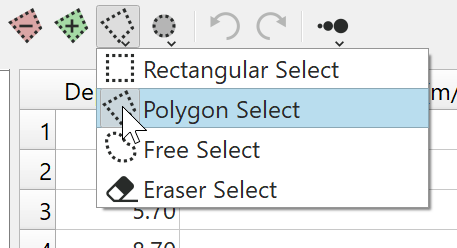
Selection Style
This button changes the selection style of both the Reject and Accept buttons. Clicking this will rotate through each of the styles, or long pressing will give you a drop down menu to select the style.
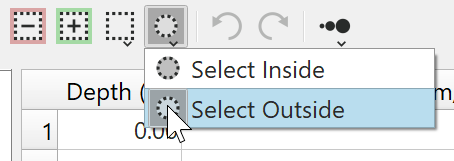
Selection Area
This button changes the selection area of both the Reject and Accept buttons. Clicking this will rotate through each of the areas, or long pressing will give you a drop down menu to select the area.
See the section on Plot Surface Editing for more information about editing with these tools.
Undo Button
This will undo the last edit actions. It is a pseudo-infinite undo buffer (c'mon, how much memory do you have?) in that you can make several edits in sequence and then undo those edits in the reverse sequence.
Redo Button
This will allow you to recover from an accidental undo operation.
Point Size
Clicking the this icon will change the point and line size drawn in the plot area. If you click and hold the button, it will display a menu where you can select point sizes between Small and XX-Large. Simply clicking will cycle through all sizes.
SVP Editor Menu
Show Column
This option allows you to change the visibility of SVP attribute columns in the table view. Table options include:
Depth
Sound Speed
Temperature
Conductivity
Salinity
Pressure
Flags
All of these fields are stored for every sample, even if this type of data was not available during import. At the moment, Qimera only uses the depth and sound speed values. In the future, it will potentially use the other data types for computing sound speed and/or absorption coefficients.
Save Image
This option will allow you to save the plot to a JPEG or PNG image.
Show Grid Lines
This option will show/hide grid lines on the plot.
Hide Rejected Entries
This option will show/hide rejected entries in the table entry.
Tree View Context Menu
If you right click on a selection in the tree view, you will show the tree view context menu.
Revert
This option allows you to revert to a saved revision of your plot
Uncheck Selected
This option will uncheck all SVPs in the current selection. Check state controls visibility of the SVP in the plot.
Check Selected
This option will check all SVPs in the current selection. Check state controls visibility of the SVP in the plot.
Check Only Selected
This option will check all SVPs in the current selection and uncheck those outside of the selection. Check state controls visibility of the SVP in the plot.
Table Context Menu
If you right click on a row in the table, you will show the table view context menu.
Insert Before
Insert a row before the currently selected row.
Insert After
Insert a row after the currently selected row.
Accept Entry(s)
Accept the selected entry or entries.
Reject Entry(s)
Reject the selected entry or entries.
Display and Control
SVP list view: A list view of the SVPs currently associated with the vessel chosen from the combo box in the tool bar. Select items in this list to edit them, the chosen item will be drawn in blue in the SVP plot window. All other items are drawn in the SVP plot in light gray in the background for context.
SVP plot: Graphical plot of all SVPs from the currently selected vessel. The currently selected SVP in the SVP list is drawn in blue, all others are drawn in gray.
Table entry: A tabular list of the data points associated with the currently selected SVP. You can manually edit them be selecting a cell. You can also right click on any item and reject that item or insert a row before/after the currently selected sample. Points selected for deletion in the SVP plot will be drawn in light gray.
SVP metadata: The time stamp and position of the SVP, as detected during import, will be displayed here. You can view and edit the time stamp and position of the SVP, in Geographic or Projected coordinates, and save them back to the file. This will create a new version of the SVP but you can always revert to the original state by right-clicking a revision item in the SVP list and choosing the revert option. You can set the standard deviation (SD) of the SVP measurements and you can also set the calibration bias for the depth sensor and SVP sensor as well in the event that these need to be corrected in post-processing. The tickbox at the very bottom of the metadata section allows you to enable/disable use of the currently selected SVP item for use in processing.
Sample Editing
Editing SVP sample data can happen either by using the selection tools in the plot area or by directly modifying the table entry values. Table modification can only work on a single SVP selection while plot tool based editing can occur on all currently selected SVPs. Follow the examples in the appendix section on Qimera Plot Surface Editing to use the selection tools for editing samples in the plot area. If you have many SVPs, use the check state of each to show/hide SVPs in order to declutter the plot. Remember that only visible and selected SVPs react to the edit tools. When you reject samples in your data, Qimera will interpolate across the gap. When an SVP that has edits is selected, the deleted samples are shown as red points where they used to occur in the plot.
If you change the Show Columns options of the table view to show Flags, you can also see the edit flags (Deleted, Added, Modified) for the specific entry as shown below.
You can use the editing tools to edit more than one SVP at a time in the same way that you edit soundings in the various sounding editors. Simply select all of your SVPs in the list view with the mouse (you can use CTRL/CMD and SHIFT modifier keys) and use one of the selection tools to select the desired samples for deletion. The multi select will disable the table and its editing features.