
How-to Clean Data with the Swath Editor
This How-to describes how to clean data with the Swath Editor tool.
On this page:
Setting up the Swath Editor window
- Ensure you have loaded Raw Sonar Files into your project. These can be added using the 'Source' pull-down menu at the top of the main window.
- You will need to build a dynamic surface. Select one or more of the sonar files from within the Project Sources window. This window can be toggled in the 'Window' pull-down menu.
- Once your lines are selected (highlighted in grey), choose 'Create Dynamic Surface' from the 'Dynamic Surface' pull-down menu. Enter a name for the dynamic surface in the popup window.
- Choose appropriate settings for the Dynamic Surface and Cube options or leave the defaults as is.
- Create the dynamic surface.
- Ensure that the Swath Editor window is visible. If it's not visible, enable it under the 'Window' pull-down menu.
- Activate the Swath Editor's functionality by clicking the Swath Select button (R keyboard shortcut) on the toolbar at the far right side of the Qimera window.
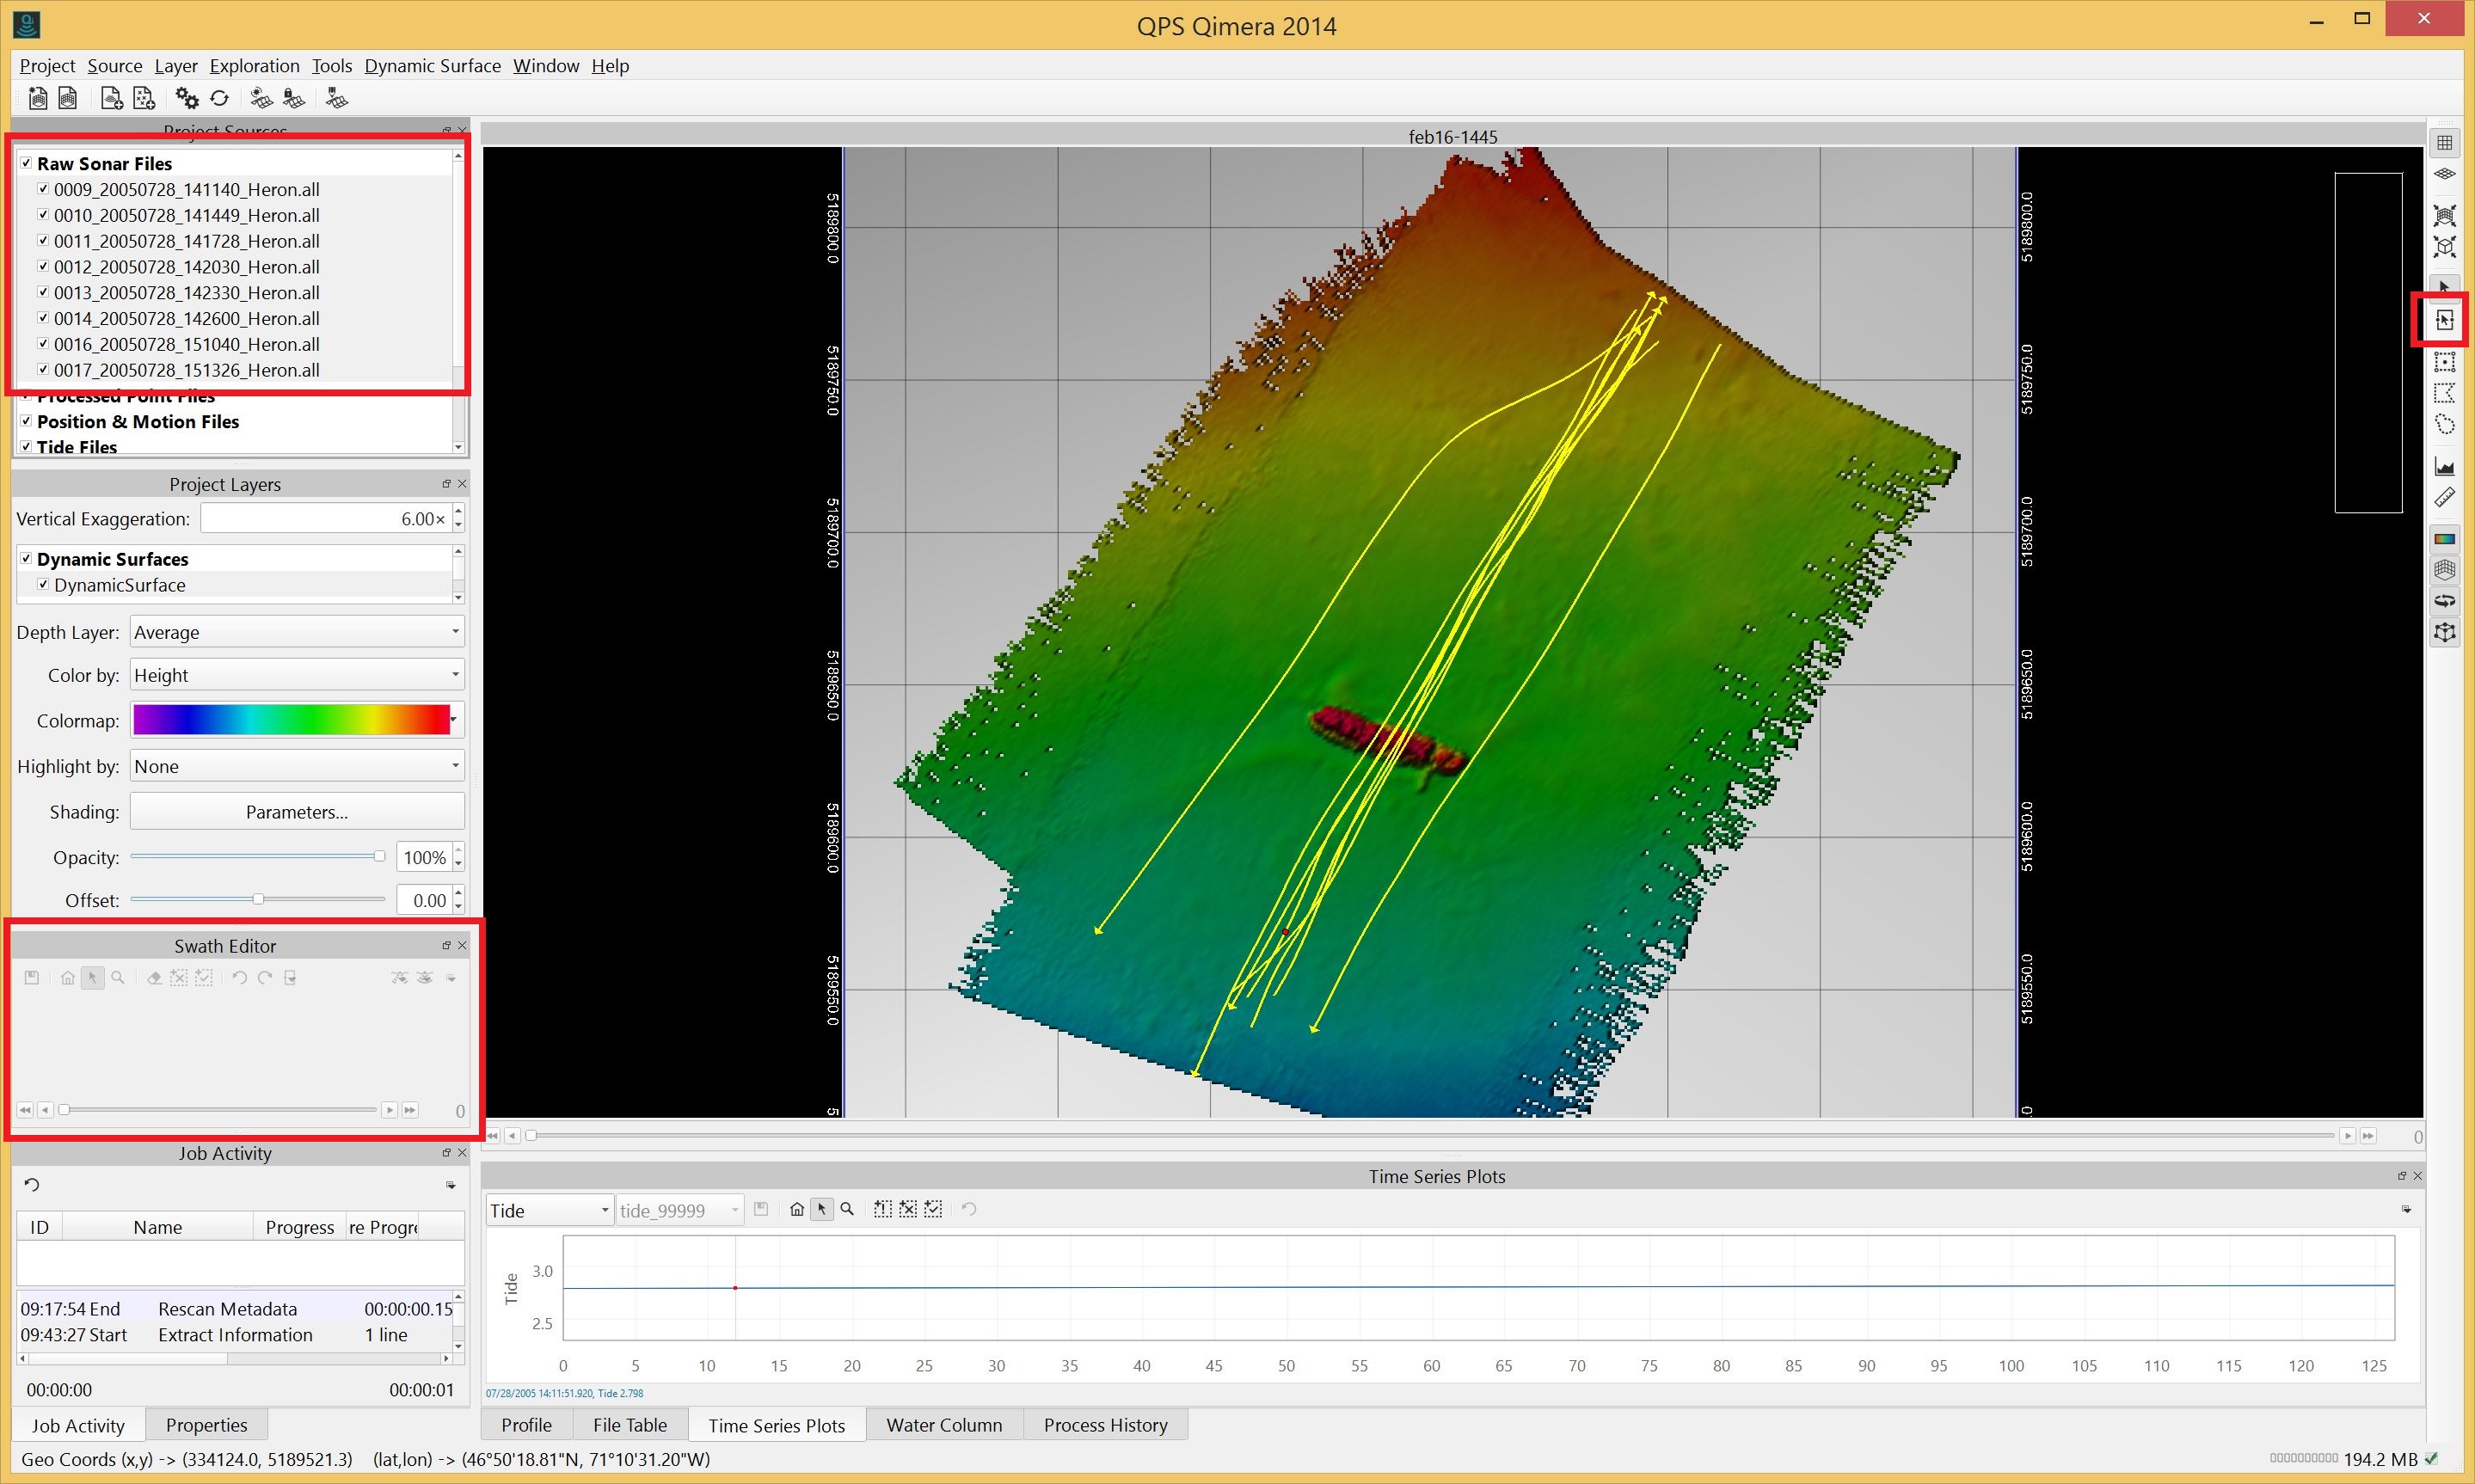
Drag the Swath Editor window out of its dock.
You should now see the Swath Editor buffer in the geographic window and the Swath Editor window should be populated with points: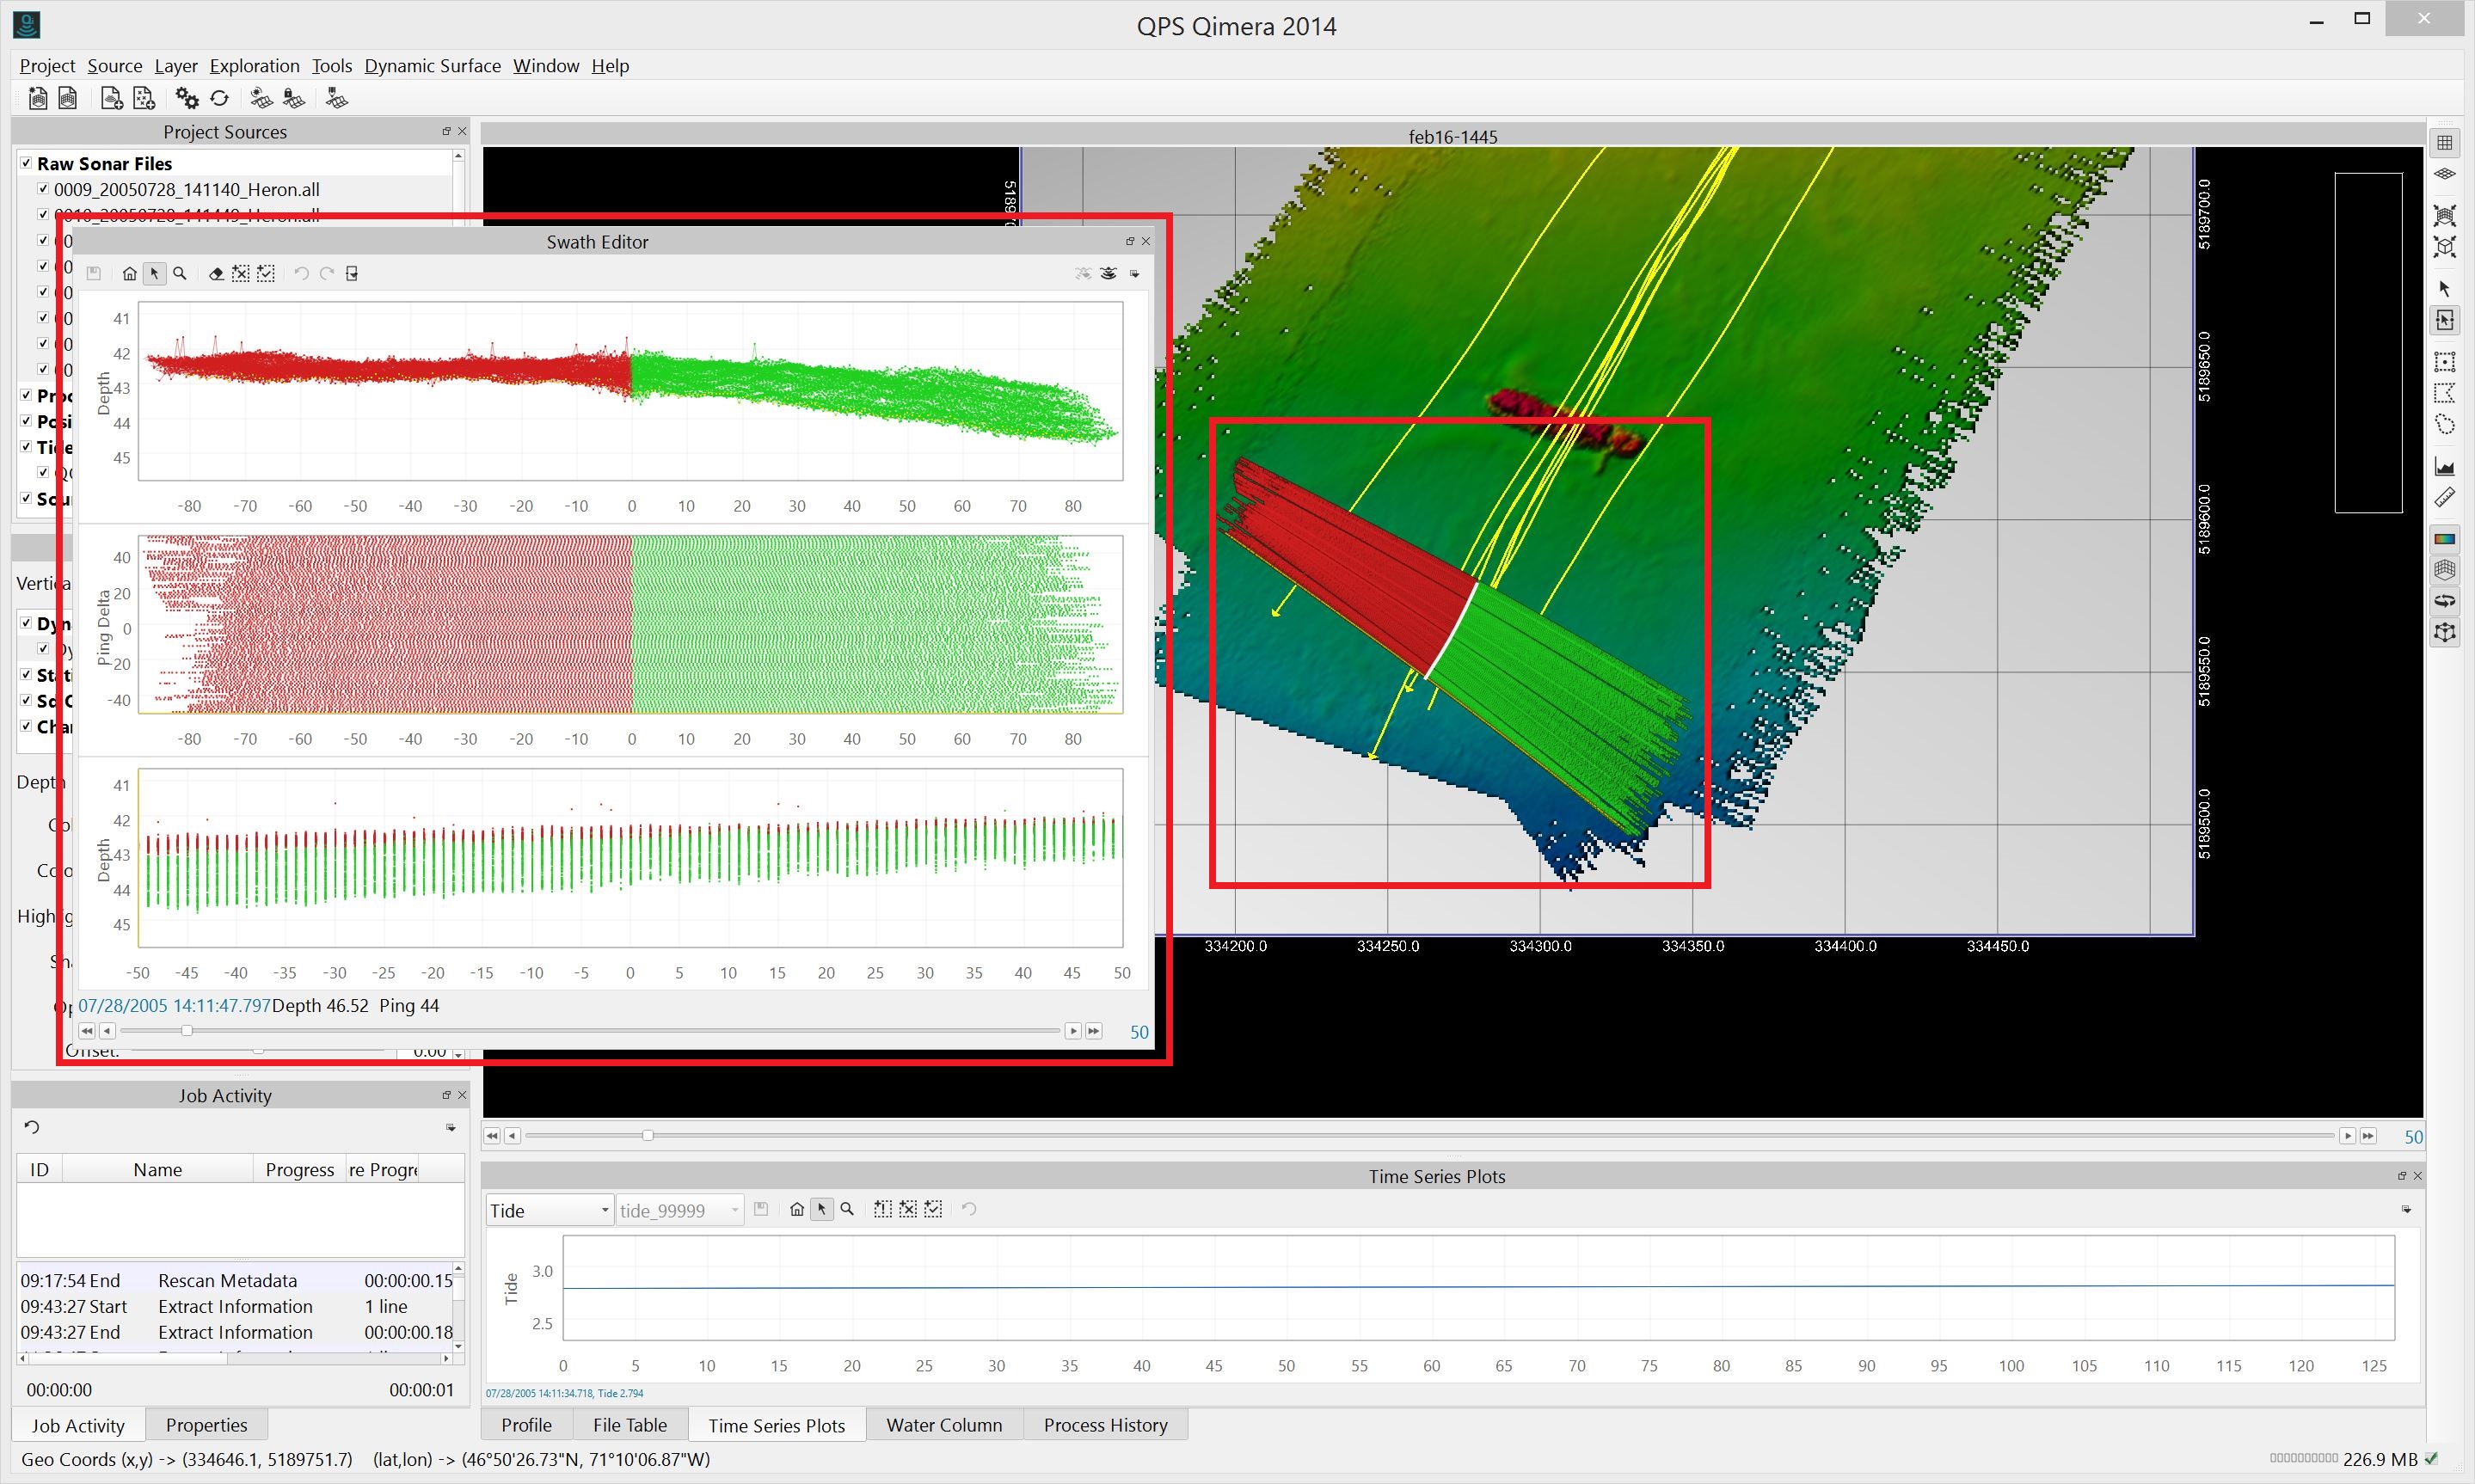
The geographical window can be set to either Plan View or Turntable View while using the Swath Editor.
Selecting lines and adjusting view settings
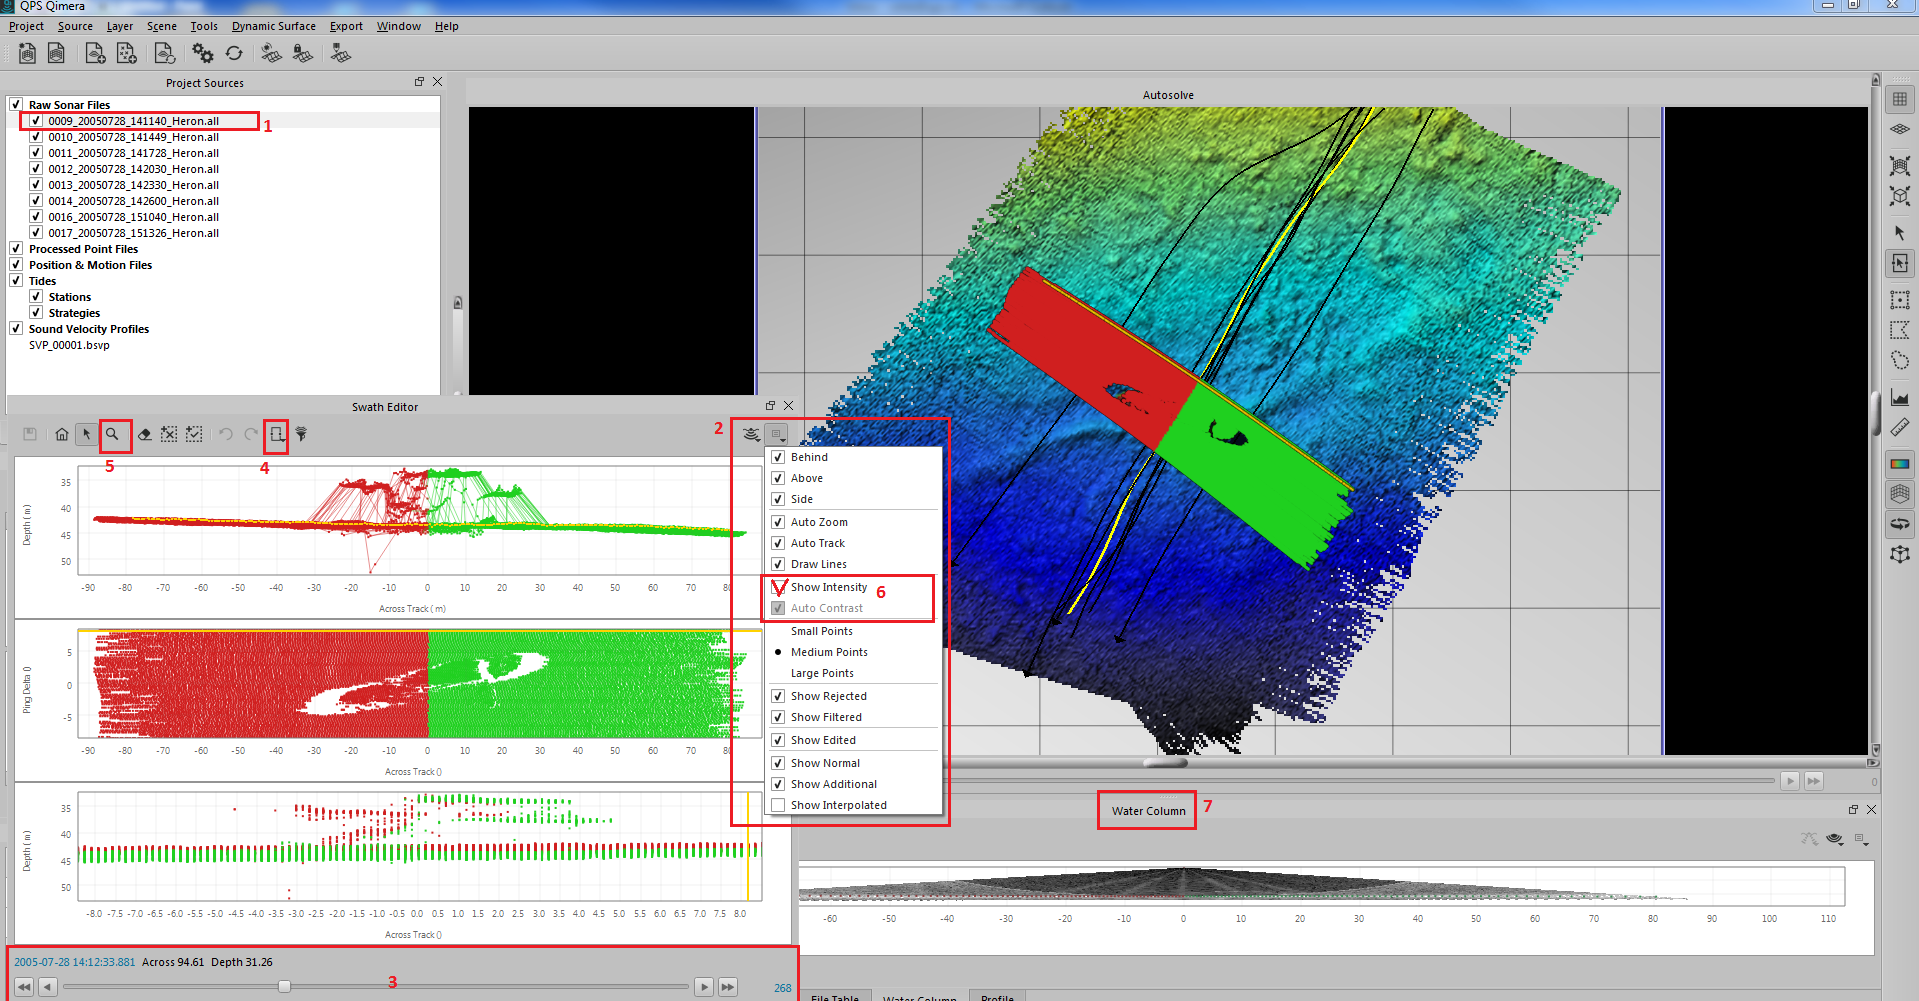
- Select the line to be edited by clicking on the line name in the Project Sources window (1) or by clicking on the line in the geographical window.
- Additional views inside the Swath Editor window can be toggled with the pull-down menu at the right top corner of the Swath Editor window (2).
Activate Behind, Above, and Side view if desired. - Select the portion of a line to be edited by clicking on it in the geographical window or dragging the red/green buffer down the line.
The buffer can also be moved along a line by using the slider and buttons (3) at the bottom of the Swath Editor window. - The length of the buffer can be changed by using the pull-down slider button (4) at the top of the Swath Editor window.
- Use the zoom button (5) at the top of the Swath Editor window to zoom into an area in the data.
- Check Show Intensity check box to reveal per beam intensity information. Read more about Intensity Display here.
- Activate Water Column display to display water column information if available.
Flagging points
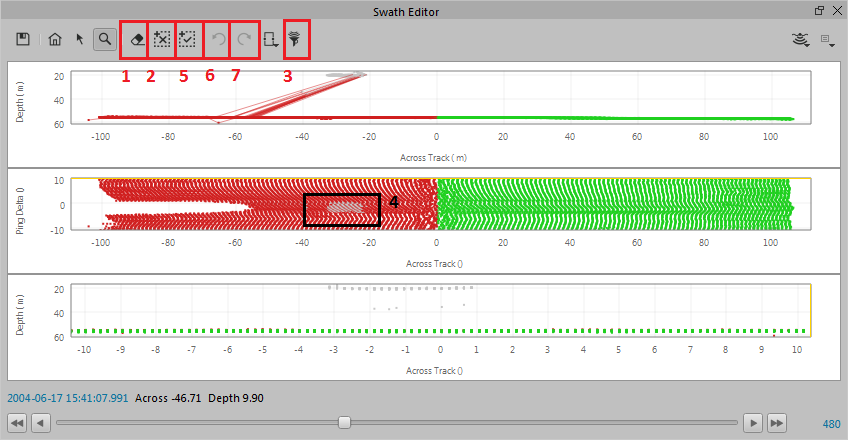
- To begin cleaning data, click the Erase Invalid (1) or Select Invalid (2) buttons at the top of the Swath Editor window.
- If you choose the Select Invalid button, you can drag a box around soundings that you want to flag as unwanted.
If you choose the Erase Invalid button, use your mouse like a paint brush. Click and drag through unwanted data to flag it.
Move the cursor slowly because fast movements will cause the cursor to skip. - You may decide to apply a Blocking filter. The Blocking will be applied to the entire file selected for swath editing.
Once you're happy with the filter results, you may want to apply the Blocking to other lines too, by applying the Blocking in "Processing".
Read more about the Blocking here. - Once soundings are flagged their colour will be changed to grey. When "Show Intensity" is on, the flagged points will be displayed in colour.
- Flagged soundings can be unflagged by clicking on the Select Valid button (5) and dragging a box around them.
- The undo (6) and redo (7) buttons at the top of the Swath Editor window can be used to step backwards and forwards through previous flagging selections.
Saving work
- When you want to finish a session, click the Save Edits button at the top of the Swath Editor window.
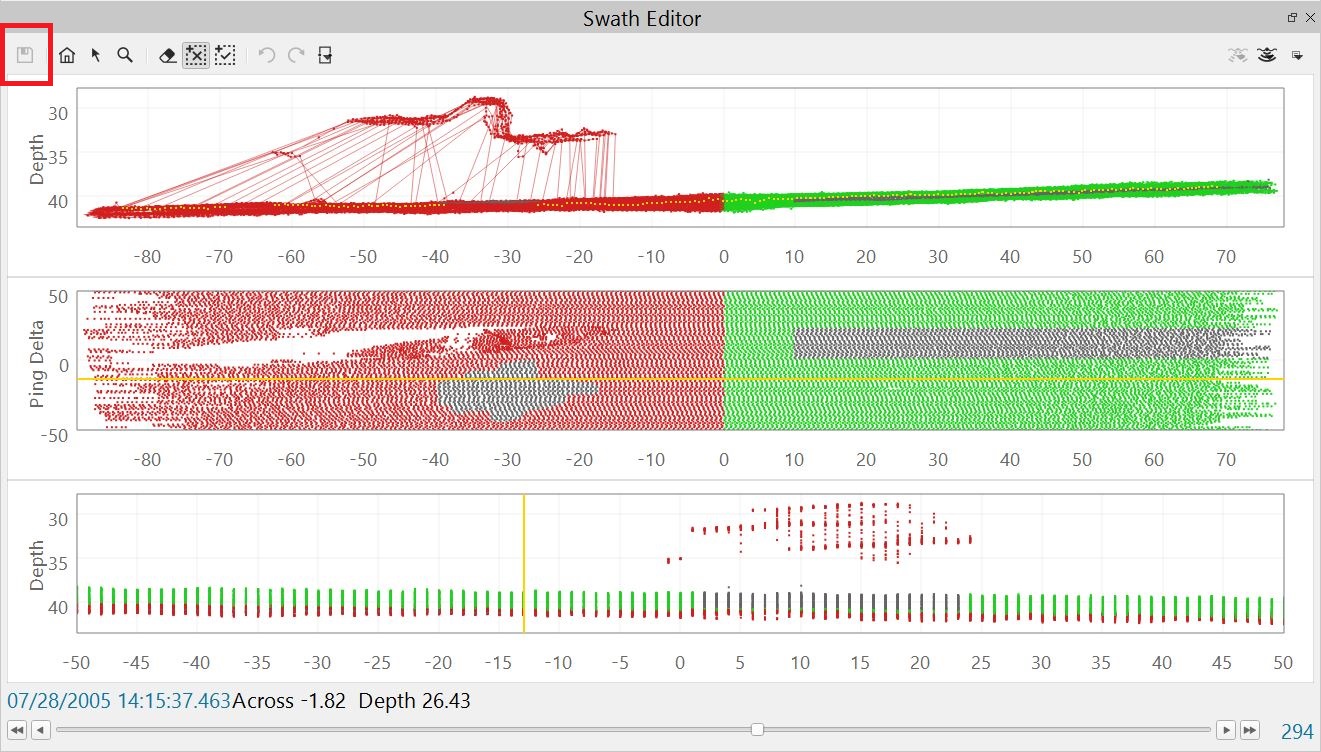
- The surface will then be re-gridded.
Short Instruction Video
Related Articles
How-to Clean Data with the Swath Editor