This document discusses the basics of point cleaning of a Qinsy project in Qimera. The starting point for this document is a Qinsy project that has QPD files built during data acquisition with Qinsy.
On this page:
Version 1.6
This How-to description is applicable to Qimera version 1.6.0 and higher.
This workflow is specifically designed for Qinsy clients who:
-
Compute online QPDs and preferably a Dynamic Surface as well
-
Are content with the quality of the online footprint calculations
-
Might use blocking filters while online to remove outliers
-
Are primarily interested in removing poor quality bottom detection points from their data sets, i.e. data editing or cleaning
Data re-processing is still possible within Qimera for the occasional line that requires a bit of re-processing.
For full sonar processing see Getting Started.
You may find more detailed step-by-step descriptions by following the links below:
-
The "Qloud method": How-to Work with Slice Editor
-
File based cleaning: How-to Clean Data with the Swath Editor
-
Cleaning large data sets and multi-user data cleaning: How-to Cooperative Cleaning Workflow
-
Applying automatic filtering: How-to Filter Operations and Filtering Profiles
-
Technical description and how-to spline filtering: How-to Spline Filtering details
Step by step guide
Step 1 Launching Qimera from Qinsy
After the data collection in Qinsy and closing the Controller a pop-up appears whether you want to start Qimera:
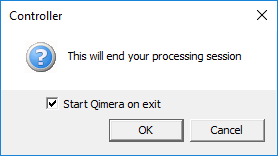
When the tick box is selected Qimera will start immediately with the collected data of that project.
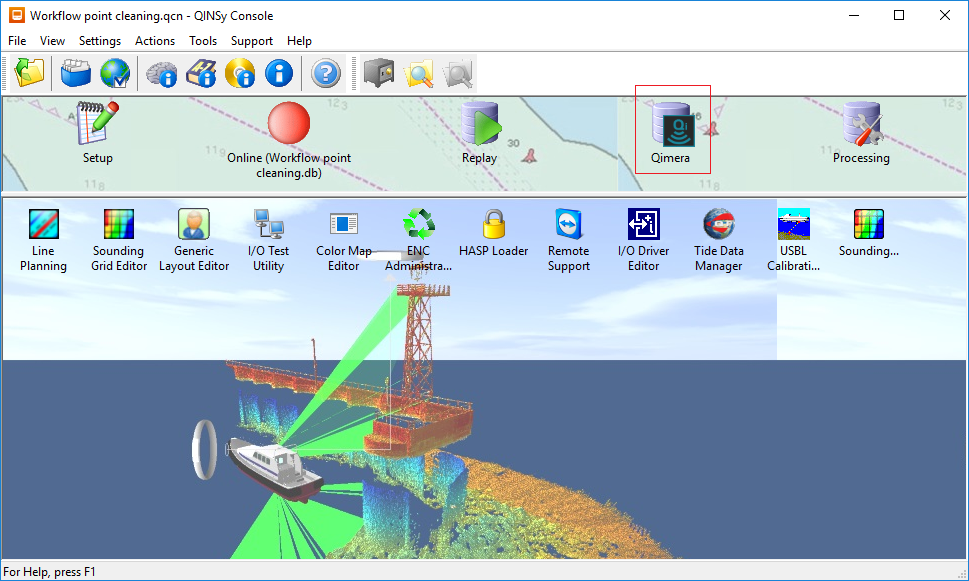
If it is not possible to clean the data right away for whatever reason, it is also possible to start Qimera from the Console at a later time:
Once Qimera is started, a pop up appears with the question if you want "Point Cleaning" or "Full Sonar Processing".
In this How-to the focus is on just "Point Cleaning". You will not get this choice when you have "Qimera Core" programmed to your dongle (no full sonar processing) and you will be taken directly to a point cleaning start up experience.
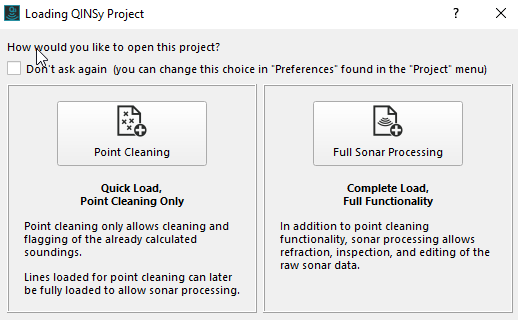
If the tick box "Don't ask again" is checked, Qimera will store this as the default value. You can change this in the Project Preferences - Remembered Prompts.
After "Point Cleaning" is selected, Qimera will automatically open the project in the chosen Qinsy folder and it will load the QPDs and Dynamic Surface if available.
Qimera also will open the Point cleaning workspace, which contain the appropriate docks and windows for the data cleaning.
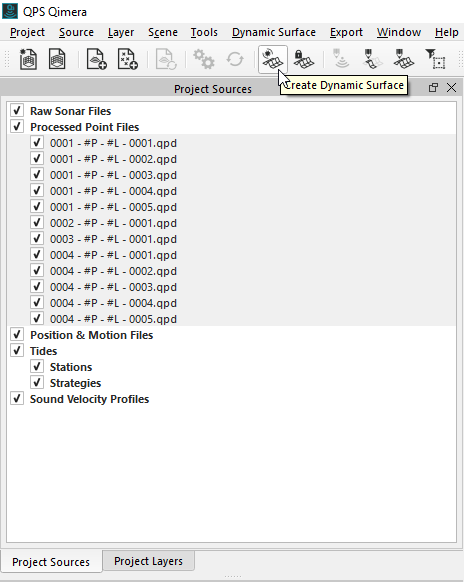
If no Dynamic Surface was created during the survey, you can create one now. Select the *.qpd files and click on the "Create Dynamic Surface" icon 
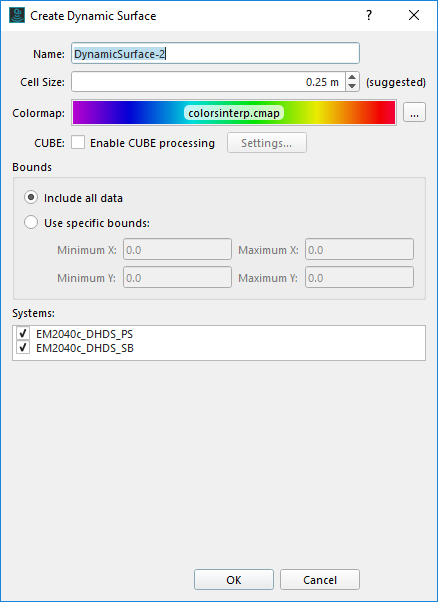
Now you can define the name and set the cell size. A suggested cell size will be given to you based on the average water depth (from the QPDs) and the average beam angle of a modern mapping system.
Step 2 Preliminary Check
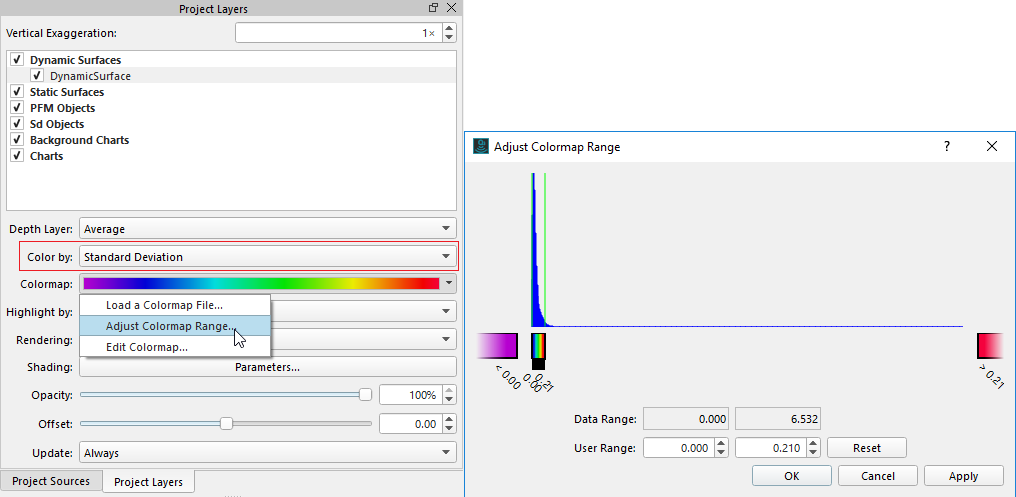
Before you do any data cleaning, you may find it appropriate to do some quick quality control, to see where your data needs special attention regarding the cleaning. This can be easily done by setting the color coding of the Dynamic Surface to "Color by" : Standard Deviation.
In Project Layers Dock, mouse select the Dynamic Surface, then select "Color by" and select Standard Deviation.
If necessary, the color map can be adjusted to user defined minimum and maximum standard deviation (SD) values, which makes it easy to find large SD values.
Use the left mouse button to adjust the minimum value and the right mouse button to adjust the maximum value.
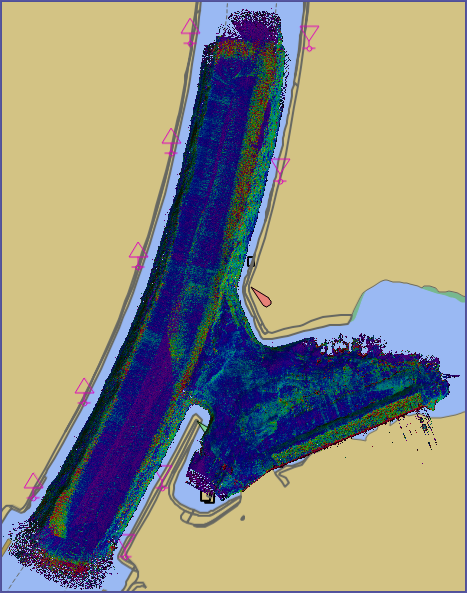
Dynamic Surface Colored by Standard Deviation
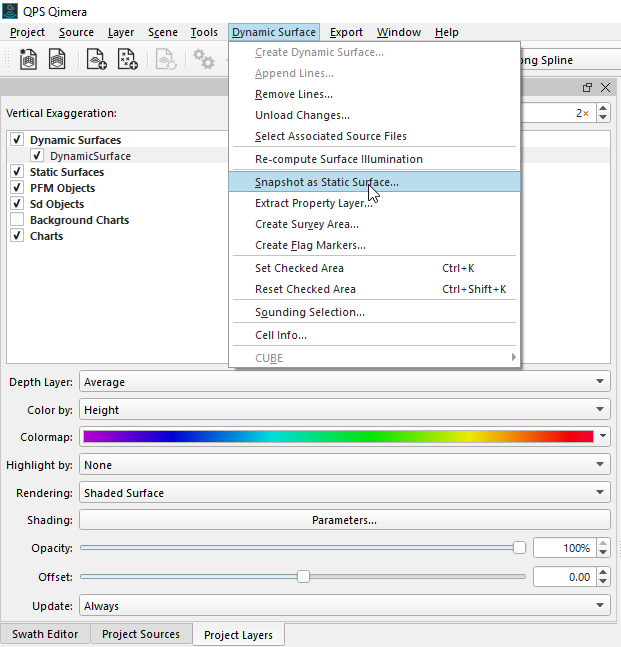
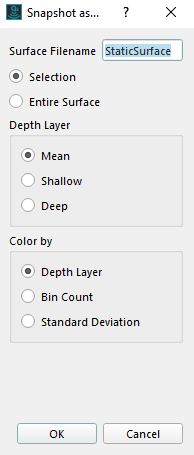
Step 3 Create a snapshot
Before filtering it is advised to create a snapshot of the Dynamic Surface. When the data cleaning is finished, you can compare the up to date Dynamic Surface to the surface you started with.
To use the snapshot function, select the Dynamic Surface, then select Snapshot as Static Surface from the Dynamic Surface dropdown menu in the Toolbar.
Choose the appropriate attribute for the Static Surface, you may want to create multiple Snapshots.
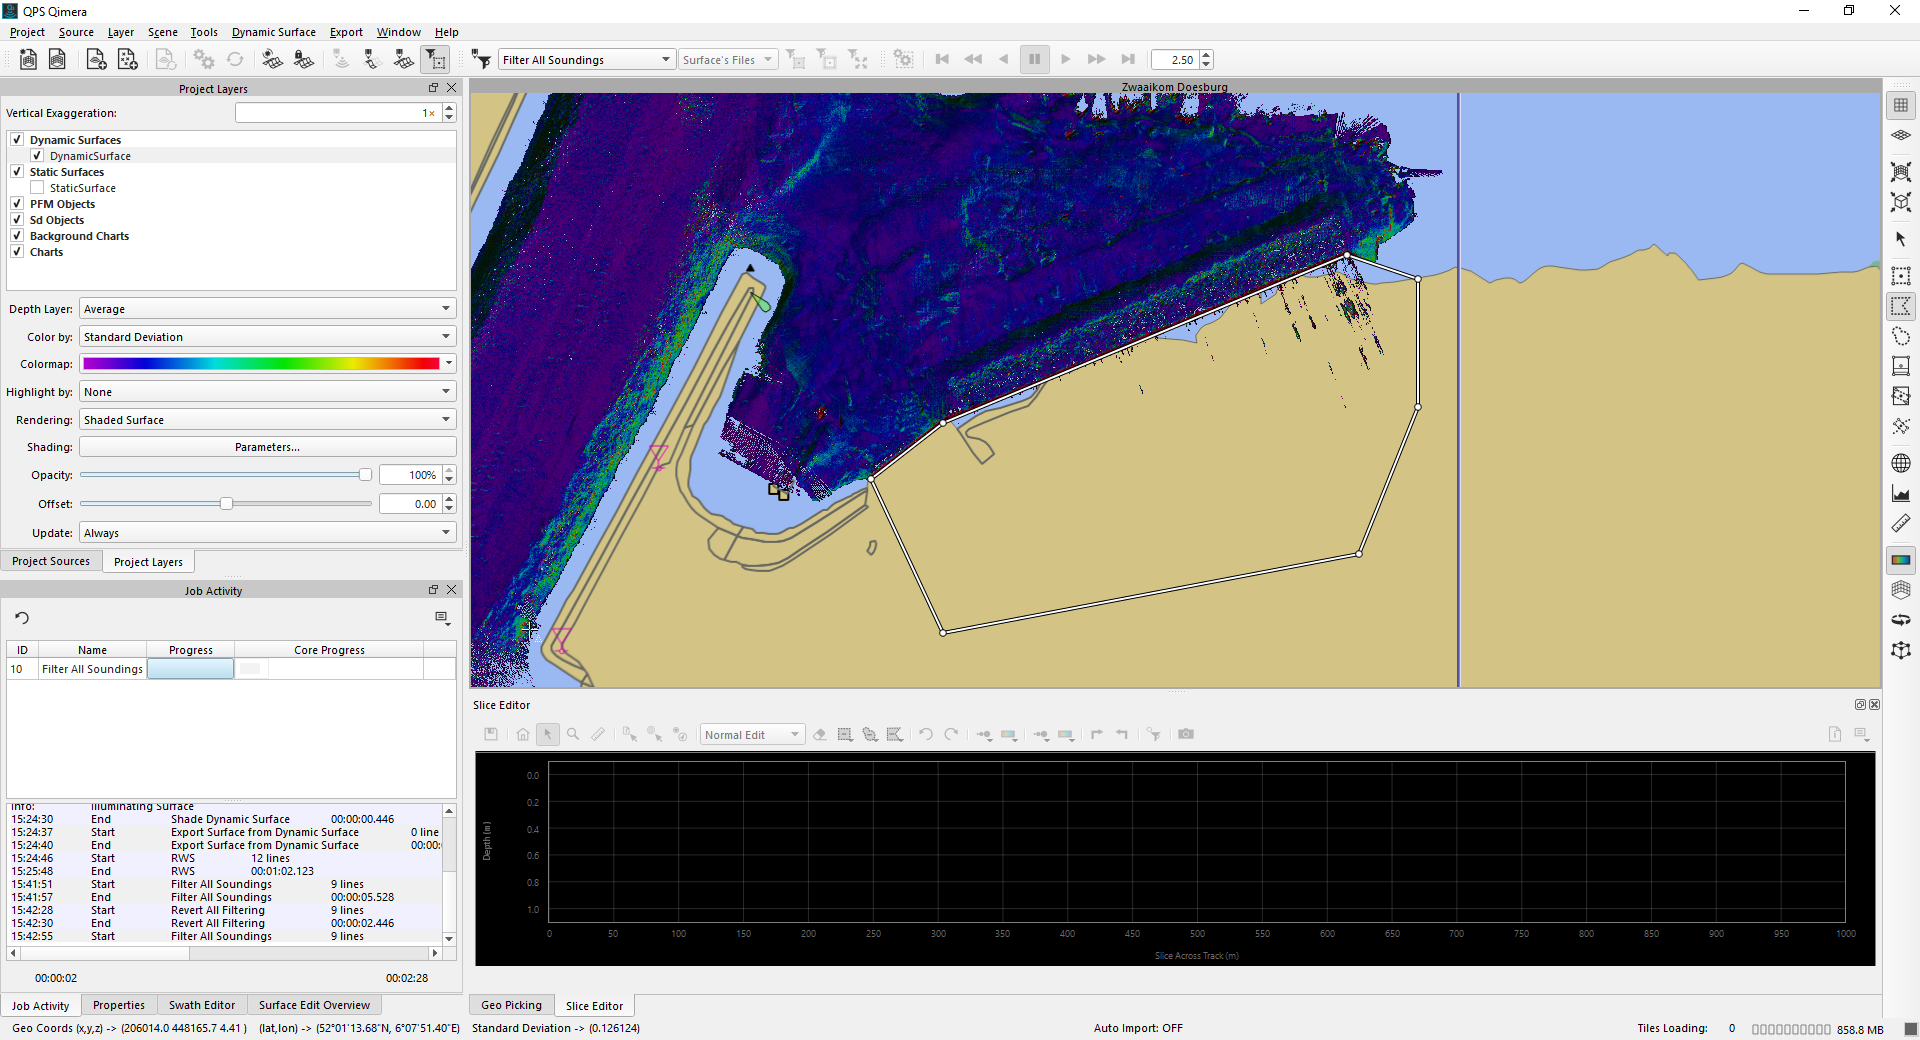
Step 4 Quickly disable points in polygon
For outlying data it is now possible to use the quickly disable points in polygon. With this option the points inside the polygon will be filtered.
To use this function the following steps have to be taken:
-
Select in the filter toolbar "Filter All Soundings"

-
Select the "Enable Surface Filter Editor"

-
Use the Polygon Select

When a polygon is created on the screen the data inside the polygon will automatically be filtered. You can also use the keyboard shortcut Shift+R to apply the current filter in the area that is selected.
See example below:
Step 5 Automatic Filtering
Before manual editing, a filter can be used to clean out the spikes. To filter the data the Filter Operation Toolbar can be used.
Below are the steps to filter the data:

-
Select the Dynamic Surface in the project layer dock
-
Select the preferred filter, for example: spline/rejected soundings/accept sounding or create a filter manually

-
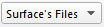
Choose which files have to be filtered, for example: all files/surface's files/selected files
-
Run the filter Inside selection/Outside selection/Everywhere

-
Update Dynamic Surface (this happens automatically, typically)

Step 6 Manual cleaning
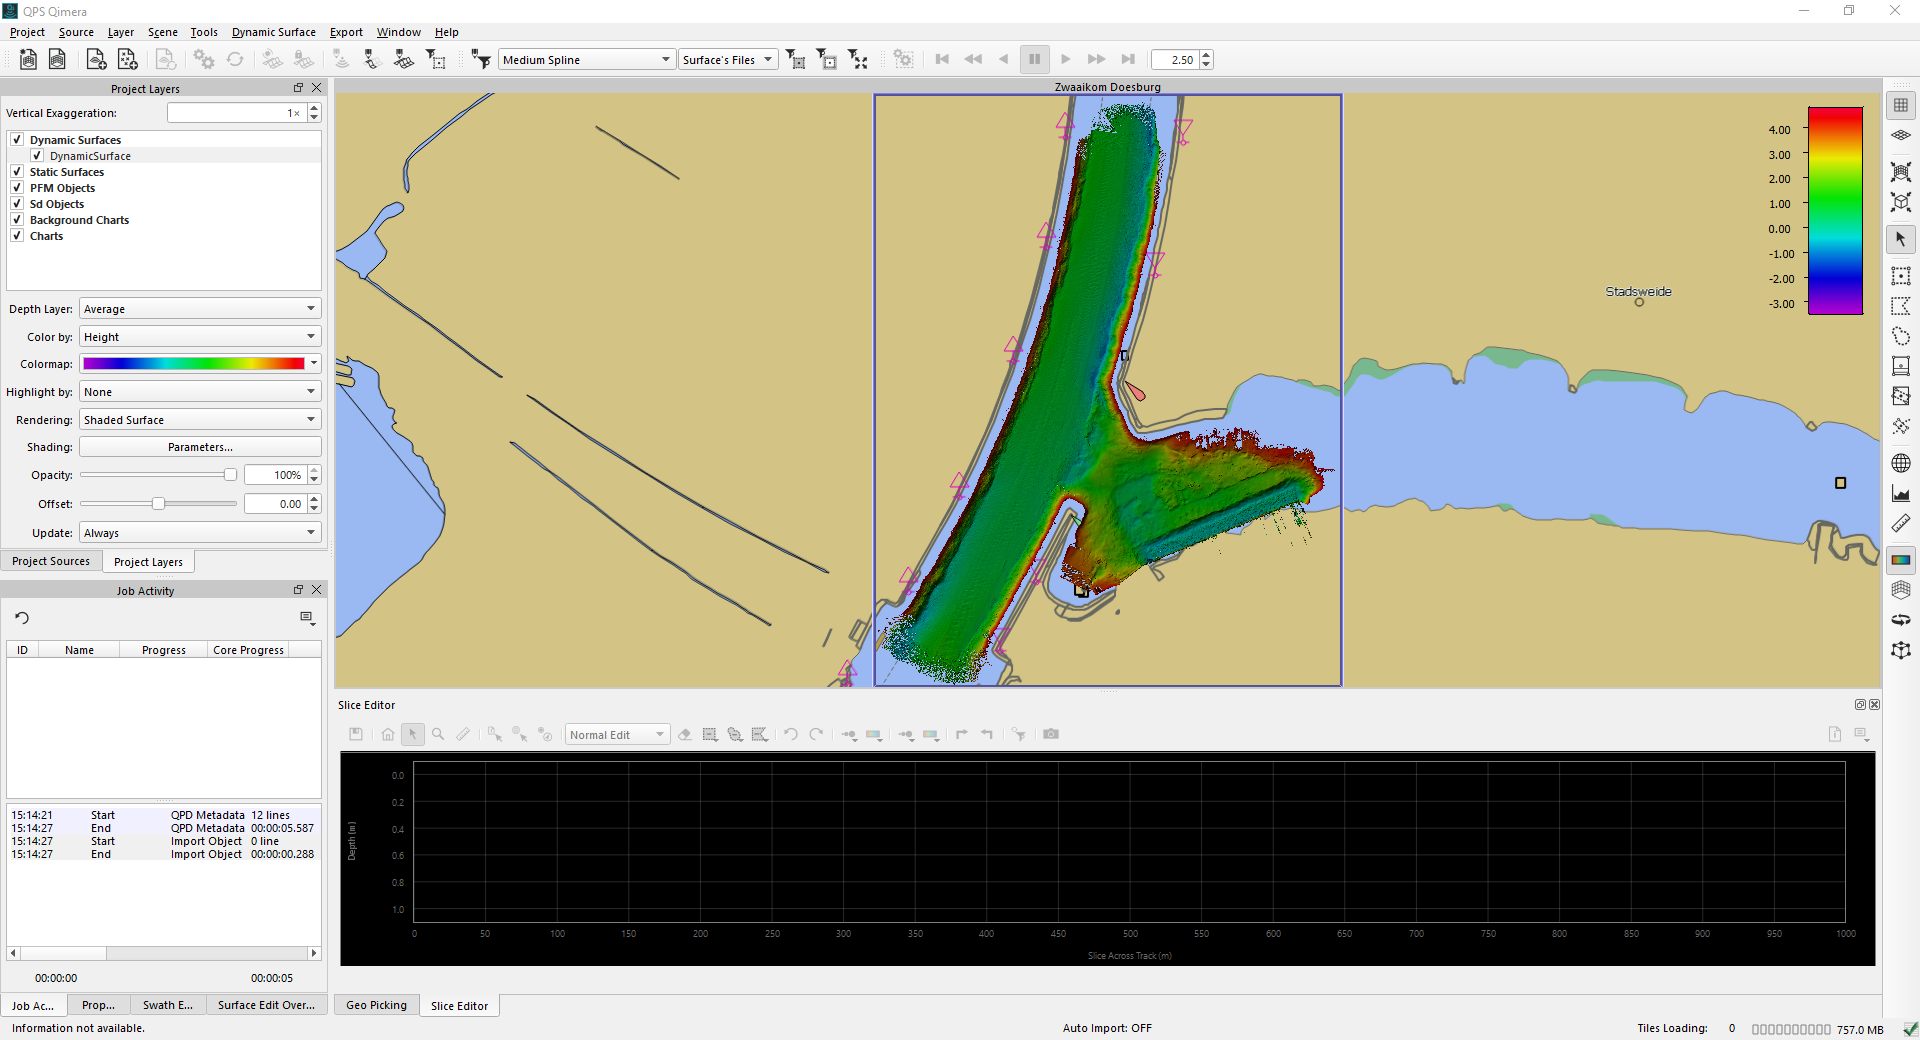
For working with the Slice Editor see: How-to Qimera - Working with Slice Editor.
For Spike Hunting use the ALT key and left mouse button: make a spatial selection, click on the spike and 2D or 3D will "hop" to the spike.
Spikes that were missed by automatic filtering may need additional manual cleaning. This can be useful around objects etc. For manual editing a selection needs to be created, this can be done by selecting one of the following icons 
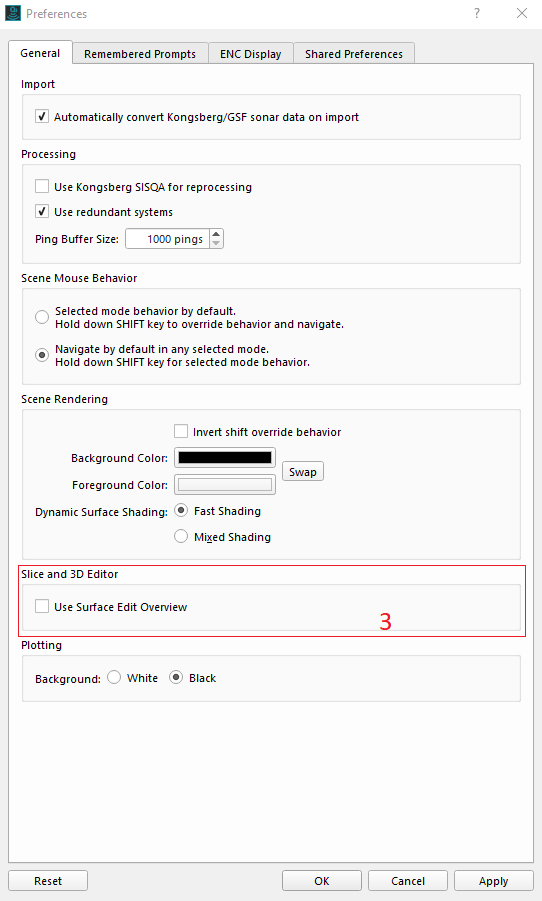
To make a selection, use the left mouse button (default setting) or choose to use the combination to hold the SHIFT key and make the selection by left mouse. For the second suggested option, the mouse default behavior for the selection should be changed on General tab of Preferences available from the Project Drop down menu.
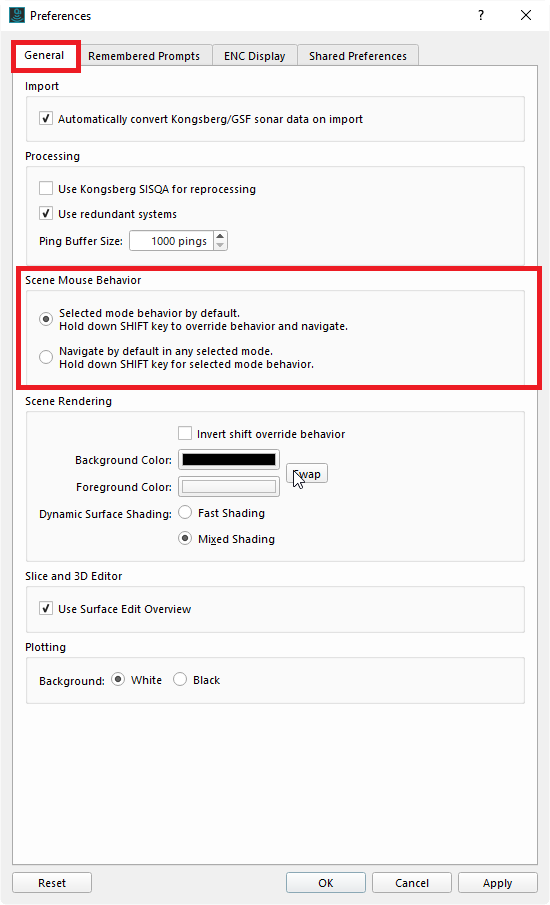
Settings for Secene Mouse Behavior
The advantage of this is that a selection can only be made when holding the shift key; you won't lose your selection when (accidentally) clicking on the 4D view.
For this How-to, the Scroll Slice Select is used 
To move the selection, use the W&S buttons to move forward and backwards and the Q&E buttons to rotate the slice box.
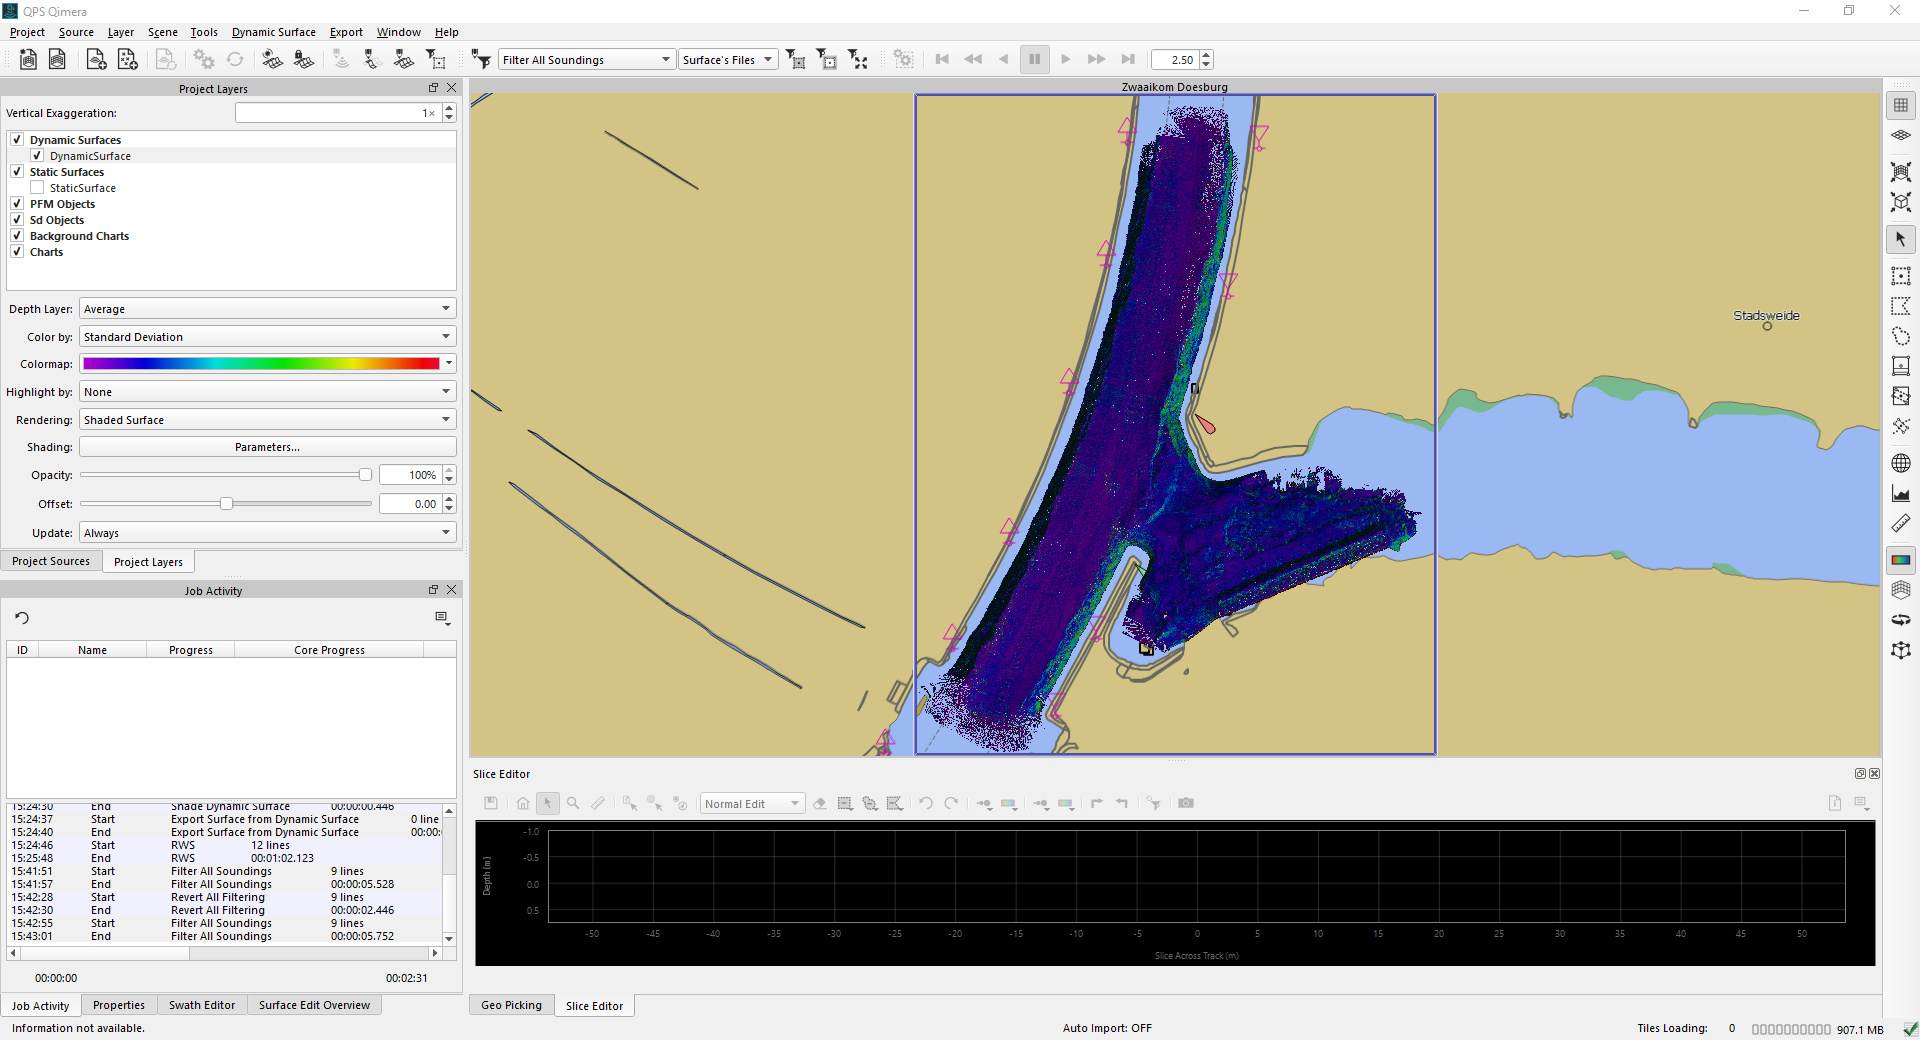
To edit the soundings launch the Slice Editor 
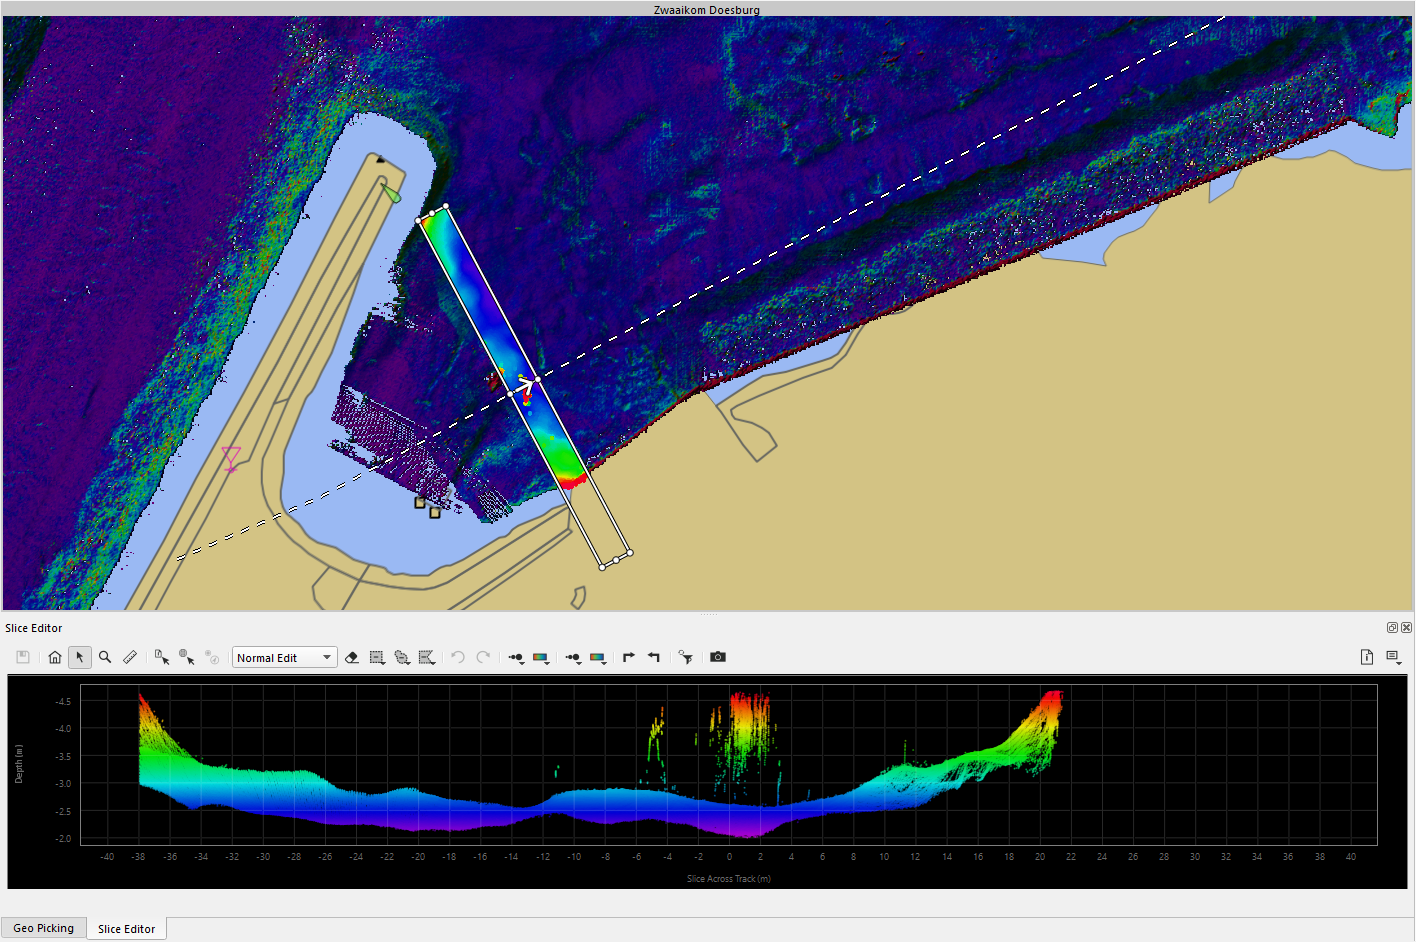
In the slice editor toolbar the user can define the settings for cleaning Reject inside/Reject outside/Color by system/Color by depth/etc.

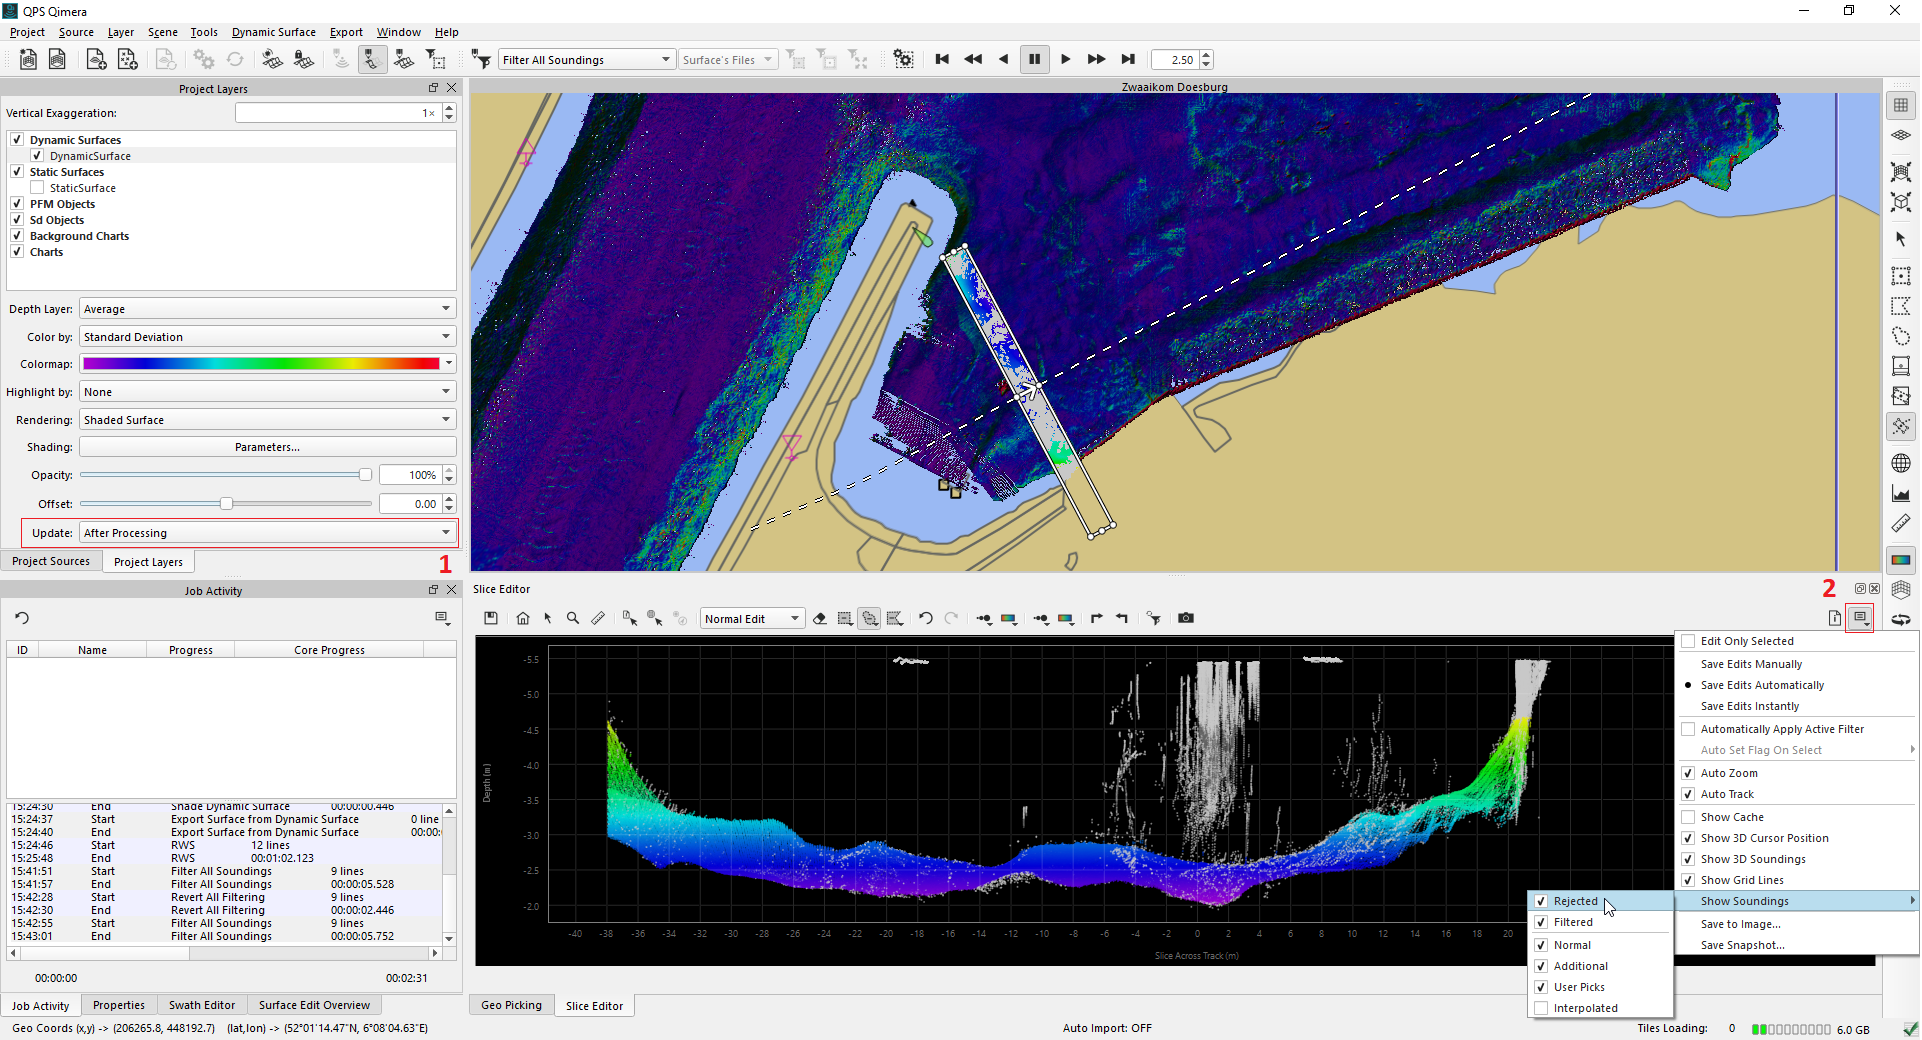
For faster editing you can select the Dynamic Surface to update "After Processing"(1), the Slice Editor is not showing rejected soundings (2) (CTRL+R), and the "Use Surface Edit Overview" in the Preferences is un-ticked (3).
After cleaning, remember to change the Dynamic Surface update back to 'Always' or apply the edits (right click on the Dynamic Surface and select 'Update Dynamic Surface from Edits').
This is only necessary if you have changed the update setting.
Step 7 Final Quality Control
After manual cleaning, re-examine the Dynamic Surface by setting the color coding to "Color by: Standard Deviation" and confirm the dynamic surface (and the related QPD) look okay.
You can decide to activate 3D view 
3D view:

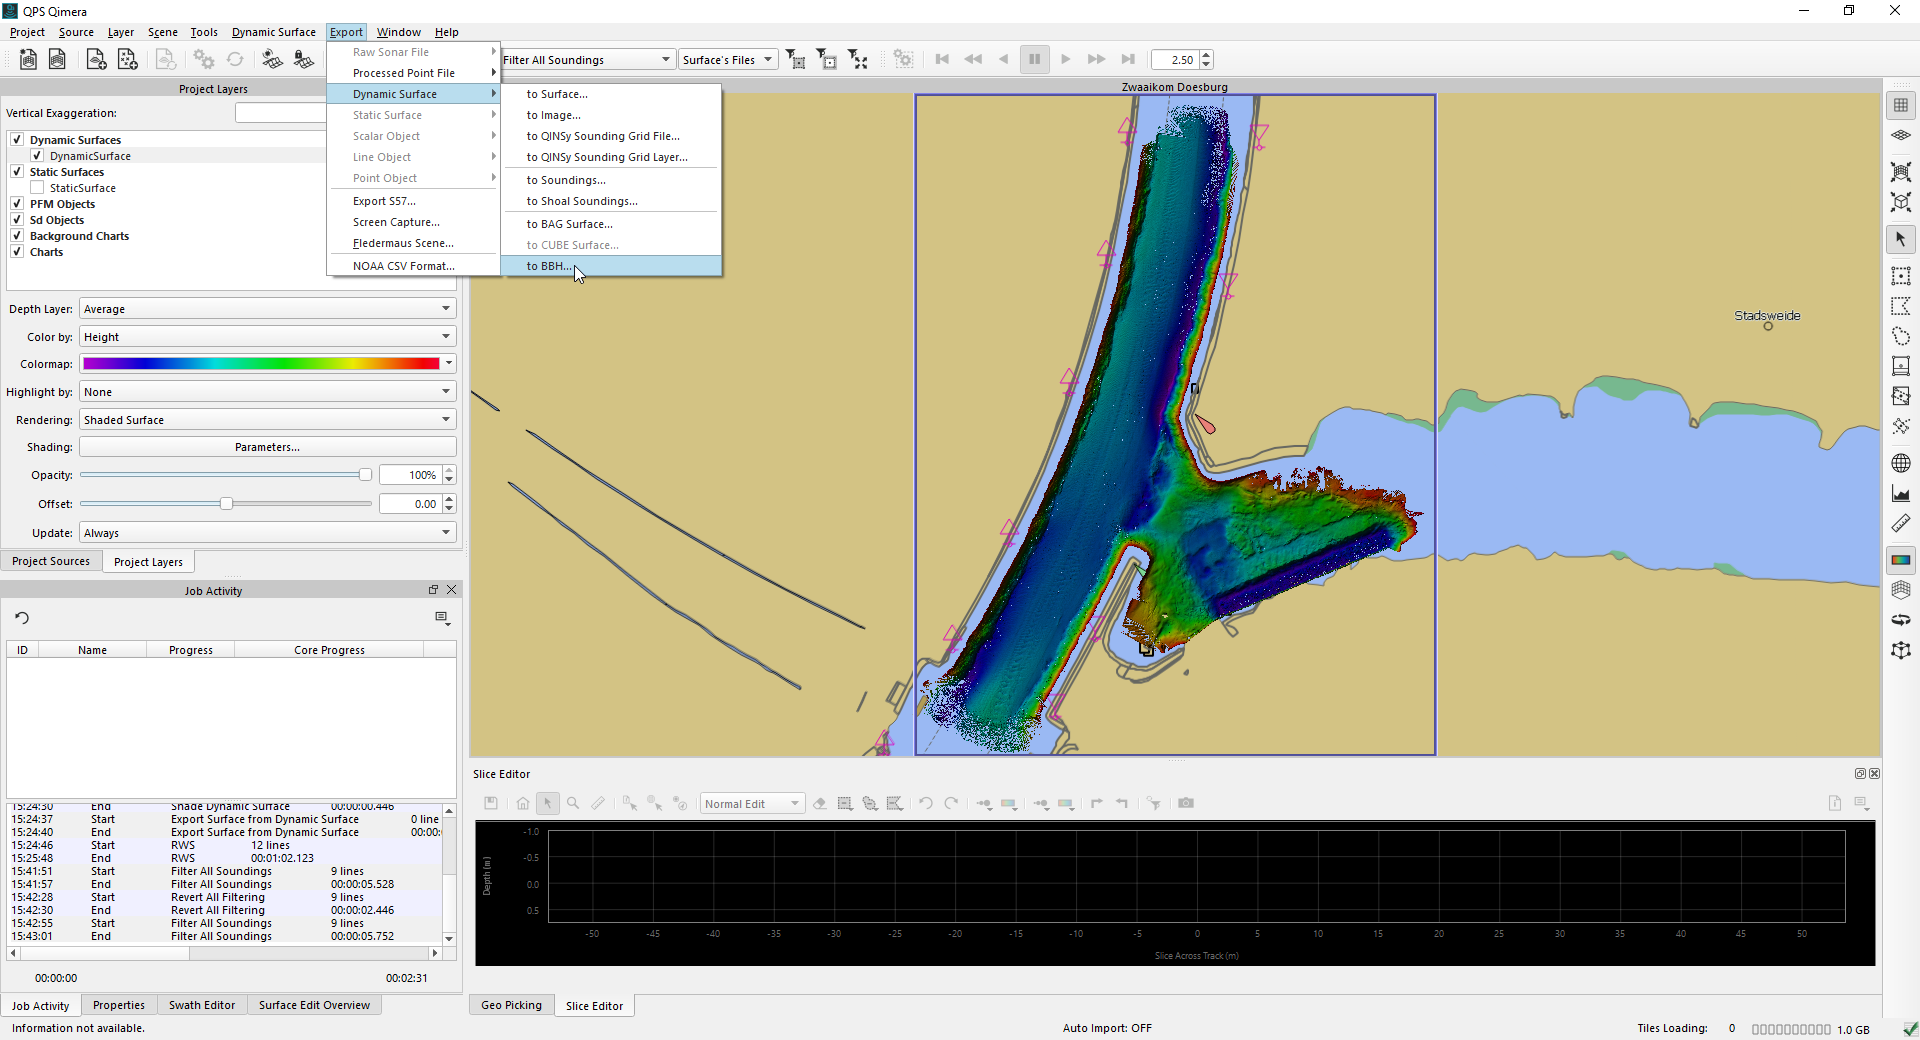
Step 8 Data Export
Once you trust the data meets the requirements, you can proceed to the next step in your workflow, for example to export the clean surface to the desired ASCII file format.