
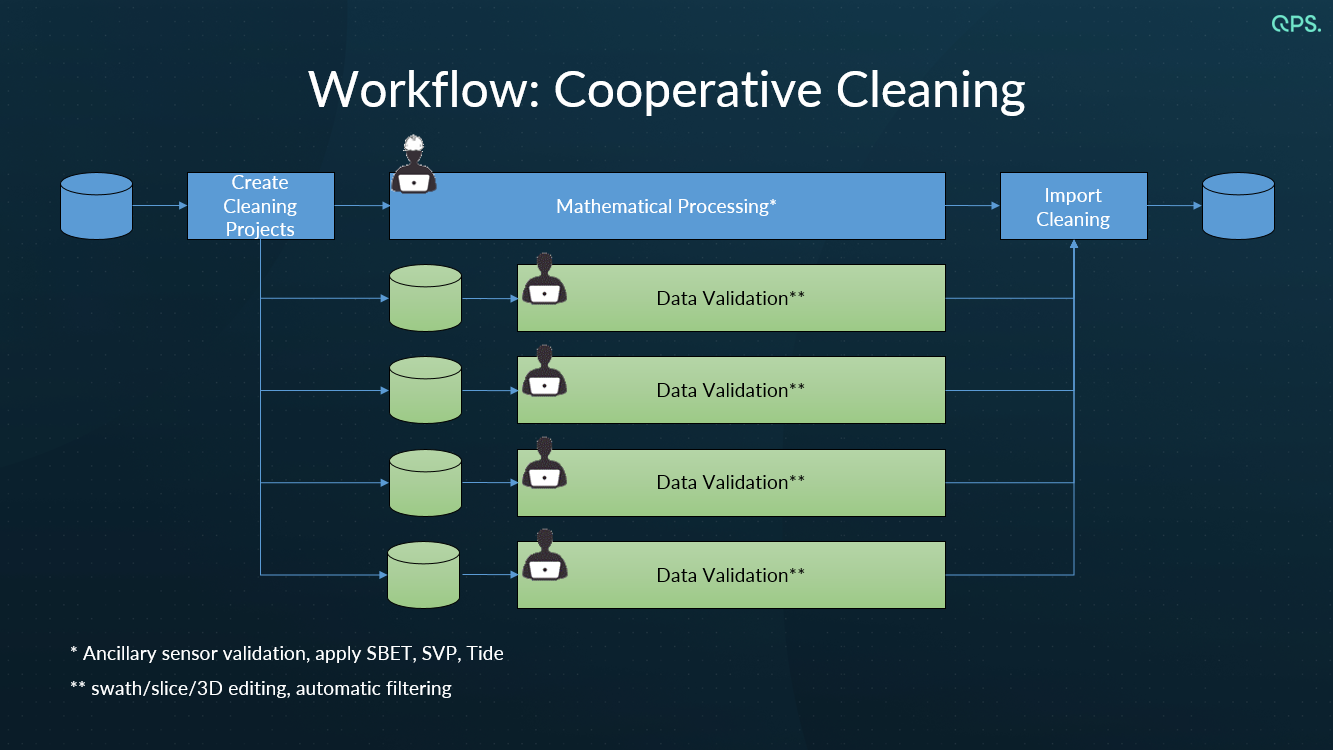
This How-to outlines how Qimera enables multiple users to work together to clean data. From a "Master" project stored on the network, you can easily create small cleaning projects to work on, on your local computer or on a USB drive to pass along to the office.
Once you've finished your data cleaning on the cleaning project, the Master project can be updated with the edits done in the cleaning projects. This is part of our answer to "multi-user", and serves the purpose of cleaning larger areas.
On this page:
Operations that shift the heights of footprints (the TU Delft Sound Speed Inversion, Z Shift Data Filter, and Apply Refraction Correction Filter) should not be carried out between when a cleaning project is created and when the edits are merged back into the master project. Applying these shifts can have unexpected consequences such as shifts being reset to zero.
The intention of the cleaning projects is to NOT do any cleaning in the master project before creating cleaning projects.
While working in a cleaning project, the user should not perform Grid Interpolations on the surface. Since grid interpolations exist only on the Surface and not within the associated QPD files, the grid interpolations will NOT carry over from a Cleaning Project to the Master Project.
Step-by-Step Guide
Step 1: Create Cleaning Projects
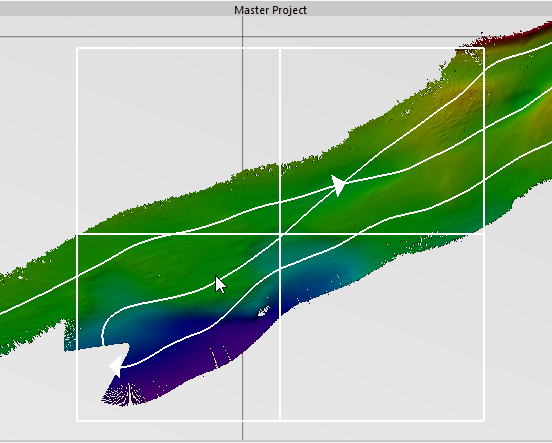
In the Master Project, if you don't select an area with the rectangular select (R) tool, Qimera will use the whole area of the project to create cleaning projects.
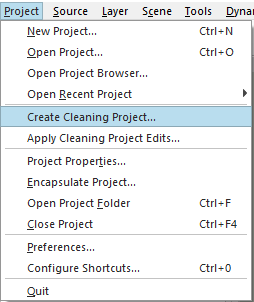
To do this, navigate to the 'Create Cleaning Project' option from the Project drop down menu:
In the Create Cleaning Project GUI, you have three prompts:
-
Project Name: This is the prefix of all cleaning projects to be made. For example when the prefix is "Cleaning" the 4 cleaning projects will be named "Cleaning" , "Cleaning1" Cleaning2" and "Cleaning3".
-
Location: This is where the cleaning projects will be saved.
-
Tile check box: This is an option which, when toggled on, will allow you to choose the number of rows and columns you will divide your survey into.
Meanwhile, while toggled off, you have the option to create the cleaning projects manually.
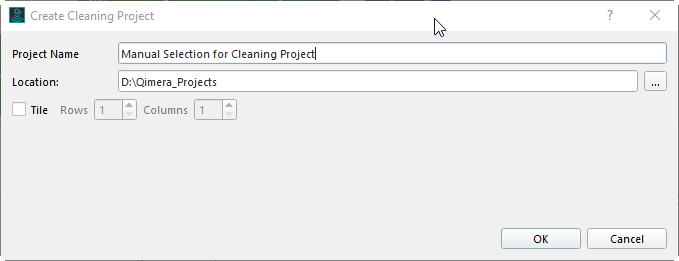
Once you're done, click OK.
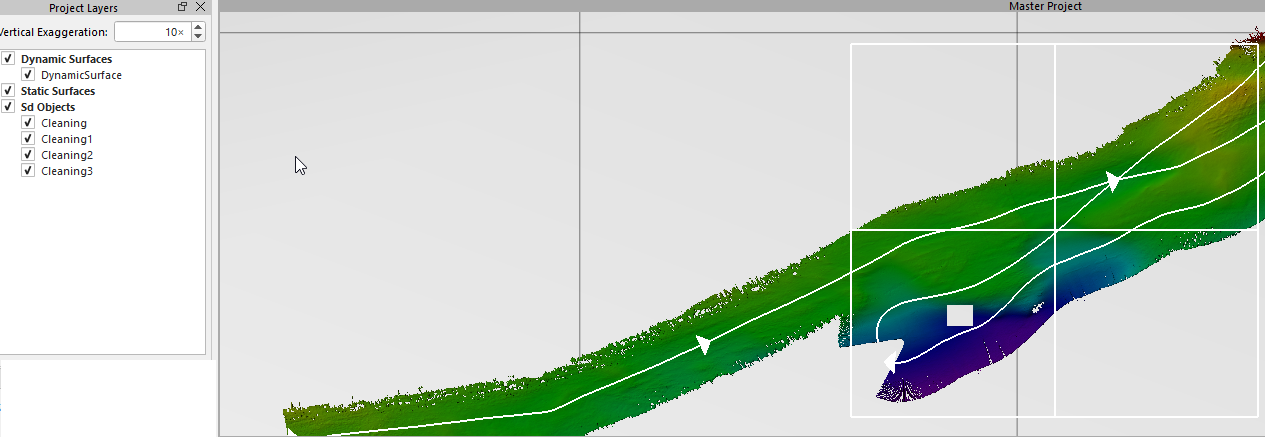
The area chosen will be divided accordingly, and the area of each is represented by an Sd Object, as seen in the image below.
They can be seen in the Project Layers window. These objects are also displayable in 4D scene.
Step 2: Open a Cleaning Project
To open one of the cleaning projects, navigate to the 'Open Project' option in the Project drop down menu.
The cleaning project contains the dynamic surface and the QPD files associated with it.
It also contains 2 Sd Objects:
-
Checkout: represents the bounds of the cleaning project
-
Overview: represents the bounds of the entire Master project
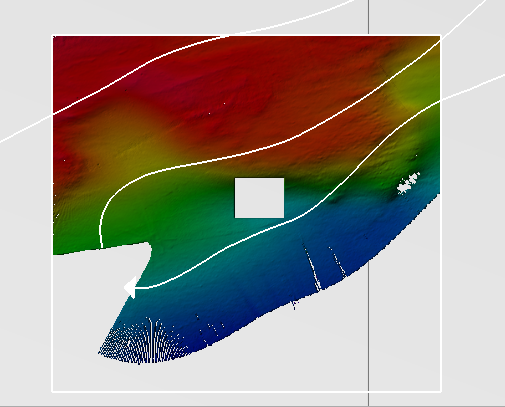
Complete any cleaning that you wish to do on the area. For this example we knocked a hole in the data.
Once you've finished your cleaning, close the cleaning project.
Step 3: Apply Edits to Master Project
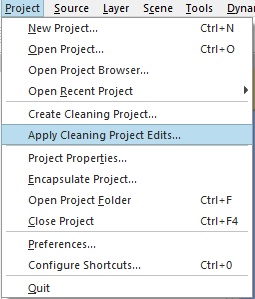
Open the Master project and from Project drop down menu choose to Apply Cleaning Project Edits (see below) then select the correct cleaning project.
See how the dynamic surface of the Master updates with the edits.
Ways to remove updates from cleaned section include the following filters: Accept All Soundings, Revert All Filters, Revert All Manual Edits
Tips and Tricks
-
Once you have finished all the work and when you have confirmed to have updated the Master project with all the edits, you may want to delete the cleaning projects from the local PC.
-
To keep track of the editing done in the cleaning projects, you can colour the Sd Object of the cleaning project rectangle in the Master project: In Project Layers window, right click on the Sd Object of the cleaning project and change the color.
You can also create a subfolder in the Project Layers window. The Sd Objects that correspond with completed merges can be moved to a 'Done' subfolder for instance. -
In case you've started the cleaning in Just Point cleaning mode, and should there be any need to review Time Series associated with the QPD, you would have to load the Qinsy DB into the Master Project by using the " Load Associated DB File" option.
Related articles
Howto Qimera - Scroll referencing
How-to Qimera - Working with Slice Editor
How-to Qimera - Filter Operations and Filtering Profiles
How-to Qimera - Spline Filtering details
How-to Qimera - Cleaning Data with the Swath Editor
How-to Qimera - Production Line Processing Workflow