
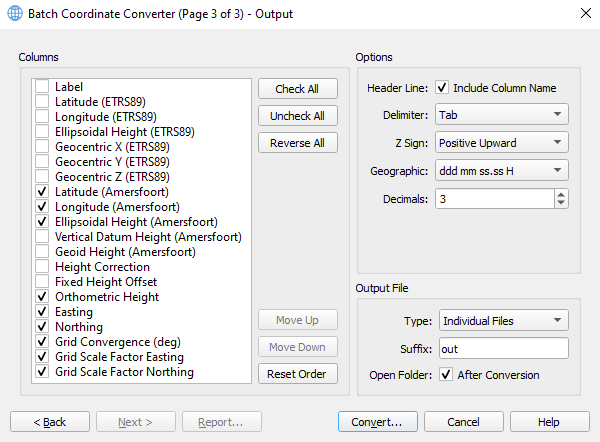
This wizard page defines how and what quantities to write to file after converting the coordinates in the selected input file(s) from the input coordinate system to the output coordinate system.
On this page:
Columns
The contents of this list depends on the selected output coordinate system configured at the Configuration Wizard Page.
Each quantity can be renamed by selecting it in the list and double clicking it or pressing F2 key.
The order of appearance in the list is such that the top list item, which is checked, is the quantity that is written to the first column in the output file(s) to be generated.
The next checked list item seen from the top is written to the second column in each output file, etc.
Unchecked quantities are not part of the output file(s). Handy buttons are supported to set all list items checked or unchecked or reverse their check status.
Moving a list item up or down works for a selected list item using the appropriate buttons "Move Up" and "Move Down".
In case the renaming of columns did not work as intended the "Reset Order" button helps to restore the default column configuration including check states.
Note that for geographic coordinates the name of the geographic coordinate system appears between brackets. This helps recognizing which geodetic datum this type of coordinates is associated with.
By default the geographic coordinates of the configured output coordinate system are checked, e.g. "Latitude (Amersfoort)" in the screenshot example here. This check state means they are supposed to be part of the output file(s).
Optionally, the geographic coordinates of the configured input coordinate system can be part of the output file(s) as well. Please check them manually as they are not checked by default. For instance "Longitude (ETRS89)".
Another note, which is worth while mentioning concerns geocentric coordinates. The name of the geographic coordinate system appears between brackets for geocentric coordinates again to help interpreting which geodetic datum this type of coordinates is associated with.
Options
The following table displays the options, which are currently supported:
|
Name |
Configuration |
Description |
|||||||||||||||||||||||||||||||||
|---|---|---|---|---|---|---|---|---|---|---|---|---|---|---|---|---|---|---|---|---|---|---|---|---|---|---|---|---|---|---|---|---|---|---|---|
|
Header Line |
|
Writes the (renamed) names of all selected columns in the order of appearance from top to bottom in the column list to the first line of each ASCII output file.
|
|||||||||||||||||||||||||||||||||
|
Delimiter |
|
This option defines the separator character between columns.
|
|||||||||||||||||||||||||||||||||
|
Z Sign |
|
This option allows to negate all checked height related quantities in the column list, which is called here "Z Sign".
In case "Positive Downward" has been chosen a multiplication factor of -1 will be applied.
|
|||||||||||||||||||||||||||||||||
|
Geographic Coordinate Format |
|
Available formats for geographic units are shown below (d=degrees, m=minutes, s=seconds, H=hemisphere).
The default option is the top item at the dropdown list: "ddd mm ss.ss H".
Note that "Coordinate Format" is visible to the user by hovering over the field, which is labelled "Geographic".
|
|||||||||||||||||||||||||||||||||
|
Decimals |
{0,1,2,3,4,5,6,7} |
This option reflects the number of decimals for quantities of type projected coordinates, which are checked in the column list.
|
Notes:
-
The number of decimals for Grid Convergence is not configurable. This number has been set by the software to 6, which suffices in practise, because this difference between two angles (true north and grid north) is being expressed in decimal degrees.
-
The number of decimals for either Grid Scale Factor Easting/Northing is not configurable either. The values are typically the same. In some cases they do differ in grid direction hence the option to select either one. This number has been set by the software to twice as many decimals as configured for the number of decimals for quantities of type projected coordinates, see "Decimals" in the "Name" column of the above table.
Output File
The following table shows the Output File options:
|
Name |
Configuration |
Description |
||
|---|---|---|---|---|
|
Type |
|
The type defines how many files are going to be written to disk. Default type is "Individual Files". Individual Files:
Single Merged File:
|
||
|
Suffix |
Any text. |
Default suffix text is "out". Type any text to be used as postfix to each output filename, e.g. "Test-coordinates-in-ETRS89 - 1_out.txt" in case the suffix is "out" (the preceding underscore character is always added after the filename by the Batch Coordinate Converter).
|
||
|
Open Folder |
Checkbox showing the text:
|
Tick off this checkbox in case after coordinate conversion it is desired to launch an instance of File Explorer showing the location, in which the resulting file(s) is/are residing. This is handy for further analysis purposes. |
Convert...
This button is used to execute the coordinate conversion. It validates the required input information and warns in case of missing information.
In case of many coordinates and numerous input files to convert a progress dialog appears.

After successful coordinate conversion the name of this button changes to "Finish...".
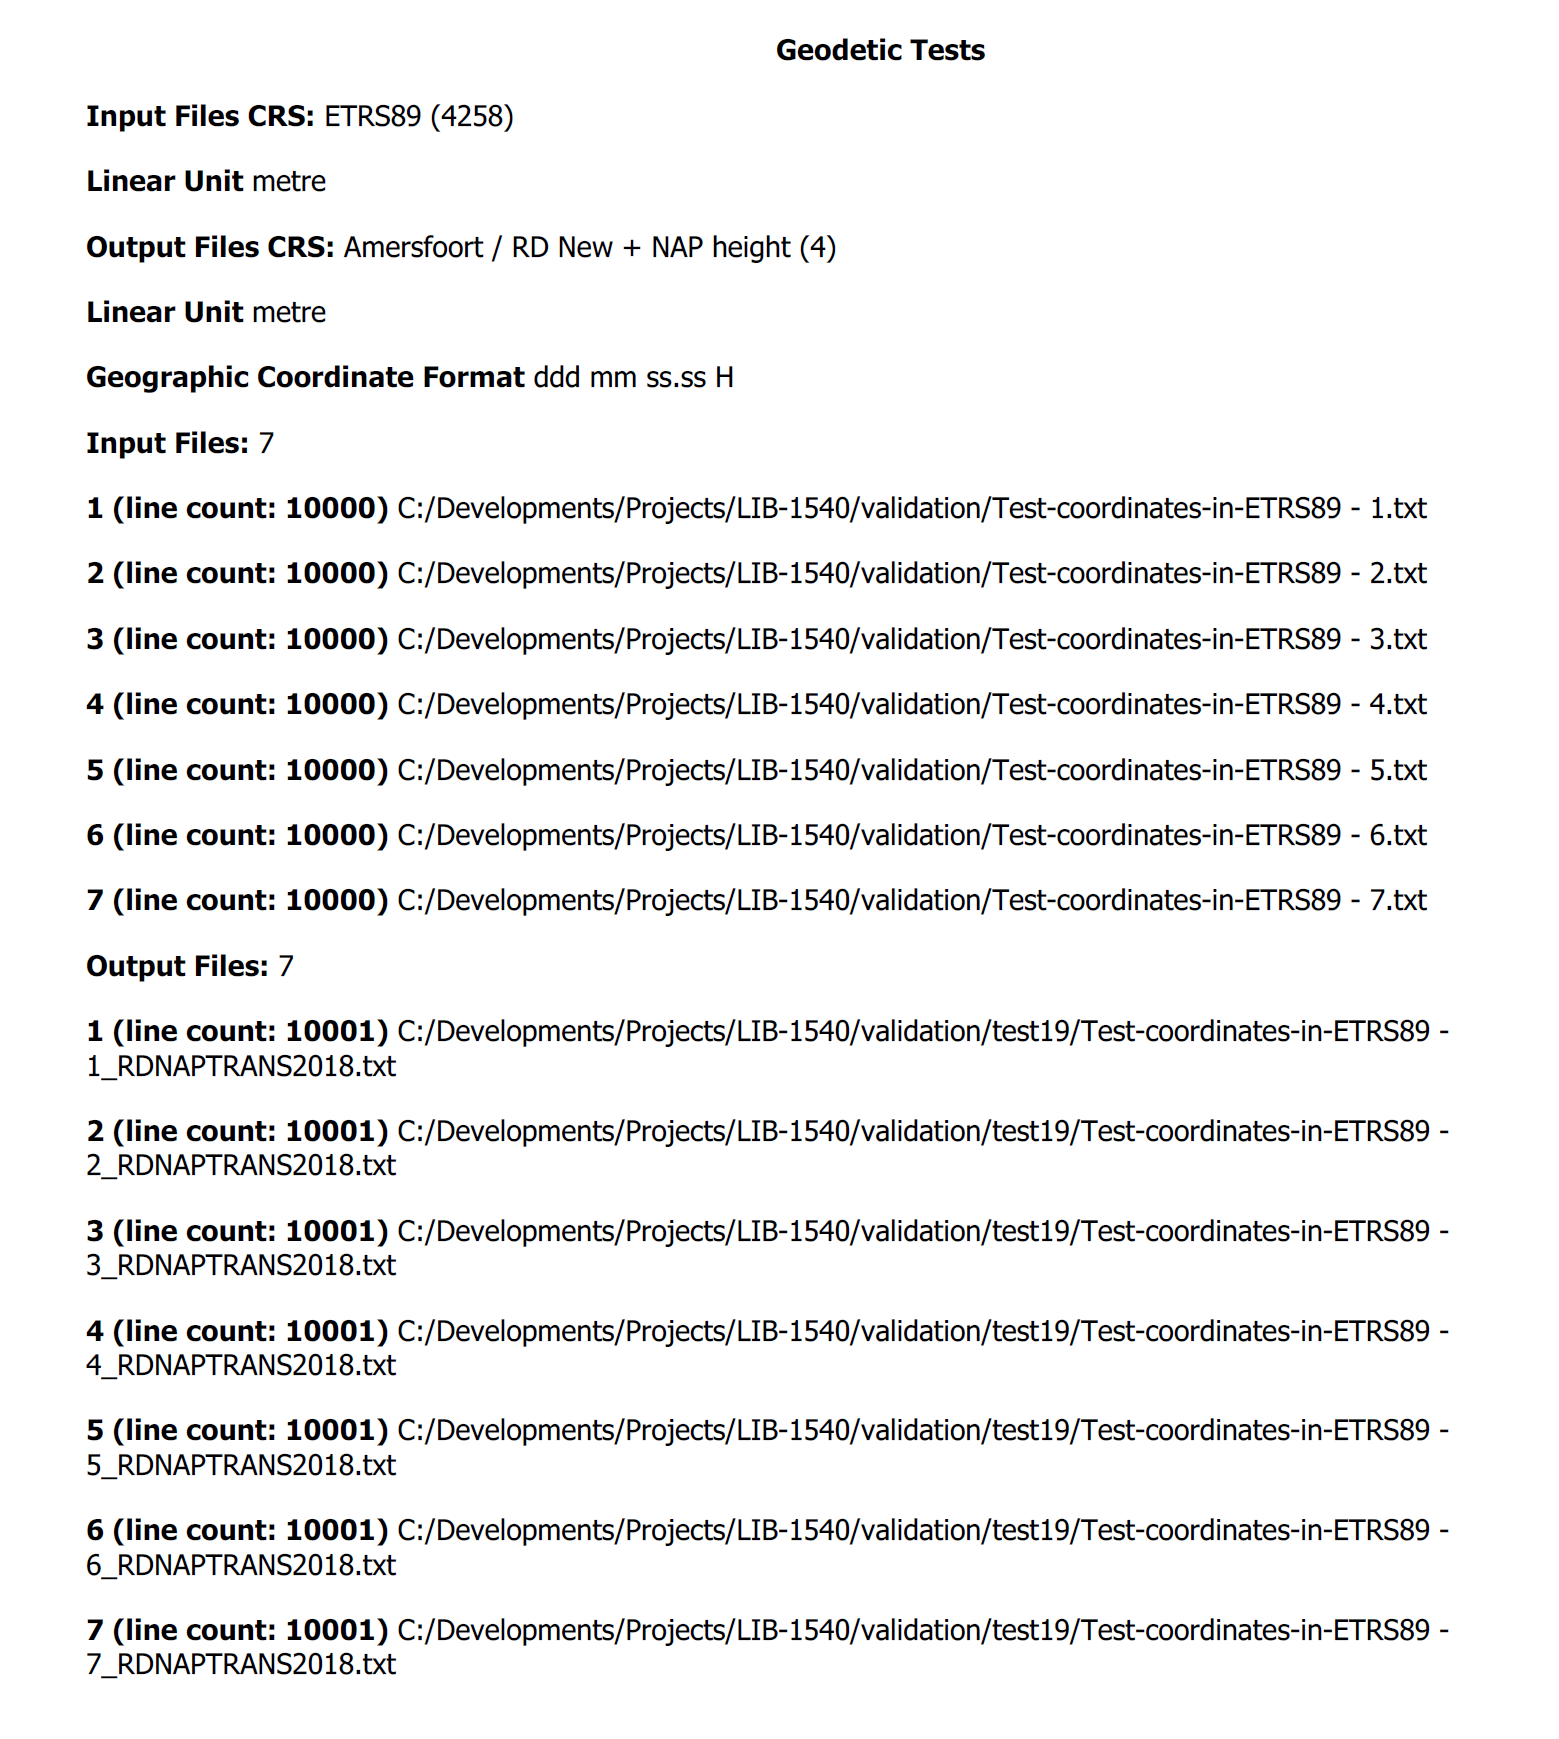
Report...
This button is enabled only after having converted coordinates successfully. At the moment only one report format is supported being a PDF formatted file.
An example of such a report is as follows:
How to close the wizard?
The wizard is closed when either clicking the "Cancel" button or the "Finish..." button.
Click the latter to see the message asking the user whether or not to create a PDF formatted report file before aborting the Batch Coordinate Converter.
Tip:
In case the user wants to redo the coordinate conversion with other options, click the "Back" button to show the second wizard page.
There click the "Next" button to show the third wizard page and change options before clicking the "Convert..." button again.