
This how-to walks through creating presentations and movies in Fledermaus 8.
The functionality discussed here differs from movie creation in Fledermaus 7. If you would like to make a movie using Fledermaus 7, please visit: How-to Fledermaus - Create a flightpath for movie making in the offline Fledermaus 7 documentation.
Introduction
Presentations and movies are a good way to show off your data without having to move large datasets around.
Creating and working with slides
Step-by-Step
This how-to begins after data import, inspection, and any necessary customization.
Step 1: Create Space Time notes (Optional)
This step is not mandatory, but it is recommended. Step-by-step instructions on how to create space time notes can be found here: How-to Space Time Notes
Step 2: Create slides
There are two main ways to create new slides, which will be the base of your presentation or movie:
From Space Time Notes
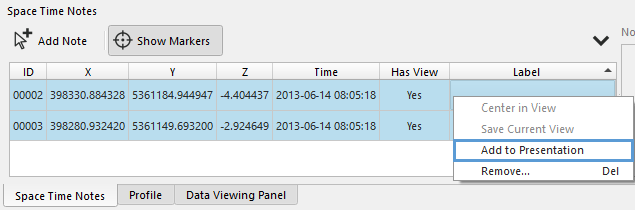
Created space time notes will be listed in the Space Time Notes Dock. From there they can be selected and added to the presentation from the right-click menu:
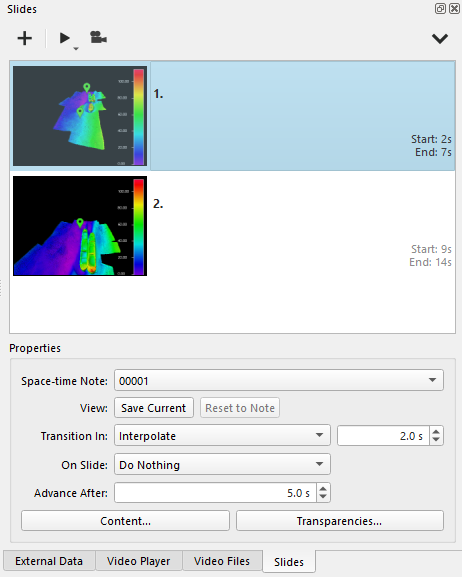
Navigating to the Slides tab, you will see that a new slide is created for each Space Time Note that was selected:
From Slides Dock
You can also create slides from the current view in your scene by using the plus button in the top left of the Slides dock, and selecting 'Create from current view' in the resulting window. This will not create a space time note.
For more information on the slides dock, please visit: .Fledermaus Slides Dock v8.0
Step 3: Define specific viewing parameters
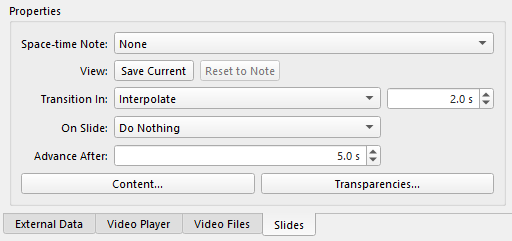
Once a slide is created, it can be selected to view and edit it's specific parameters.
These parameters include the name and view, transition type and time between slides, text and layout settings, as well as transparencies of certain layers within your scene.
If you wish to change which layers are visible during the presentation or video, you can change the transparencies in order to only see what you want during specific slides.
Please note that if you change which layers are visible in your scene (using the checkboxes next to the file in the ) during slide creation or edits, the previously visible layer(s) are not saved in earlier slides!
Step 4: Producing Deliverables
Once your slides are created and edited, there are two options in Fledermaus to use them to present your data.
Presentation Options
The first of these options is to use the presentation controls available in Fledermaus.
These controls are accessed directly from the Slides Dock, by selecting the 'Play' icon located in the top left toolbar:
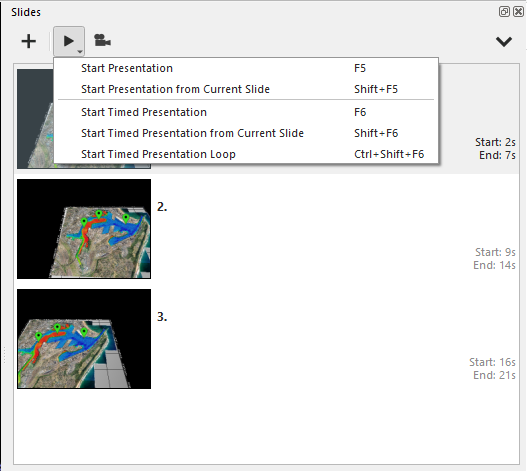
From this menu, a presentation can be started either as a manual presentation (proceed to next slide on click), or a timed presentation (proceed after set time).
These options will play your presentation in the selected format directly within Fledermaus.
These presentation options are also available in Fledermaus Viewer, if the loaded .scene file contains slides.
For more information on the Fledermaus Viewer, please visit: How-to Fledermaus Viewer
Movie Creation
Another option is to export your timed presentation as a movie.
This option is also accessed through the Slides tab, from the film projector icon, and brings up the following window:
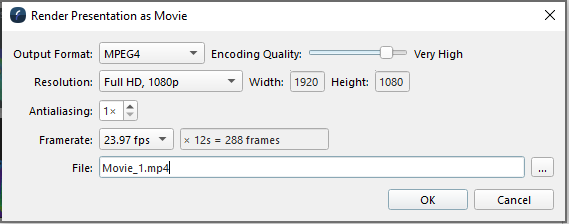
In this window, you can set up the video parameters according to your needs. The available settings that can be customized include the output format, resolution, and frame rate, as well as file name and location.
Please note that the render process may take some time, depending on the settings selected and number of slides.