
Qimera Application Preferences Dialog
How to Start
- Preferences option of the Project menu in the Main Menu bar
What it Does
This dialog is used to modify application preferences.
General Description
Preferences are used across all projects created by Qimera. They are not project specific. There are 4 preference tabs which are described below.
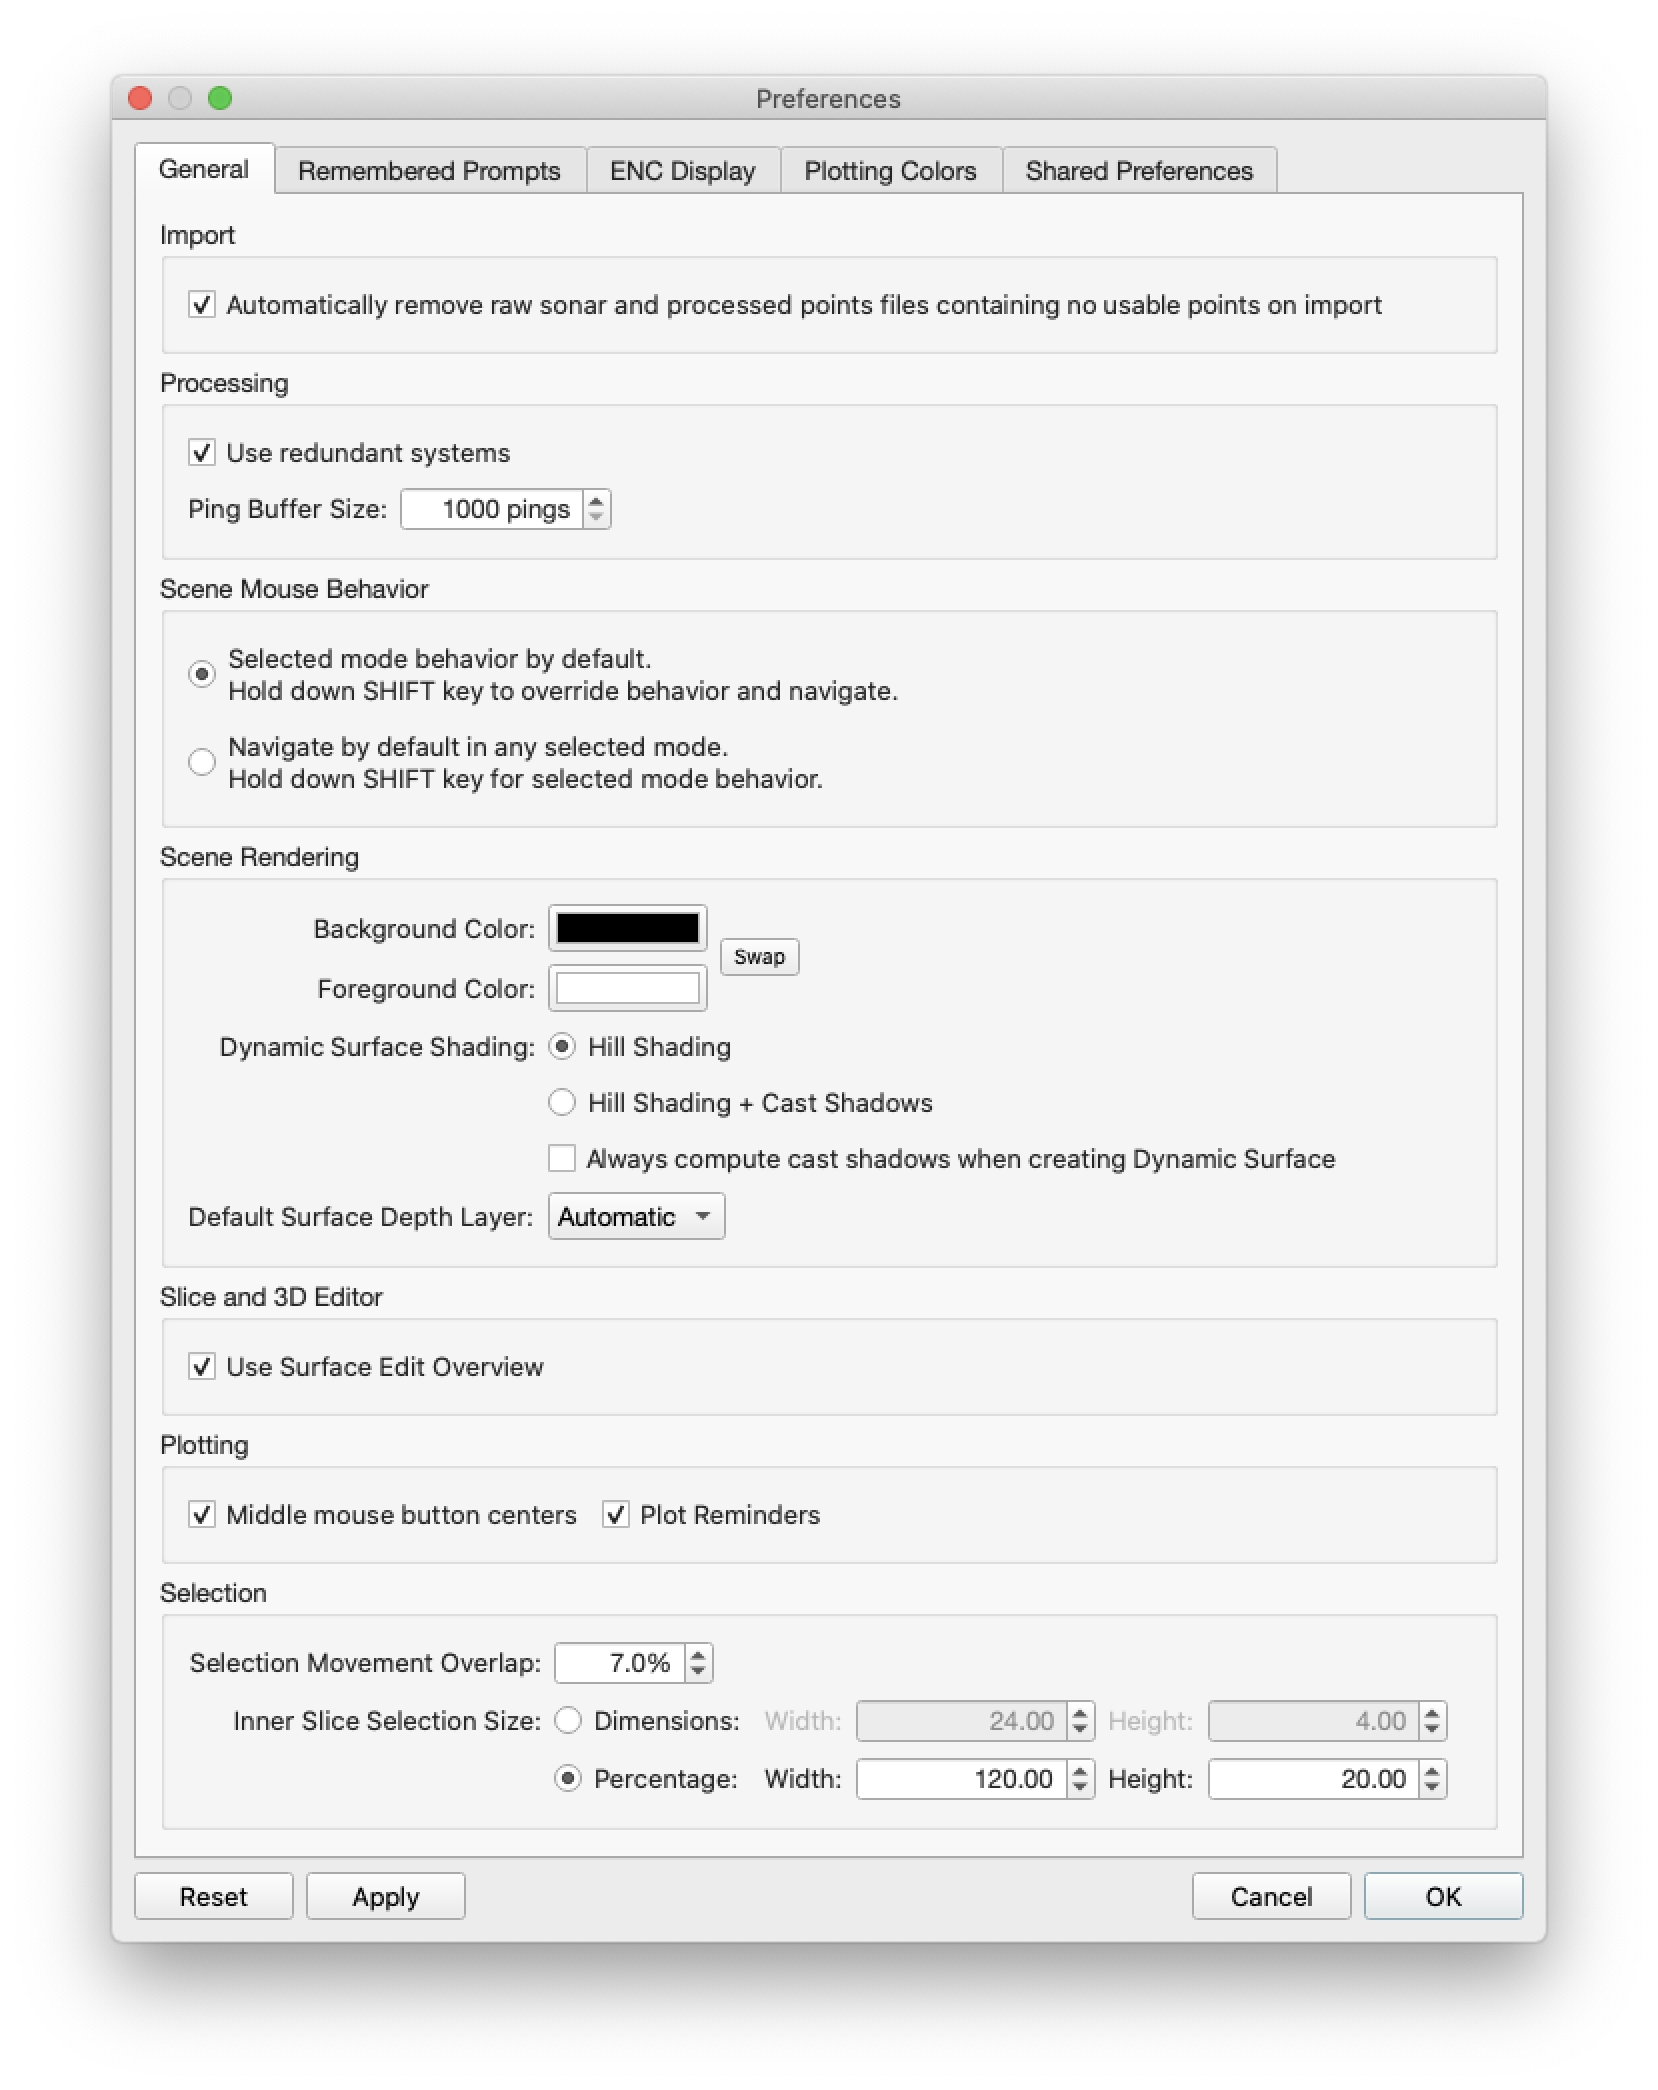
Preferences - General
Import
The Import group has an option to Automatically remove raw sonar and processed points files containing no usable points on import. Checking this box will let Qimera automatically remove raw sonar files or processed points files that were found to have no usable points (empty) after the file is initially scanned. Unchecking this box means that you would have to manually remove those files from the project. This manual removal is made easier with the Select All Empty Raw Sonar Files context menu.
Processing
The Processing group has two configurable options. The first option, 'use redundant systems' allows you to configure Qimera to use data from backup sensors. This is applicable in the event that the primary sensor is either missing data, or a time span of data has been edited in the Time-Series Editor using the Invalidate Edit mode. If backup data is of reasonable quality, it is preferable to enable this option. If backup data is of poor quality, or incorrect, it is advised to disable this option.
The second option, 'Ping Buffer Size', allows you to change the ping buffer memory size during sound velocity correction. During sound velocity correction, Qimera will buffer the processed pings into memory and write them at all at once. The size of this buffer determines how many are stored before writes to disk. The large this buffer, the more efficient your processing will be.
Scene Mouse Behavior
Some user workflows prefer scene navigation by default for any mouse interaction. Some user workflows prefer original mouse behavior. You can change the mouse navigation behavior of Qimera by changing this option.
The Selected Mode behavior allows mouse interaction with the scene to perform the operations allowed by the selected mode. For example, in Area Select mode, if you left-click-drag over a surface in the scene, you will create a selection area. Doing this in another location will create a new selection area. If you want to navigate within the scene, you have to hold down the SHIFT key.
The Navigate by Default option will navigate the scene with any mouse interaction for any selected mode. In order to use the capabilities of the selected mode, you must hold down the SHIFT key. For example, if you are in Area Select mode, you must hold down the SHIFT key to select a new area.
Scene Rendering
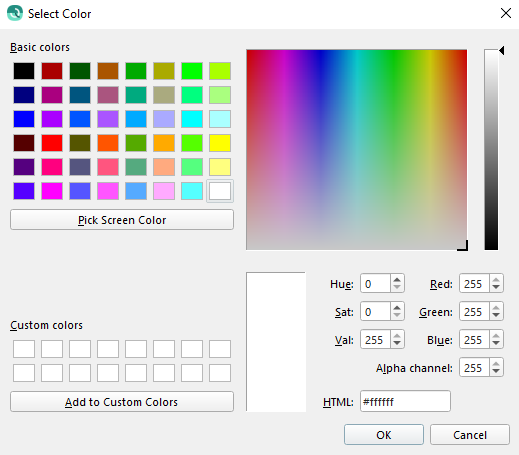
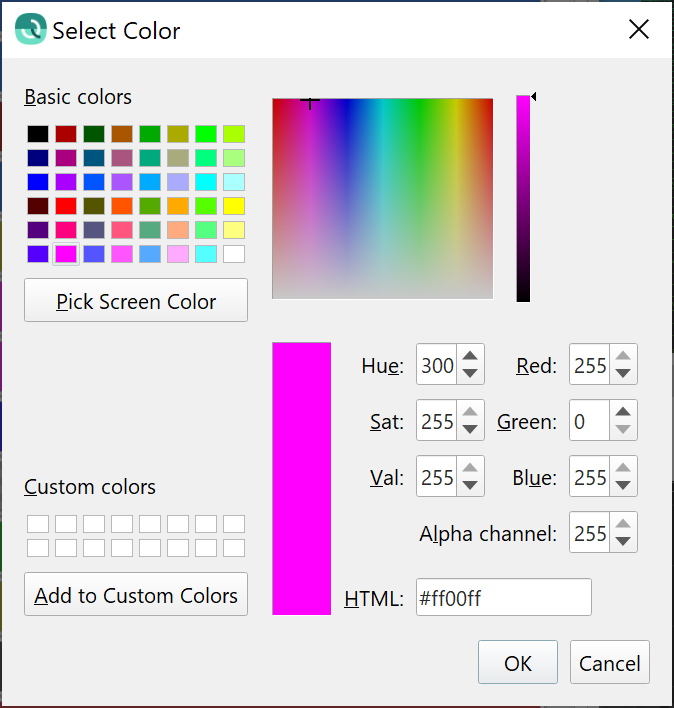
The Background Color and Foreground Color options allow you to change the colors of 4D Scene. Use the Swap button to swap the foreground and background color.
To change the background or foreground color, simply click on the colored area of the Background or Foreground Color button to populate the Select Color dialog box, as shown below.
The Dynamic Surface Shading group options allow you to change the shading mode of the Dynamic Surface. The major difference is how the shadows are represented. For Hill Shading, the shadows are shown through a standard hill shading algorithm. This is all done by the video hardware and requires no additional processing, this generally gives the quickest grid and re-grid times. The Hill Shading + Cast Shadows option will show Fledermaus cast shadows using the Fledermaus shading engine. While superior to hill shading, there is additional processing required to generate the additional illumination parameters. The effect being when you first create a surface or switch surfaces, Qimera will start a process to generate the illumination parameters. During this process, the display switches back to Hill Shading mode until the process completes and the cast shadows are shown. The larger the surface, the bigger the processing time to generate the cast shadows. For Qinsy users, the configuration that most closely matches the visualization available in Qinsy while online is Hill Shading.
If you are primarily using Hill Shading, then the cost to generate the illumination parameters is wasted during the initial build. You can speed up surface creation by delaying the illumination processing by unchecking 'Always compute cast shadows when creating Dynamic Surface'. If you later decide to switch to Hill Shading + Cast Shadows, then Qimera will start a process to generate the illumination parameters at that time.
The Default Surface Depth Layer allows the user to have a preferred view when reviewing Dynamic Surfaces, e.g. Shallow, Average, Deep The default is the Average layer.
Slice and 3D Editor Options
Use Surface Edit Overview
By default, the Surface Edit Overview loads the Dynamic Surface and Visited/Edited areas overlay whenever you use the 2D Slice or 3D Edtior. You can turn this behavior off using this checkbox. This can help improve performance if you are editing a very large surface on an older computer.
Plotting
Users can enable and disable a few plot options for the various plot widgets in Qimera. Firstly, you can configure the mouse behavior to be such that a click of the middle mouse will recenter the plot. The second option is to have the text overlay reminders in the plots that require some user action in order to load data.
Middle Mouse Button Centers
By default, clicking the middle mouse button in a plotting surface will re-center the plot to that location. You can disable this feature using this preference.
Selection
Selection Movement Overlap specifies the percentage of overlap when advancing a selection using the movement keys.
The Inner Slice Selection Size allows setting the default inner selection rectangle size when Fixed Slice Select or Free Slice Select selection modes are used. Using the Dimensions radio button option will set the absolute values for width and height of the inner selection box independent of the outer selection box . Using the Percentage radio button option will set the inner selection box dimensions to values computed from the percentages entered and the dimensions of the outer selection box.
Once accepted the values will be stored and recalled for the current operating system user for each selection.
Remembered Prompts
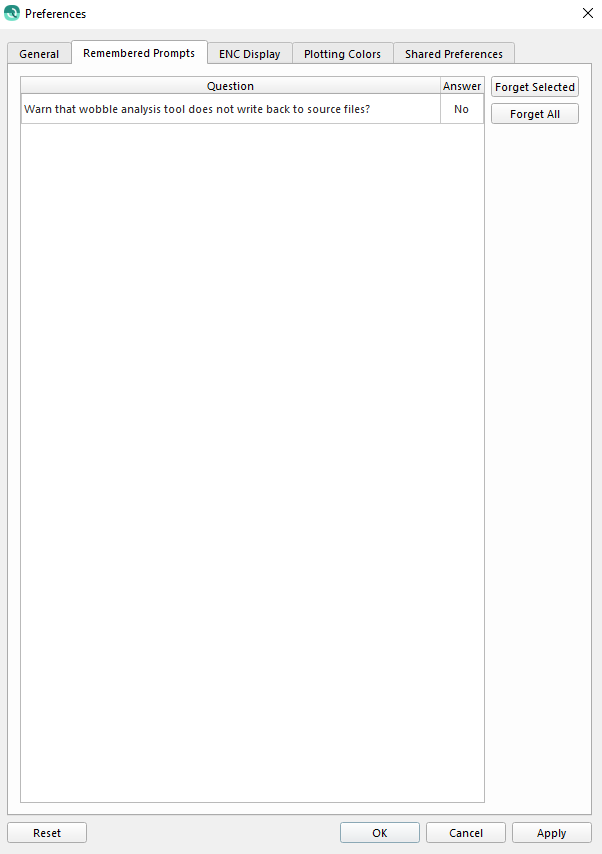
A key mechanism of Qimera's Dynamic Workflow is to prompt the user with questions about the next logical step in the process. For example, after you create a project, Qimera will show you the following prompt.

If you click the Add Raw Sonar Files option, Qimera will launch the Add Raw Sonar Files dialog. If this is your preferred action, simply check the Don't ask again option and Qimera will always perform this action when you create a new project. It will also remember if you select any of the other options and have the check box selected. The answer will then appear in the Remembered Prompts table as shown below.
In addition to the prompt bar noted above, many message boxes in Qimera will contain Don't ask again or Don't show this message again with check boxes. If the user checks these boxes, that will also populate in the Remembered Prompts table.
If you decide to change your original answer to the Don't ask again or Don't show this message again check boxes in order to populate the prompts once again, simply select the row of the question asked by the Dynamic Workflow feature and click Forget Selected. Click Forget All to enable return of all prompts.
ENC Display
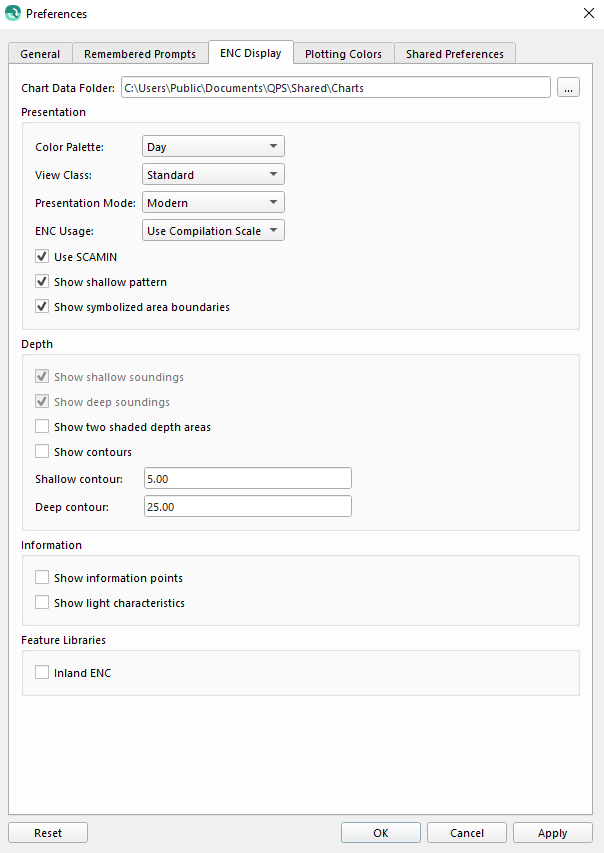
Chart Data Folder
This path dictates where Qimera will look for QNC files to load for chart display. Change this only if you want to use QNC files from outside the default hierarchy.
On Windows, this preference is shared with the ENC Administrator. Changing it in one application will update the other.
Chart Presentation
The Color Palette option can be Day, Dusk, Night
The View Class option can be Base, Standard or All. This determines the amount of background data in the chart such as buoys and sector lights.
The Presentation Mode option effects how various features are symbolized. Traditional, Simplified and Modern symbol sets are available.
The ENC Usage option controls how Qimera transitions between charts in the same area as the view scale changes. "Standard" employs the usages levels standardized by the IHO. "Use Compilation Scale" employs the usages specified by the maker of the chart.
The Use SCAMIN option displays objects only when the scale is smaller than the minimum scale set for that specific object. This prevents cluttering of the screen when zooming out.
The Show Shallow Pattern option displays a pattern to indicate a shallow area.
The Show Symbolized Area Boundaries option enables the display of boundaries around areas.
Chart Depth
The Show Shallow Sounding option shows actual depth numbers.
The Show Deep Sounding option shows actual depth numbers.
The Show Two Shaded Depth Areas option shows shallow and deep water separated by the safety contour, which is a thick gray line. The default is four shades of blue: dark blue for shallow water to light blue for deep water.
The Show Contours option shows lines connected places of the same depth.
The Shallow Contour option shows a line around a shallow area. Set the depth value for this contour. Only enter when Show Depth Contours is activated.
The Deep Contour option shows a line around a deep area. Set the depth value for this contour. Only enter when Show Depth Contours is activated.
Chart Information
The Show Information Points option will show an information symbol with an object which has additional information available.
The Show Light Characteristics option shows the light features of buoys and sector lights.
Plotting Colors
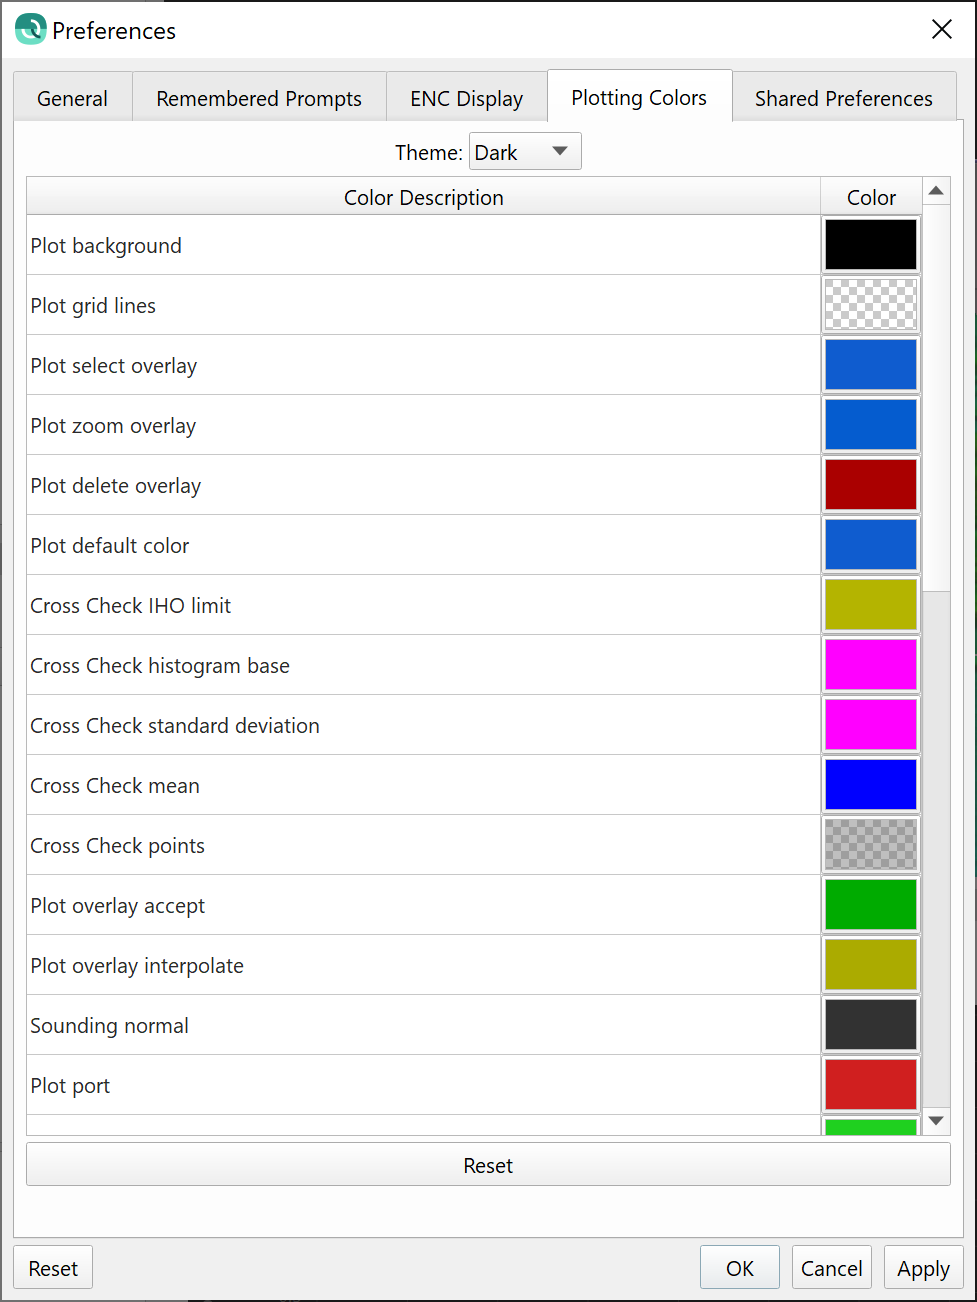
Theme
Users can choose from a dark, light or custom theme for all of the plots used in Qimera's widgets, like the Slice Editor, Time-Series Editor, etc. The dark palette configures plots for a dark background, and the light does the opposite. Users can create their own custom theme as well.
Color Description and Color
The table layout of this tab lists all the various items that are configurable for plotting, including the plot background. Clicking on any of the colors in the Color column of the Plotting
Colors tab will launch the color selection widget, shown below.
Reset
The reset button in this tab will restore the various themes back to their default settings corresponding to the configuration that was standard with the currently installed release.
Shared Preferences
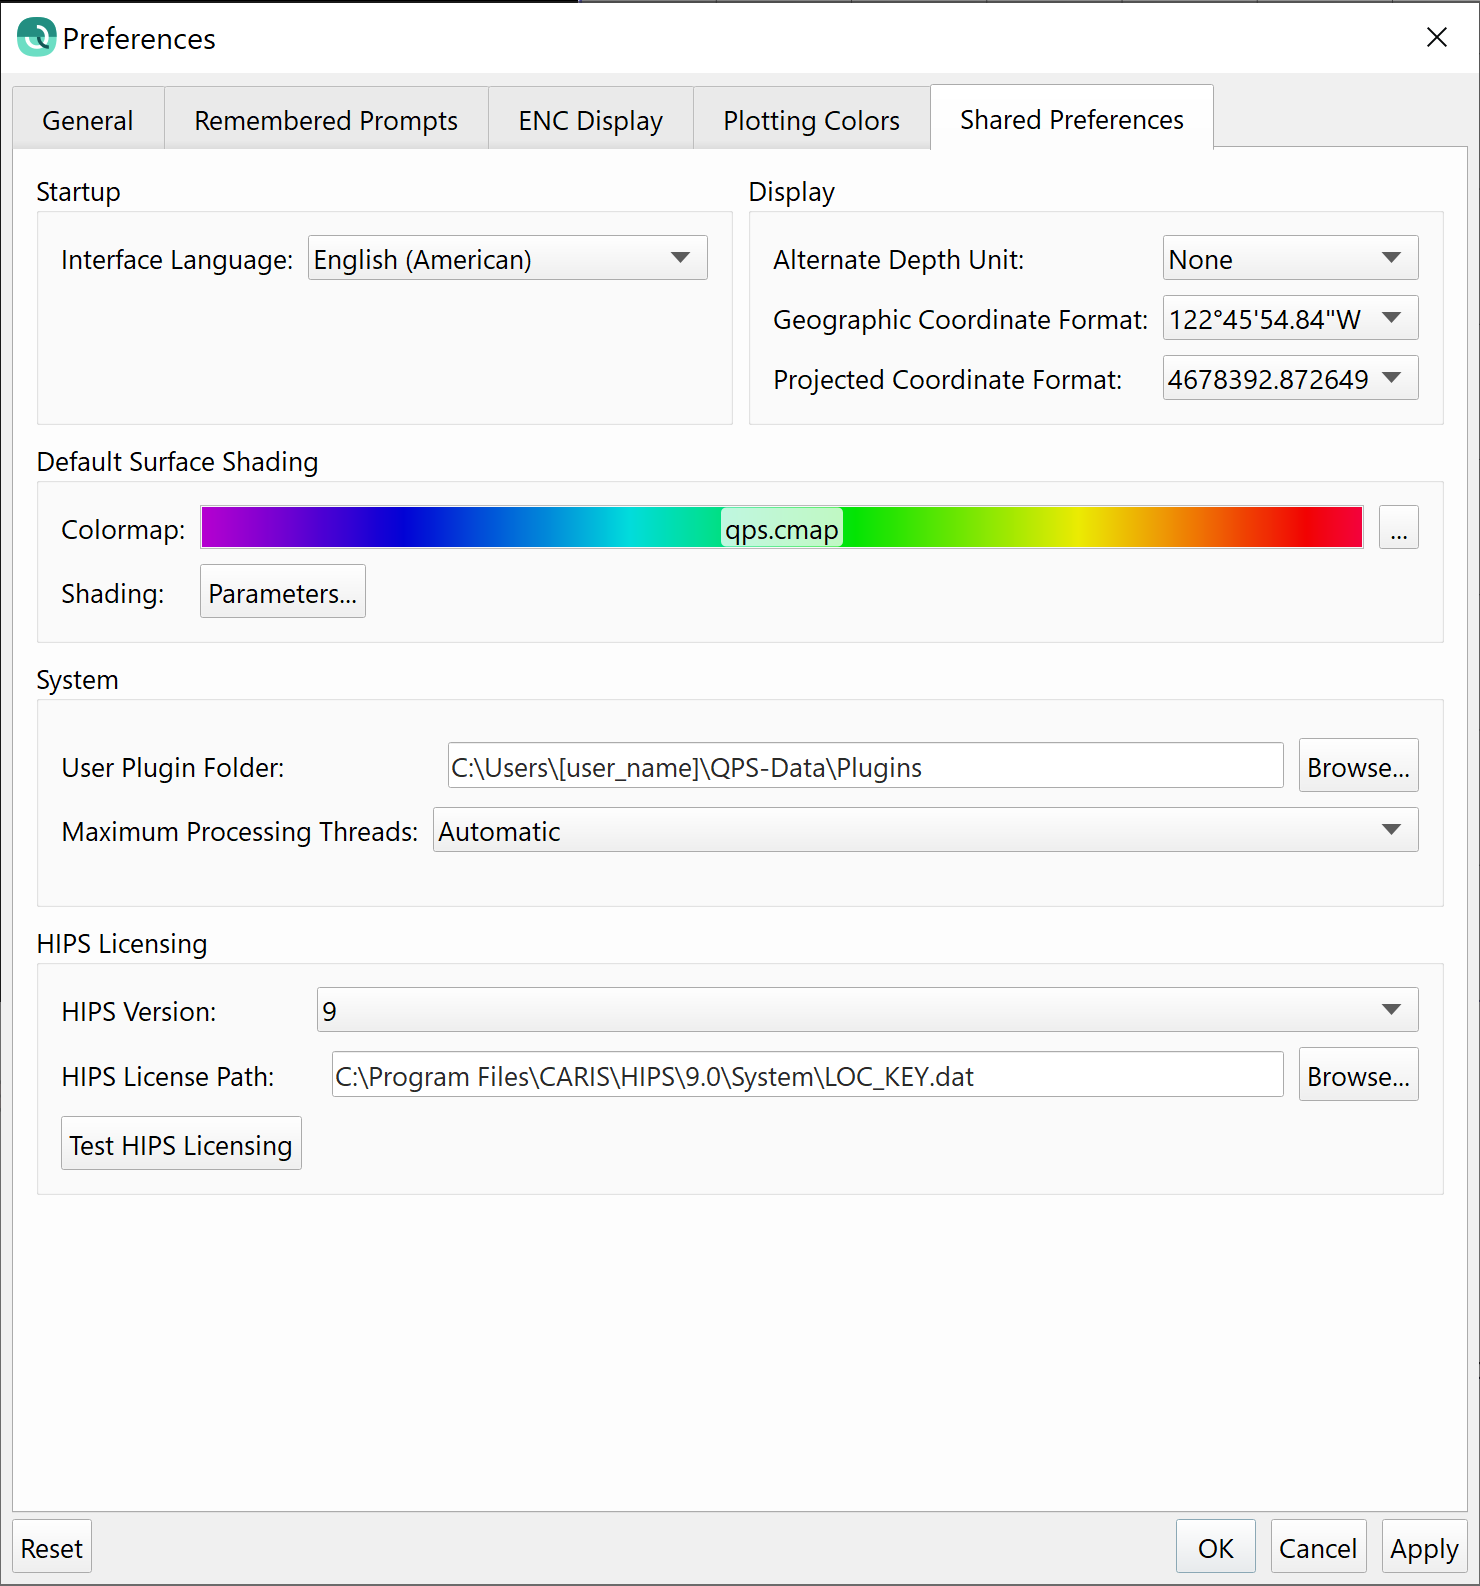
Startup Options
The Interface Language combo box allows you to select the language to be used by the user experience when Qimera is restarted. This list will increase over time and new language packs will be available from the download section of Qimera on the QPS website.
Display Options
These options change how geographic or projected coordinates are viewed in dialogs and the Status Bar of Qimera.
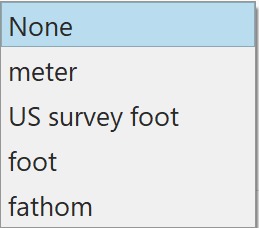
Alternate Depth Unit Options
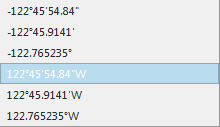
Geographic Coordinate Formats
Projected Coordinate Formats

Default Surface Shading Options
Please see the sections on the Shading and Colormap dialog for more information on this section. These options are used whenever creating Dynamic or Static surfaces in Qimera.
System Options
The User Plugin Path allows you to specify a directory from which application plugins will be loaded (in addition to the system plugin directory). This only applies in scenarios where there is a need to load plugins other than those installed with Fledermaus.
The Maximum Processing Threads dropdown limits the number of tasks the applications will attempt to run in parallel. Setting it too high may reduce system responsiveness, while setting it too low may fail to make efficient use of processing capabilities. It should generally be left at "Automatic".
The ArcGIS License Checkout dropdown allows you to specify which, if any, ArcGIS license type you would like to point to when using ArcGIS integration features. "Automatically Determine License Type" is the default for convenience purposes, but can be slower than choosing a specific license type, especially when checking out licenses over a network. Note that this setting is only available on ArcGIS capable licensed copies of Fledermaus.
HIPS Licensing
The HIPS Version dropdown box allows you to specify whether you are using a HIPS 9 or 11 license. This is used when importing HDCS data.
When the HIPS Version is set to 9, the HIPS License Path field allows you to specify the HIPS license file, which is typically located in the System folder of the CARIS installation path.
When the HIPS Version is set to 11, the HIPS License Host field allows you to specify the HIPS 11 license string - either the license server's hostname for a server license, or "no-net" for a HIPS 11 local license.
The Test HIPS Licensing button performs a license check based on the parameters specified in the HIPS Version and HIPS License Path/Host fields.
Return to: (2.6) Qimera Interface#qimerainterface
Return to: Wizards and Dialogs