
Description
This driver shows real time tidal information using the Admiralty Tide Tables distributed by the United Kingdom Hydrographic Office. Utilizing an XML file containing various tide stations, the driver calculates the real time tidal height for that location and outputs the value via the Height Aiding dialog. It is also possible to interpolate between two stations, retrieving the height at set position.
Driver Information
|
Driver |
Admiralty Tide Table (ATT) |
Interface Type |
File/Unimplemented |
Driver Class Type |
DrvQPSFreeBase |
|---|---|---|---|---|---|
|
Yes |
Input / Output |
Input |
Executable |
DrvQPSFreeBase.exe |
|
|
Related Systems |
|||||
|
Related Pages |
|
||||
Database Setup
Either an existing database or a new database can be used. Independent of the database chosen it must contain a Tide Gauge System and a Position Navigation System. The image below illustrates an example setup.
Add a Tide System:
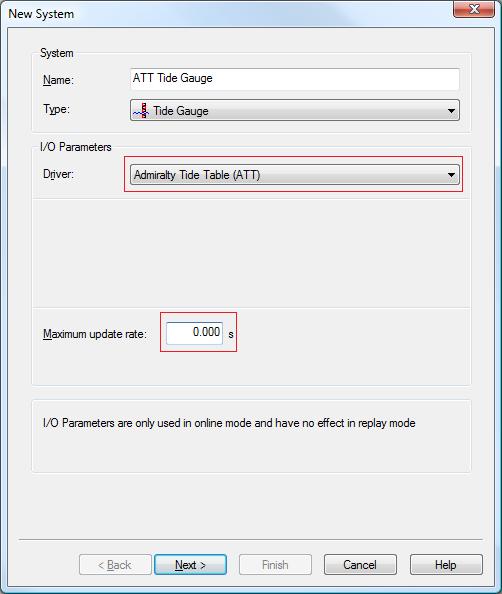
Choose "Tide Gauge" as the type of input. This system uses the "Admiralty Tide Table (ATT)" as driver. The update rate determines how frequently the tidal information should be calculated. If the update rate is left at zero, the tidal information is calculated at a frequency of one Hertz.
Add an Observation:
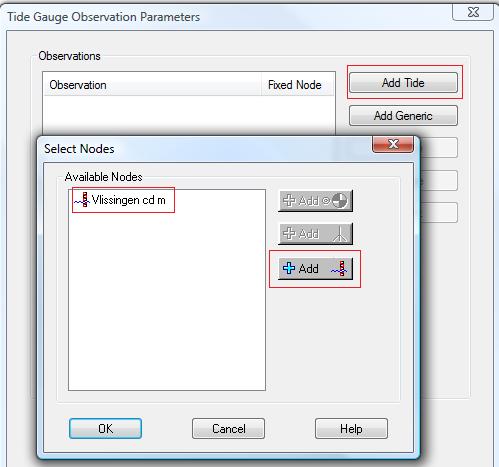
The image above shows the next page of the wizard. Here you can add a tide station by pressing the Add Tide button. This brings up a dialog where the tide station can be selected. In this setup one station has already been created. A new tide station can be added by pressing the ![]()
Observation Parameters:
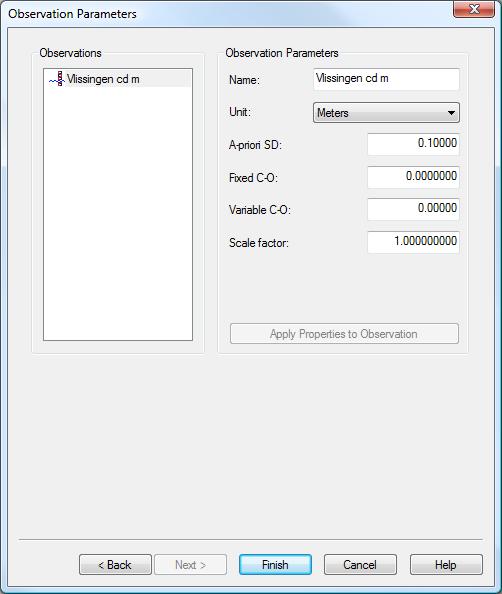
This is the last wizard page. Here additional observation parameters can be added. For this example the default values suffice.
Adding a Tide Station
Adding a new tide station happens in the same manner as adding a new station or node. The picture below illustrates how this is done.
Creating a Tide Station:
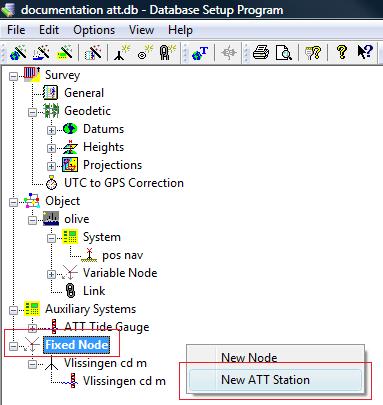
By right clicking on a fixed node and choosing New ATT Station the appropriate wizard is shown that guides you through the steps needed to create a new tide station.
Edit Node Parameters:
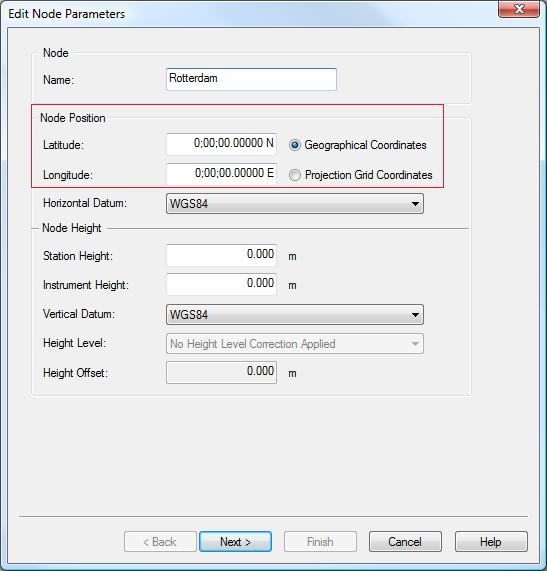
The first dialog shown requires information about the fixed node location. Information such as the horizontal and vertical datum, station height and instrument height can be added here.
Note:
Node position information is mandatory when creating a tide station. If these values (latitude, longitude) are left at zero the latitude and longitude of the previously chosen tide station will be used.
ATT Station:
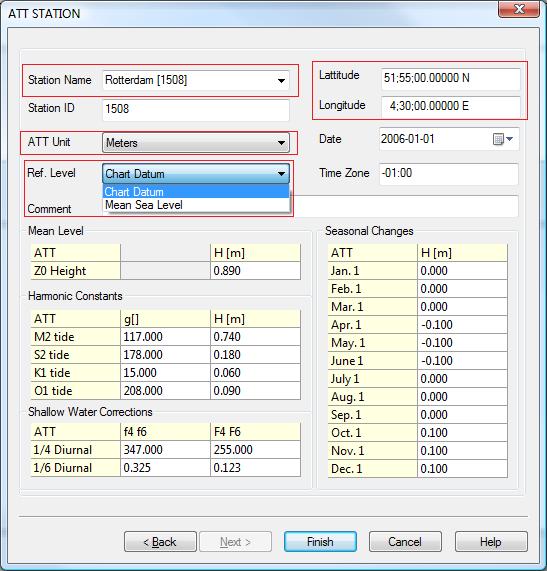
This dialog shows the information that is stored in the XML file. Clicking on the arrow pointing down ![]()
Reference Level and Time Zone
It is very important to select the correct Reference Level.
There is a choice between Mean Sea Level and Chart Datum. Choosing the wrong reference level for your situation will output a height level that is not expected.
It is also important to set the correct Time Zone using a negative prefix if east of Greenwich or a positive prefix if west of Greenwich.
Note:
In this dialog it is also possible to add a tide station to the XML file. This can be achieved by entering a new name in the station name box, and changing the parameters in the fields on this page (e.g. station id, mean level, harmonic constants etc.). Every tide station must have a unique station id : duplicate station id's will not be accepted as new stations.
Online
Go Online ![]()
![]()
Computation Setup:
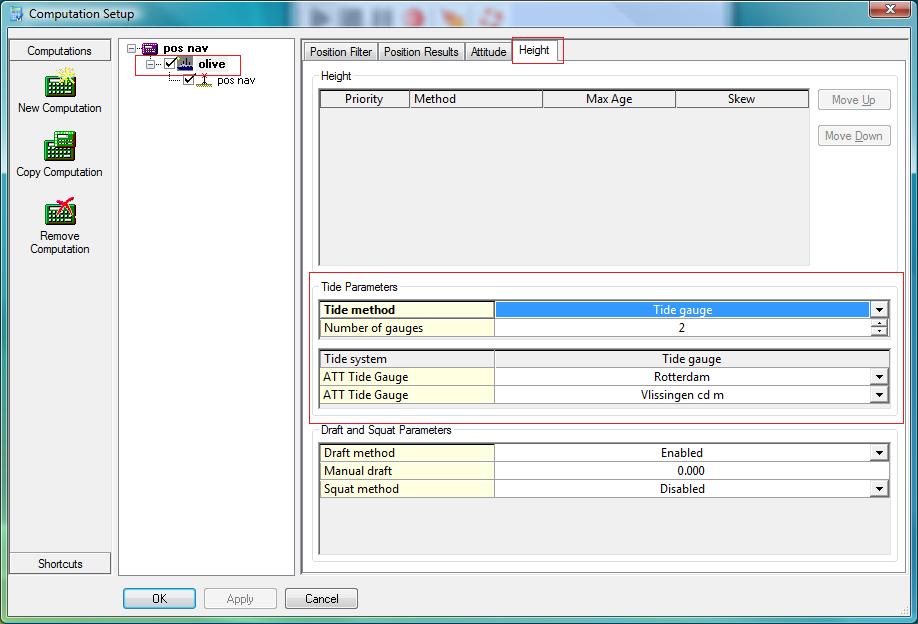
By selecting the object, in this example 'olive', and pressing the Height tab, the appropriate fields for setting up the tide parameters are displayed. As Tide method select Tide gauge. The number of tide gauges can be selected. In this example we use two to demonstrate interpolation. The ATT Tide stations selected in the Database Setup are displayed. The Tide systems here are Rotterdam and Vlissingen.
Observation Physics Display:
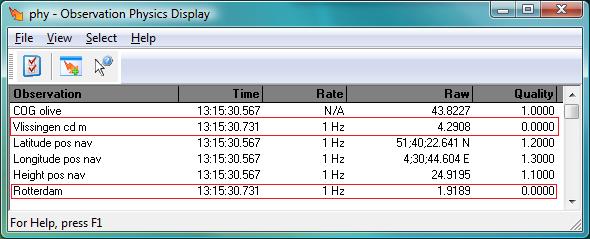
In the Observation Physics Display, as shown above, the current tide and height for Rotterdam and Vlissingen are displayed.
Height Aiding Driver:
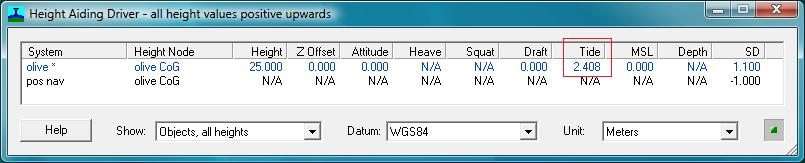
In the Height Aiding Driver display, as shown above, the tidal height is interpolated according to the vessel's position at sea.
Note:
The tidal values in the Observation Physics Display and Height Aiding Driver are displayed according to the current time in UTC time. The values are displayed in the measurement unit chosen when the tide stations where created, in this example meters.