Qinsy 9.0.0 - New Functionality
On this page:
New Geodetic User Interface
The user interface for the geodetic settings can now be started when creating a new project which is similar to how it is done in Qimera and Fledermaus.
In addition the geodetic settings can be re-used as these are stored in a file.
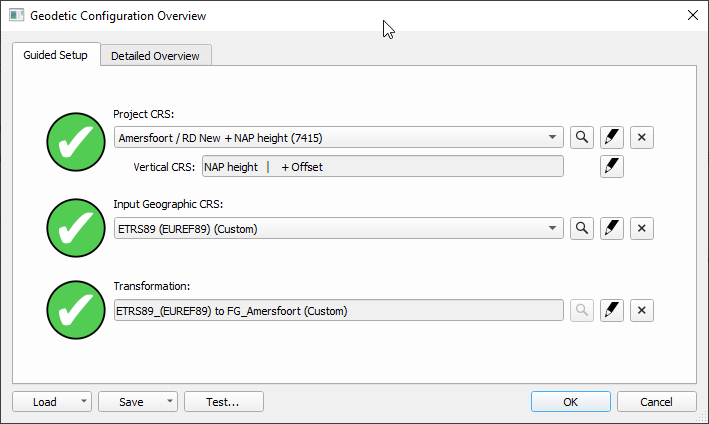
New documentation on the project setup with geodetic settings can be found here:
More information that describes the transition scenarios can be found here:
How-to Geodetic Upgrade Qinsy 8.18.3 to 9.0.0
Note that with the new user interface the geodetic settings will be part of the Project Settings. This replaces the method whereby the settings from the active template database were used.
The advantage is that it is easier to use the template database on another project with different geodetic settings
Save function for User defined Coordinate Reference System (CRS) settings
The new geodetic user interface allows for the storage of settings. This is an important part of the functionality since it replaces the storage of these parameters in template databases.
When saving settings it can be done so that these will be part of the predefined list or to save them to a file with extension WKT. (See the Knowledge Base document: What is WKT?). The settings file can be used to load the settings in a new project.
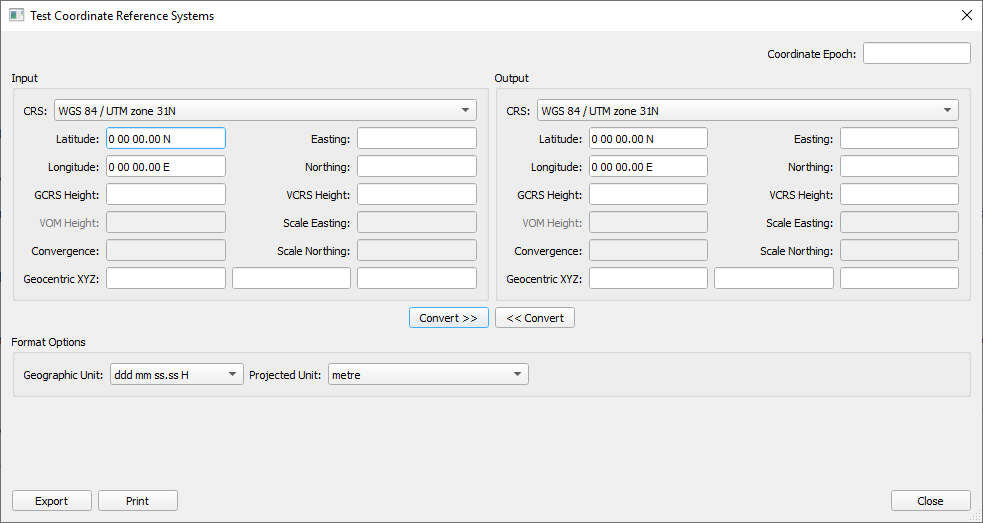
Add transformation epoch to Geodetic Test Utility
The epoch option has been added to the new Test coordinate dialog
EPSG support
It is possible to use EPSG codes when setting up geodetics.
See the Knowledge Base document: EPSG database? What is EPSG?
New Project Dialog
The project dialog has had a refresh and is now common between Qinsy and Qimera, with functionality merged from the previously used dialogs in both applications.
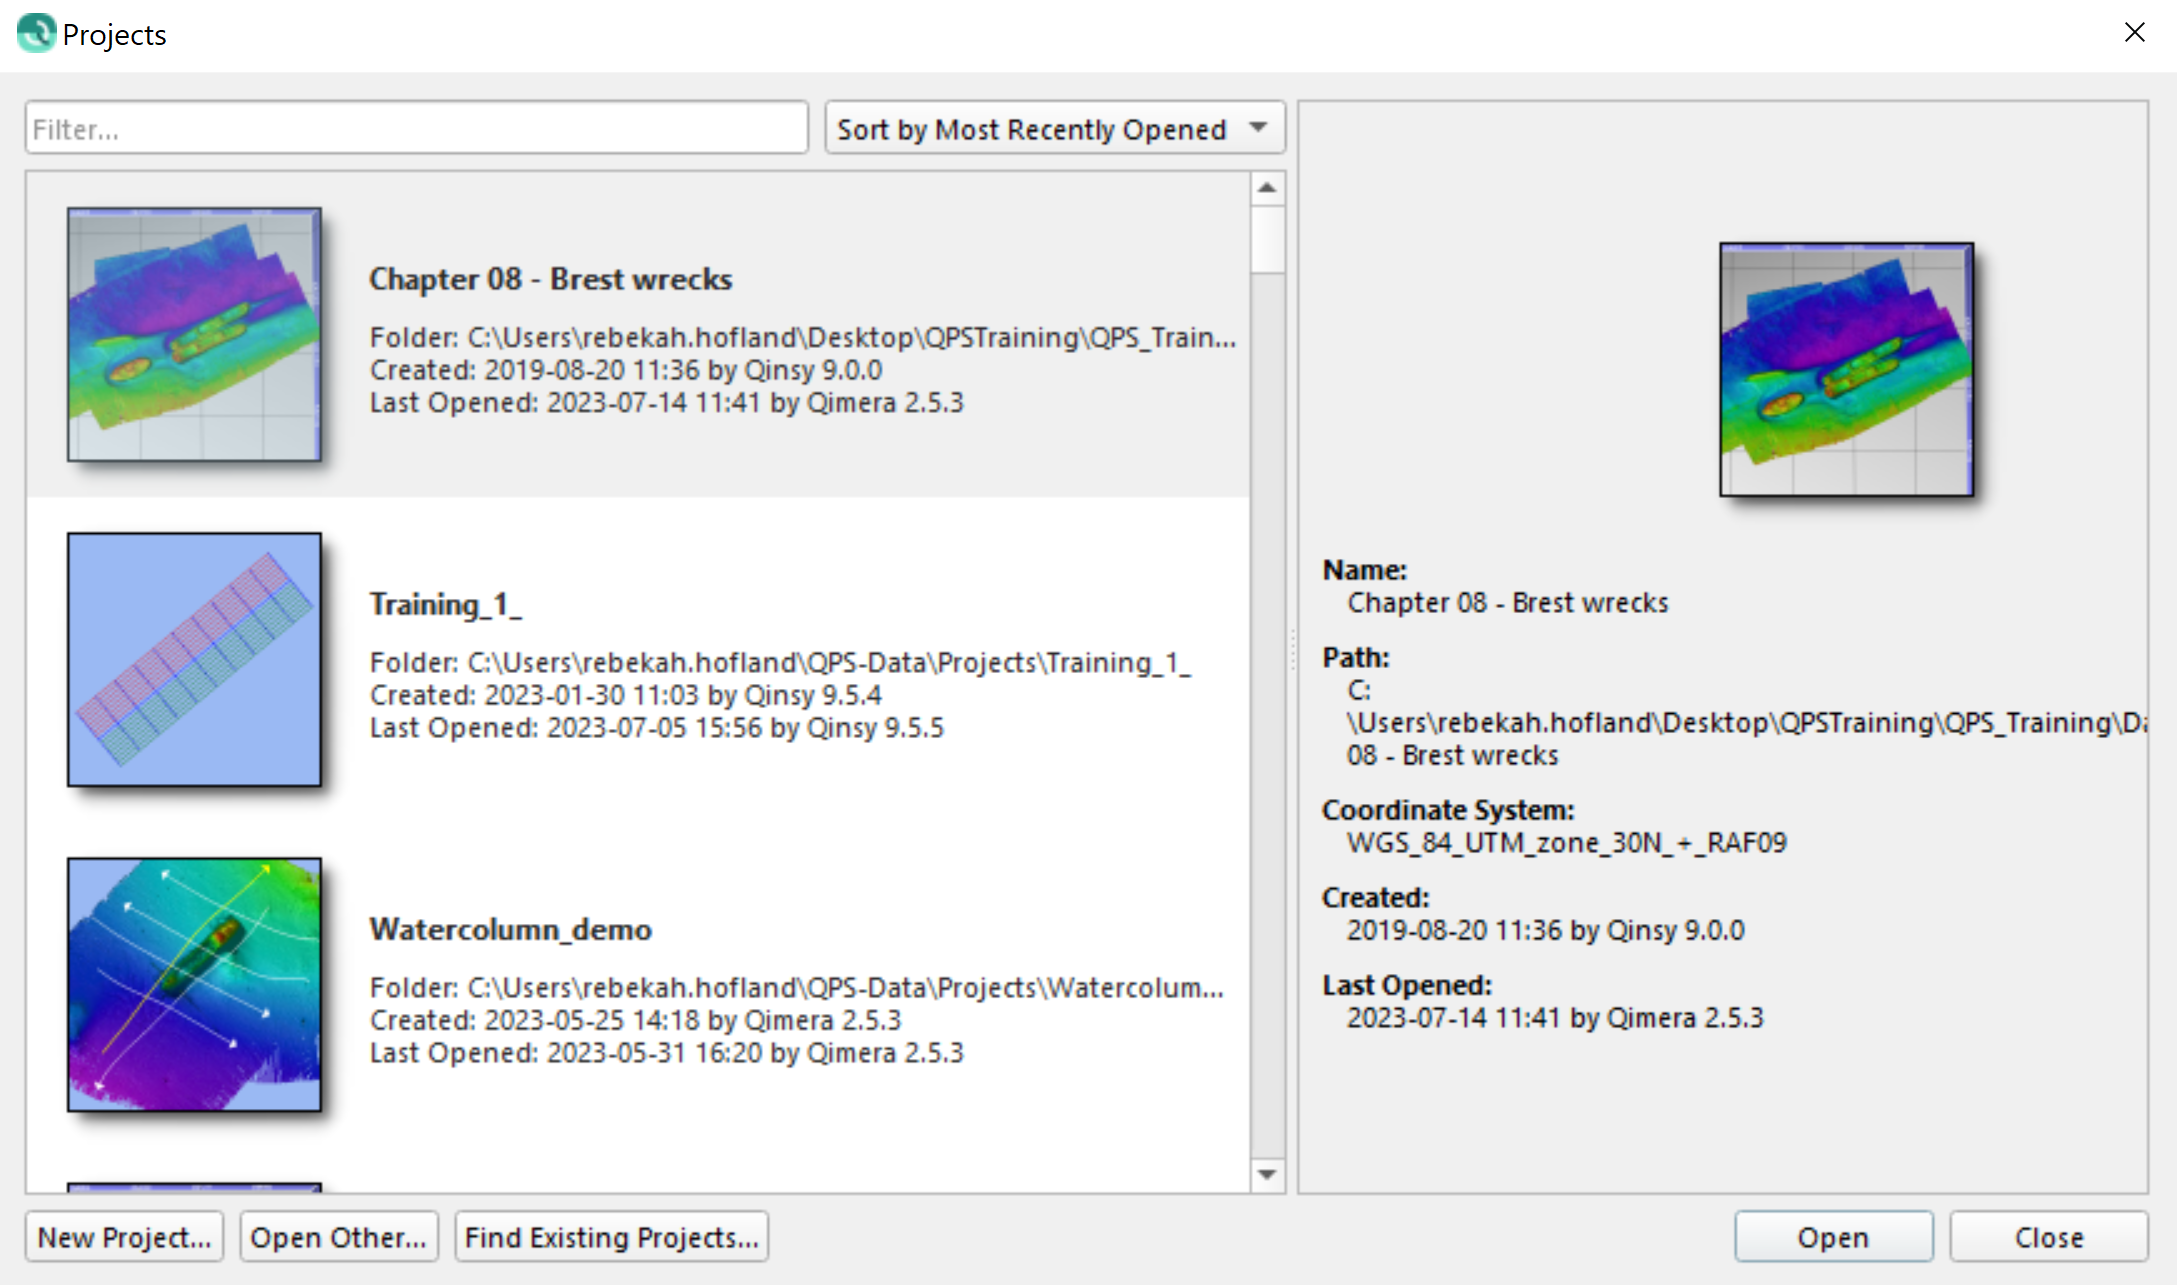
In the dialog there is an option to select an existing project with the option to filter on project name.
The New Project dialog has also been changed. Here the name can be entered and also the geodetic settings.
For the geodetic settings the option to select from Predefined, Previous project or Set up are new.
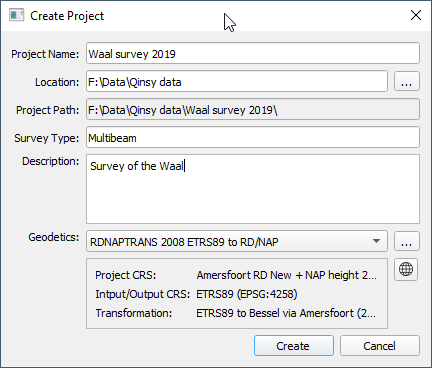
See the Knowledge Base document: Creating a new project
Online
Add the option to monitor a folder for new Sound Velocity Profiles
Using a Sound velocity profile requires some action by the user before this can be used in Qinsy. There are now instruments with wireless communication that take away the step for connecting a cable. With a wireless communication it is also possible to transfer the data automatically.
What has been implemented is that a folder can be monitored for a new SVP file. When a new file is found it will be automatically updated and used. This has been tested for AML and Valeport.
Automatic range update in Navigation Display
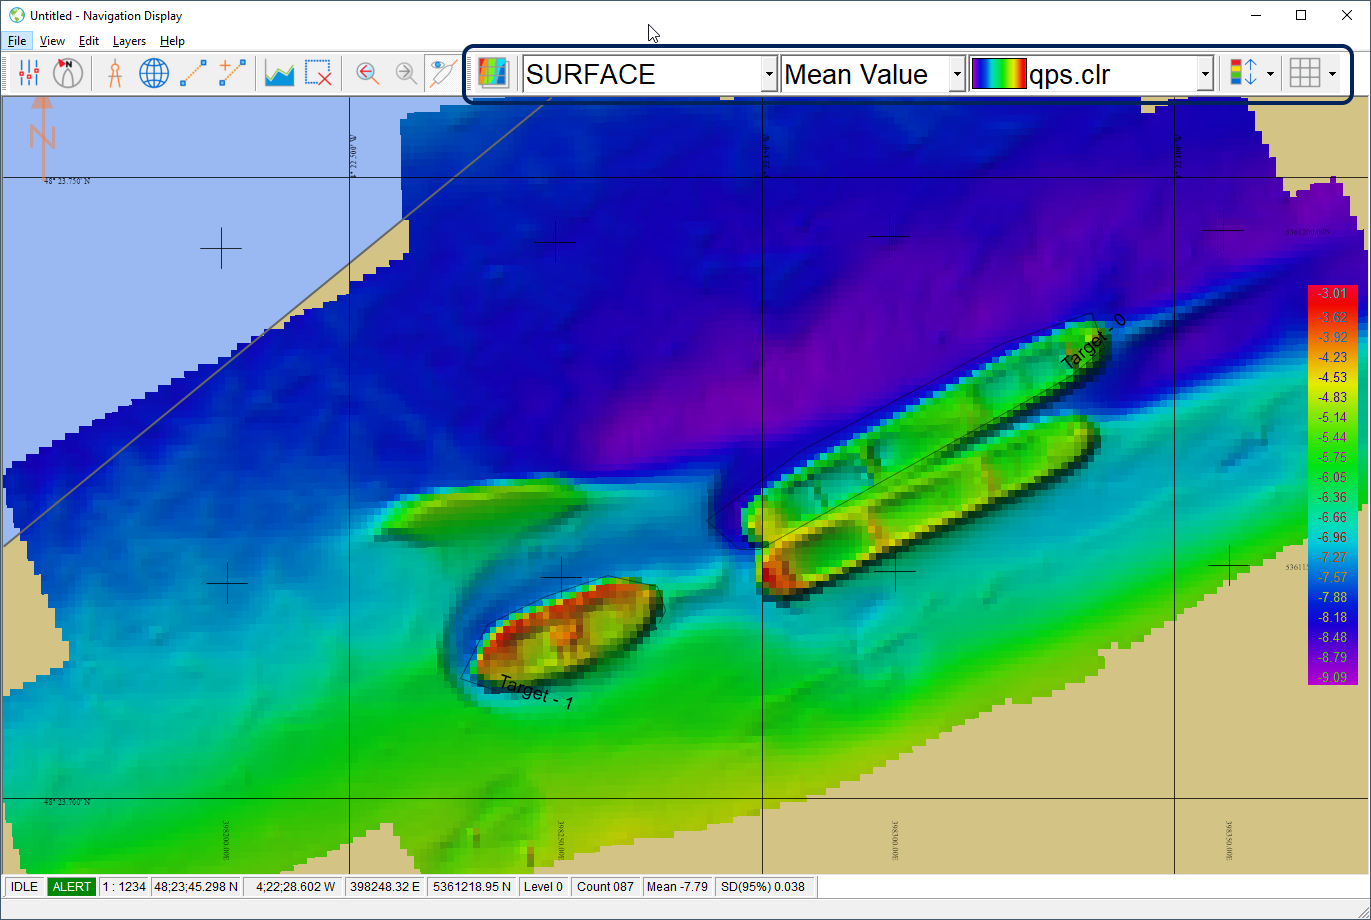
The option to have the color scale adjust automatically to the color range in the current grid – min and max value updates in intervals.
Extended Toolbar to select layer and attribute in Navigation Display
A new tool bar which allows for direct selection of layer attribute and color scale has been added. The new Automatic range can also be selected here (data in view).
Online Line log
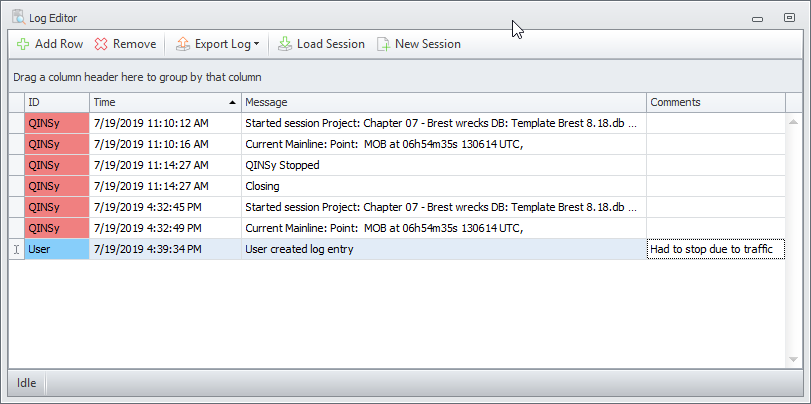
When online a log editor can be opened from the Contoller's Options menu.
This utility always runs in the background while recording data.
It offers the possibility to add lines to the survey log in which user comments can be placed.
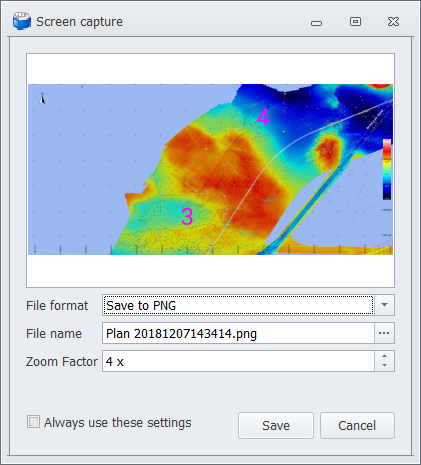
Screencapture/snap shot functionality in Navigation Display
Instead of pressing Alt+PrintScr and having to open a picture editor, you can now press Ctrl+P. A screencapture is taken immediately.
Also, Ctrl-Shift+P can be used and a dialog is opened in which the file format can be selected, a file name, a folder and the zoom factor.
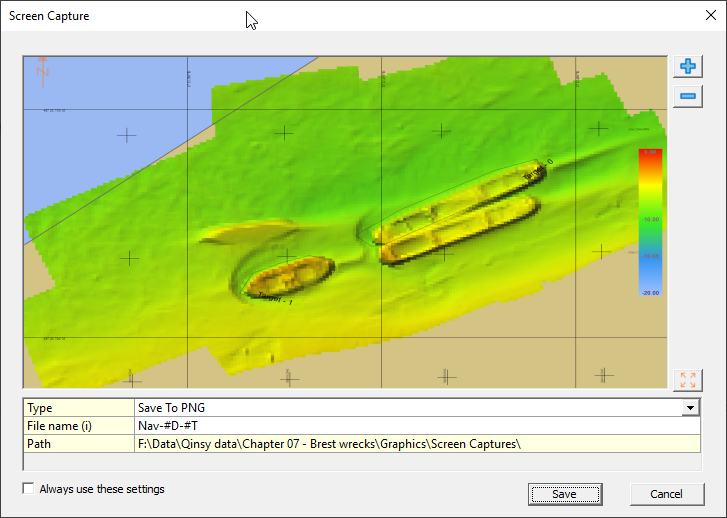
- Supported formats are: PNG, JPEG, PDF and Copy to Clipboard (so you can still open your favorite picture editor).
- The output directory can be in the project or outside. When a project folder is selected, it is updated whenever another project is loaded
- Files will always get a suffix, to prevent accidental overwrites
- Change the zoom factor to get a higher resolution image
- To speed up the workflow, use the 'Always use these settings' option. To modify the settings, use 'Ctrl+Shift+P'
Option to Hide / Show Graphical User Interface of drivers online
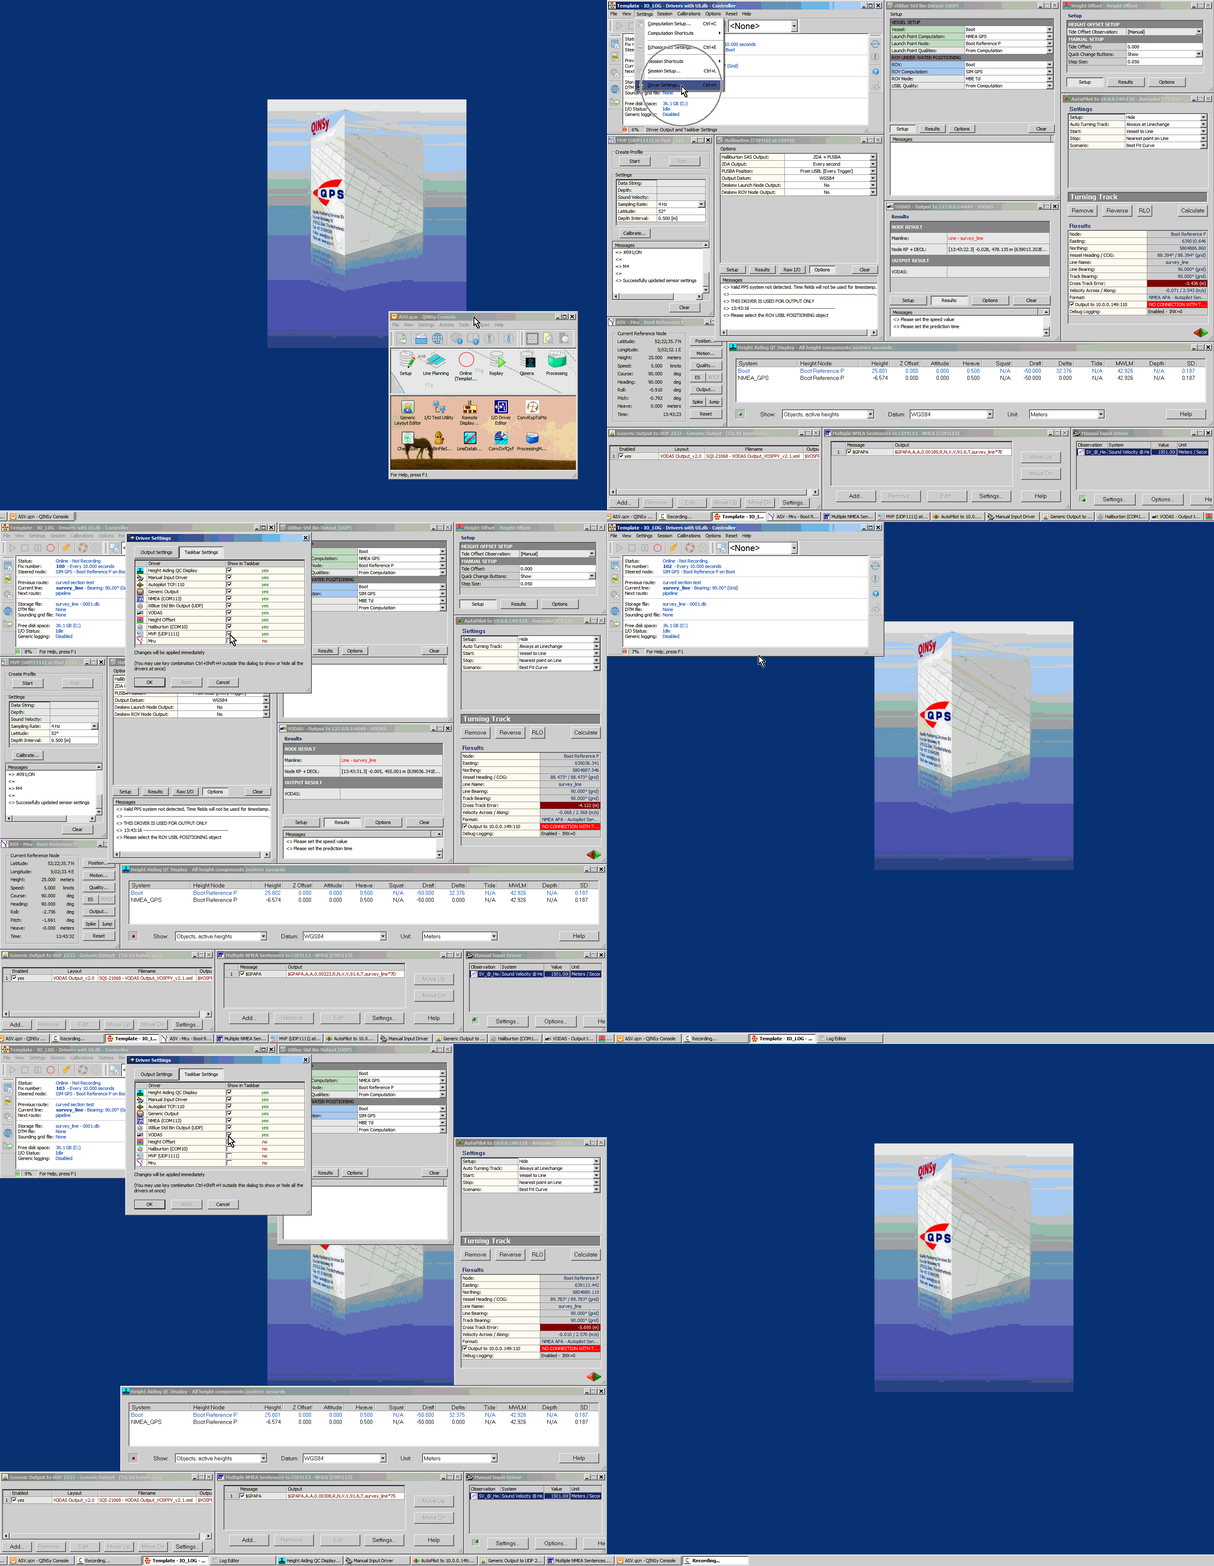
Remember: shortcut Ctrl+Shift+H will quickly toggle all drivers to show or hide them without the need for the dialog to be open.
The Height Aiding QC Display will by default be hidden on a new installation. All drivers with user-interface will by default be visible.
Survey Manager
Export and import for Land XML
The Line Tools - Export to Land XML has been added. Designs and line data can be exported to the commonly used exchange format.
The Line Tools - Import for Land XML has been newly created and more types of data are supported.
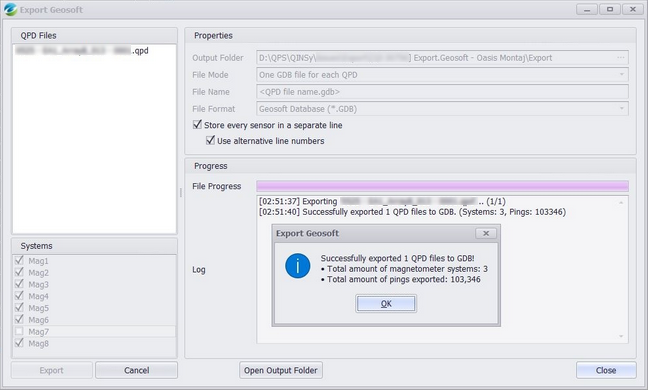
Export Magnetometer data to Oasis Montaj
The export of Magnetometer data to Oasis Montaj has been cumbersome, using ASCII exchange files which required a lot of checks.
The magnetometer data that is stored in a QPD can be directly exported to a Geosoft database. This removes an error prone step in the processing of magnetometer data.
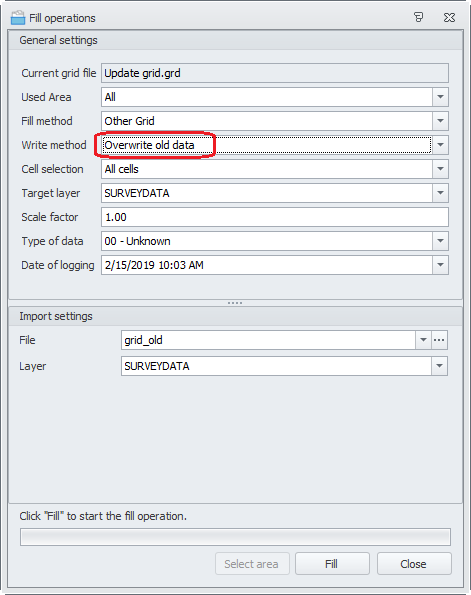
Sounding Grid - Import - Update Grid On Time (latest)
This option allows for updating a grid with new data only in areas where the data is newer.
This requires for a grid to be used that has the date/time attribute defined.
Drape function
A new drape function will be available for users that have the need to extract depths from a grid along a line.
The results are stored in a new line and can be used in variety of ways. For instance, creating a design or using it in a volume calculation.
Exporting the data to a file for further analysis in other software is also possible.
Erase function for Dynamic Surface
It is now possible to erase part of a dynamic surface. This works in a similar way to the Erase option in the Navigation Display and the Quick erase in Qimera.
An area can be selected and the grid in that area will be erased. The footprints in the QPD in that area will get status 'disabled'.
Screen capture/snap shot functionality in Survey Manager
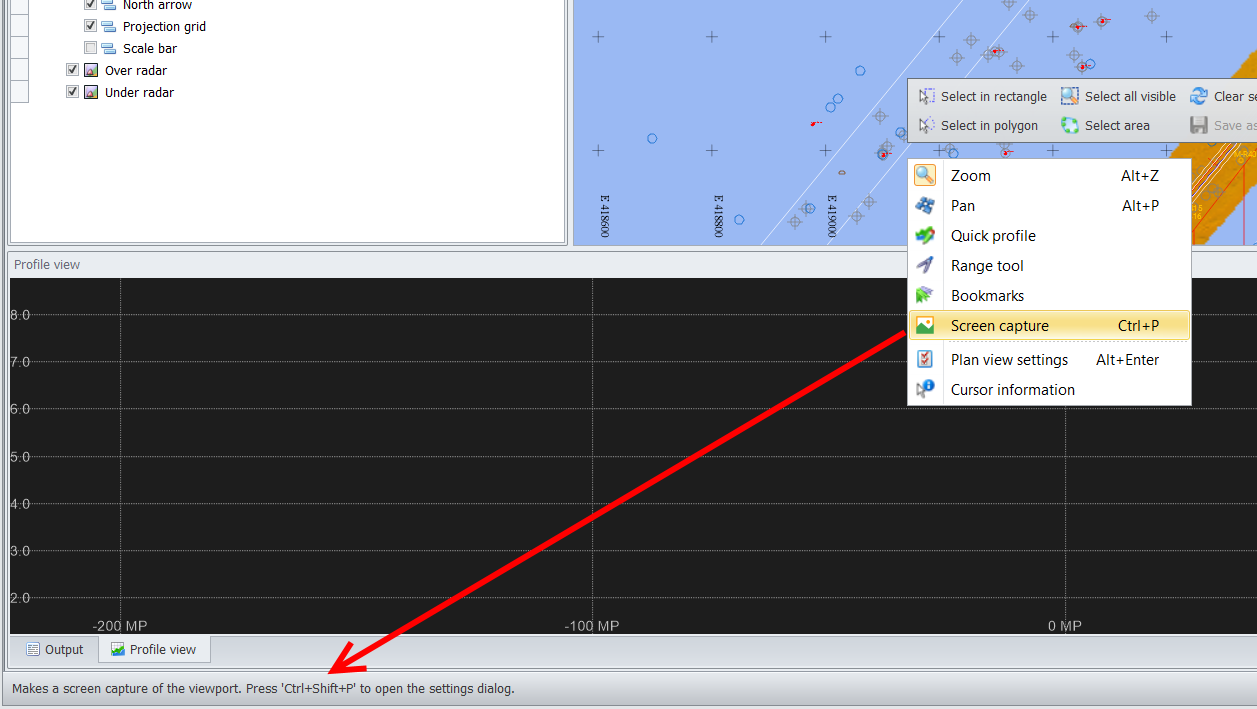
Similar to the functionality in the Navigation Display, as shown above.
Instead of pressing Alt+PrintScr and having to open a picture editor, you can now press Ctrl+P in either the Plan or Profile View.
A dialog is opened in which the file format can be selected, a file name, folder and zoom factor.
Supported formats are: PNG, JPEG, PDF and Copy to Clipboard (so you can still open your favorite picture editor).
The output directory can be in the project or outside. When a project folder is selected, it is updated whenever another project is loaded
Files will always get a suffix, to prevent accidental overwrites
Change the zoom factor to get a higher resolution image
To speed up the workflow, use the 'Always use these settings' option. To modify the settings, use 'Ctrl+Shift+P'
Another addition is that the tool tips are now shown in the status bar when a context menu is shown:
