How-to I/O Driver Editor
This How-to will explain how to create your own driver.
Important: Update files first
With Qinsy 9.4.x all drivers have been updated.
In order to use drivers, created in older Qinsy versions, you will need to open them in the I/O Driver Editor and click through the settings (Next, Next, Finish).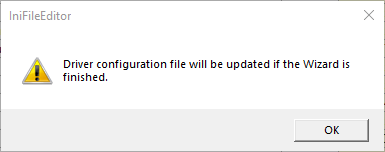
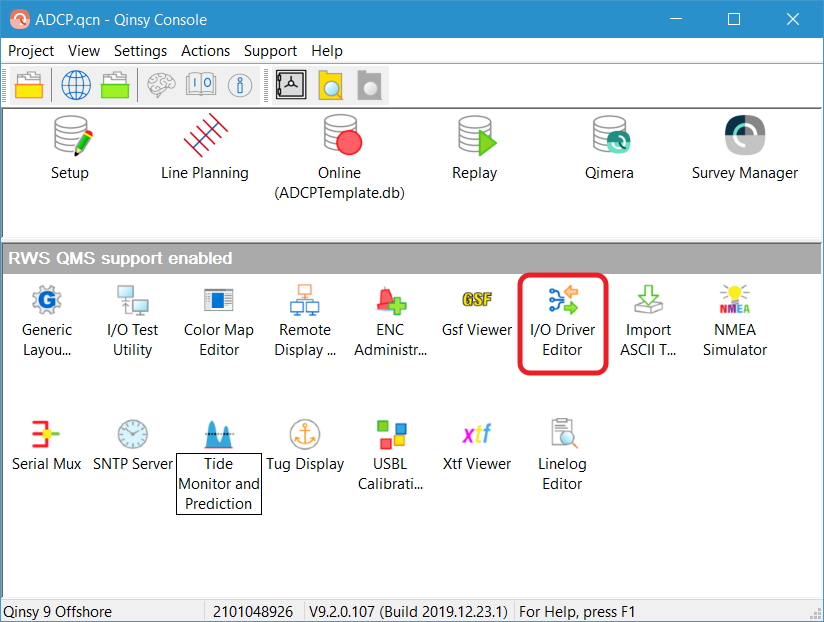
The I/O Driver Editor is technically referred to as IniFileEditor.exe
Purpose
Creation and/or editing of generic drivers for ASCII input
This data string connection can either be through standard RS232 format,
Or through network UDP
Or via an OPC connection
Decoding of multiple systems from a single string
Decoding of multiple strings on a single COM port
For each string that needs to be decoded, a separate driver needs to be created
Adding the I/O Driver Editor to the Console
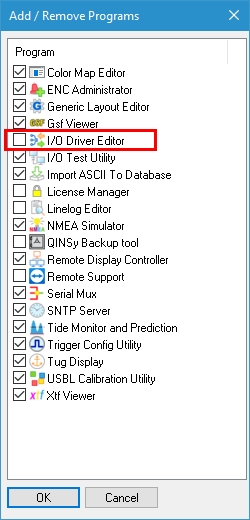
In case you do not see the I/O Driver Editor in the bottom pane, you can add it with the following steps:
Right-click in the bottom pane and select "Add / Remove QPS Programs..."
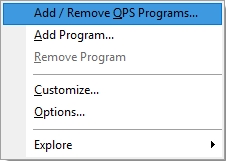
Tick the checkbox
Creating a driver
Delimited strings
Under Type: select 'Generic Input'
Press the 'New' button to create a new file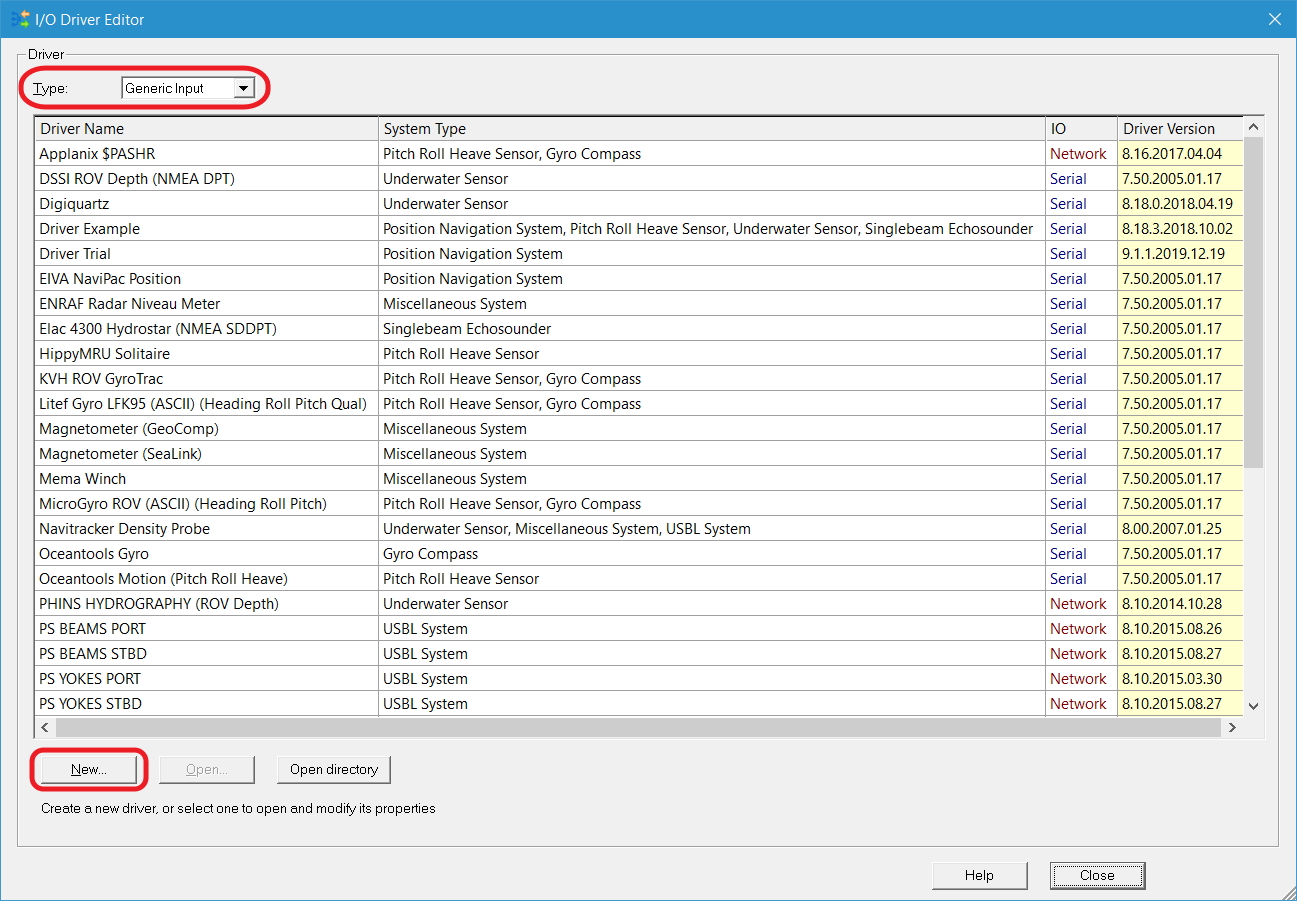
General Information
Enter a name
Start characters can be placed in the name for easy identification
This is the identifier and indicates where Qinsy should start decoding
Define whether it will be decoded via:
Serial
UDP
OPC - How-to I/O OPC Driver
Select System Types
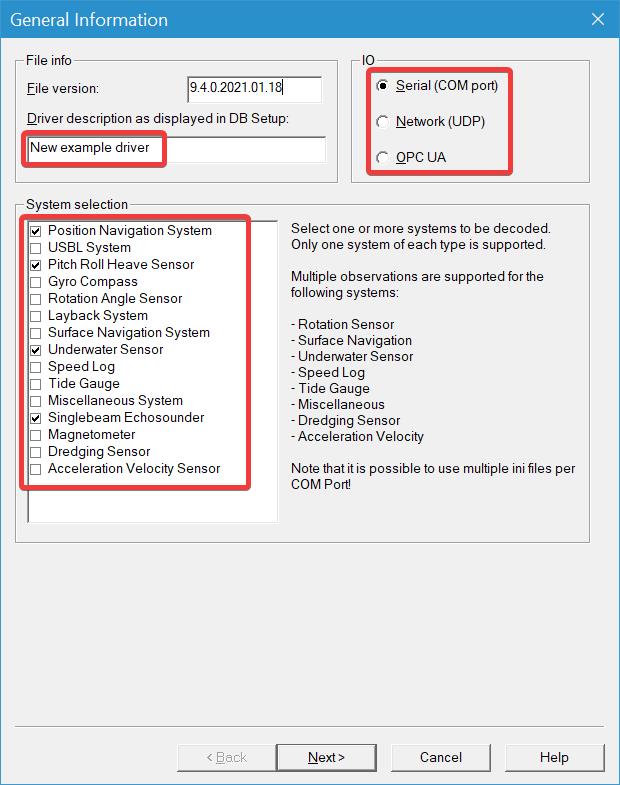
Press Next>
Beacon, object or sensor IDs are not supported.
An example is were you have several of the same data-strings that have a field that indicates it is valid for another beacon, object or sensor ID.
A workaround, in case this is at the beginning of that string, is to include it in the Start character (see below).
In case you have more questions on this, please reach out to QPS support.
Set the Decoding Parameters
String Parameters
Start characters
This is the identifier and indicates where Qinsy should start decoding
Termination character
For most strings this is either a Line Feed (LF) or a Carriage Return (CR)
Separation character
This is often a ",": Comma
Minimum length
Minimum number of characters that will be decoded
Maximum length
Maximum number of characters that will be decoded

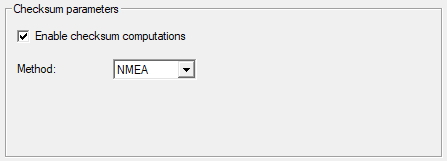
Checksum parameters
In case there is a checksum at the end of a string, enabling this option will give you 4 methods of decoding it:
NMEA
Modulo
CRC16
CRC32
F1 Help inside I/O Driver Editor
For an explanantion of the various Methods, use the inline F1 Help function of the I/O Driver Editor.
Timetag parameters
In case the time in the string is in GPS time, a correction to UTC can be applied
The option to use the date from the system is enabled by default and the date from a data string is not decoded
(See the F1 Help function of the I/O Driver Editor for further explanation)

Press Next>
Set the Decoding Properties
Observations
Each system type has its own list of observation types
Highlight a system and by clicking "Add"/"Remove" you can select the observations that need to be decoded
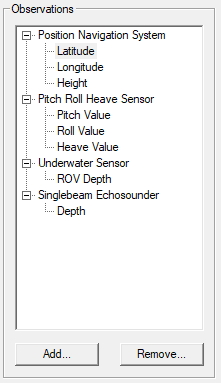
Encoding: this can either be ASCII, the Sine of Angle or EXPONENTIAL
Mask: For a position latitude message, for example, it can be written in several different ways:
Degrees minutes seconds
Decimal degrees
For a System Date, when the 'Use system date' was disabled on the previous page, masks for the date in the string can be selected:
Day Month Year
Year Month Day
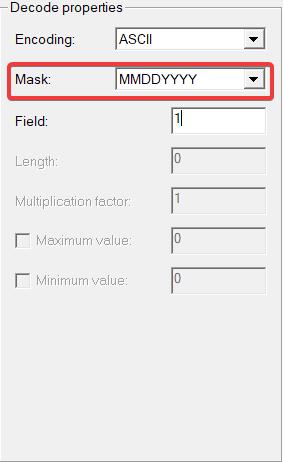
Field
If you use a separation character, this will define the fields:

Length: not applicable for delimited strings
Multiplication Factor: the observation will be multiplied by this value and the result will be used in Qinsy
Maximum value: If it is higher, it will not be decoded
Minimum value: If it is lower, it will not be decoded
Observation name: This is the name you'll see in the template setup and online
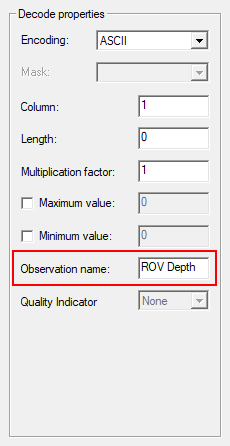
Quality Indicator: If a quality indicator is available under a system that supports multiple observations, it can be assigned to the system-observation is belongs to.
This can be done by selecting the observation and selecting it from the drop down menu, as displayed in the picture below.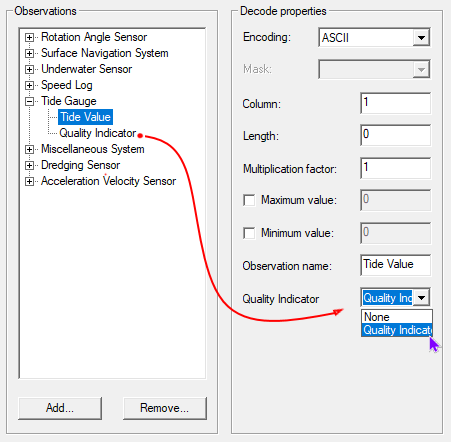
Fixed length strings
For strings that have a fixed length, the steps for creating a driver are slightly different:
Same as Delimited strings
Same as Delimited strings
Make sure to set the Separation character to None

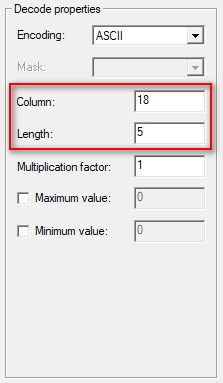
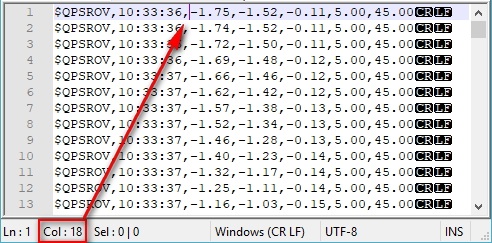
On the last page you can now define where you want to start decoding (Column) and how many characters the observation has (Length).
Adding the driver to the Template
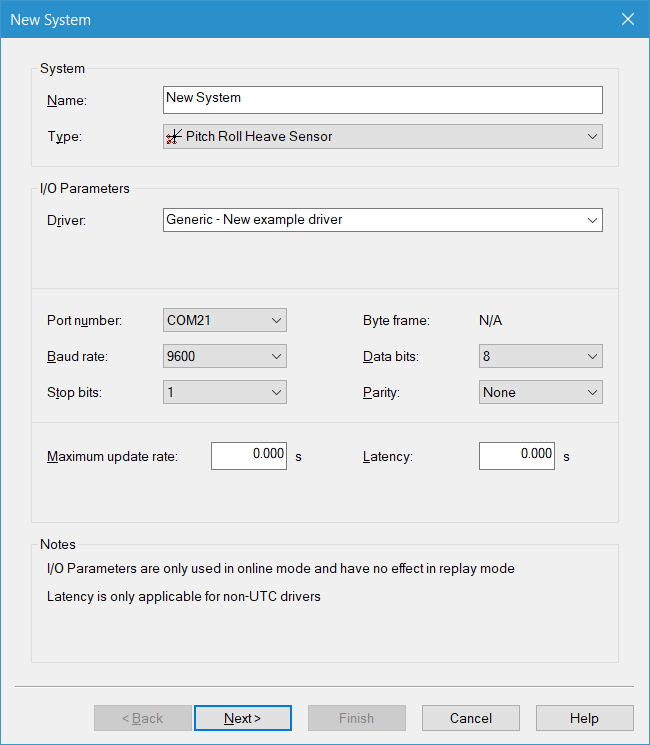
The newly created driver can be found in the drivers list. The name will start with 'Generic' followed the name you entered.
For each system type you defined, you can select this driver. They should then all be able to connect to the same COM or UDP port.
Tip
In case you have modified observation settings in the I/O Driver setup, you might need to remove it from your template and add it again.
We suggest to first check this online in the Observation Physics Display and if it is not recorded to re-add the driver.
Online
The Observation Physics display will enable you to check if the observations are decoded correctly:

Storage location
If you want to use the drivers that you created on another PC, you will need to copy them to the correct directory:
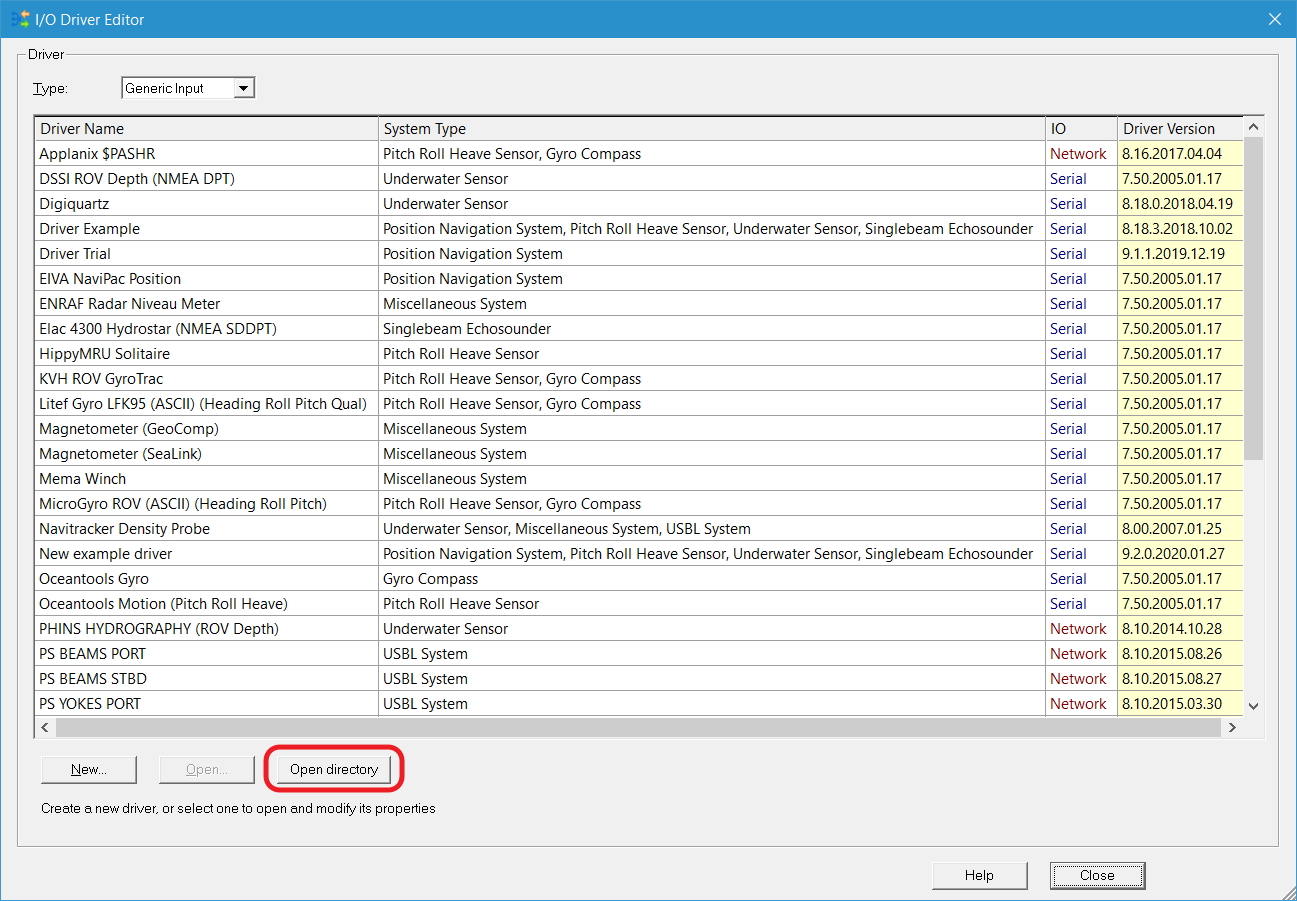
C:\Users\Public\Documents\QPS\Qinsy\Drivers\Definitions\Input |
|---|
A button named 'Open directory' is available in the main display that directly brings you to the correct folder:
