
This How-to describes step by step the definition of the Area Method used in Tide Processing.
The idea is that for different areas (defined by at least 3 grid coordinates), a unique tide calculation method can be defined.
During the process of tide reduction the ping transducer position is used to select the area.
Tide Data Manager
-
Start the Tide Data Manager module from the Survey Manager.
In this program the Definition (QTF) and Data files (QTD) are created.
For the Area Method it is best to use only a single Tide Definition File (QTF). -
Create a new Definition file (see also: How-to Tide Processing).
-
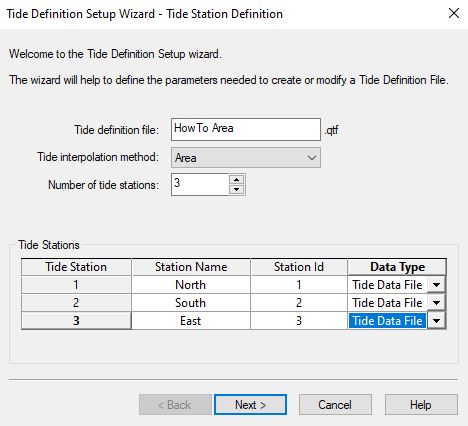
Specify a name for the definition file and select the Area method.
-
Adjust the total number of tide stations that you will be using.
Later on in the wizard the stations will be assigned to the area(s). -
Set unique Station Names, Station Id’s and the Data Type (usually 'Tide Data File' if gauges are used):
-
Press Next.
This will show the Tide Stations Definition page.

-
On this page the station grid coordinates can be entered. For the Area method, only grid coordinates are used.
The time zone is usually left at zero. -
Press Next.
This will show the Area Definition page.
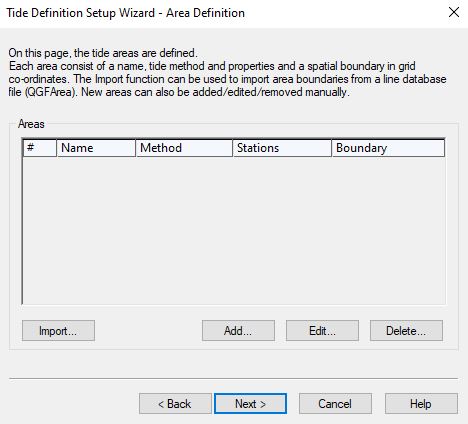
On this page the areas are defined. Here you can enter an unlimited number of areas. The area boundary can be entered manually or imported from a *.qgfarea file (formerly *.PRO file).
We strongly advise setting up the polygons in the Line Tools module of the Survey Manager first to prevent mistakes. Save to an Area database (*.qgfarea) file and import it in here.Defining neighboring areas
Make sure that areas align perfectly or keep a tiny overlap between the areas.
This is to ensure that the Tide Processor finds no transducer positions located in gaps between defined areas.
In such a case, a 'No area found' error message is triggered.
-
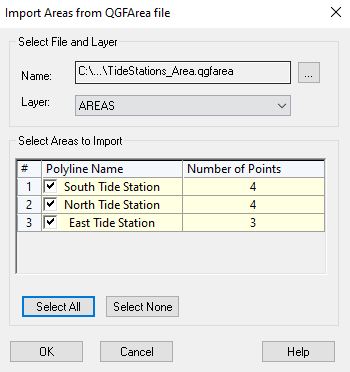
Press Import.
-
Select *.qgfarea file.
-
Select the appropriate Layer (usually AREAS).
The Import dialog shows only polylines with at least 3 points. -
Select the Area(s) you wish to import.
-
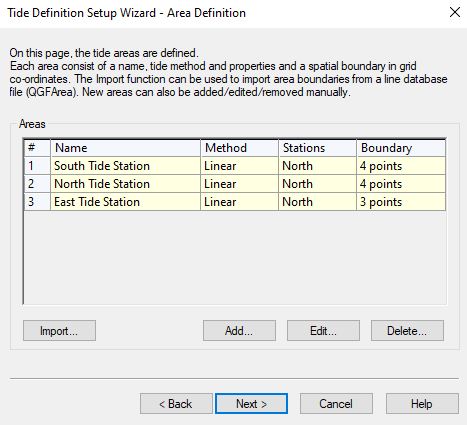
Press OK.
The areas are imported with default stations used.
-
Now edit the area (Edit button or double click in the Area grid).
This will launch the Tide Area Properties dialog.
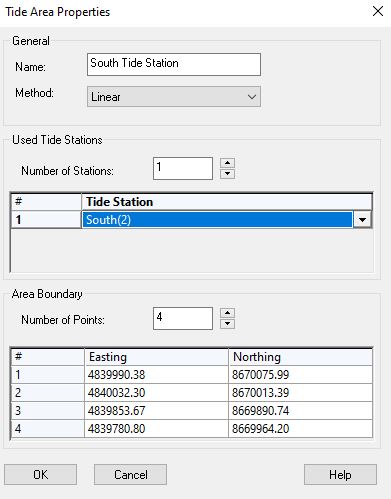
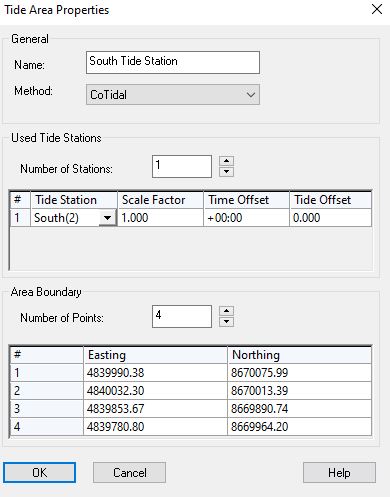
In the left picture, linear properties are shown, in the right picture co-tidal properties are shown. -
Select an appropriate Name, by default the Area name from the Area file is used.
-
Select Method (in this example co-tidal or linear).
-
Select one or more Stations. Stations should be unique. The vertices of the selected area are listed under Area Boundary. Click OK.
For a square area only 4 points are required, a 5th point (same as 1st) is not necessary. Note that the coordinates can also be copy/pasted in from for instance Microsoft Excel.
One or more stations can be selected. This is also allowed when the co-tidal method is used. In this case the final tide is determined by determining the co-tidal corrected tide for the stations. -
Press Next and Finish to create the QTF file.
The tide gauge data should be imported into the QTD files: How-to Tide - Tidal Data.QTDs
Note that for QTDs, data must be available for the duration of the survey for all used stations; otherwise the tide reduction process will fail.
-
Close the Tide Data Manager after QTF and QTDs are defined.
-
Select the QPD files that are to be reduced and start the Tide Processor module.
-
Press Start.
See for more information the document 'How-to Tide - Tide Processor'.
If no fault messages were displayed in the progress box then the tide reduction was executed successfully.
Position outside areas
For the Area method it may occur that the tide reduction fails due to the fact that the position of the data lies outside all the defined boundaries.
In that case a warning message is shown with the faulty position.