
How to Start
Static Horizontal Shift Tool option from the Tools→Dynamic Grid Shifts menu in the Main Menu bar.
What it Does
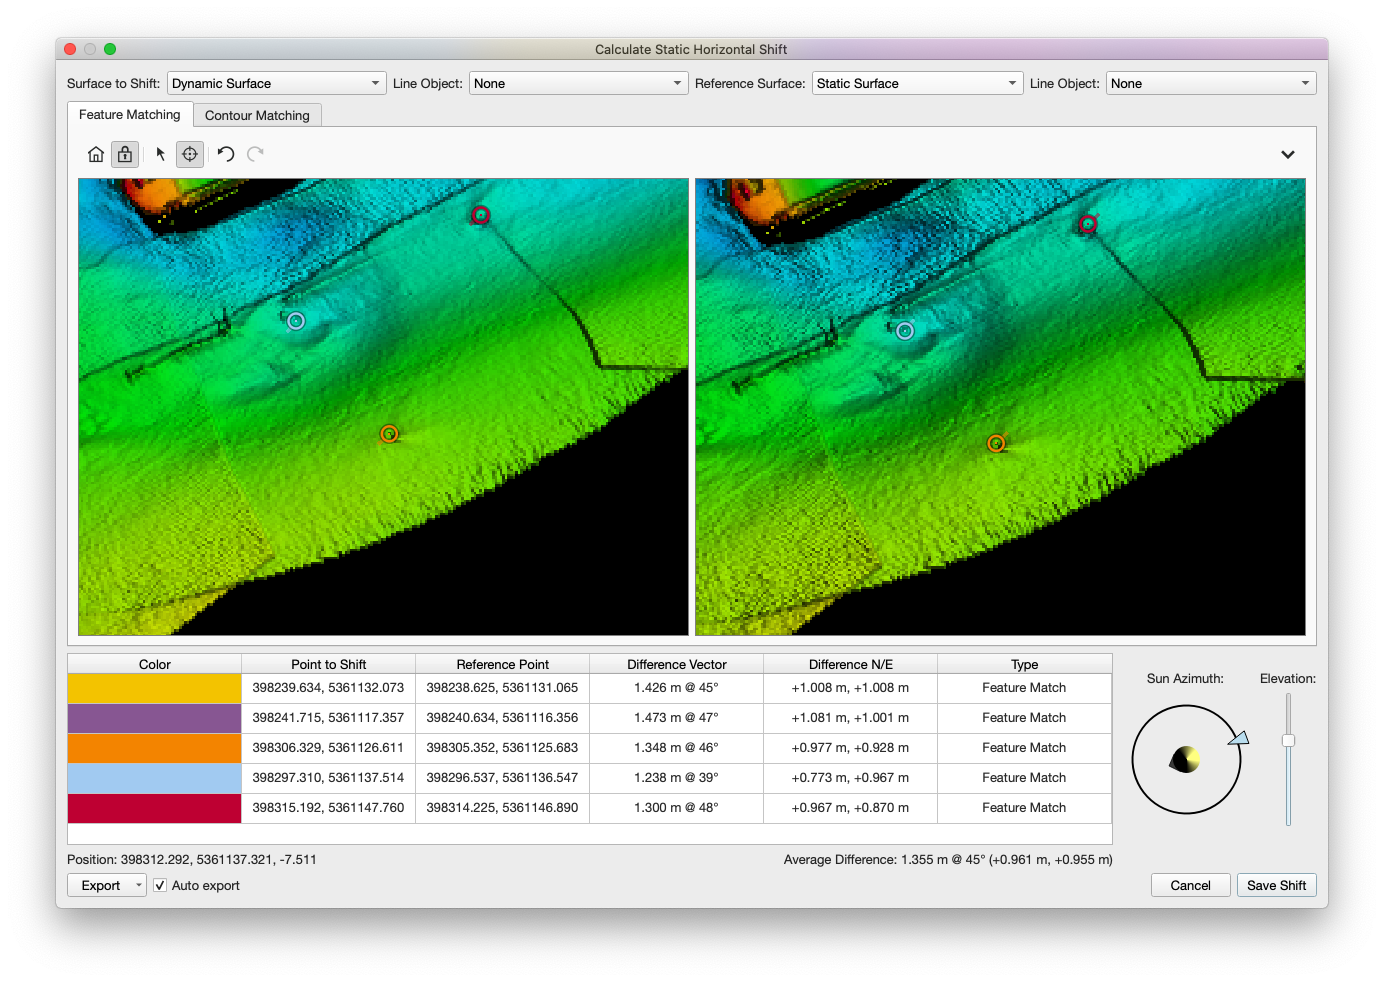
The Static Horizontal Shift Tool allows a user to align a Dynamic Grid from a survey to another reference grid using either point selection feature matching or contour matching. Feature matching allows the user to select a number of corresponding point pairs on each grid while contour matching allows the user to visually align two contours within a given area. Qimera collects a table of these differences as the user moves around the grid adding more and more pairs, automatically computing the average difference. When satisfied, the user can then choose to apply a shift to the raw sonar files in the dynamic grid to minimise this difference.
General Description
The average horizontal offset is computed by averaging the horizontal displacement of all fiducial pairs in the Point Table. As fiducial pairs are registered by clicking on like features or manually aligning contours, symbolic color coded icons appear that represent the location of each pick.
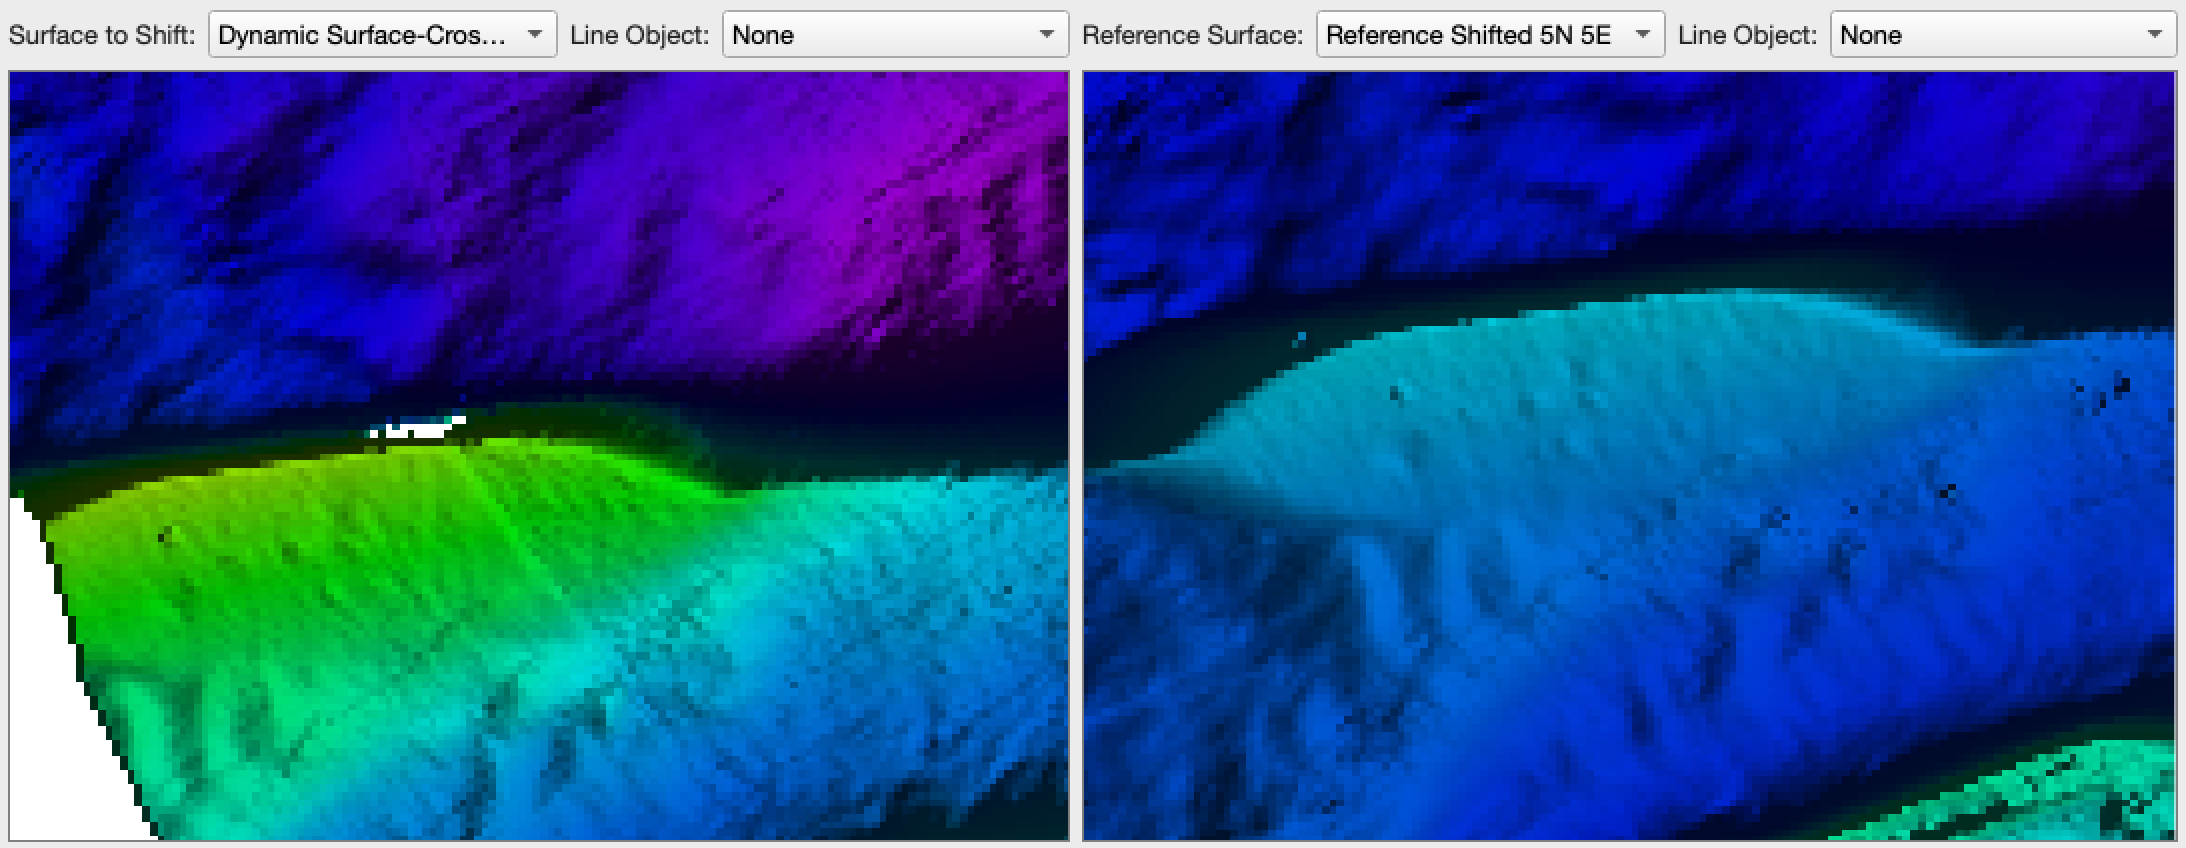
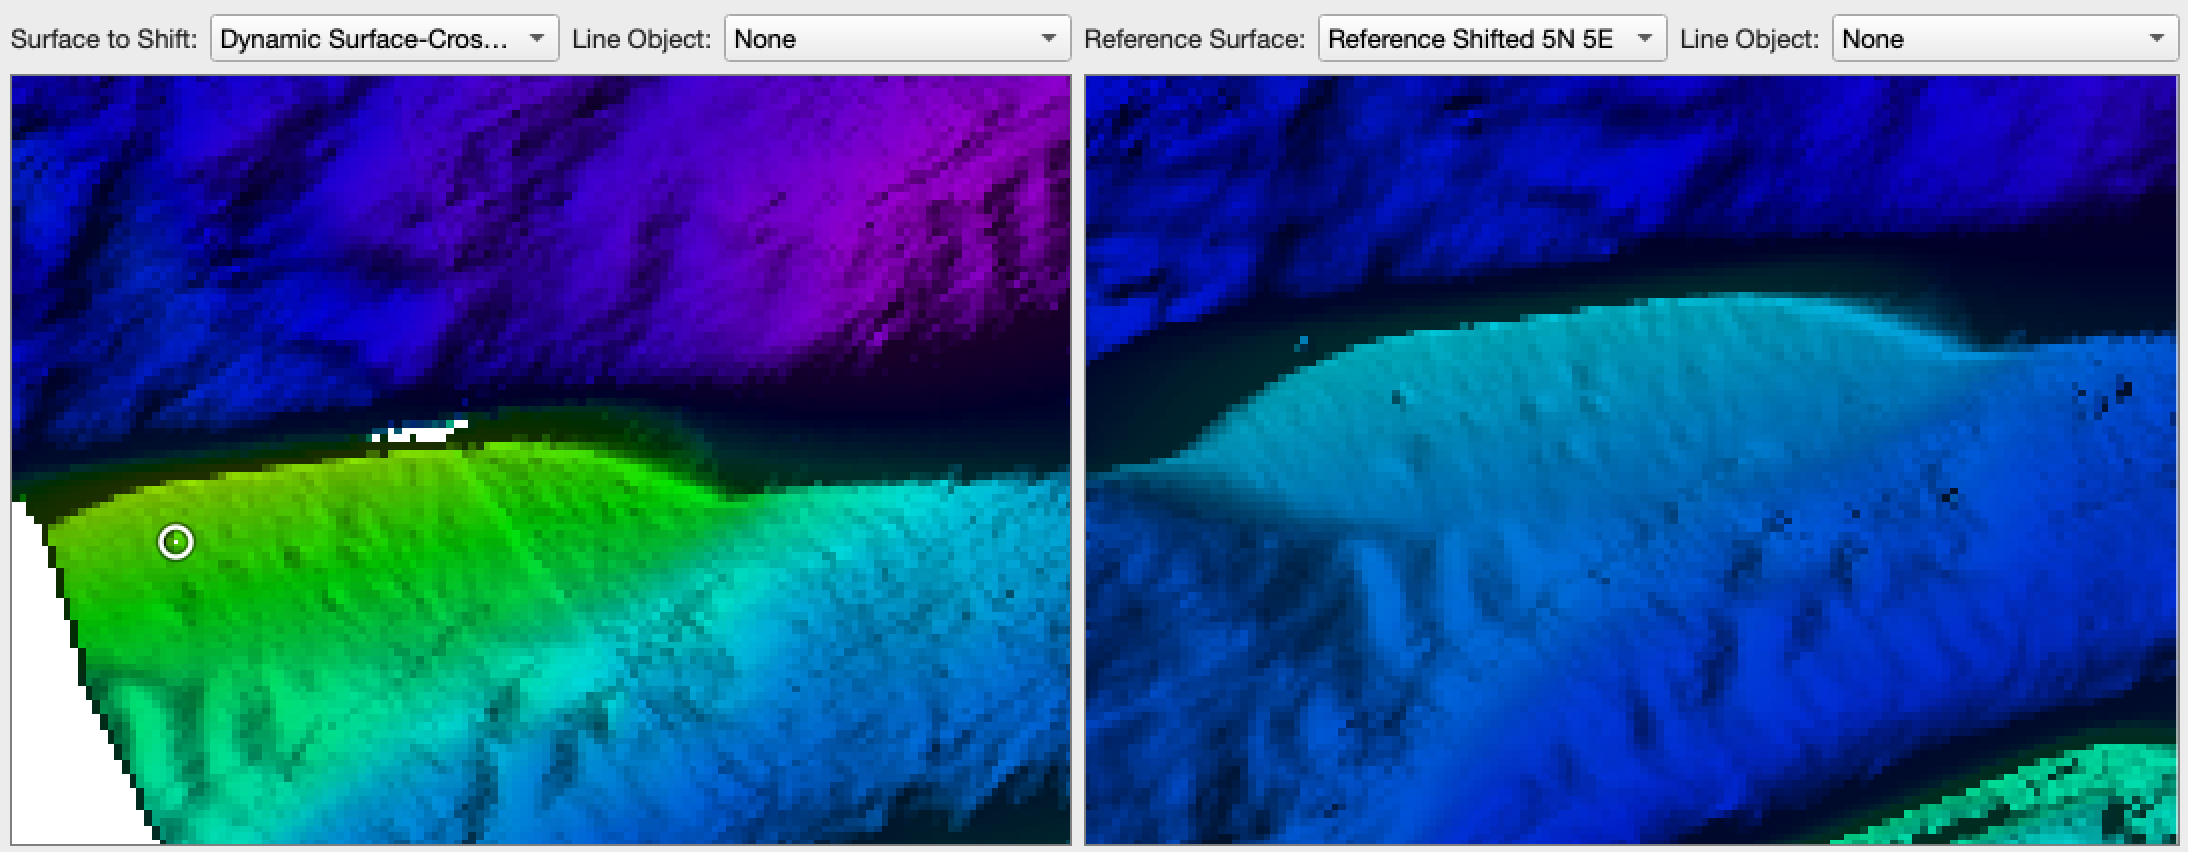
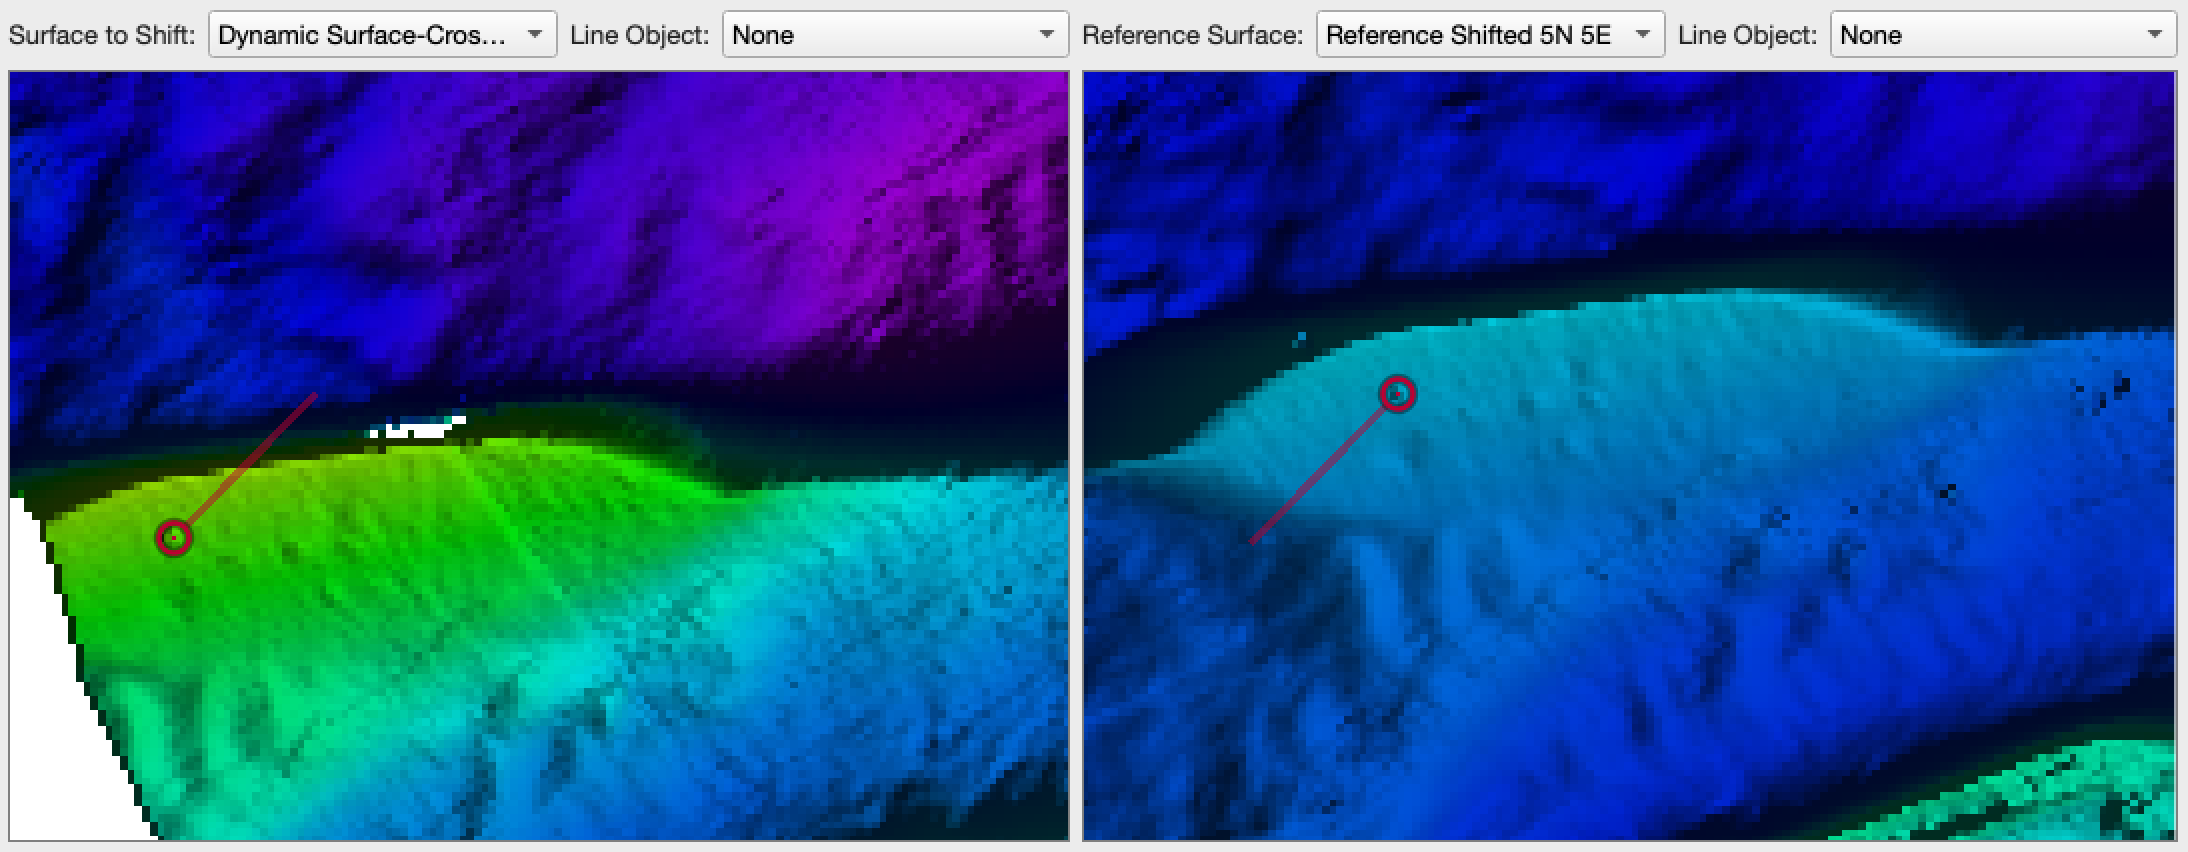
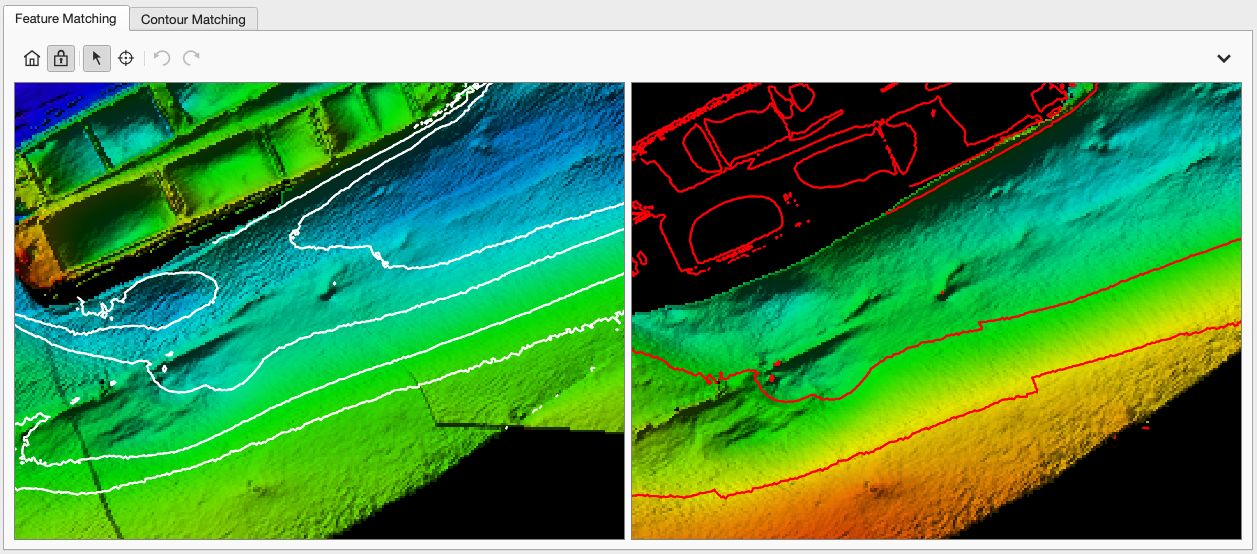
Feature matching will display a circular icon that has a "tail" that extends to the corresponding fiducial position in the opposite grid view. You can start a pick pair in either grid view. The panels below show how the icons appear as you start and finish your pick on a feature. In this example, the user chose a simple bump that appeared in both grids. As you pick, the points are also added to the Point Table.
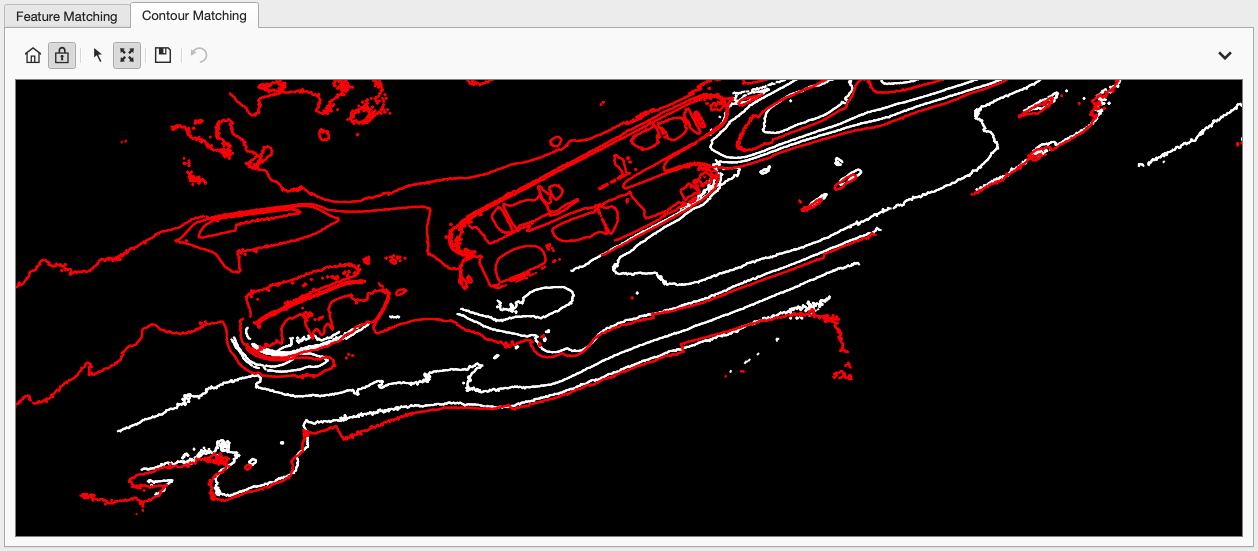
Contour matching will display two square icons with a connecting line that indicates the start and end location of the manual contour shift. In the associated example we can see four fiducial point pairs generated after four subsequent alignments.
Initial view:
First fiducial point picked:
Matching fiducial point picked:
Contour Matching Fiducial Points:

Toolbar
Feature Matching Toolbar
Contour Matching Toolbar

If you have zoomed into an area of the plot, this button will zoom out to the extents of the data.
 Synchronize Grid Views
When this option is on, the center of each grid view will be the same world geographic location as you pan or zoom. If you uncheck this option, you can then pan/zoom the views independently.
 Explore Mode
This is the primary mode of the tool. As you move your cursor over a grid view, the label in the lower left of the window will update to show the Easting, Northing and Depth values. This mode also allows you to pan and zoom the grid views.
 Feature Matching Pick Mode
This mode allows you to pick fiducial points on each grid. You can still pan each view by holding down the Shift key while left clicking. Remember that the Shift key always overrides the active mode of a plotting grid and allows you to click-drag to pan the window. For more information about navigating within a plotting window, see the section on Plotting Grids. After you have made a pick, the location will have a white circular icon. It will remain white until you pick the corresponding fiducial point in the opposite window. You can start picking a fiducial point pair in either window. You can use the Undo button to undo the last pick you made.
 Contour Matching Pick Mode
This mode will enable you to drag the selected Grid to Shift Line Object when you are contour matching. You can still pan the view by holding down the Shift key while left clicking. After you have completed the translation, click the Save button to save a fiducial pair. The view will reset and the saved start and end locations of the shift will be represented by a color coded box connected by a line for visual reference. You can undo any previous entry using the undo button.
 Undo
Undo
This will undo the last entered fiducial point or Remove Point Pair operation from the table context menu.
 Redo
Redo
This will redo the undo operation.
 Menu
Menu
Remove All Point Pairs
This will clear the point pair table.
Grid Views
The grid views part of the dialog helps you see corresponding features or contours and pick them as fiducial points to help compute the average XY offset to apply.
The Feature Matching view has a left and right grid view. The left view is the Grid to Shift view. The first combo box contains all of the Dynamic Grids in your project. If you started this tool with a Dynamic Grid Selected in the Project Layers Dock, this grid will be selected in the combo box. The Line Object combo box helps you display visual aids such as contour lines. Currently you can only display 1 of these in each view for clarity.
The right view is the Reference Grid view. The first combo box contains all of the Dynamic and Static Grids in your project. The Line Object combo box helps you display visual aids such as contour lines for that grid.
Context Menu
The Contour Matching view displays lines or contours selected in the Line Object combo boxes. To ensure easy differentiation it is advised to set the line object layer colors in the Project Layers Dock prior to using this tool.
Pair Table
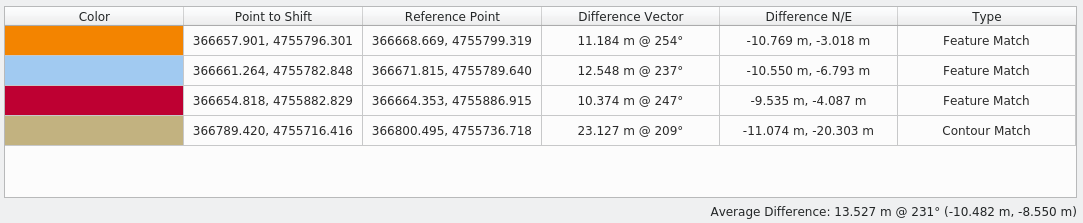
This table contains all of the collected fiducial points pair. The table contains the easting/northing positions of both points, the difference between them expressed as both a distance/bearing and as northing/easting deltas as well as which view was used to generate the pair. All of these differences are averaged to calculate the final average difference shown below the table.
Right clicking on a row displays a context menu offering the following actions:
Center View on Point Pair
This option centers the left window on the fiducial point location. If the views are locked, the right view will pan to this geographic location.
Remove Point Pair
This option will remove the currently selected point pair. You can Undo this operation.
Lighting Control
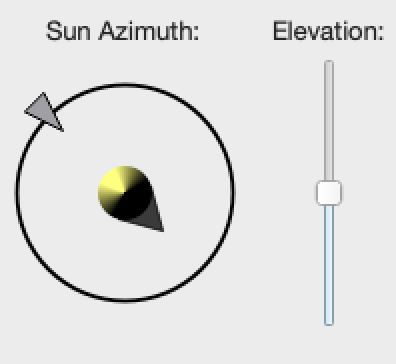
The lighting controls help expose features on the grid which can help with picking corresponding fiducial points. See the section on the Shading Parameters Dialog for information on how to use this control. The only difference here is that the control is Dynamic, in that, the lighting changes appear instantly on the grids. Additionally, the lighting control pays attention to the state of the Lock button on the toolbar.
Export Button
Export Table as Text
This will export the fiducial point table to a text file.
Export Feature View as Image
This will export the Feature Matching tab map view as an image file.
Export Contour View as Image
This will export the Contour Matching tab map view as an image file.
Export Window as Image
This will export the entire contents of the dialog as an image. This is useful for an overview for reporting.
Export Scene as Image
This will export the main Qimera window scene work area as an image.
Export All...
This will launch a dialog and allow you to specify the location and items you would like to export. The selectable list contains the content listed under 'Export Button'.
Auto Export Checkbox
Selecting this box will automatically save all of the listed exports under the Export Button to a unique timestamp folder in the current projects export directory.
Cancel Button
This button will cancel the operation and exit the dialog.
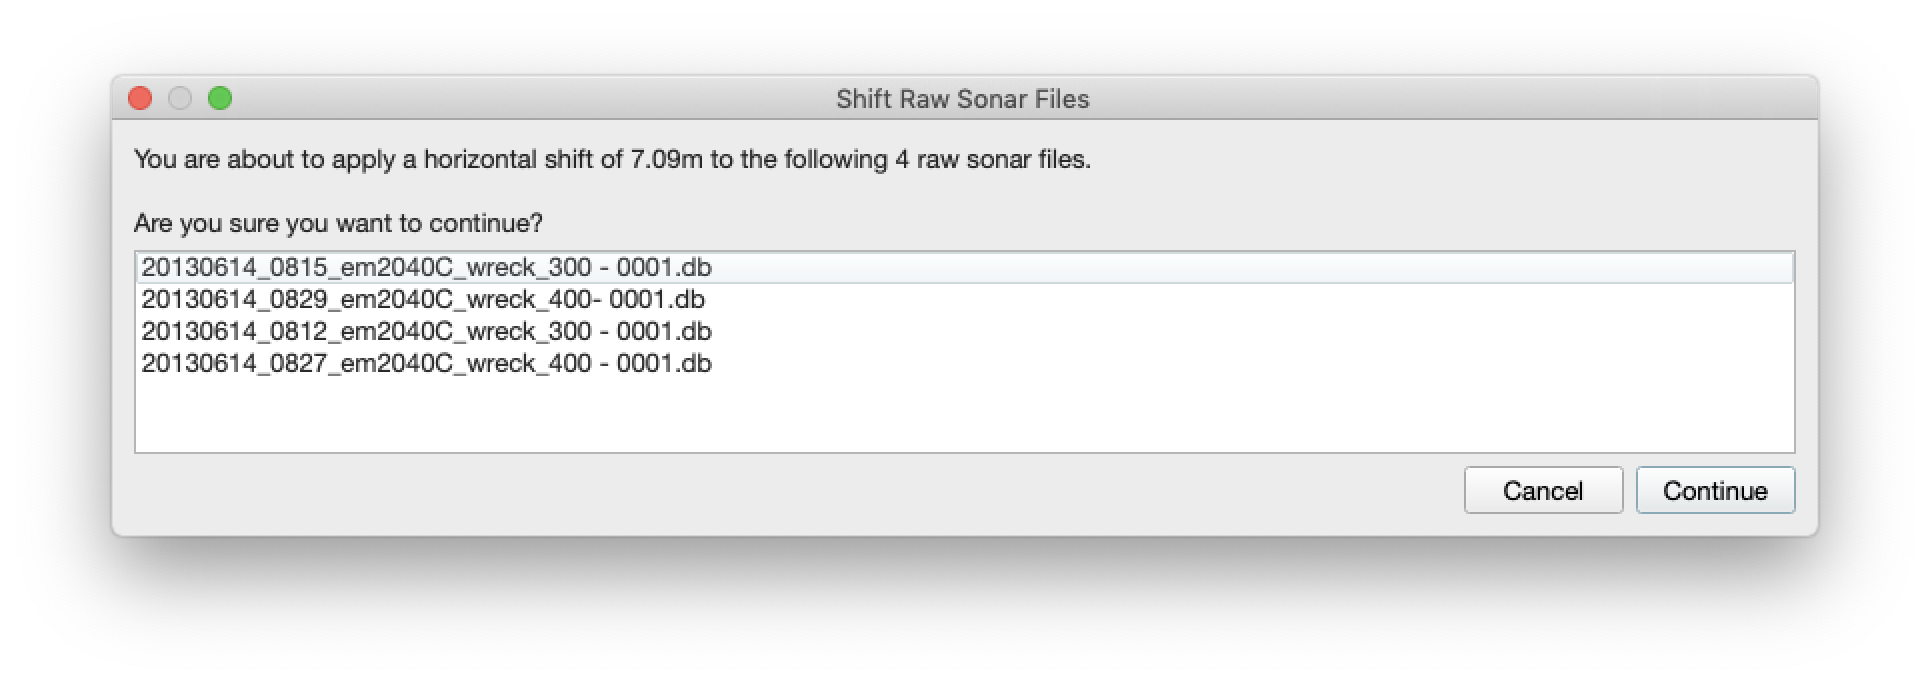
Save Shift Button
When you click this button, you will get a confirmation dialog indicating the amount of shift applied and which specific raw sonar files will receive the shift. If you click Cancel, you will cancel the shift operation. If you click Continue, the shift will be applied and Qimera will prompt you to reprocess the affected files.
Return to: Qimera Dynamic Grid Shifting Tools
Return to: Qimera Table of Contents