How-to Use the Wobble Analysis Tool
This How-to describes the use of the Wobble Analysis Tool to test for and correct common motion and offset related problems
For more in-depth information on the effects that changes in this tool have on your data, please visit the Qimera Wobble Analysis section of the Qimera Reference Manual
On this page:
Setting up the data & activating the Wobble Analysis Tool
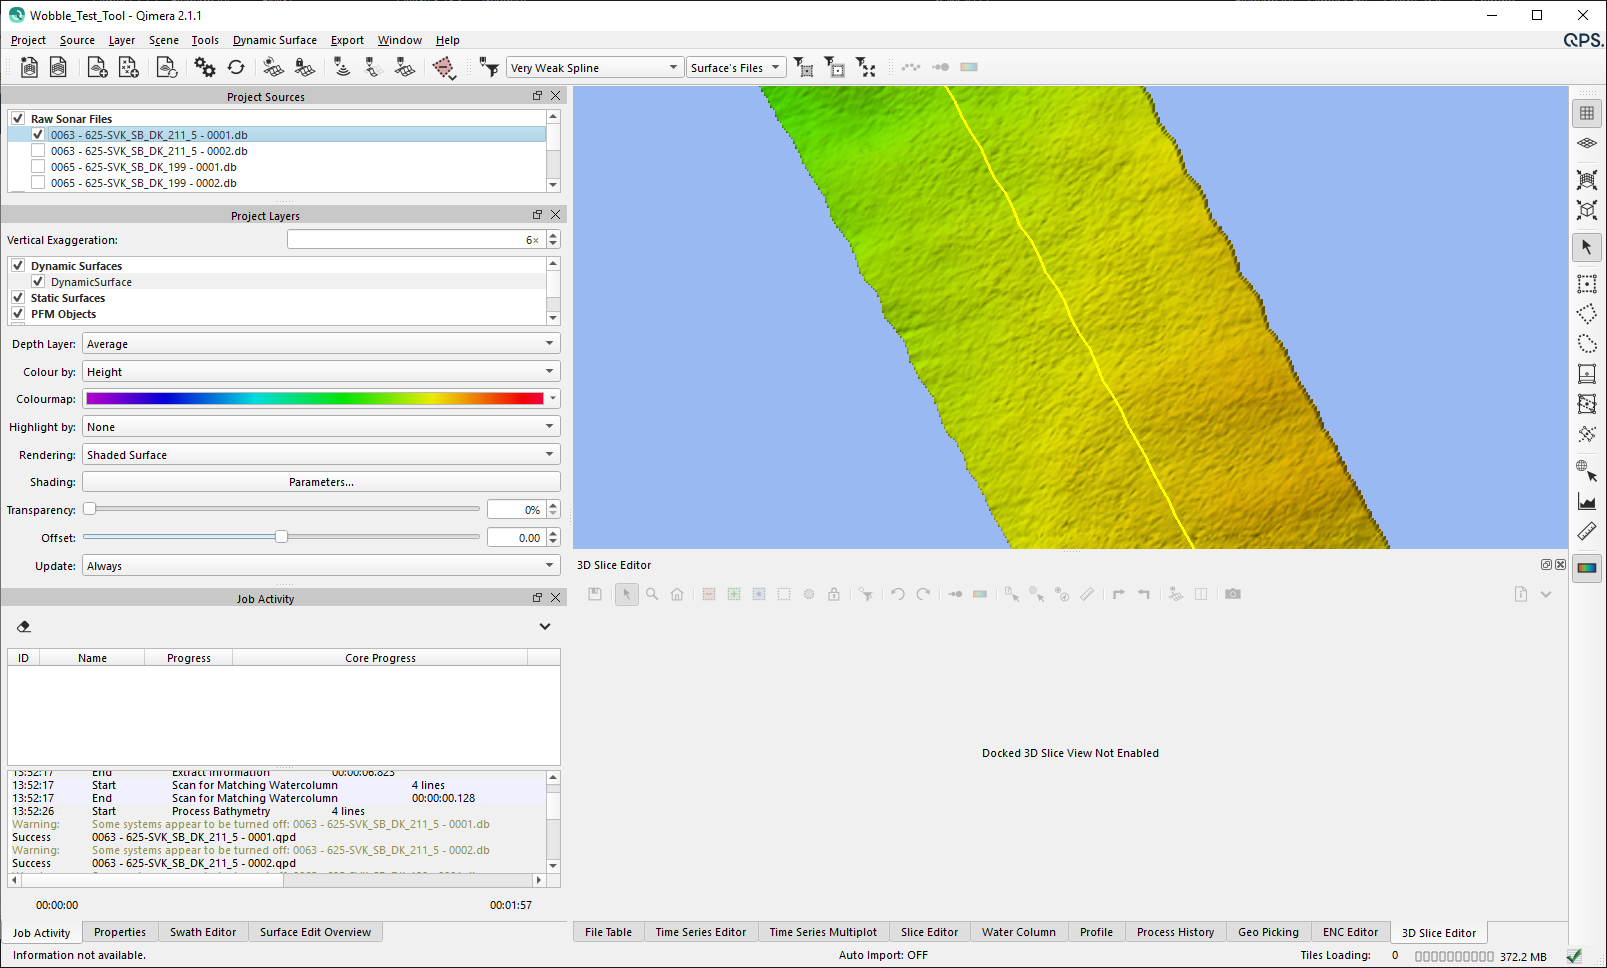
- Ensure you have loaded Raw Sonar Files into your project. These can be added using the 'Source' pull-down menu (1) at the top of the main window.
- It's best to first build a dynamic surface from the line you intend to use the Wobble Analysis Tool on. Select the sonar file you will be using the Wobble Analysis Tool on from within the Project Sources window (2). This window can be toggled in the 'Window' pull-down menu (3).
Select 'Create Dynamic Surface' from the 'Dynamic Surface' pull-down menu (4) or click the 'Create Dynamic Surface' Icon (5). - Select a single line to be loaded into the Wobble Test Tool from within the Project Sources window (2).
- In the 'Tools' pull-down menu (6) at the top in the Main Menu bar, select 'Wobble Analysis Tool'. This will populate the Wobble Test Plot Dock with your selected line loaded.

Wobble Analysis Tool Dock Overview
Once the Wobble Analysis Tool is selected, the Wobble Test Plot & Wobble Test Control docks will populate.
Please note, the data displayed here has been exaggerated in order to easily illustrate the effects of the Wobble Analysis Tool.
- When the Wobble Analysis Tool is open, a selection box will be placed over the data in the 4D Scene window. It can be moved, resized and rotated using the nodes on the selection box itself.
The white arrow indicates which direction the soundings will be viewed in the point cloud display within the Wobble Test Plot dock.
- The Wobble Test window can be divided into 3 main areas:
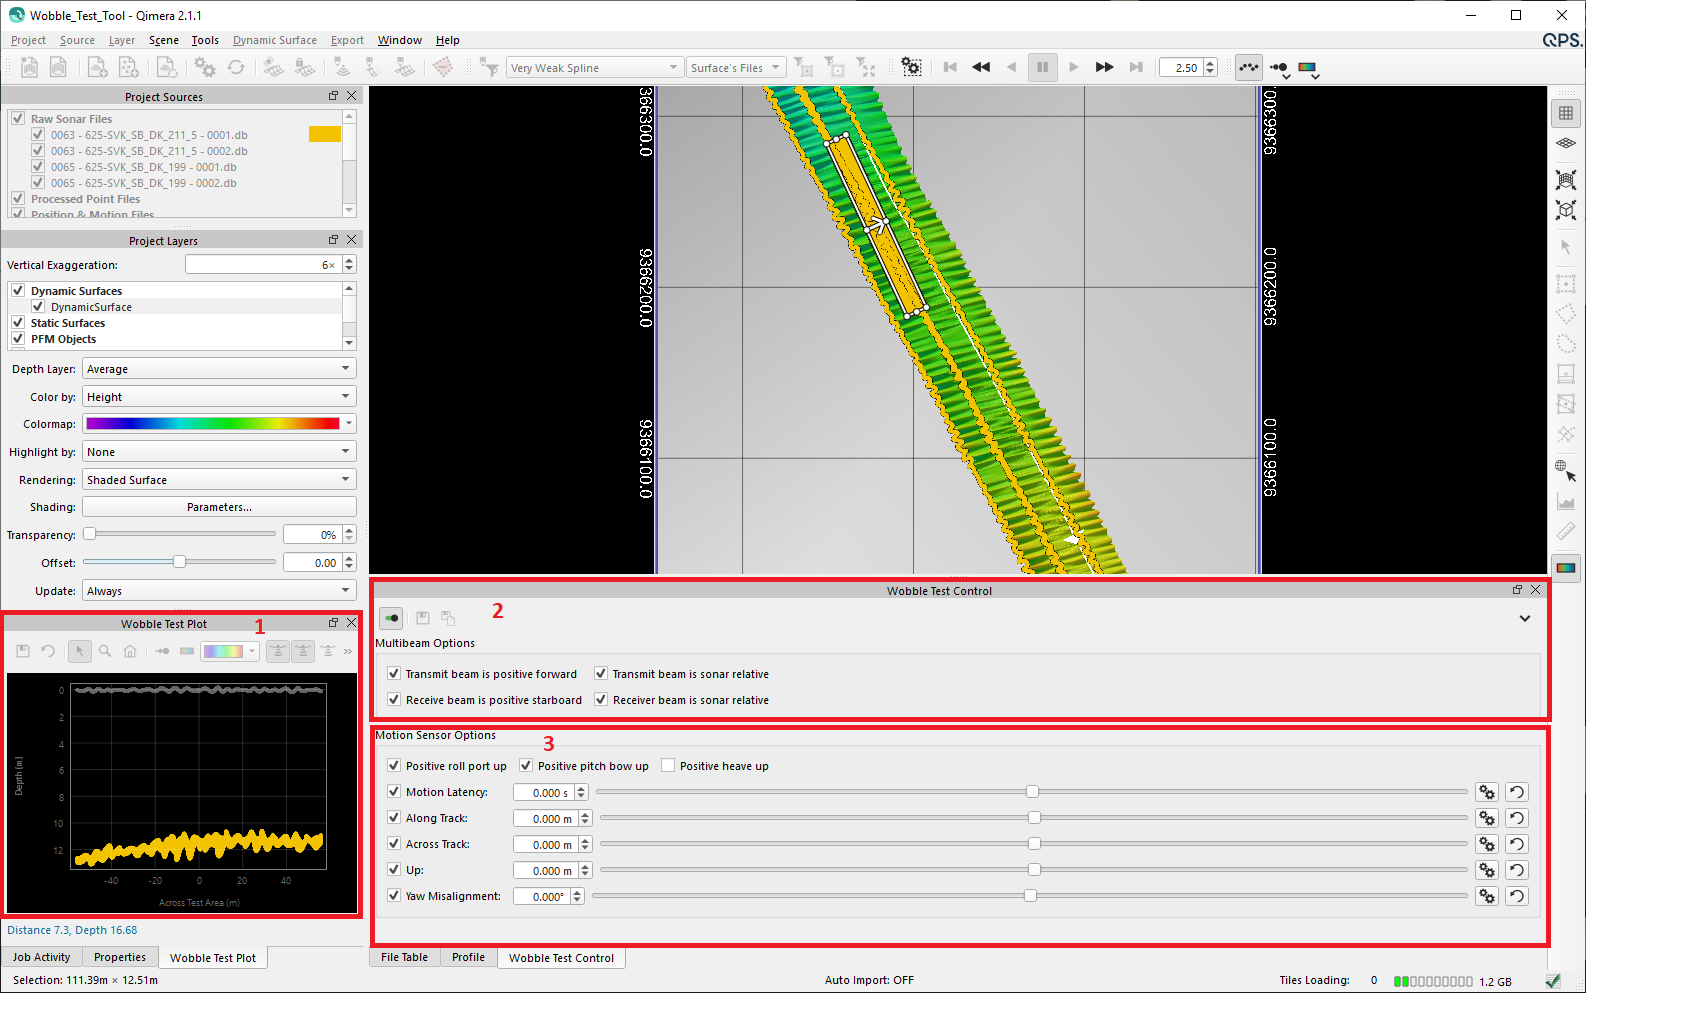
(1) Wobble Test Plot: Cross sectional of the point cloud. This contains the soundings that fall inside the selection box that is located over the grid in the 4D Scene window. The points are viewed from the side of the direction of the white arrow in the selection box .
(2) Multibeam Options: Allows for toggling the reversal of common MBES setup options and relative directions.
(3) Motion Sensor Options: Allows for toggling the reversal of the direction in which Roll, Pitch, and Heave are applied. It also contains sliders allowing for adjustment of Motion Latency as well as Along Track, Across Track, Upward Positional and Yaw Misalignment offsets of the IMU relative to the vessel CoG.
Using the Wobble Analysis Tool
In the example used here, there is a wobble that doesn't exist at nadir and gets more pronounced towards the outer beams.
- Move the selection box (1) towards the outer beams and ensure that it is aligned parallel to the ship track.

- Note the change in the point cloud (2) in the Wobble Test dock. The point cloud will be adjusted in real-time as you toggle settings and move sliders in the Wobble Test Control dock.
- As an exercise, you can cycle through the check boxes, toggling their application. If a certain setting doesn't improve the problem or makes it worse, return the setting to it's original.
- To reset all the settings, click the Reset button (3) at the top of the Wobble Test Plot dock.
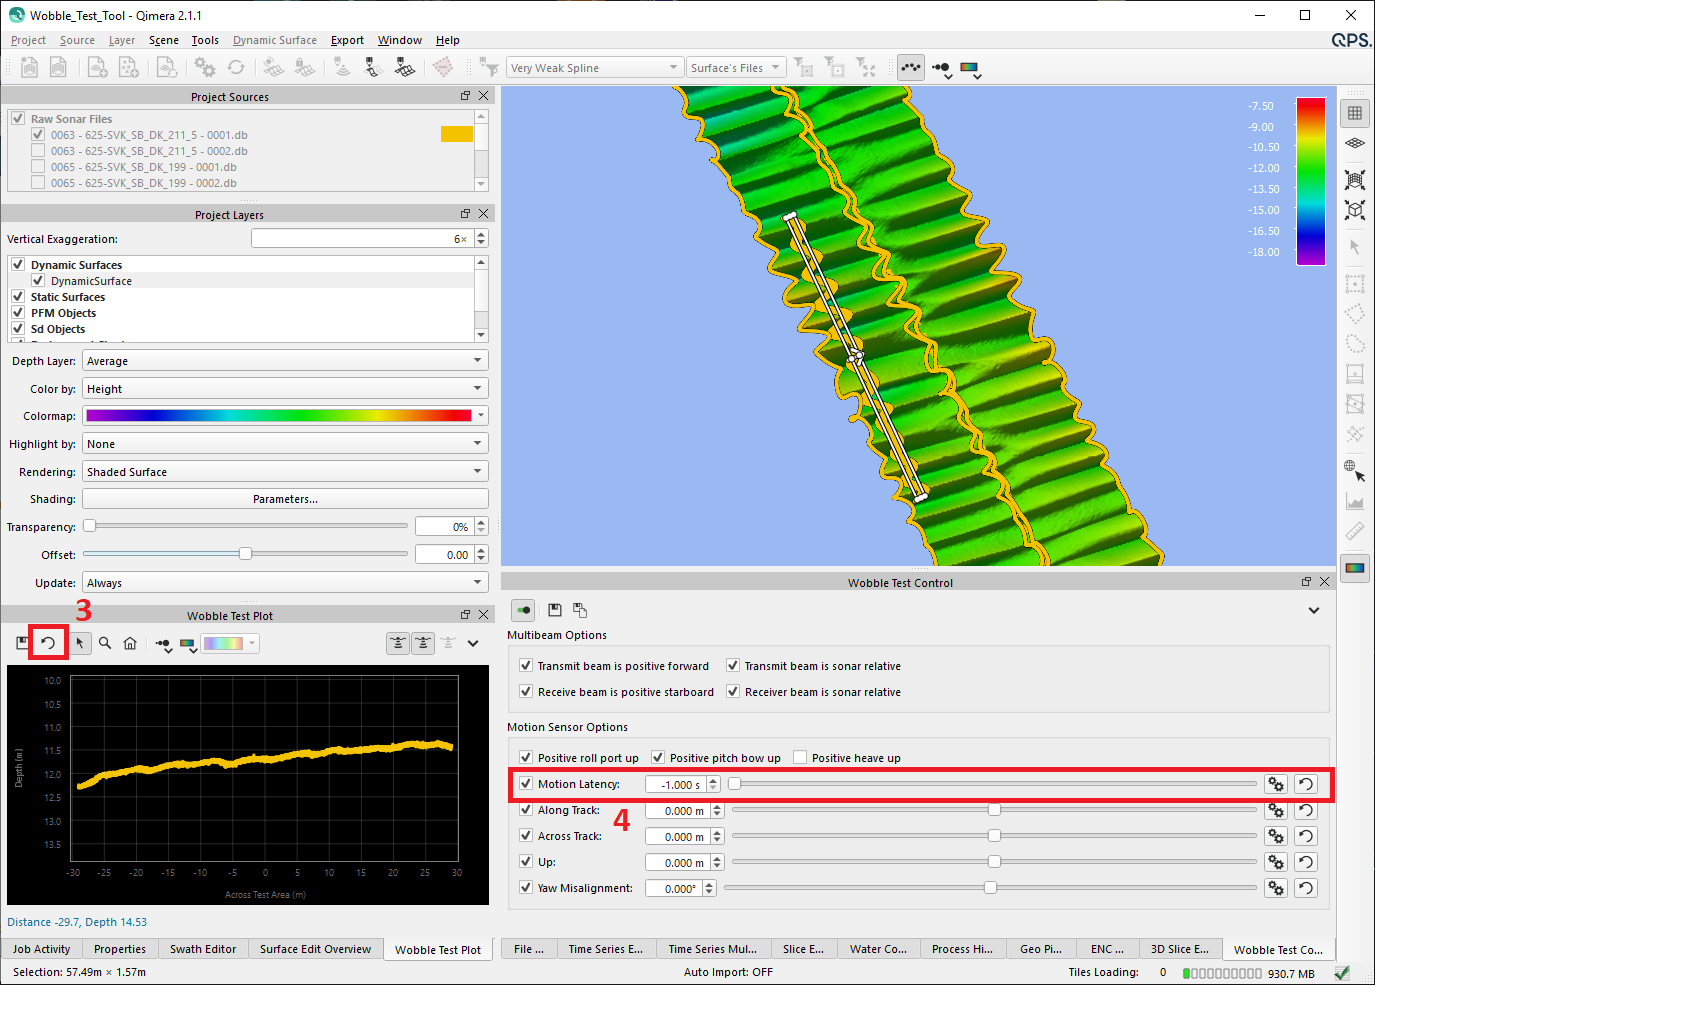
In this example, the only change that improved the data was the adjustment of the motion latency. (4) By pressing SHIFT while moving the slider, you can observing the change occuring, and zero in on a setting that provides the best reduction of the motion artifact.
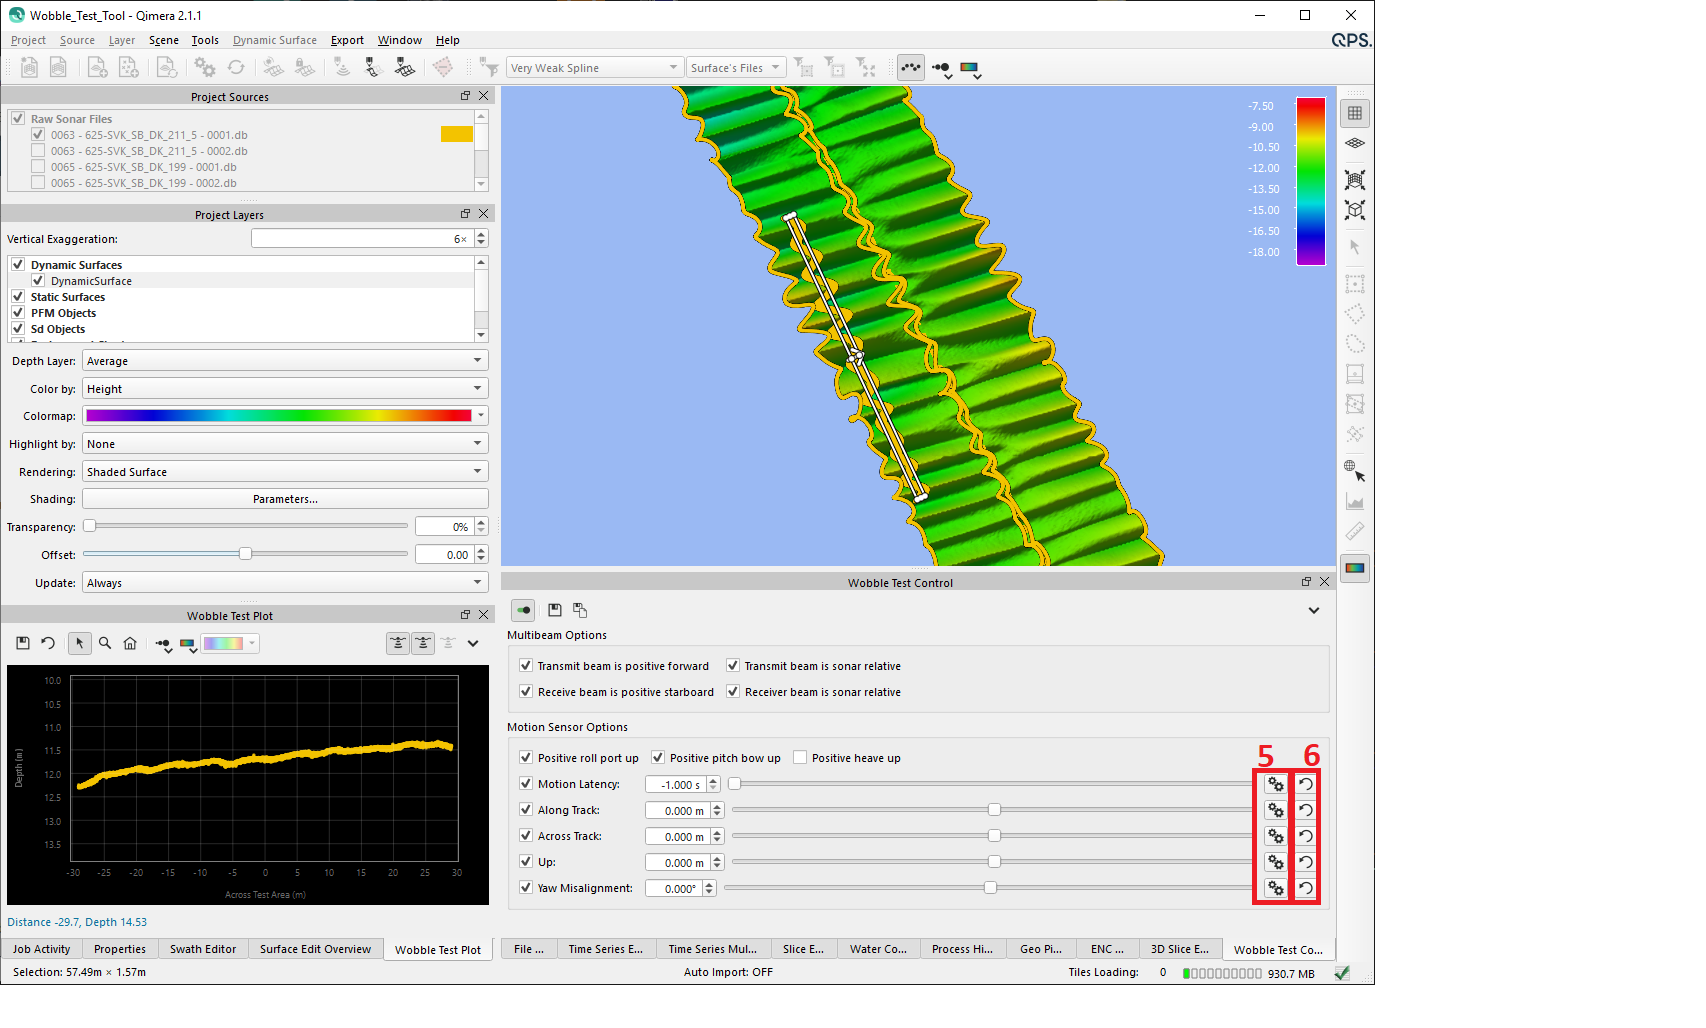
Certain situations may require a combination of adjustments.
- If the scale of the slider needs to be adjusted, it can be done by clicking on the Settings button (5) that is located to the right of each slider.
- Each slider also has a Reset button (6)
For more in-depth information on the effects that changes in the this tool have on your data, please visit the Qimera Wobble Analysis section of the Qimera Reference Manual
Saving and Applying Changes
- Once you are satisfied with your adjustments, click on the Save & Apply button (1) at the top of the Wobble Test Control dock. First, this will prompt you to save a wobble test file. Rename and save the file in your project. The default location of this file will be Project/Vessel/Filename.wobbleanalysis.

2. Once the edits have been saved, a dialog box will then prompt with the files where the changes made using the Wobble Analysis Tool can be applied to the data. 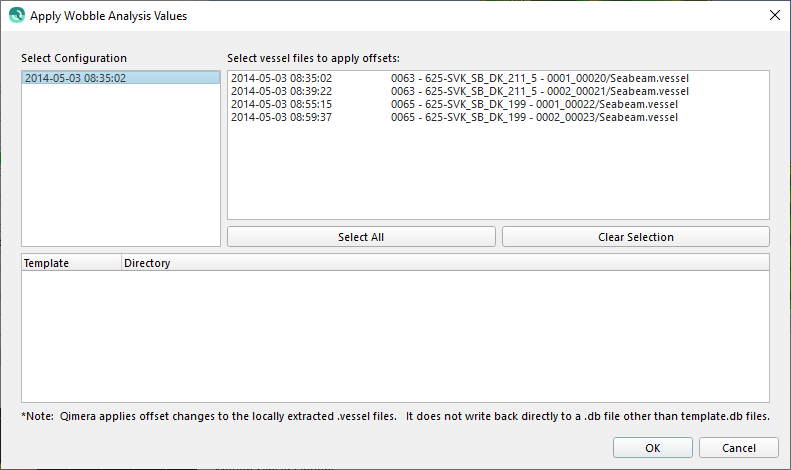
3. Select the file(s) where the edits need to be applied and click OK.
4. Dynamic Workflow may appear at the top of the 4D Scene window (depending on the user settings) prompting you to reprocess the affected files. Ignore the box for now or click no.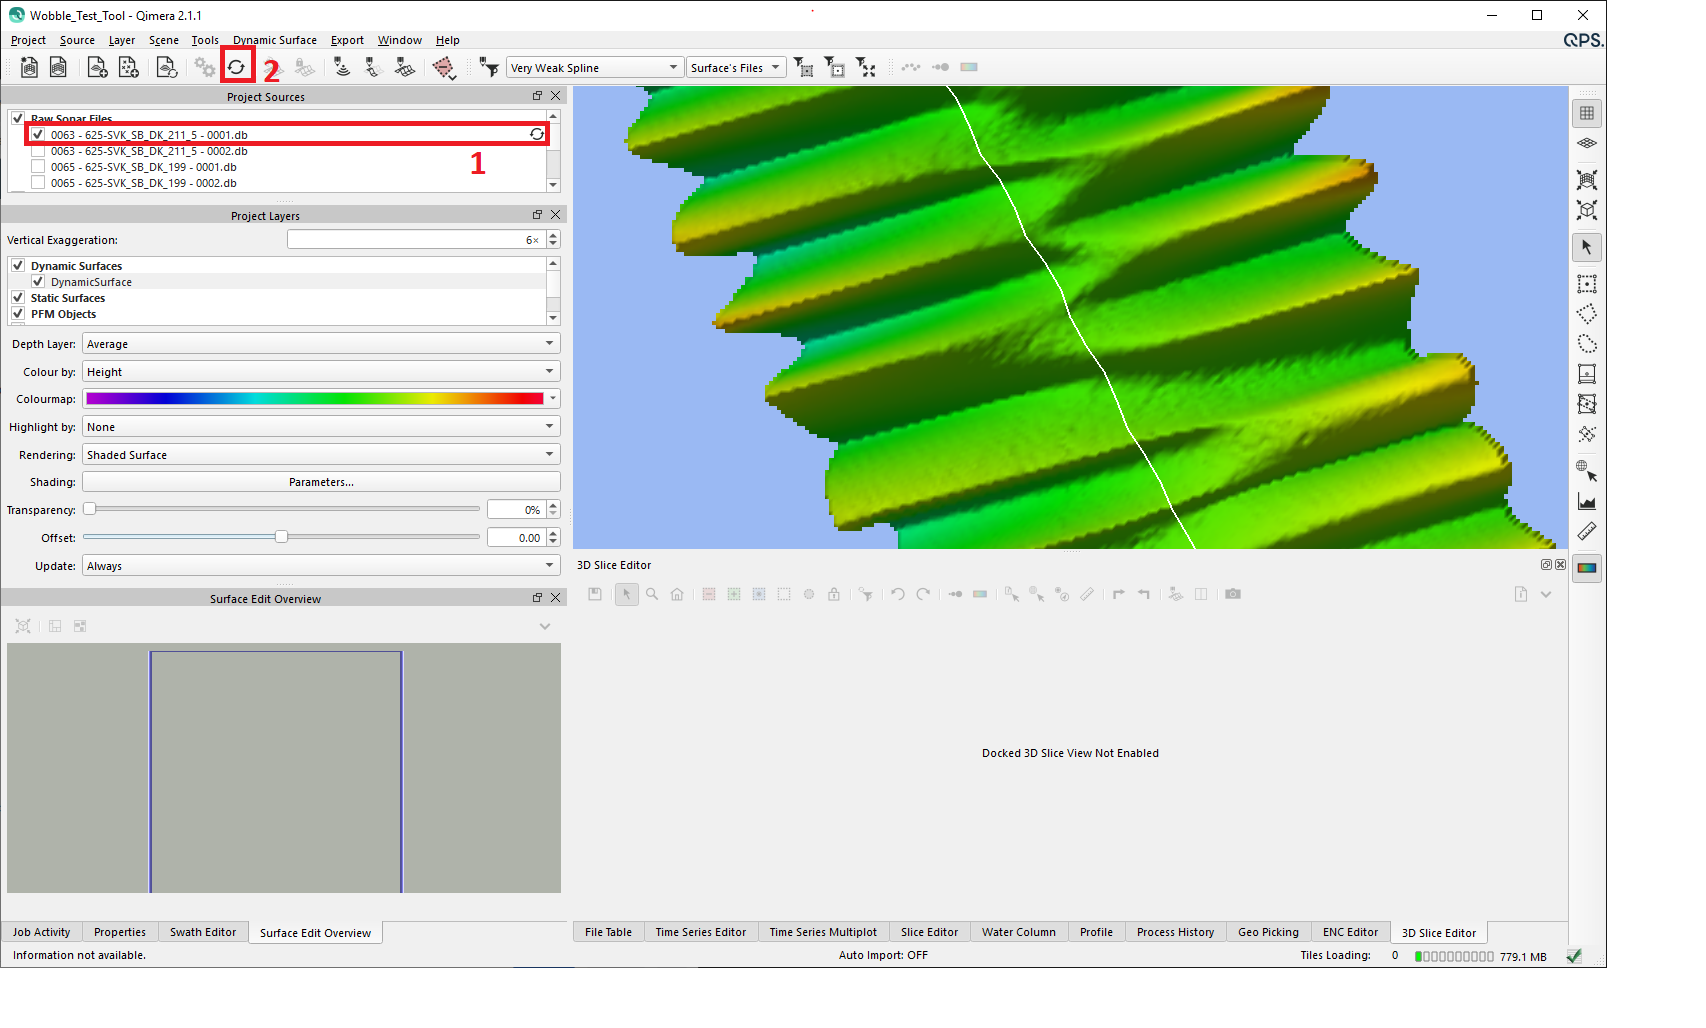
5. Notice that the reprocess icon (1) appeared next to one or more line names in the Project Sources box.
6. If you hold your mouse over this icon it will describe what reprocessing steps will be carried out.
7. A single line can be reprocessed by double clicking on its file name in the Project Sources box (1).
8. To reprocess all lines that require update, click on the Auto Process icon (2) near the top menu bar.
9. Once the reprocessing is complete, the Dynamic Surface(s) will be recomputed.