
How-to Import ArcGIS TIN into Sounding Grid
How to use the tool with models of water ways in Qinsy.
Importing happens in three phases:
- Phase 1: Convert ESRI ArcGIS Data to Qinsy QGF-file.
- Phase 2: Convert TIN from Qinsy QGF-file to layer in QINSy GRD-file.
- Phase 3: Actual usage of the created Qinsy GRD-file in an online survey situation.
Note
We don't read the ArcGIS datum or projection information.
Check that the geodetic setup in both the ArcGIS Geodatabase and the Qinsy project are the same otherwise there will be a problem: The data will be displayed in the wrong location.
Importing and gridding models of water ways
This document describes how to use the tool with models of water ways in Qinsy.
1 Importing from an Esri Geodatabase
This paragraph describes how a TIN surface from an Esri Geodatabase can be converted to a QGF file.
Import from Esri
Before models of waterways can be used on board they first need to be converted to the internal QPS format.
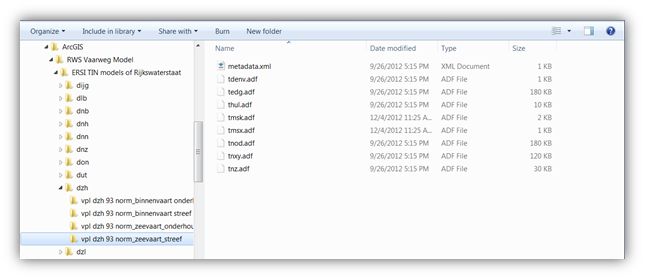
In this manual we assume that the Esri Geodatabases are present as a folder on the local hard drive.
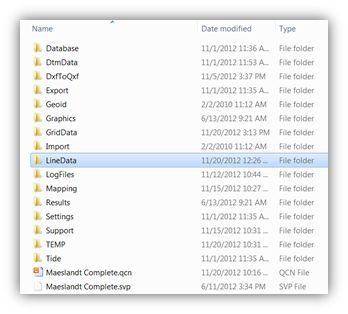
See the example below for a folder structure on which the Import module development has been based.
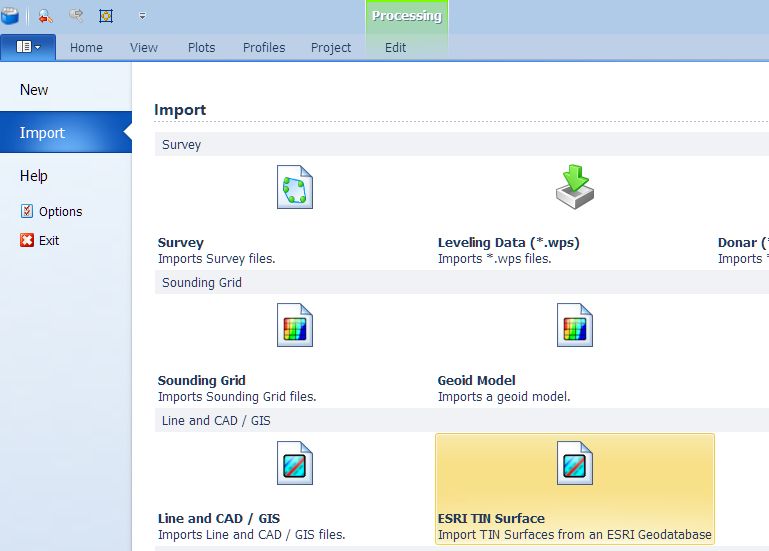
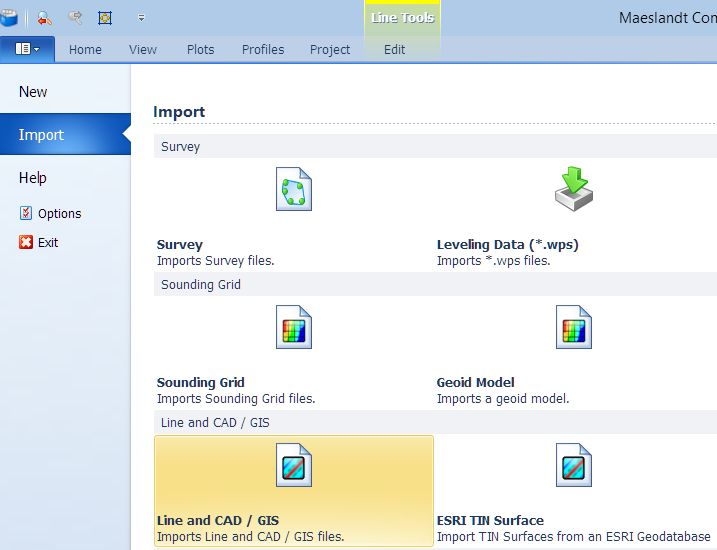
From the File tab choose the option "Import ESRI TIN Surface".
After choosing this import option a window opens in which a folder can be selected which contains the Esri database:
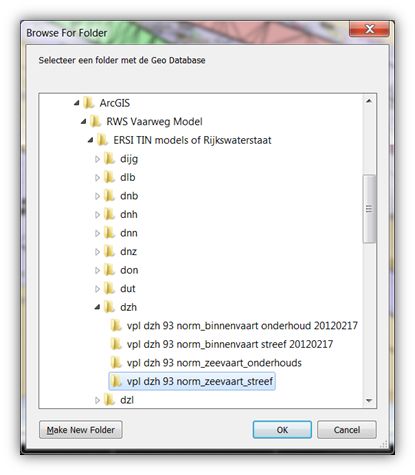
Choose a folder and the conversion of the waterway model will start.
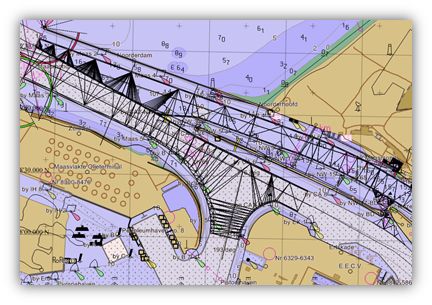
When the conversion has been completed the converted model will be imported into the Survey Manager.
The waterway model will be visible as a collection of triangles.
Validation
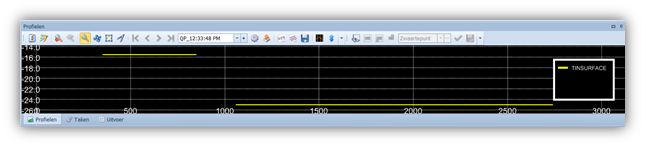
For validation a "Quick Profile" can be drawn over the model. The correctness of depths can be checked this way.
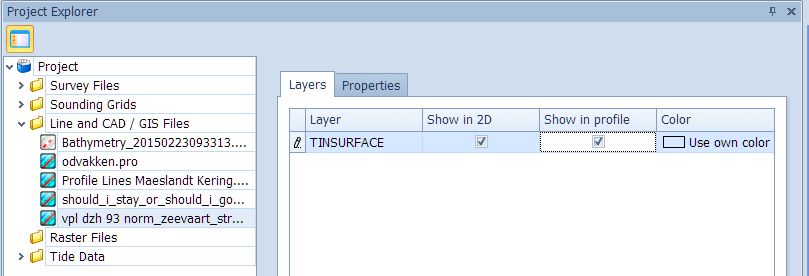
Make sure that the models to be validated are enabled in the Project Explorer.
Use the "Quick Profile" button to start the tool.
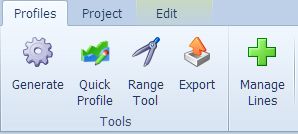
Now draw a line using the right-click to end it.
The profile window will open with the generated profile in it.
Databases for use on board
The converted QGF files are stored in the LineData folder of the active project.
These files can be transmitted to the vessels for use in a Sounding Grid.
2 Gridding the water way model
This paragraph will describe how a water way model can be converted to a Sounding Grid.
Import the water way model
Before the water way model can be imported the converted file needs to be placed in the project folder. The format of the file is *.QGF.
This stands for QPS Graphics File. We advise to place the file in the LineData folder of the active Qinsy project.
From the File tab in the Survey Manager choose the option "Import GIS Files":
A window will appear in which the water way model can be selected:
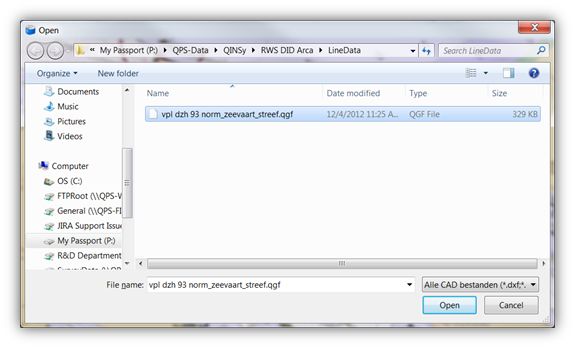
Various files can be selected at the same time.
When the importing is finished the water way model will be visible in the Survey Manager:
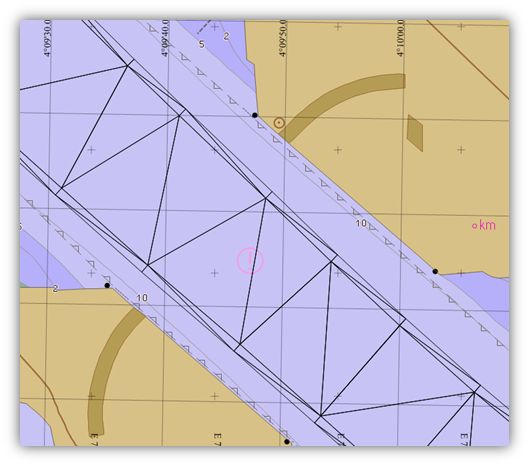
The water way model is a so-called triangulated model. In the Survey Manager it will therefore be displayed as a collection of triangles.
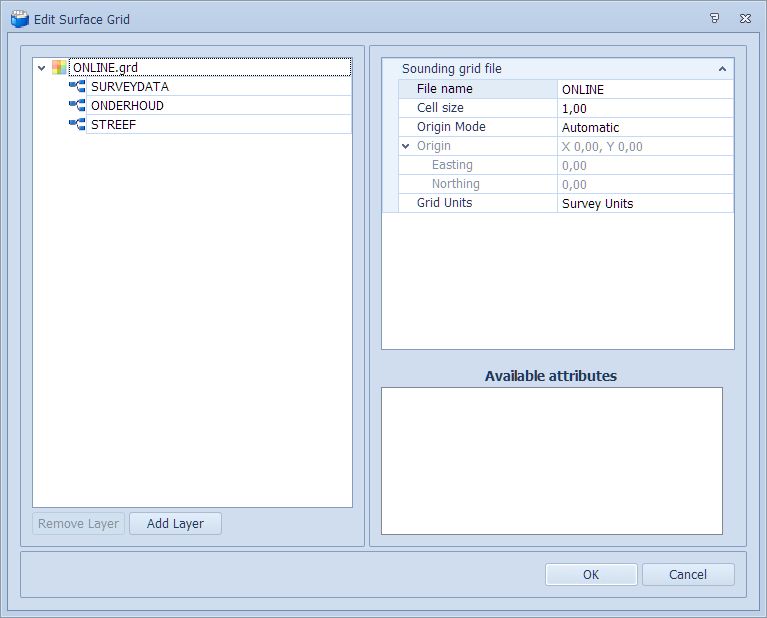
Create a new Sounding Grid file
In this example a new grid will be created with a cell size of 1 by 1 meter. The grid contains a layer named “ONLINE”.
This layer can be filled with online recorded data. The remaining layers are “ONDERHOUD” and “STREEF”. These layers will be filled with the water way models.
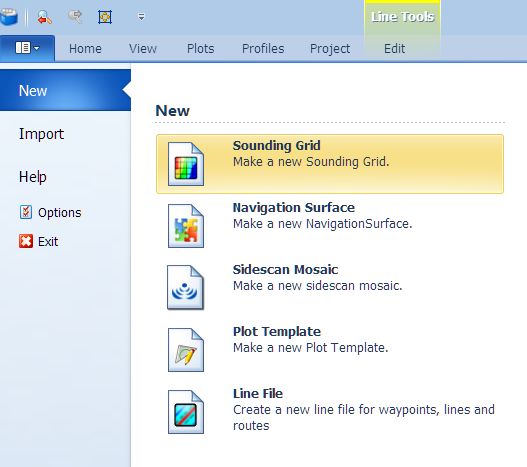
From the File tab choose the option "New Sounding Grid":
Note the choice of cell size. The smaller the cell size, the longer it will take to fill the grid with the water way model.
Try to work with small work areas when a 1 by 1 grid is needed.
Import water way model in a Sounding Grid layer
Before the water way model can be imported into the Sounding Grid the grid needs to be made suitable for editing.
This can be done by double-clicking on the file in the Survey Manager's Project Explorer or by selecting the "Grid Tools" ribbon page.
Now the Sounding Grid ribbon is activated:
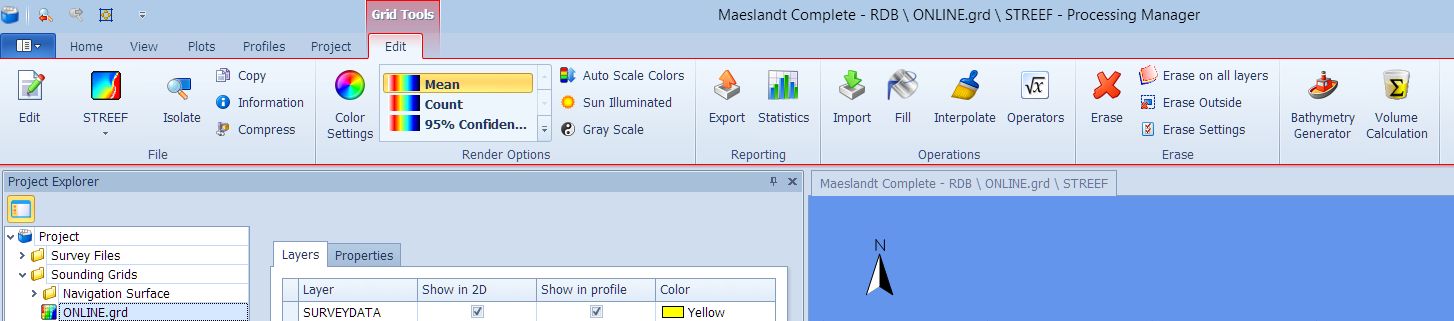
Make sure the active layer is selected. In this example it is “STREEF”.

Now select an area into which the water way model is to be imported. This can be a rectangle, a polygon or a predefined area:
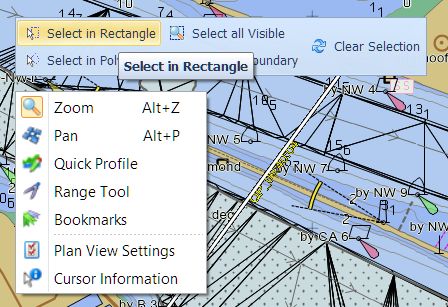
In this example we will use a rectangle. The selection can be accessed through the popup menu in the plan view. Right click in the plan view to show the popup menu.
When the area is selected press the "Import" button.
This will open a window with which various kinds of data can be imported into the Sounding Grid:
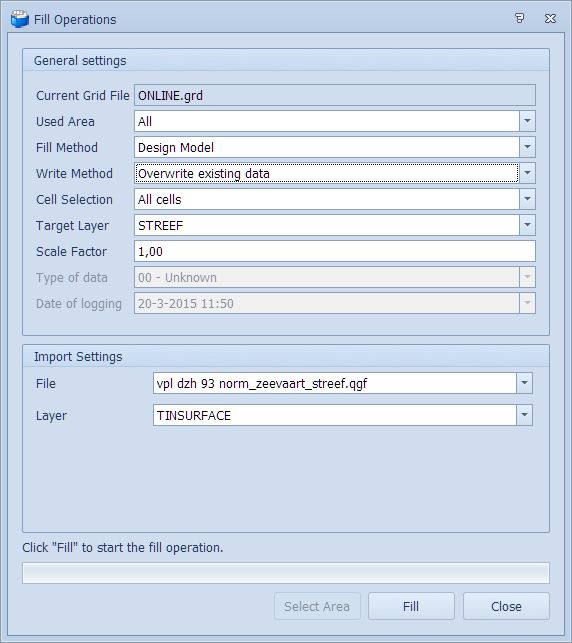
Choose filling method “Design Model”
The water way model is a design made up of triangles, make sure the destination layer is “STREEF”. In this example we will import the model for maintenance depths for shipping.
Under import characteristics choose the correct file and layer to import. By default the water way models have only one layer: “TINSURFACE”.
When the settings are correct click on "Fill". The Sounding Grid will now be filled with the water way model. Progress is shown in the bar.
The result is displayed as follows:
If necessary this action can be repeated for the “ONDERHOUD” / maintenance water way models.
The grid is now ready for online use,
3 Online use
This paragraph will describe the use of water way models during a survey.
Select the online grid
In the “Session Setup” of the Controller choose the Sounding Grid with the imported water way models.

For the depth data choose a different layer than for the for the water way model. In this example we will use the layer “SURVEYDATA”.
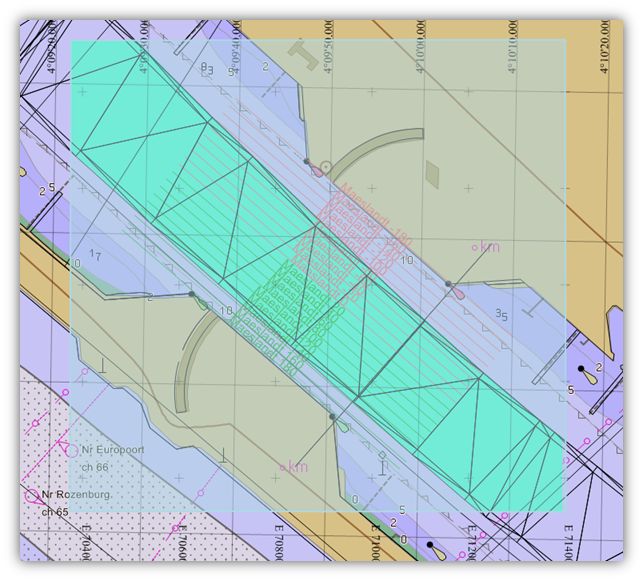
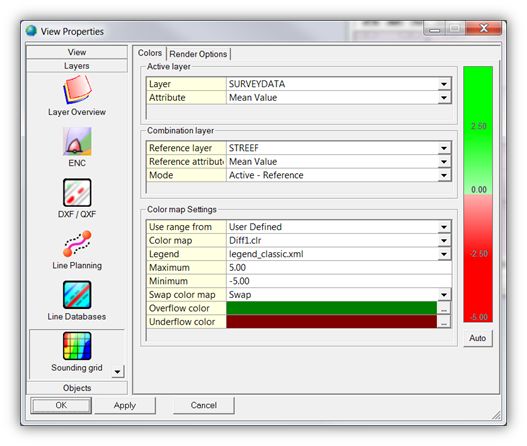
Navigation Display
To compare the layers of the recorded data and the water way model enter this in the Navigation Display:
During recording the Navigation Display looks as follows:
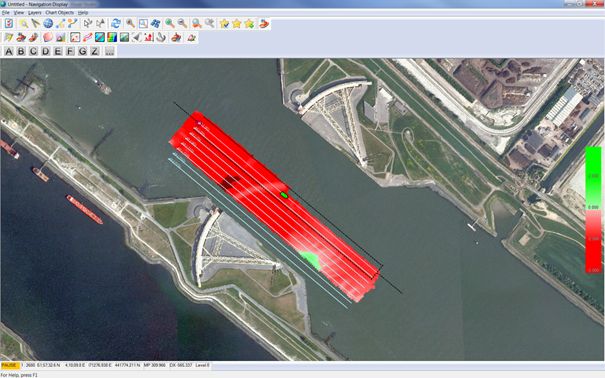
A Sounding Grid will only be displayed in areas where data is available in both layers.