
How-to Backup and Restore Project Data
This how-to briefly explains how to use the Qinsy Backup and Restore tool.
Introduction
The Backup and Restore tool can be used to back up your data or restore project data from earlier in the project.
It can also be used to move a project (and all the related files) from one PC to another.
Step-by-Step to Open Tool Dialog Box
Step 1: Open the Qinsy Backup and Restore Tool
Open the Qinsy Backup and Restore tool from upper program toolbar (See 1 in Figure 1).
Or open the Backup and Restore tool from the lower pane in the Console (see 2 in Figure 1).
If the tool is not visible, right click and add it from the "Add/Remove QPS Programs" dialog box.
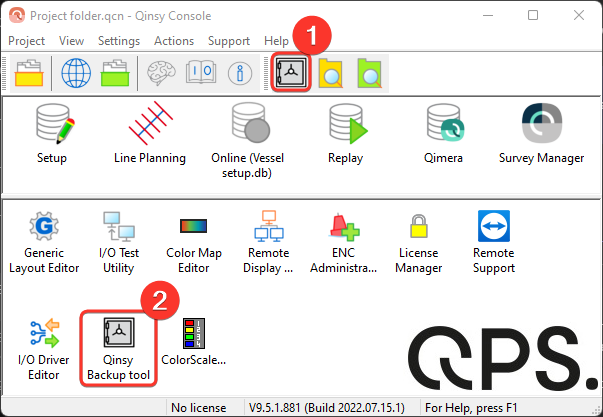
Figure 1. Open the backup and restore tool (1 or 2).
Step 2: Choose to Backup or Restore
In the Qinsy Backup & Restore Tool dialog box choose to backup or restore data, depending on what you would like to do, and select "Next >" (see Figure 2).
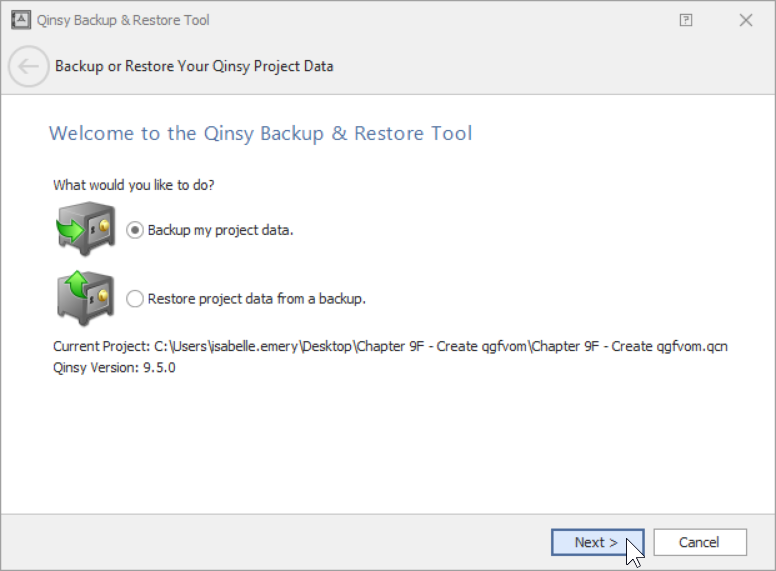
Figure 2. Choose to restore or backup data.
Backup Project Data
Step-by-Step to Backup Data
Follow Steps 1 and 2 from the Step-by-Step to Open Tool Dialog Box section above, choosing to backup data in Step 2.
Step 3: Kind of Backup
If you want you can choose the kind of data to backup and select a date range. Select "Next >" to continue (see Figure 3).
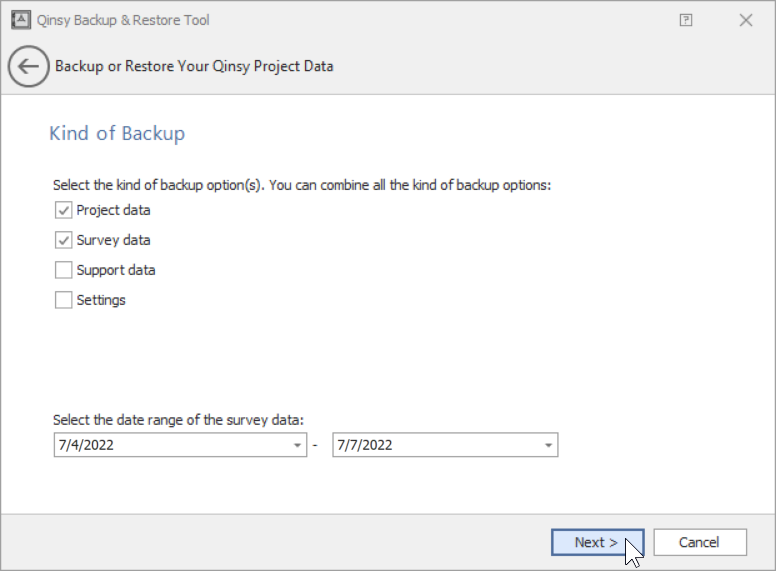
Figure 3. Choose the type of data to backup.
Step 4: Select Backup Items
Select the items to backup.
- Project Folder;
Here you can select which folders from the Project Folder you would like to backup. - Qinsy Folders;
Theses are files stored in the Public Documents folder and contain user created files that are used in multiple projects and for example ENCs. - Common Files Folder;
Here you can select which folders from the Common Files Folder you would like to backup. - Registry.
Qinsy saves some settings in the Windows registry. More info on this can be found in the Restoring Registry section below.
By checking the checkbox you backup the entire folder. If you only want to backup certain files, you can select them in the "File" column.
Once all desired items are chosen, select "Next >" to continue (see Figure 4).
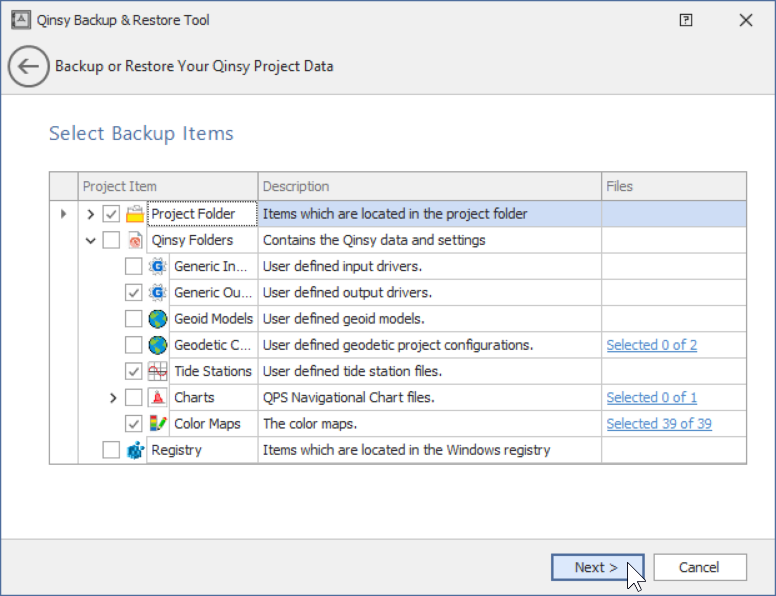
Figure 4. Choose items to backup.
Step 5: Choose Backup Location
Choose a name for the back up file and select the location to store the file in from "...". Add a comment on the file, select "Next >" to continue (see Figure 5).

Figure 5. Name and choose backup file location.
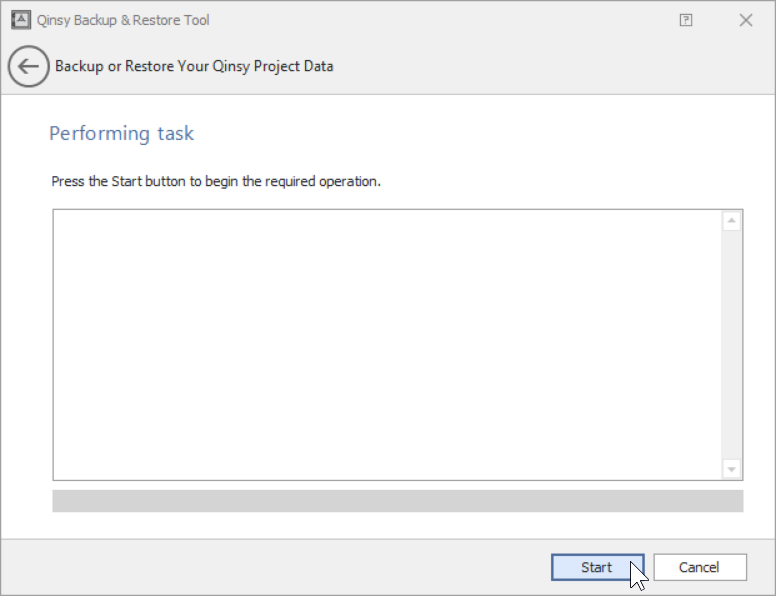
Step 6: Preforming the Backup Task
The files are now ready to be backed up and saved where you specified in Step 5. Select "Start" to start backing up the data (see Figure 6a). Once the backup is complete, select "Finish" to close the Qinsy Backup & Restore Tool dialog box (see Figure 6b).
Now you have backed up the chosen data and files to your Qinsy project.
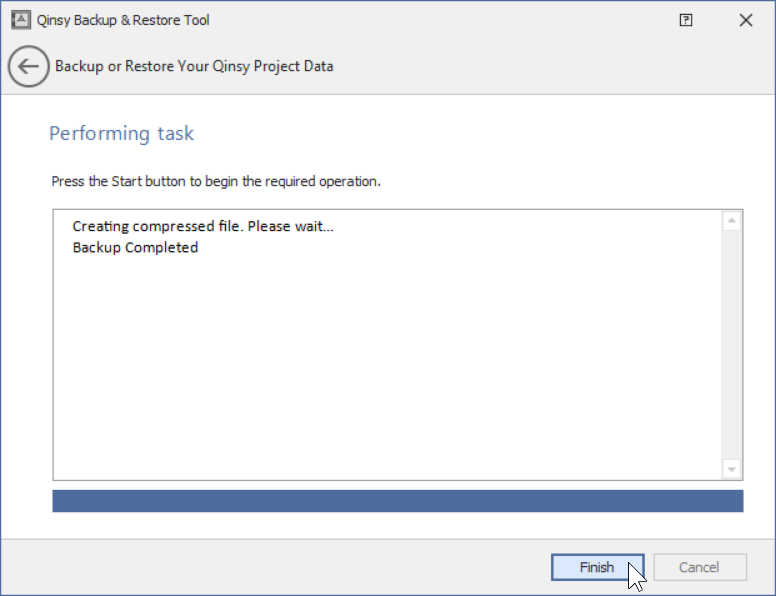
Figures 6a and b. Start the backup and close the backup and restore tool dialog box.
Restore Project Data from a Backup
Step-by-Step to Restore Data
Follow Steps a and 2 from the Step-by-Step to Open Tool Dialog Box section above and the next steps if you are only restoring Project Folder and Qinsy Folder files. If you are restoring the registry folder see the Restoring the Registry section below.
Step 3: Select File to Restore
Navigate and select the backed up file (*.qbr) to restore.
Note that the restore locations are automatically populated with the original file path.
This is done intentionally since users usually have the same folder structure on all Survey PCs and because it saves you time restoring some settings.
You can also choose a different file path. However, you might then need to set some settings manually like:
- Select the Common Files Folder location;
- Enable Background files in the Navigation display;
The restore location for common files folder, and the Backup file comment will automatically be filled out or greyed out depending on the information in the backup file.
Select "Next >" to continue (see Figure 7).
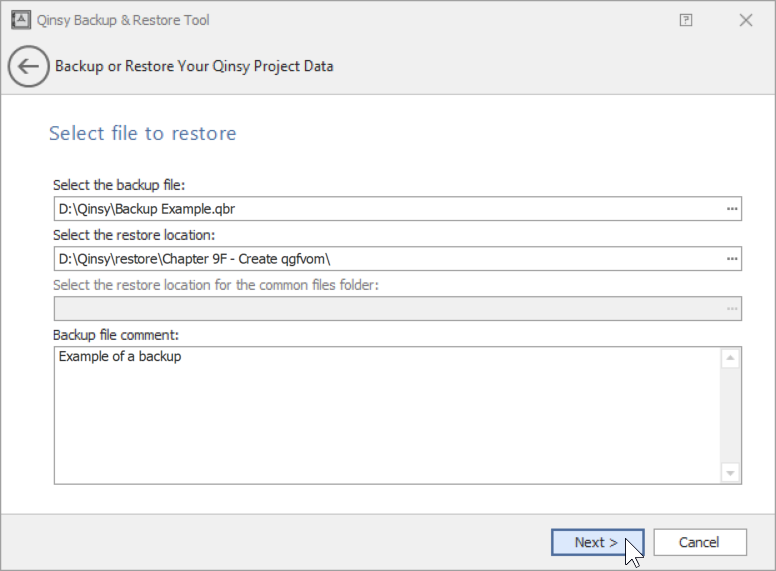
Figure 7. Choose a file to restore and where to restore the file to.
Step 4: Select Items to Restore
Select the folders and items from the Project Folder and Qinsy Folders that you would like to restore. Select "Next >" to choose the files and continue (see Figure 8).
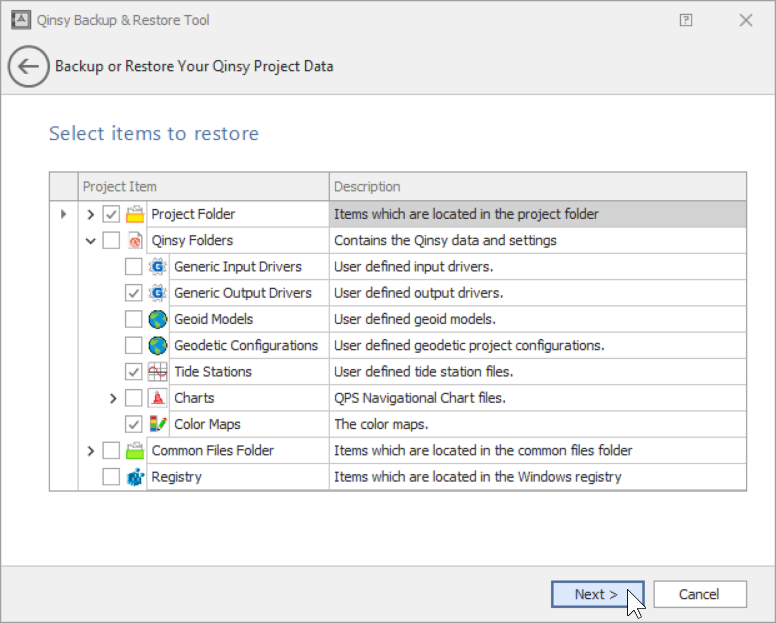
Figure 8. Choose the files to restore.
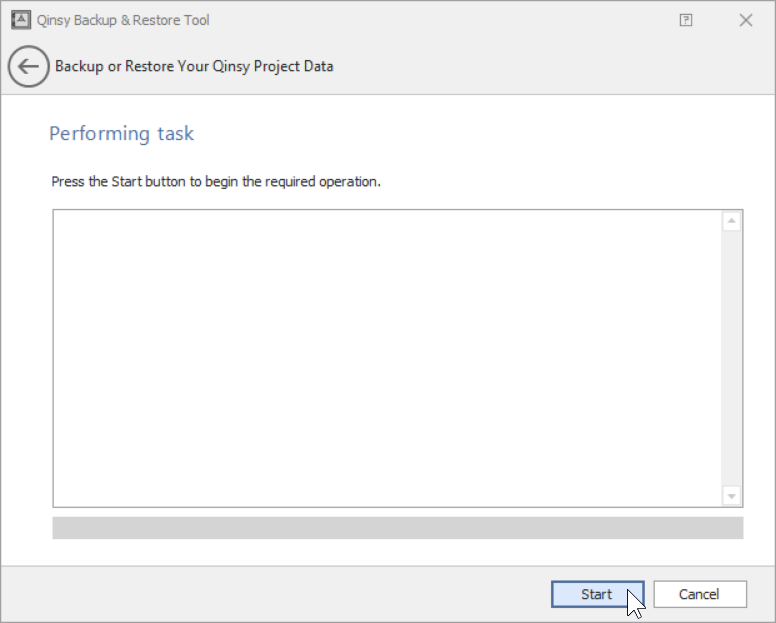
Step 5: Performing the Restore Task
The files are now ready to be restored and saved where you specified in Step 3. Select "Start" to start restoring the data (see Figure 9a).
Once the restore is complete select "Finish" to close the Qinsy backup & Restore Tool dialog box (see Figure 9b). Now you have restored the data and files to your Qinsy project.
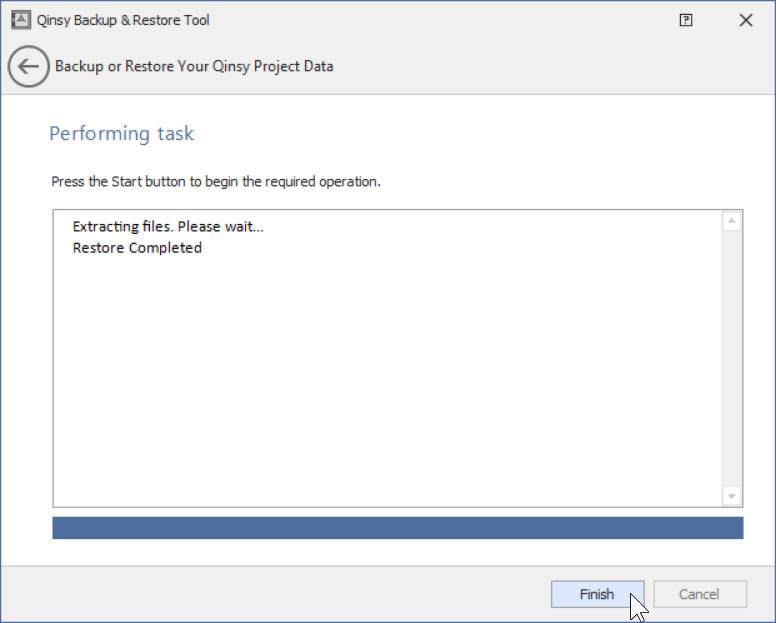
Figures 9a and b. Start the restoring and close the backup and restore tool dialog box.
Restoring Registry
Note that the registry file will be place in the Project folder. In order to restore that, you need to manually apply it by double clicking on the file (see Figure 10).
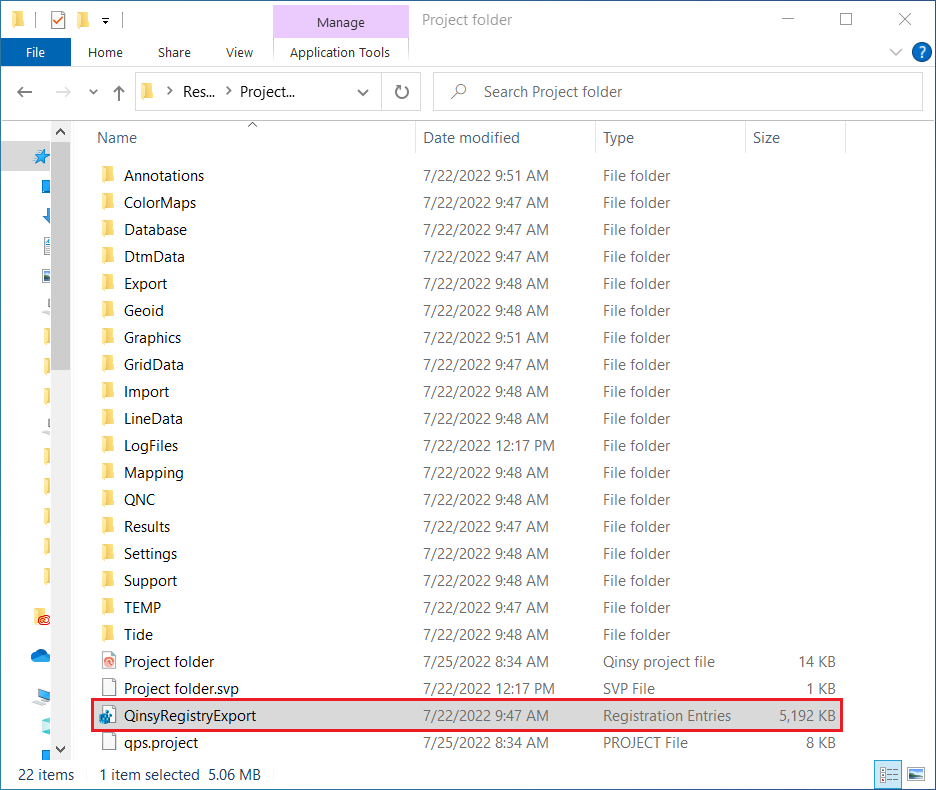
Figure 10. The restored Qinsy Registry that needs to be open and activated.
Applying the registry is needed since several settings on the Console, Controller, Projects, Drivers are stored there.
However, we also advice to be cautious with applying the registry file from PC-A on PC-B since it might apply settings from PC-A that you did not want.
Additional Tips
- When opening the restored project on a "clean" PC that has no QPS projects, open the restored project by double clicking on the downloaded Project Backup (see red rectangle in Figure 11) to easily open Qinsy and restore the downloaded Project.

Figure 11. The downloaded Project Backup.
Additional Information
- F1 inline Qinsy Help (after opening tool)