How-to ENC Editor
This How-to outlines the features and functionality of the ENC Editor, released with Qimera 1.6.0.
On this page:
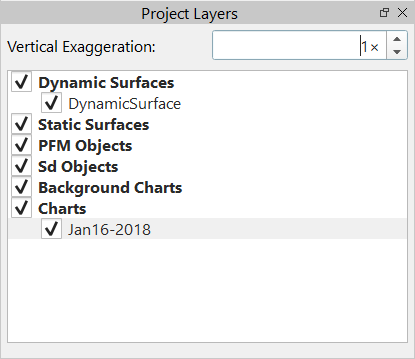
- To display your ENC on top of other layers, right click on 'Charts' in the Project Layers dock and check the box next to 'Charts on Top'
- Toggle the same setting for individual chart objects if need be.
- To zoom to an ENC Object, right click on it in the ENC Editor table and choose 'Center On'.
The ENC Editor, released as part of Qimera 1.6.0, allows for the creation of ENC Features. These features are stored in a QPS proprietary format file, a .QNC. The Qimera created QNCs can be exported to S57 .000 files. Features can be linked to soundings or a fixed position from a grid layer (i.e., shallow, deep, average, CUBE). Features linked to a sounding will reflect any changes to that sounding's location or depth. Features linked to a grid layer will reflect any changes to that grid layer's depth.
ENC Layers
Create a New Layer
Option 1:
Right click on 'Charts' in the Project Layers dock and select 'Create New Chart'.
Option 2:
Go to the the ENC Editor dock and click on one of the 'Create ENC .... Object' buttons and select a location or sounding in one of the views. If no layer has been created, a prompt to create a new layer will appear.

Import Existing Layer
Right click on 'Charts' in the Project Layers dock and select 'Add Files' or 'Import Files'. Add files is used for bringing in existing QNCs, Import Files is used to import a .00* or QNC.
ENC Objects
Creating an object
Creating an ENC Object in the ENC Editor
The ENC Editor supports creating Point, Line, and Area ENC objects.
Point Object Creation
Click on the 'Create ENC Point Object' button in the ENC Editor dock menu bar, then click on the surface.
A point will be created at the depth of the node closest to the cursor.
Line Object Creation
Click on the 'Create ENC Line Object' button in the ENC Editor dock menu bar, then click on the surface to create the line.
Area Object Creation
Click on the 'Create ENC Area Object' button in the ENC Editor dock menu bar, then click on the surface to create the line. Close the area by clicking on the first point.
Creating an ENC Point Object in the Swath Editor
Only Point Objects can be created from the Swath Editor. These objects will be associated with the selected sounding, typically the shallowest one.
1) Create a selection of any type and start the Swath Editor.
2) Click on the 'Create ENC Point Object' button in the Swath Editor menu bar.
3) Select a sounding in the Swath Editor plot window.
Creating an ENC Point Object in the Water Column Viewer
Only Point Objects can be created from the Water Column Viewer. These objects will be associated with the selected sounding, typically the shallowest one.
1) Create a selection of any type and start the Swath Editor.
2) Go to the Water Column dock, isolate the pings of interest where the object can be seen.
3) Click on the 'Create ENC Point Object' button in the Water Column menu bar.
4) Click on the desired point in the Water Column fan view Swath Editor plot window. This will create an ENC feature object and it will create a "user additional" sounding in the sounding set. Be sure to click Save prior to exiting the Swath Editor.
Creating an ENC Point Object in the Slice Editor
Only Point Objects can be created from the Slice Editor. These objects will be associated with the selected sounding, typically the shallowest one.
1) Create a selection of any type and start the Slice Editor.
2) Click on the 'Create ENC Point Object' button in the Slice Editor menu bar.
3) Select a sounding in the Slice Editor plot window.
Creating an ENC Point Object in the 3D Editor
Only Point Objects can be created from the 3D Editor. These objects will be associated with the selected sounding, typically the shallowest one.
1) Create a selection of any type and start the 3D Editor.
2) Click on the 'Create ENC Point Object' button in the 3D Editor Control Bar.
3) Select a sounding in the 3D Editor plot window.
Configuring an object
Once the Point, Line, or Area has been selected, a dialog will appear that allows for the object and its attributes to be configured:
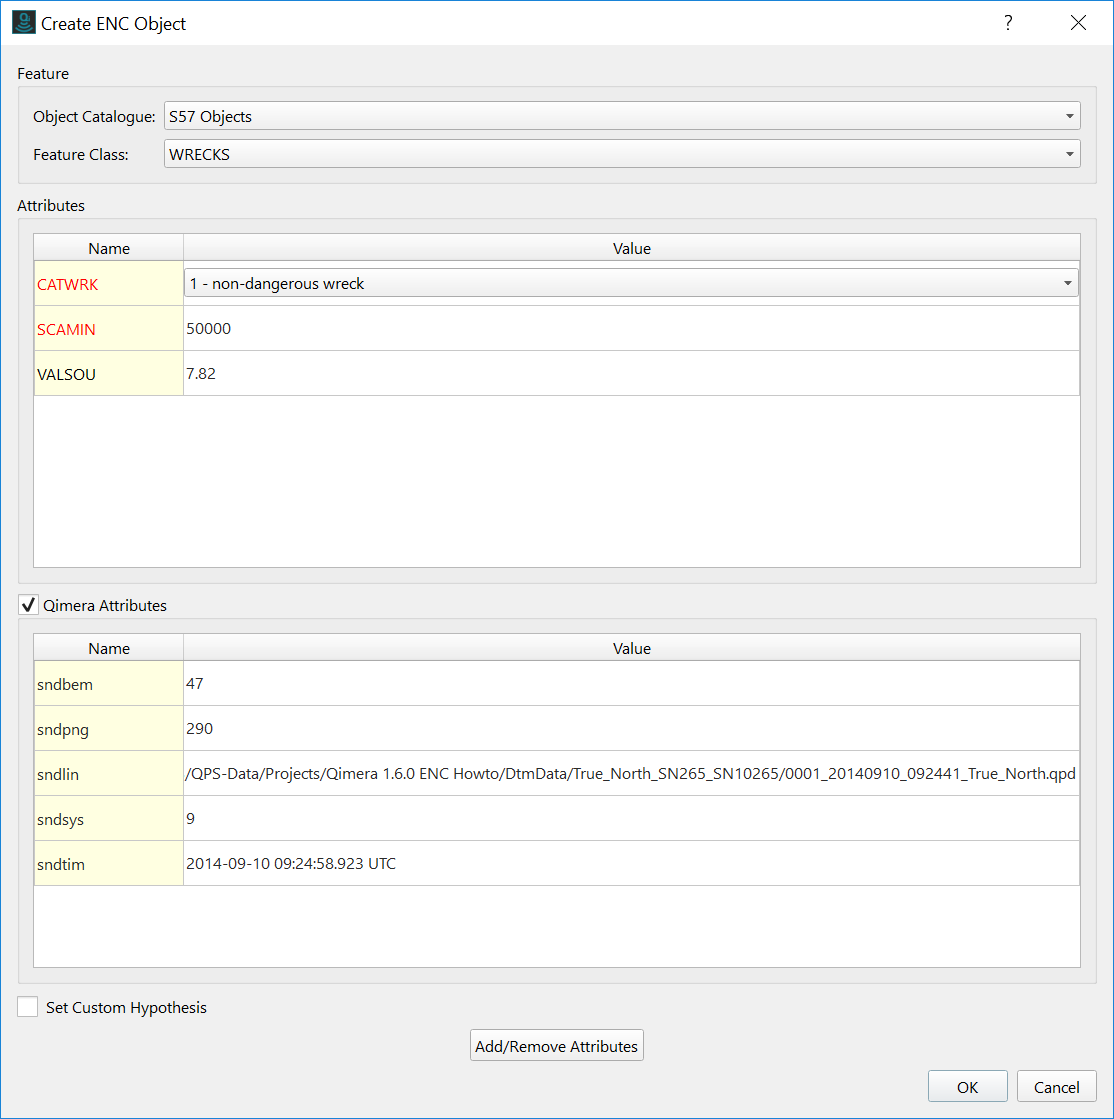
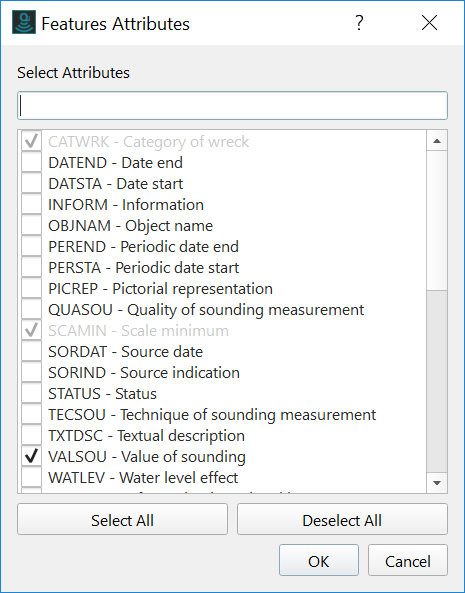
Choose the appropriate values from the 'Object Catalogue' and 'Feature Class'. Attributes can be added or removed via the 'Add / Remove Attributes' button near the bottom.
Toggle attributes on or off (some are mandatory and cannot be turned off):
Working with the ENC Editor Dock
Once ENC objects are created, you will see the table in the ENC Editor Dock populated with those objects.

Selecting Objects
Clicking in Main Window
Click on the 'Pick ENC Object' in the ENC Editor toolbar. Click on an object in the main view to highlight it in the table. This is best done after highlighting objects via another method.
Selecting Objects in the ENC Editor Table
Use the shift or control keyboard keys and the mouse to select one or more objects in the table. Once highlighted there, they will become visible in the main window.
Selecting Objects Geographically
Click on the 'Select ENC Objects' button in the ENC Editor toolbar. Draw a selection in the main window. All objects that fall in that selection will be displayed in the main window and will be highlighted in the ENC Editor table.
Selecting Objects with Filters
See the section below for more information on filtering objects.
Editing single objects
Double click on an object in the table, or select it, then click on the 'Edit Feature' button in the ENC Editor dock.
Editing multiple objects
If several objects are selected, either via geographic selection, a filter, or highlighting several objects in the ENC Editor dock, they can be edited as a group. Right click on one of the selected objects in the ENC Editor dock and choose 'Edit'. You can also click on the 'Edit Feature' button in the dock. This will bring up the Edit ENC Object dialog and applicable attributes can be added, removed, or edited.
Any attributes that differ between the selected attributes will be displayed in orange, indicating that all objects do not have the same value for that attribute. If you make not edits for an attribute, no values will be overwritten. If you make edits to an attribute that differs, the label display color will change to green indicating that all objects will now have to same value for the edited attribute.
Working with Filters
Creating a New Filter
To create a new ENC filter, right click on 'All Features' in the Filter section of the ENC Editor dock. Choose 'Add Filter'.
The Add Feature Filter dialog will appear:
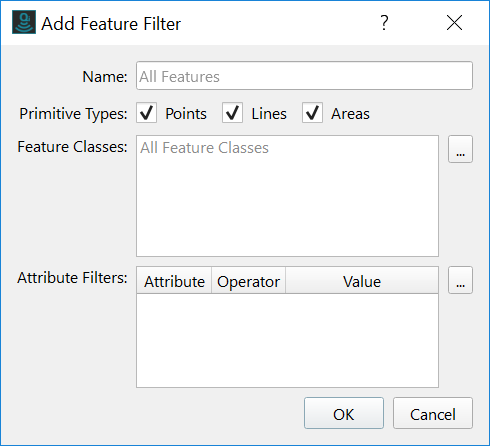
Enter a name and select which object types you want the filter to include. Select which feature classes you want to include in the filter. Attributes can be filtered as well with simple Boolean and Relational operators. If you do not enter a name for your filter, the name will be updated automatically to describe the filter contents.
The following filter shows objects that are points, of class UWTROC, and have a VALSOU of less than 10.0 (m) and WATLEV attribute equal to 'partly submerged at high water'.
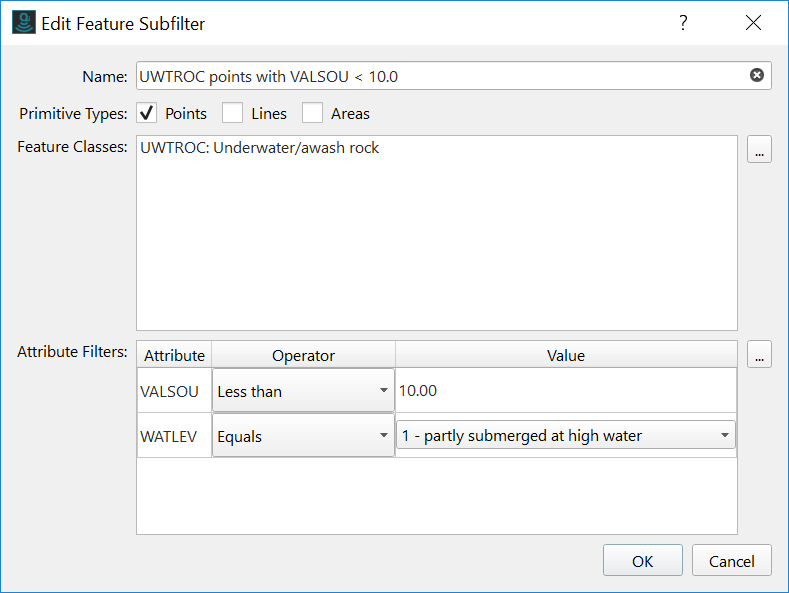
Filters can be nested within other filters to improve organization and simplicity of individual filters. These are called subfilters. To create a subfilter, right click on an existing filter and select 'Add Subfilter'.
Applying a Filter
Using a filter is as simple as clicking on it. The filter results will be shown in the table.
Editing Filters
Right click on a filter to edit, duplicate or remove it. You can also add a new sub-filter with the same action.
Importing and Exporting Filters
Filters can be exported and imported. Use the ENC Editor drop-down menu (at the top right of the dock) to access this functionality.
Querying a chart
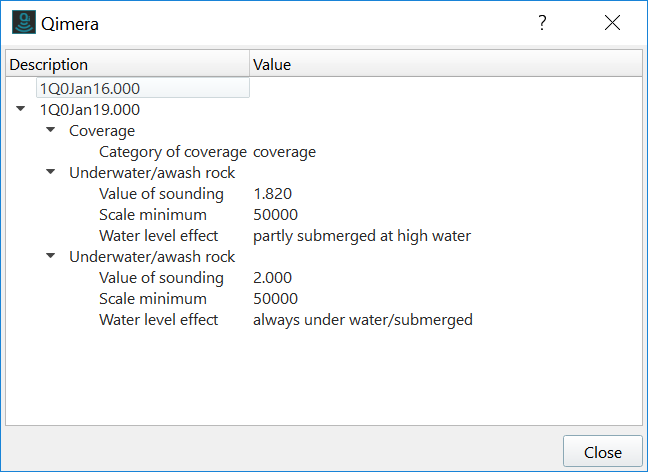
It is possible to query chart elements. Click on the 'Query Chart' button in the ENC Editor dock and then click on the scene.
This tool can be used to query both user created objects, and elements in an imported chart or a background chart.
After clicking on an ENC object or feature, a window will appear showing all the objects that overlap the point clicked:
ENC Editor drop-down menu
At the top right of the ENC Editor dock is the dock drop-down menu.
This menu contains the following functions.
Edit Feature
This is the same as double clicking or right clicking on a feature in the table.
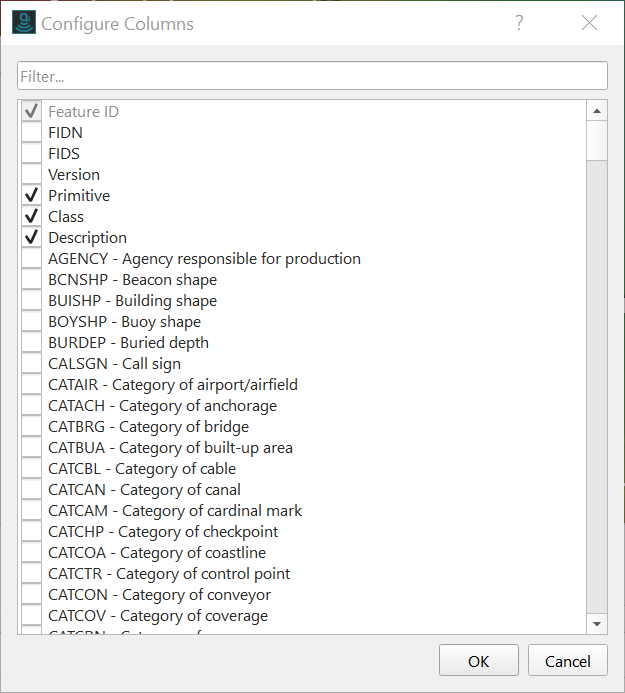
Configure Columns
This is used to configure the visible columns in the ENC Editor table:
Export and Import Filters
This starts a file dialog used to either load or save a filter.
ENC Editor Feature Table
The table displays all features that result from the active filter (or all, as default, if 'All Features' is active).
The columns of the table are configurable via the ENC Editor drop-down menu.
Right Click Functions
Copy To & Move To
This allows features to be copied or moved to another chart.
Edit
Edit a feature. The same as double clicking on a feature.
Center On
Center the scene on the selected feature.
Delete
Delete a feature from a chart.
Exporting an ENC
An ENC Chart created in Qimera can be exported to an S57 (.000) file. To do this, highlight a chart in the Project Layers dock and go to the Export drop-down menu at the top of the Qimera Window. Choose 'Export S57' and provide a file name and location.
