This How-to describes the workflow for sound speed processing in Qimera.
On this page:
Importing SVPs
SVPS imported with raw sonar files
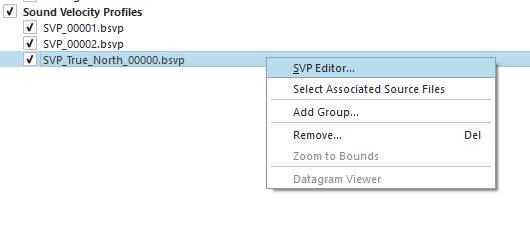
Depending on the Raw Sonar File type, the profile that was logged in the file will be extracted and will be available for use and editing in Qimera. To view what SVPs were brought in by default, scroll down in the Project Sources window:
Importing ASCII SVPs
ASCII SVPs can be imported via the ASCII importer.
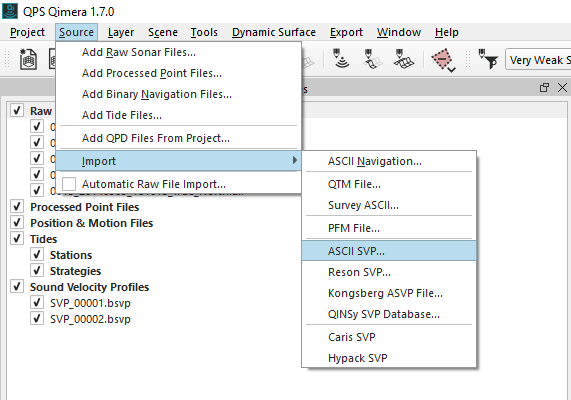
Load an ASCII SVP file by clicking on the 'Source' pull-down menu, then navigating to 'Import', then click on 'ASCII SVP'
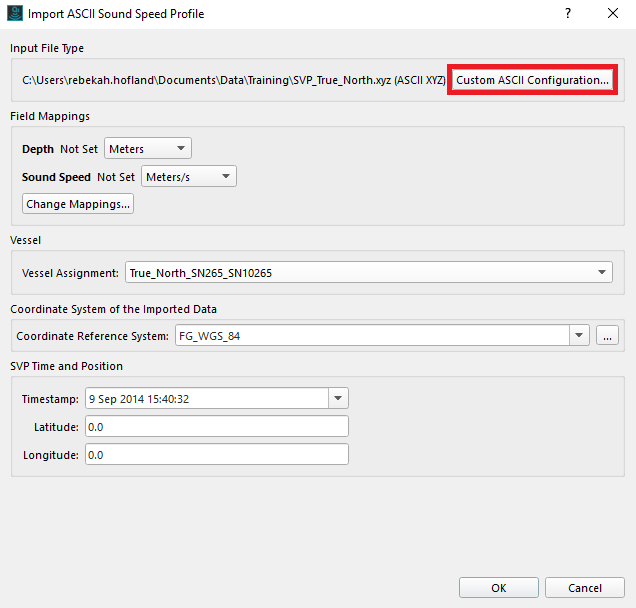
This will bring up the Import ASCII Sound Speed Profile window. Your SVP file type may or may not be detected automatically, depending on its type. If you see the button highlighted below, click on it to enter the Custom ASCII Configuration dialog:
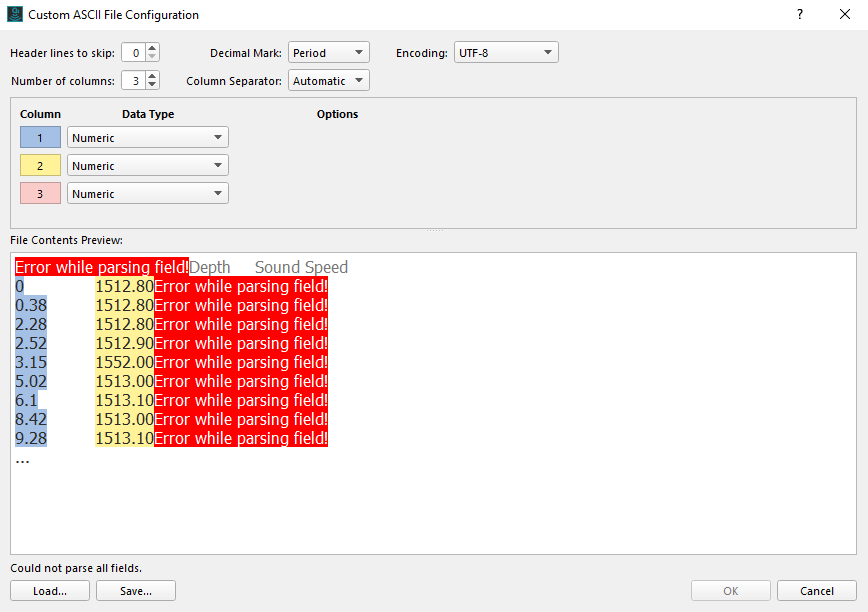
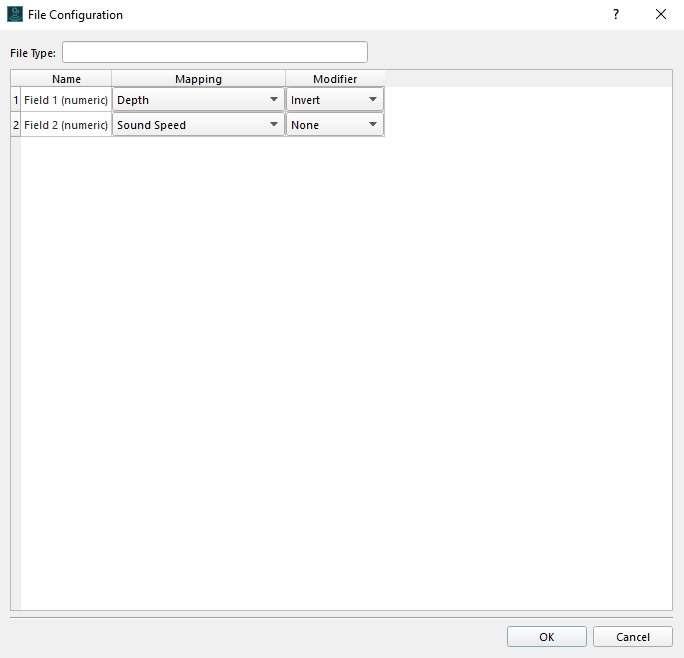
Within this window, the settings can be adjusted so that Qimera can bring the file in properly. As seen below, when settings need to be changed the file preview will show an error.
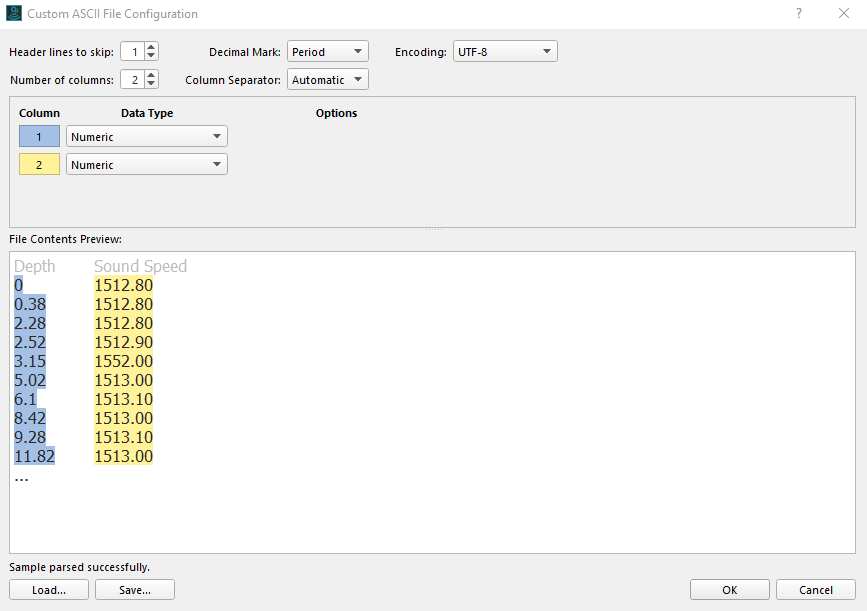
To fix these errors, header lines to skip and number of columns were changed. Each file is usually different however, as sometimes the type of data in a field needs to be changed.
For a more detailed walk through of the parser and Field Mappings, please refer to the Howto Qimera - Applying Tides documentation and take a look at the 'Import Non-supported tide data' section there.
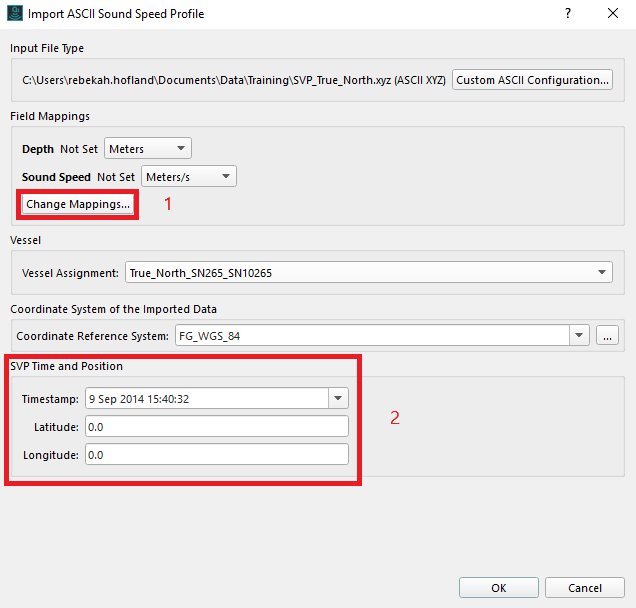
Once you have the data parsed successfully, click OK and configure the Field Mappings (1) in the Import ASCII Sound Speed Profile window.
If you are planning to apply position or time based rules to your sound speed processing, ensure that the Time & Position information (2) is correct. This can also be completed later using the SVP Editor.
Editing SVPs
Qimera features a tool for graphically editing SVPs
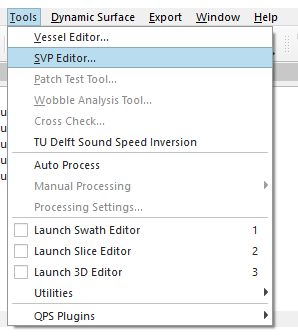
To edit individual SVPs, right click on the filename in the Project Sources window (left image) and select 'Edit SVP'. You can also select 'Edit SVP' in the 'Tools' pull-down menu (right image).
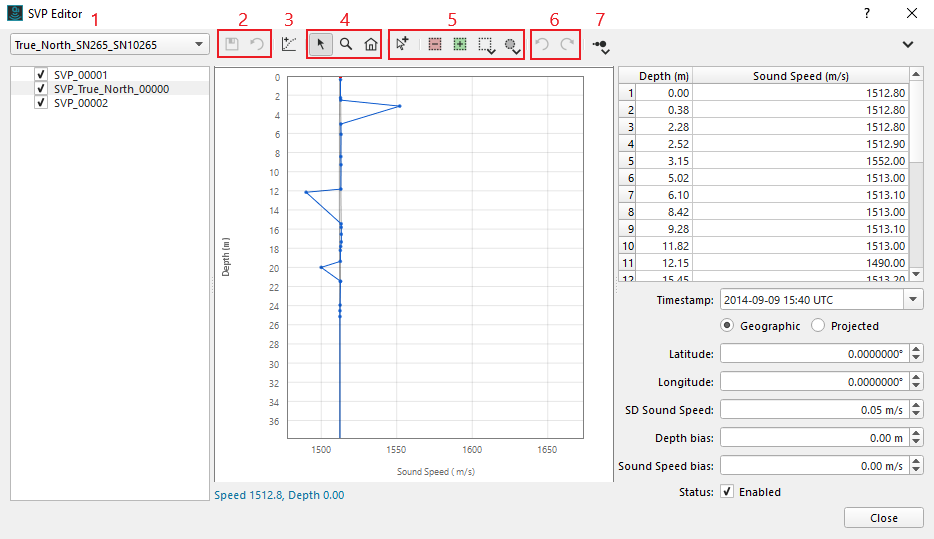
You should now see the SVP Editor window: Along the top of the window are the following (from left to right):
Use the mouse scroll wheel while hovering over the graph, it will zoom the y-axis. (The explore button must be active for this to work)
Points can be graphically added, flagged as invalid or valid.
Double clicking in the depth / sound speed table at the right allows for values to be edited.
Each time an SVP is edited, changes can be saved. This will create a revised SVP which will be visible under its filename, and the SVP can be reverted back to the original by right clicking the revision, and selecting revert.
A new SVP can be created from scratch. Click the 'New SVP' button and enter a filename and time.
Points can be created graphically after clicking on the 'Add Entry' button
Points can also be created by right clicking in the table and adding a row before or after an existing entry.
Applying changes
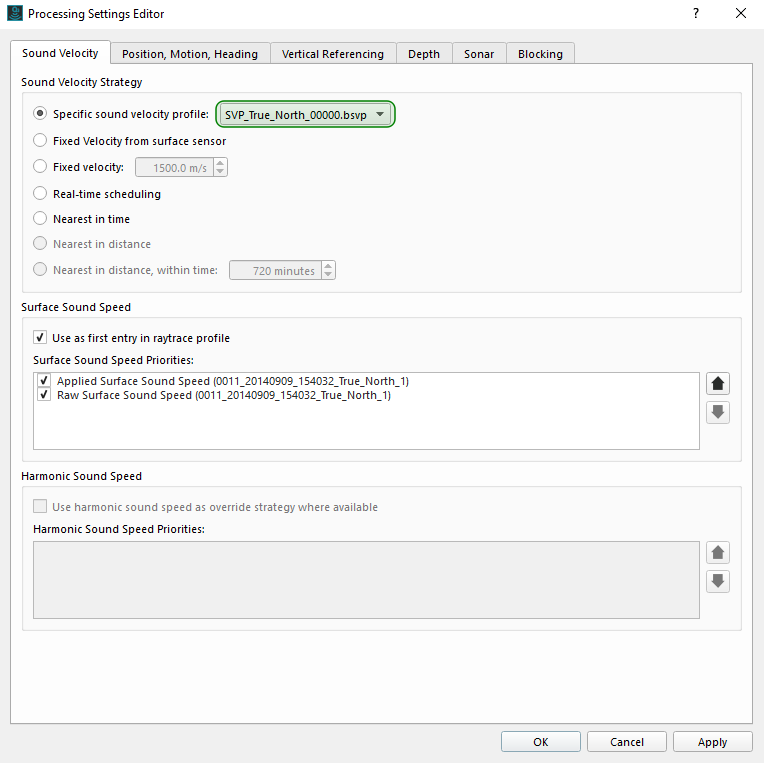
Click on the 'Processing Settings' button at the top of the Qimera Window. This will bring up the Processing Settings Editor.
In the Processing Settings Editor you will see options that dictate how the sound speed information is applied to the data.
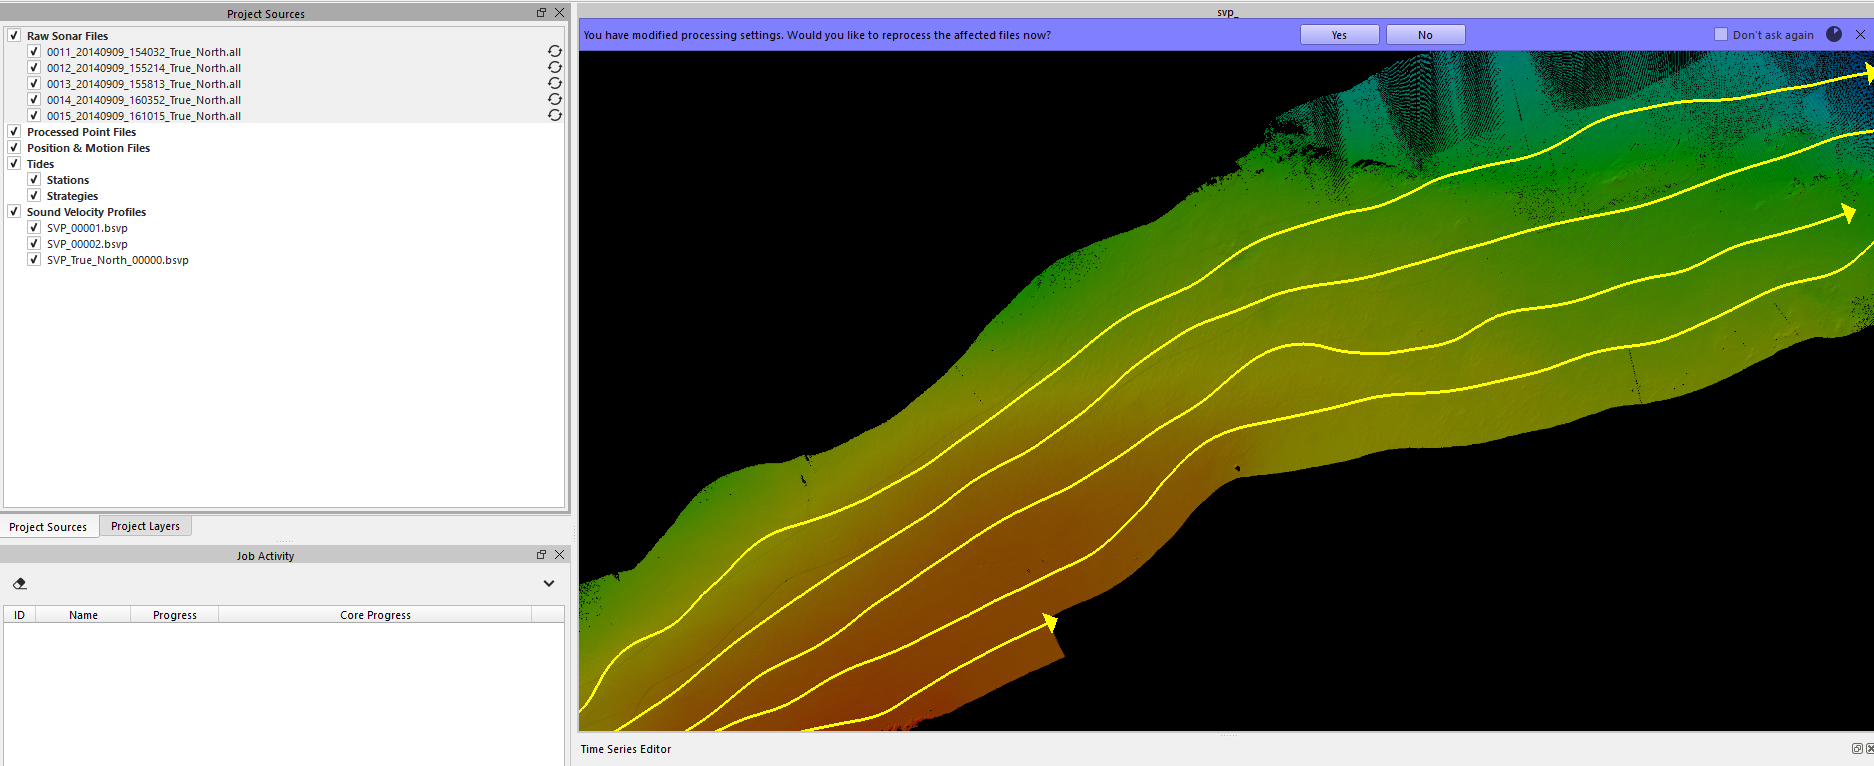
Once you apply processing settings, a blue bar will appear at the top of the geographic window prompting you to 'reprocess the affected files'. You can click on this or move your attention to the Project Sources window.
4. Next to an affected file, you will see the reprocess icon, two circular arrows. If you hover your mouse over this icon it will reveal which reprocessing steps are required. In this case the file(s) 'Require Full Raytrace Processing'
5. The reprocessing can be carried out by double clicking on individual lines or clicking on the 'Auto Process' button at the top of the Qimera window. Auto Process will reprocess all lines that require update.
6. After one or more lines are reprocessed, all dynamic surfaces will be updated.
JavaScript errors detected
Please note, these errors can depend on your browser setup.
If this problem persists, please contact our support.