How-to Apply Tides
This How-to describes the work flow for applying tides in Qimera.
On this page:
Import supported tide data
If your file is one of the following formats then you can import it directly into Qimera:
- Qinsy Tide Data (*.qtd)
- Qinsy Regular Tide File (ex: 24/10/2009 10:10 1.24)
- UK Tide Gauge Network, BODC Tide format
NOAA CO-OPs OPeNDAP
- Caris (*.tid) (ex: 2000/11/01 00:00 0.522)
- Swedish Maritime Authority (*.niv) (ex: 20040819,1240, -0.0)
- ARGOSS - Fixed Format
- COWLIS - Canadian Hydrographic Service
- MSQ Dialmace
- PREDUCT - Dutch Navy (*.qtr)
- RIKZ - Dutch Public Works
- HMS - Fixed Format (*.log)
- DMY HMS - Fixed Format (ex: 15/09/00 08:30 -2.02)
- YMD HMS - Fixed Format (ex: 20000808 0000 -12)
- Finnish Maritime Administration
- SHOM
- From the 'Source' pull-down menu at the top of the Qimera window, hover over 'Import' and select 'Supported Tides'
- Navigate to the location of the your tide file and open it.
User-defined import of tide data (ASCII)
Qimera allows detailed parsing of an ASCII file containing tide data.
- From the 'Source' pull-down menu at the top of the Qimera window, select 'Add Tide Files...'
- Select your ASCII file and open. The ASCII configuration window will then launch.
- The tool will try to auto-detect the number of header lines. If this number is correct, the header lines should be greyed out.
- Scroll down the File Contents Preview (if necessary) and view the data fields.
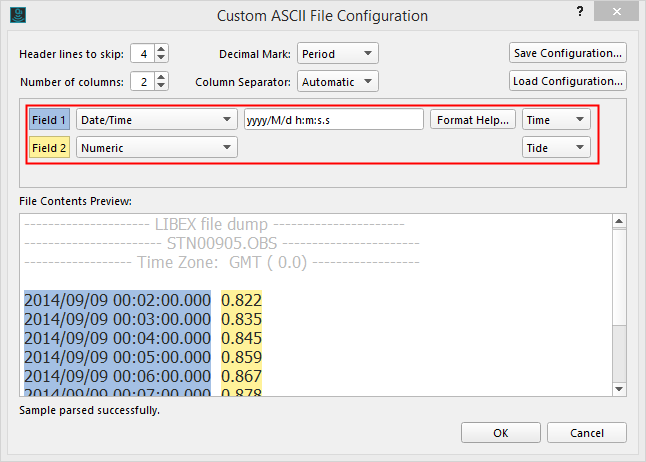
In this case, the date/time field has been correctly detected, the tide and time have also been set.
If your file has been incorrectly parsed follow the steps below, otherwise skip to step 10. - Each column of data needs to be associated with a data type. Use the field pull-down menus next to each field.
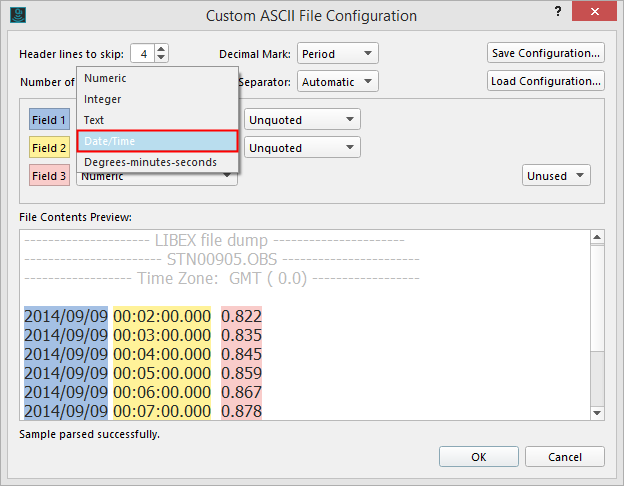
- When the data type for field 1 is changed the default date/time may or may not work:
The default format is editable. Changing it in this case to (yyyy/M/d h:m:s.s) solves the problem. It also leaves you with an extra field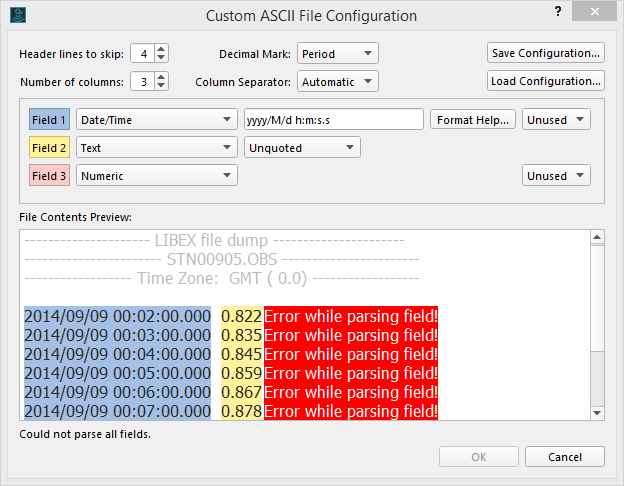
- In the case above, the Field 2 data type needs to be changed to Numeric and the number of fields reduced to 2 (If you want to save this configuration for future imports, use the Save Configuration button near the top right corner of the window).
- You now need to set the the Field Mappings, using the pull down menus at the end of each field to set the correct value
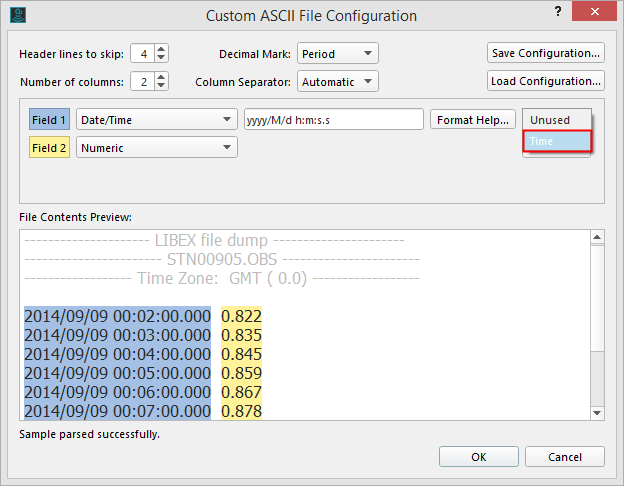
- Once the sample has been parsed successfully (this will be stated below the Contents Preview window) you can click OK
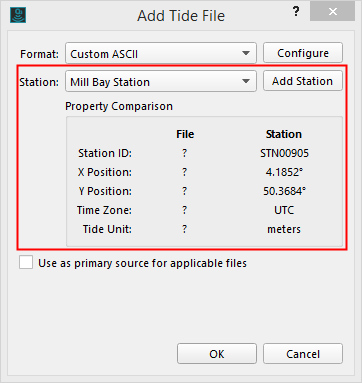
- Now the tide station needs to be set.
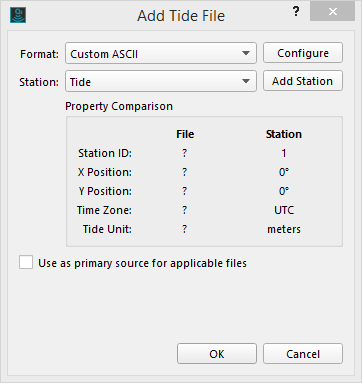
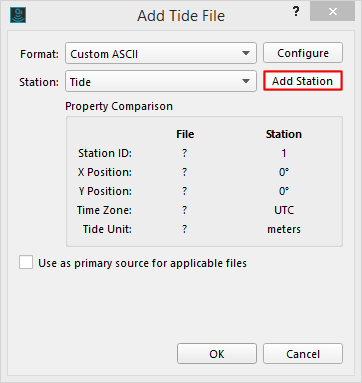
- You can either use the station information given or click the 'Add Station' button.
- This will allow you to set a new tide station for your data. Make sure that you have a unique ID, the correct co-ordinate system.
- It is important to have to correct position of the tide station and the correct recorded time zone or your tide will not be able to be applied.

- Check the recorded unit and add the datum if you wish.
- Click OK and you will return to the Import ASCII Tide Profile Window.
- Make sure that all the information has been correctly updated
- If you wish this to be set as the primary height source tick the box.
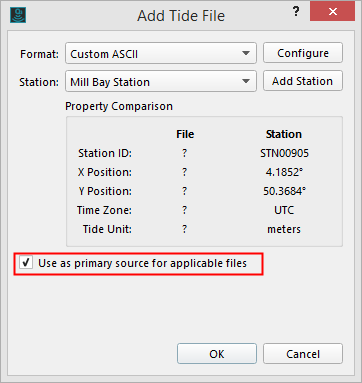
- Be aware, if the files do not match up with the tide (either the time or the location) the tide file will not be applied.
Confirm Tide Data Import
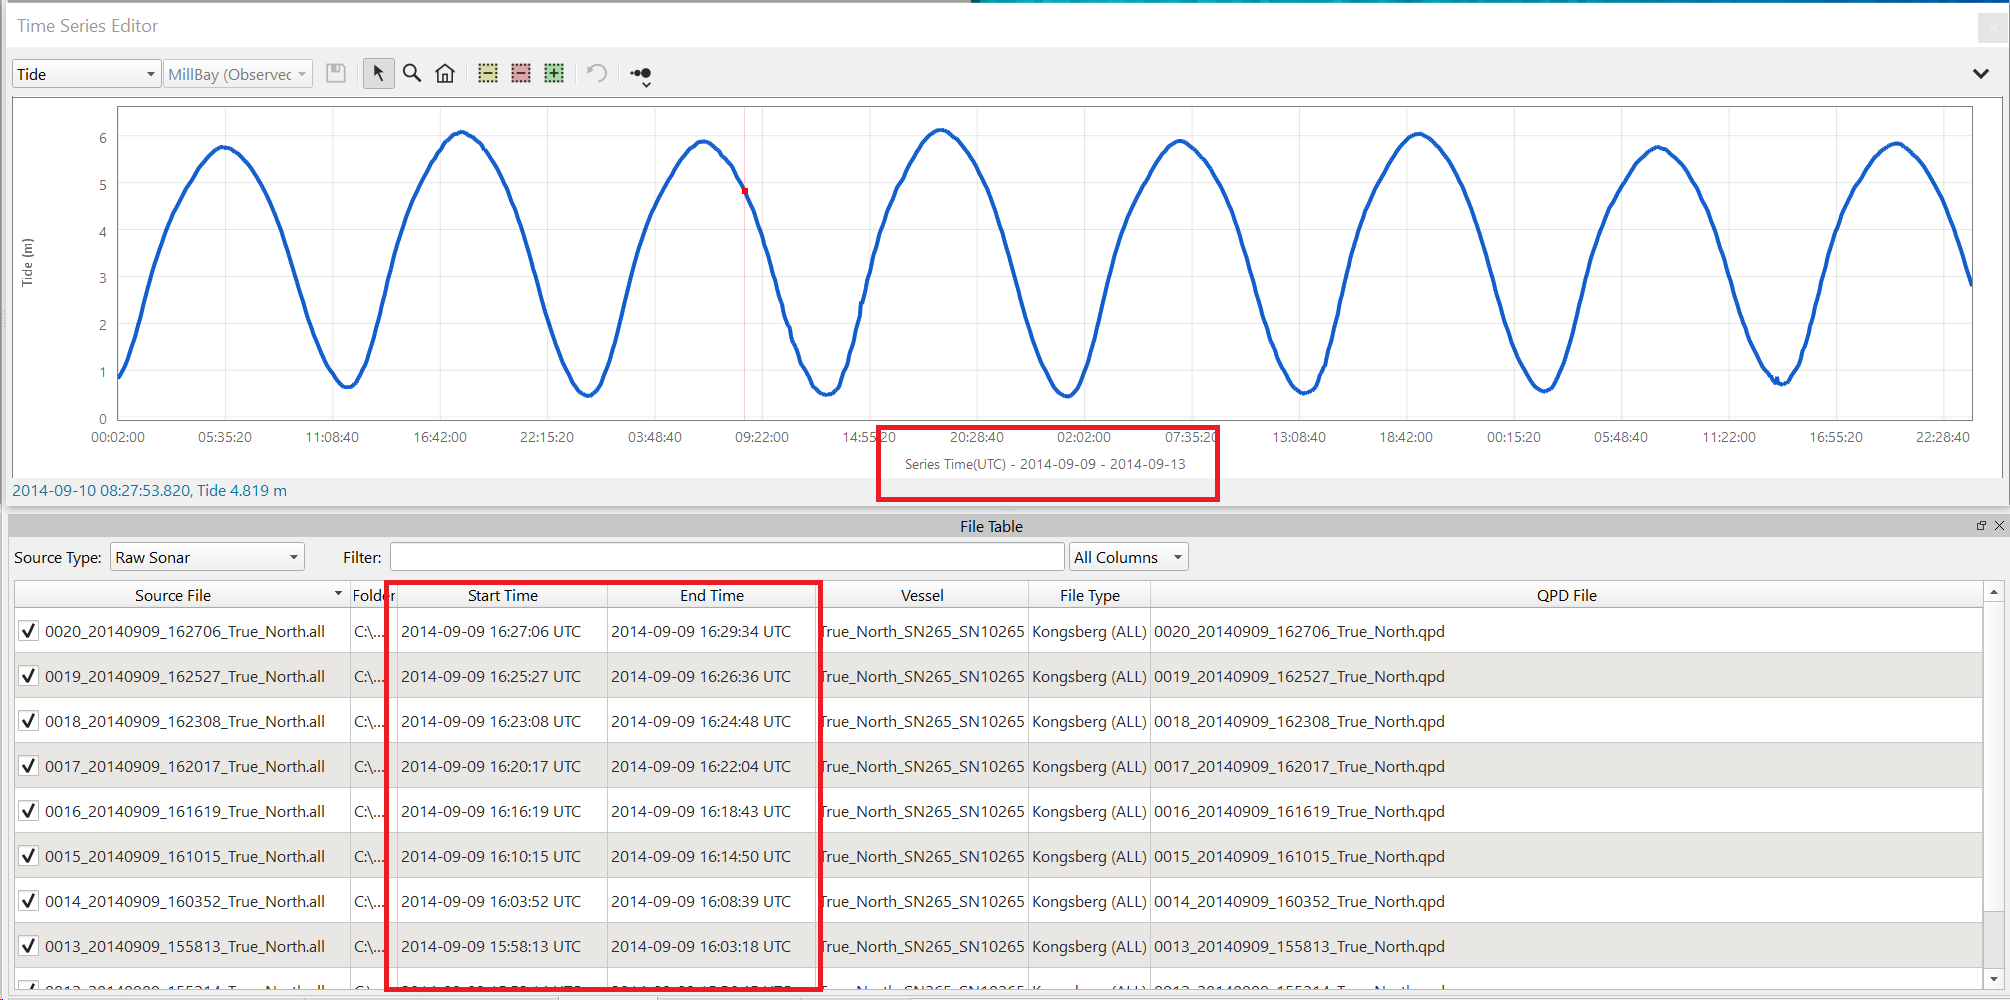
Visual Confirmation
- Select your tide file in the Project Sources box (1) in the main Qimera window. If it is not present, it can be enabled under the Window pull-down menu.
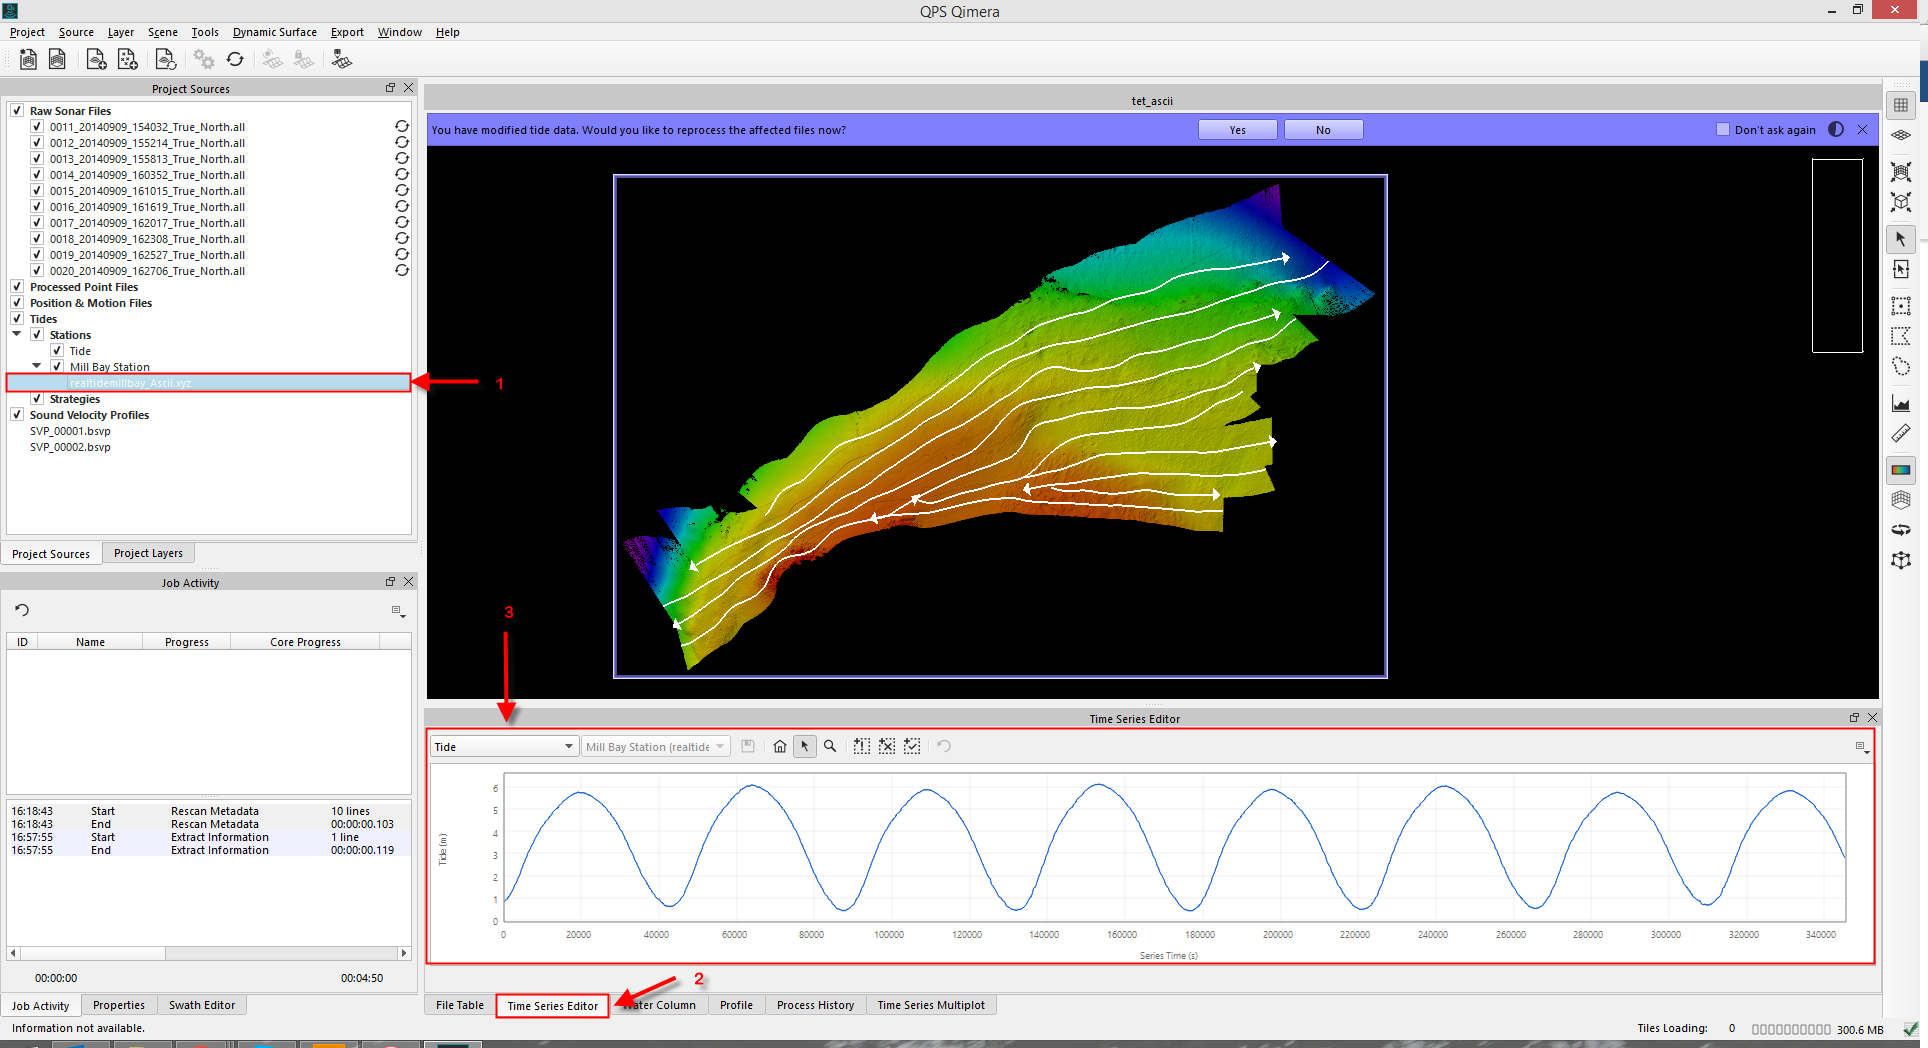
- Click on the Time Series Plot tab (2) at the bottom of the screen. This box can be enabled under the Window pull-down menu if it is absent.
- You will see the tide data in the Time Series Plot (3)
Data Overlap
- You may see a dialog pop up at the top of geographic window asking if you want to reprocess files now. Before you click yes, you may want to confirm that all files have appropriate overlap with the tide data.
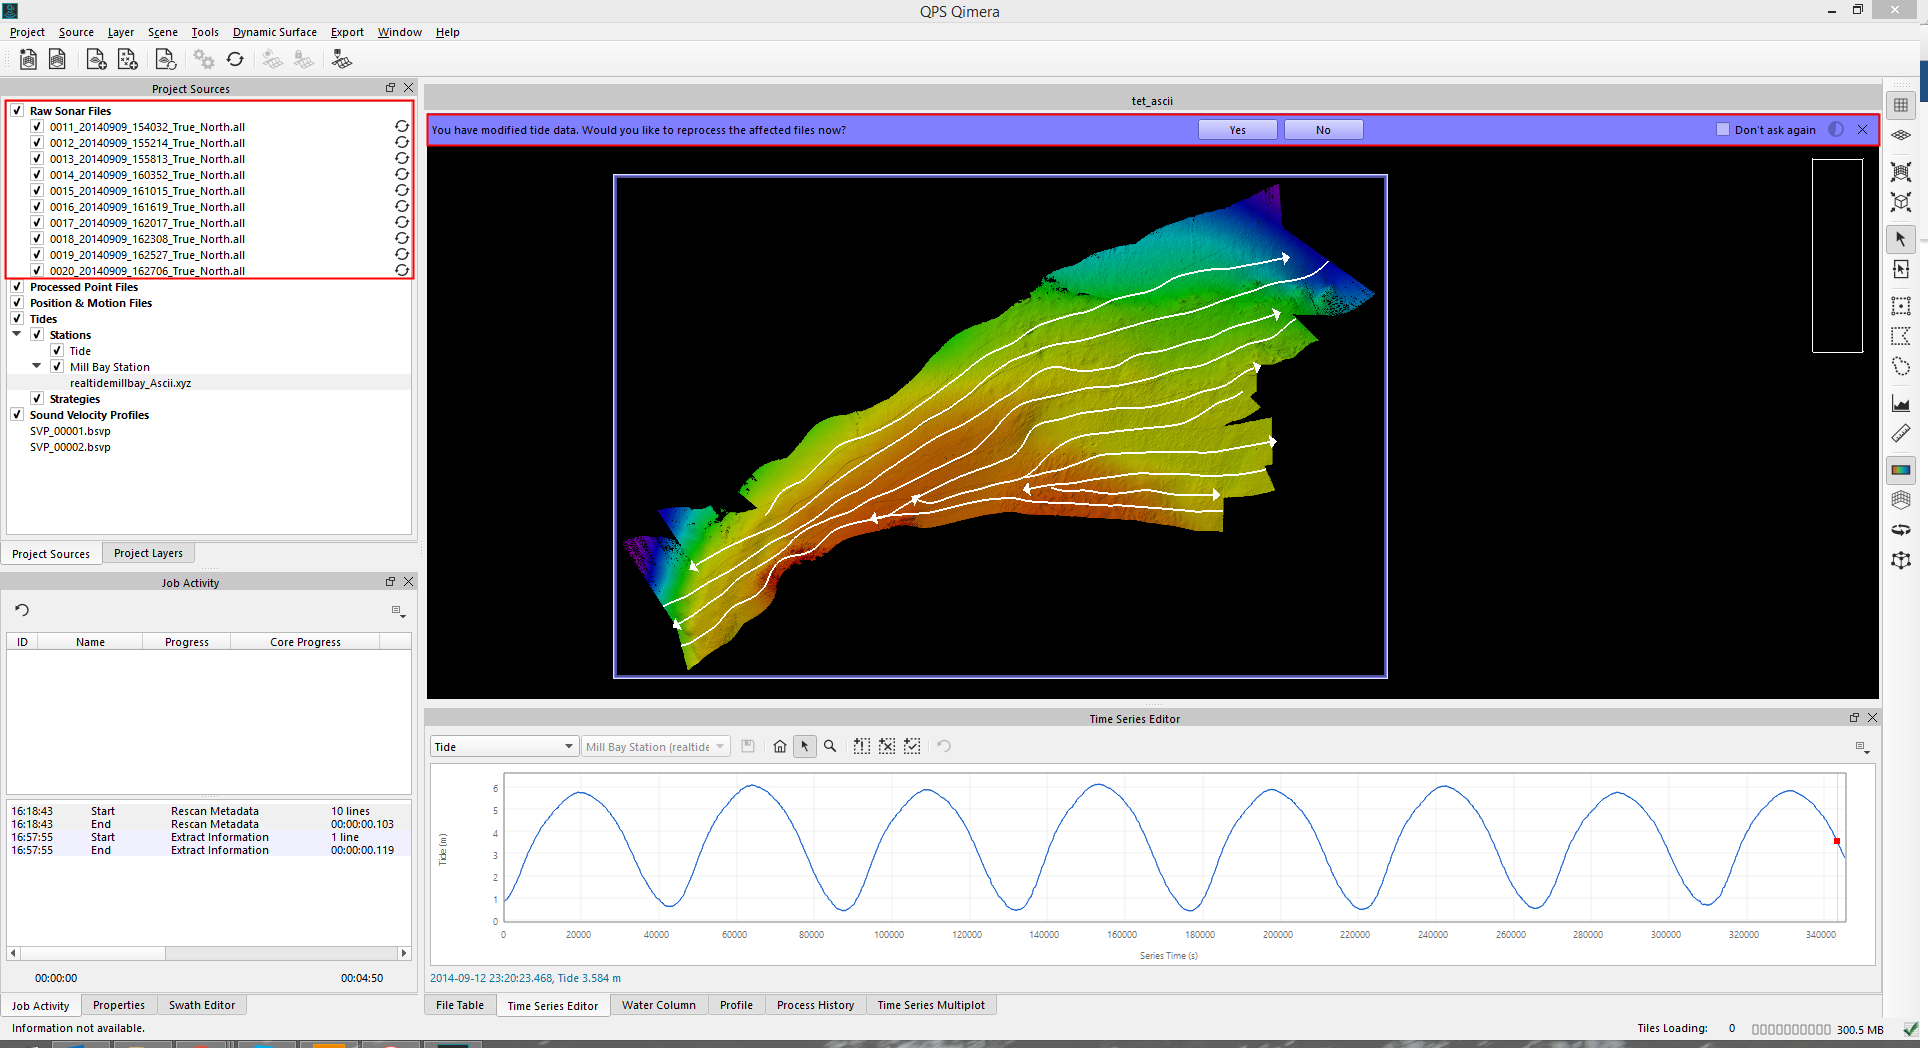

- Additionally, you can confirm that your tide series beginning and end overlap with your data files:
- Check the status of the multibeam files in the Project Sources window.
- You should see the reprocess icons to the right of each line name. Hover your mouse over the icon, it should indicate that the line requires Z navigation reprocessing. This indicates that the data from the tide file overlaps with the multibeam data and is waiting to be applied to that line.
- To process the lines, select them and click on the Auto-Process button just under the menu at the top of the screen. Alternatively, each line can be reprocessed by double clicking the name.
- The dynamic surface will automatically be updated when the reprocessing is complete.