License Manager Reference
Table of Contents:
How to Start
Launch the standalone license-manager.exe located in C:\Program Files\Common Files\QPS\License-Manager OR
Launch the License Manager from each QPS Application
Window/Linux - View License Status... under Help Menu in the Menu Bar
macOS - View License Status... under the Application Name in the Menu Bar
What it does
This dialog manages QPS product licenses across its entire software suite.
General Description
In order to run any software in the QPS Suite, a valid license must be available for the software application.
QPS applications currently support Softlock and HASP Dongle licenses that are fully integrated into the License Status Dialog.
When you purchase a QPS software application you will be provided with licenses of your choosing.
License status
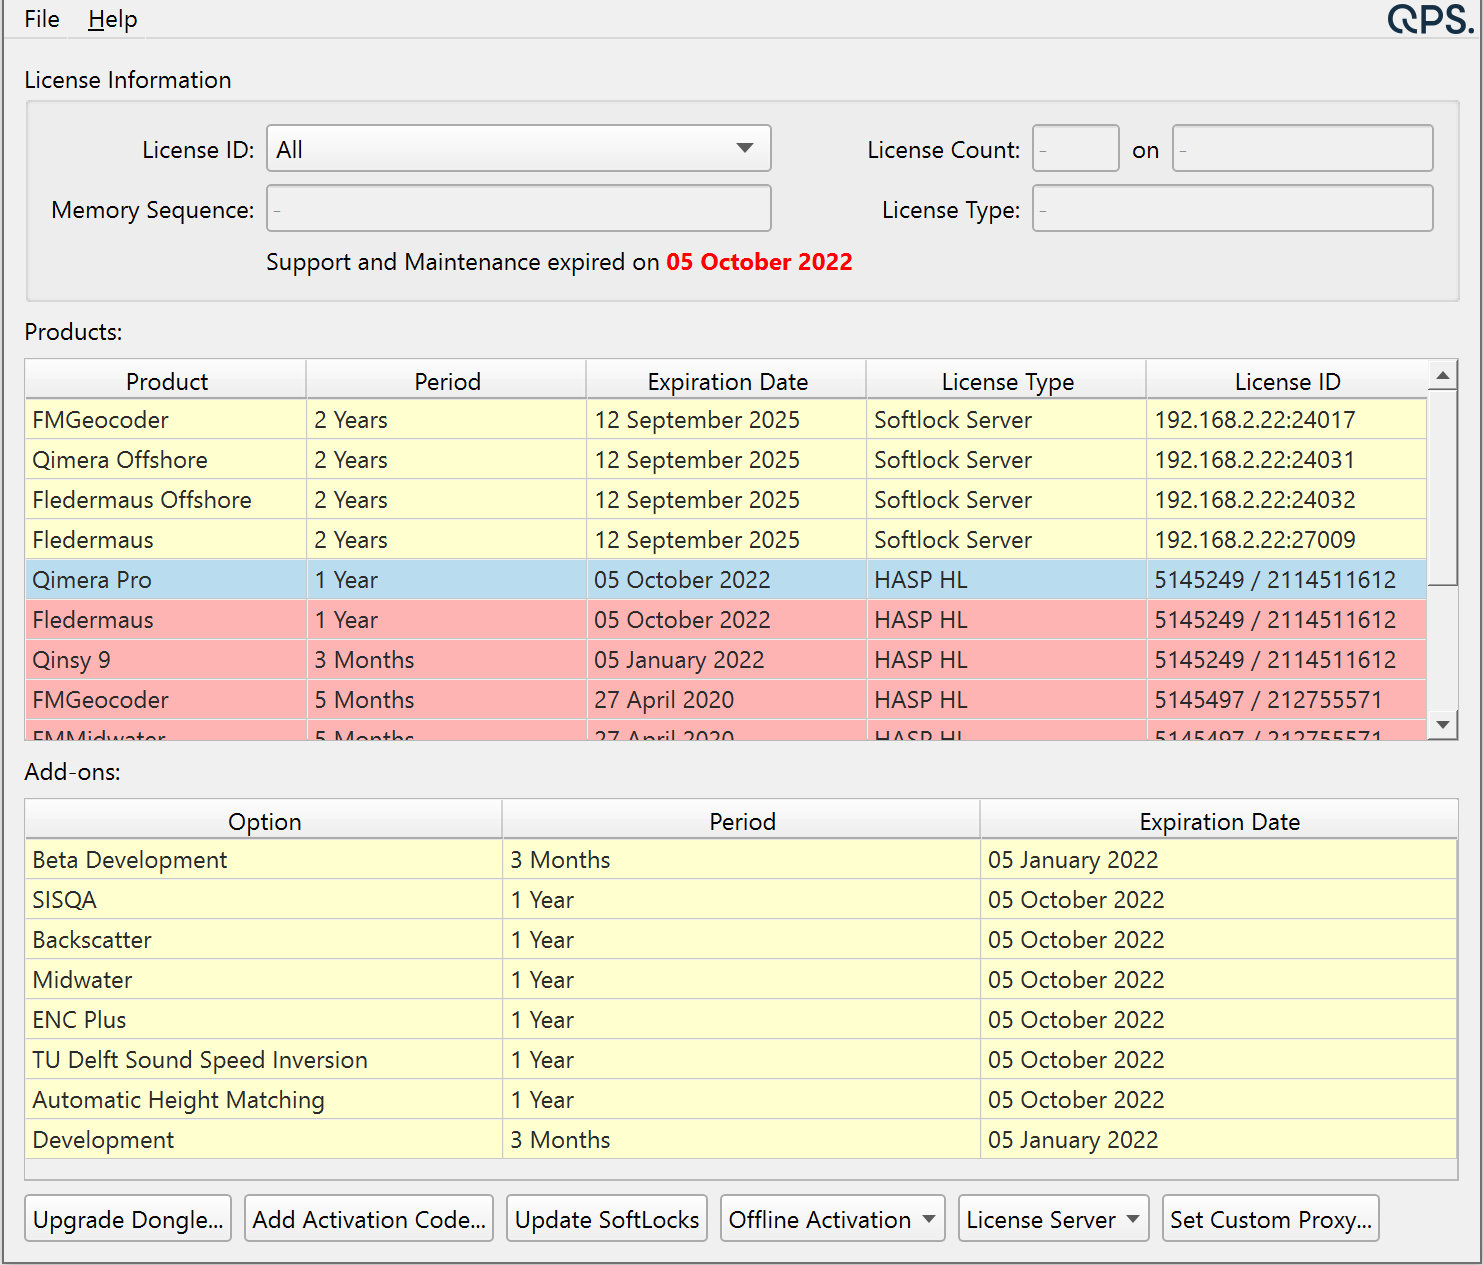
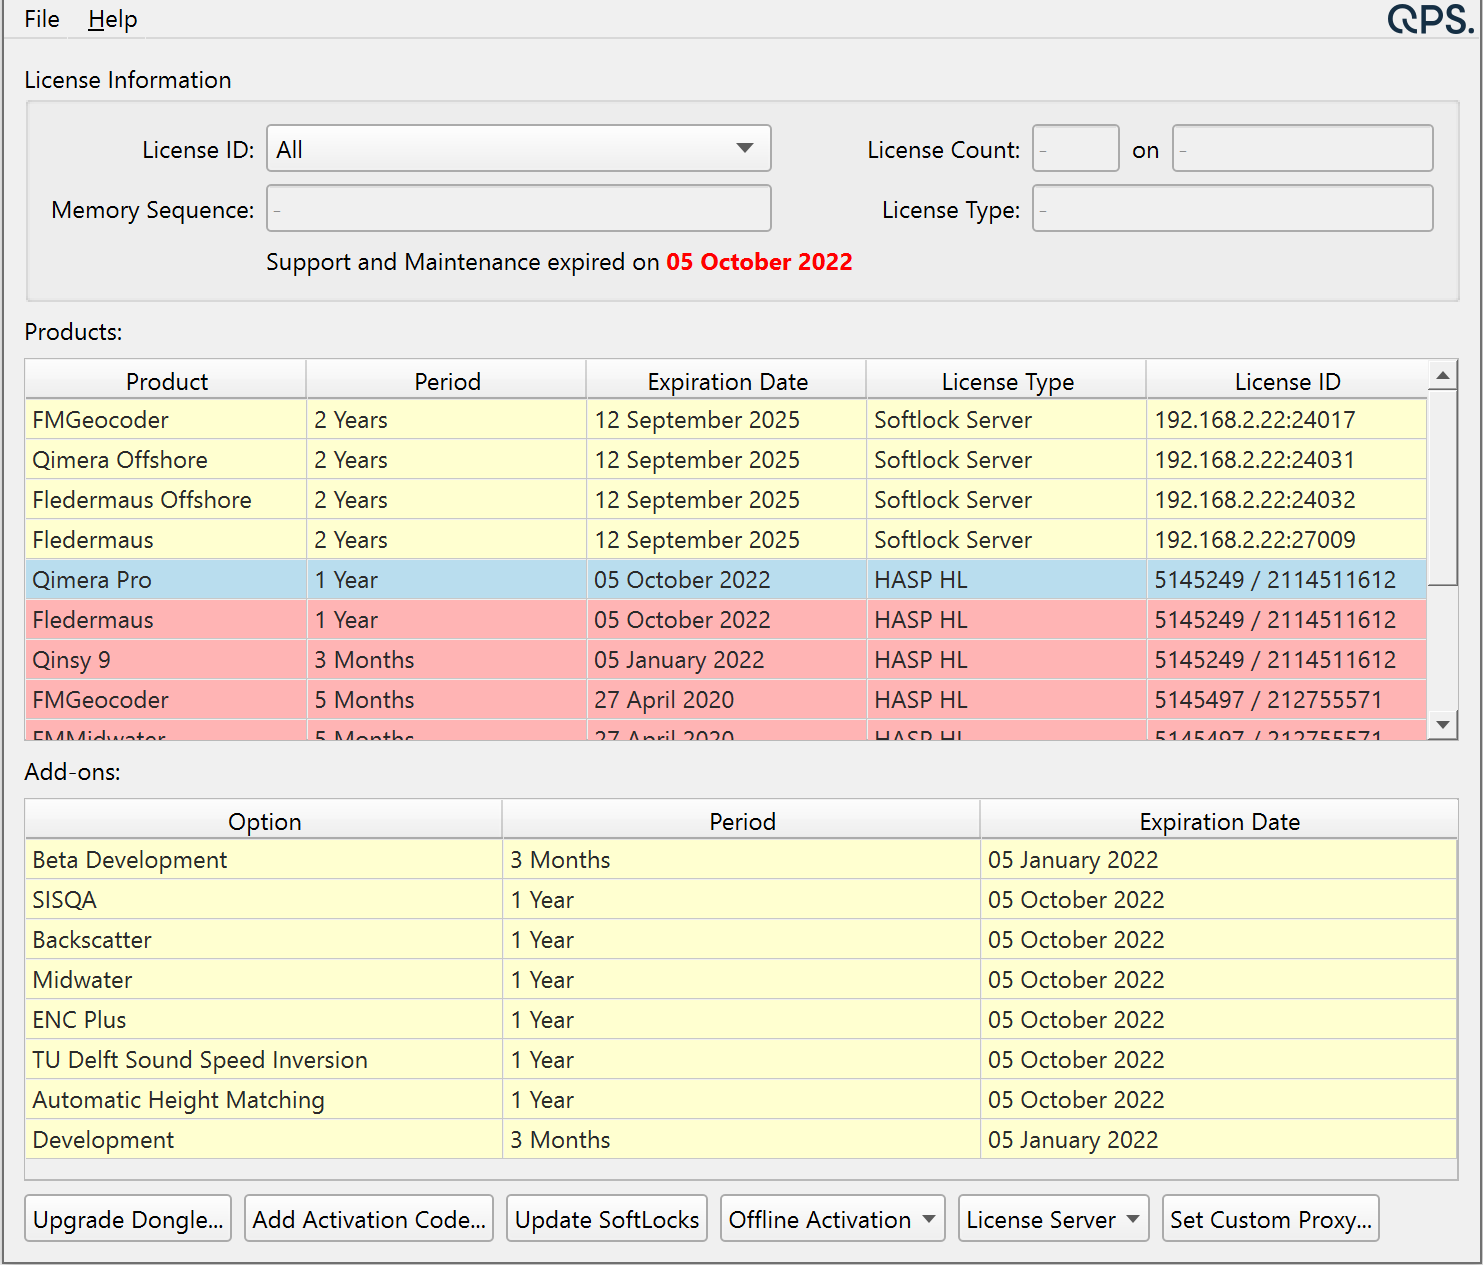
License Information
The License Information group contains information for the currently selected license in License ID combo box.
Selecting a License in the License ID combo box will filter the Product table to only contain that license.
Product
The Product table contains information for all HASP and Softlock product licenses attached to the device.
If a Softlock license is no longer needed on the device it can be deactivated using the Deactivate combo box cell and selecting online or offline deactivation.
Add-Ons
The Add-Ons table displays any additional functionality your License may offer for a particular product line.
Selecting a License in the Product table will filter the Add-Ons for the selected License.
Copy License ID or Tag ID
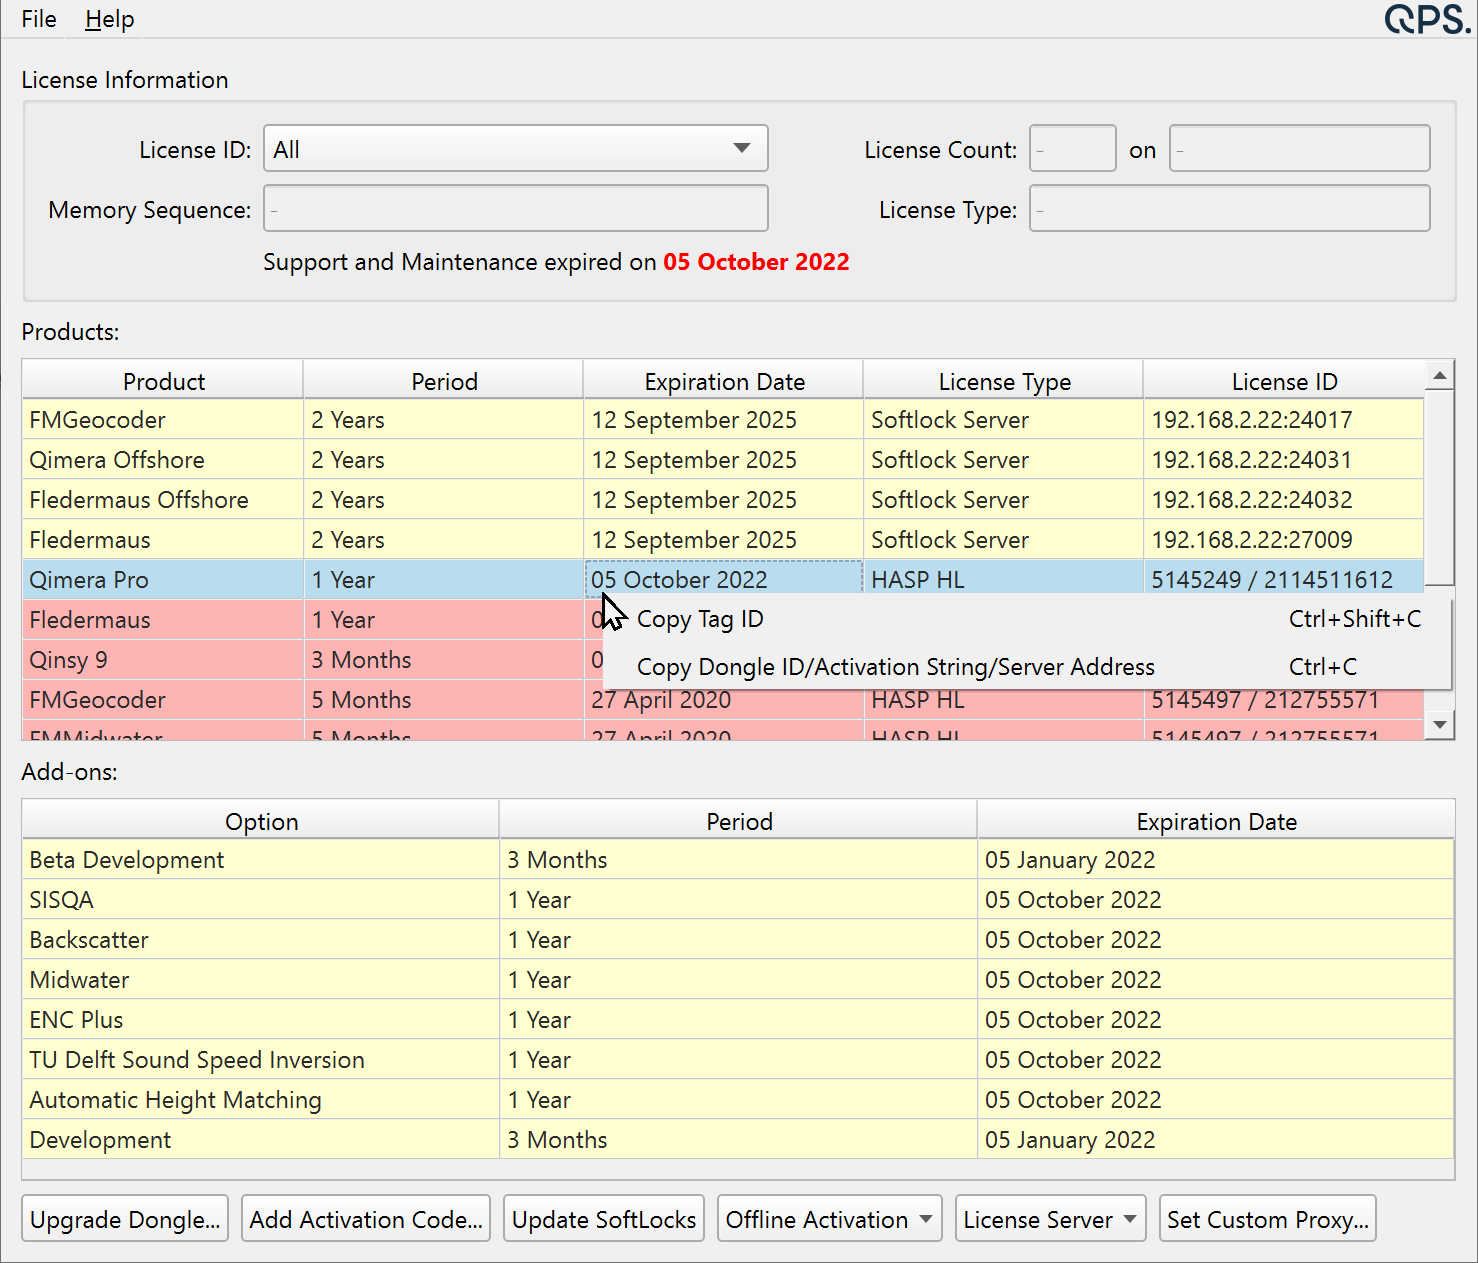
In the case that a license ID needs to be conveniently copied from the License Manager, simply right click (click with the right mouse button) on the product for which the license ID is to be copied, then select one of Copy License ID or Copy Tag ID.
The option to select depends on what is to be copied. The Tag ID is one of the following: for dongles, it is the number that appears on the printed tag attached to the physical dongle, for softlocks, it is the 7 digit number like a virtual tag ID starting with the digits 520, for servers, this is the same as the license ID.
The license ID is one of the following: for dongles, it is the number electronically associated with a dongle, shown in tandem with the tag ID in the display separated by a slash; for softlocks, it is the 28 character activation code separated with dashes, not including the product number or name' for server licenses, this is the location of the server for that product.
Shortcut keys are available. It is sufficient to click on the product row, then press the control, shift and C keys together (Ctrl+Shift+C) to copy the tag ID. The license ID may be copied as before in v1.2 by pressing Ctrl+C.
See an example of the right click menu in the following:
Upgrade Dongle
Selecting a HASP dongle from the License ID combo box will enable the button to Upgrade Dongle.
QPS will provide a HASP Upgrade code that will have to be entered or loaded into the Upgrade Code Dialog Window.
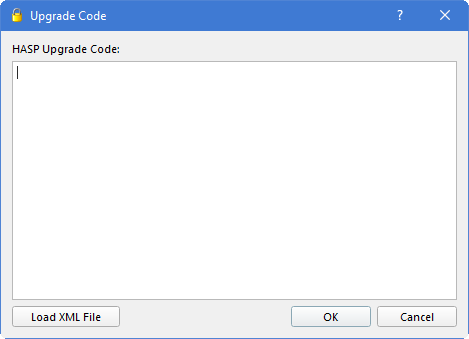
Press Load XML File to browse for the file. When you open it, the code will automatically be loaded into this window.
After pressing OK the dongle will be upgraded and will be ready for use.
Add Activation Code
This is meant only for Softlock licenses.

Selecting the Add Activation Code... button launches a new dialog to add a new Softlock License obtained through QPS.
The Softlock license key can be entered manually, pasted into the first text field, or loaded with an appropriate XML file using the Load XML File button.
Clicking OK will apply the new Softlock License for use.
Be connected
An active Internet connection is required for the activation to complete.
In exceptional cases an offline activation may be used. The file created during offline activation must then be sent by Internet to QPS. The file can be sent from another computer or network.
Update Softlocks
This will refresh an existing Softlock.
At the moment of writing (August 2019) only the newly added product licenses will be visible.
The product licenses already available on the Softlock will be invisible.
They need to be added manually from the old *.xml file and can be used from there onward.
This means you will need to store the Soflock activation codes for later use.
If changes have been made to a Softlock License, for example new Add-Ons requested, the local Softlock License will have to be updated.
This can be done manually using the Update Softlocks button.
Softlocks are automatically updated whenever a licensed application is started and when the License Manager is opened, if the computer with the application is connected to the Internet. So, in general it should not be necessary to use the Update Softlocks... button. However, if the need arises, the status of the licenses may be easily updated by clicking Update Softlocks....
Offline Activation
This option will only be offered in exceptional cases.
An Offline Activation code will only be supplied for a limited time, approximately 1 year, or for the time the license is valid.
In the event of limited internet connectivity Offline Activation can be performed by clicking the Offline Activation button.
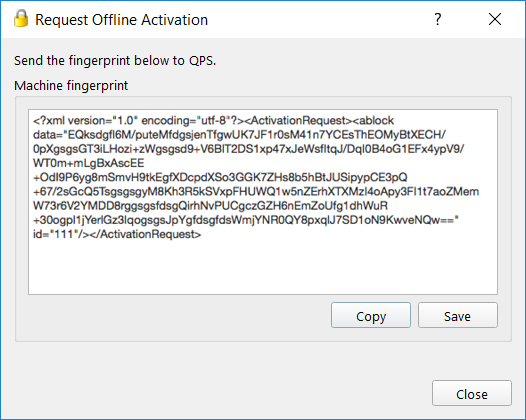
After selecting Generate Request... you will be required to enter your QPS supplied Softlock Product Key which will generate an XML formatted machine fingerprint that must be provided to QPS.
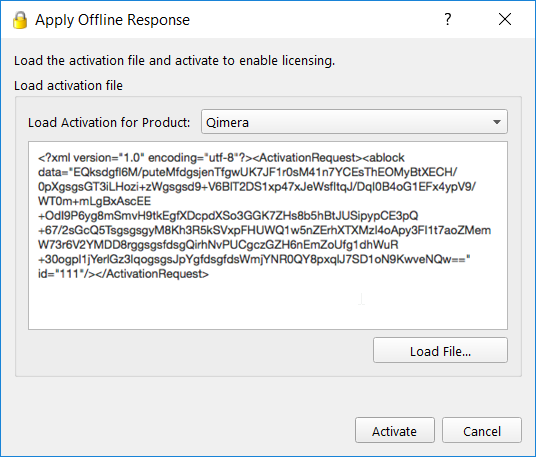
QPS will then provide an XML formatted activation string that can be applied using the Apply Response... option of the Offline Activation button.
Connect to Server
This option is meant for IT managers.
If a license server has been configured it can be used to distribute licenses over a network.
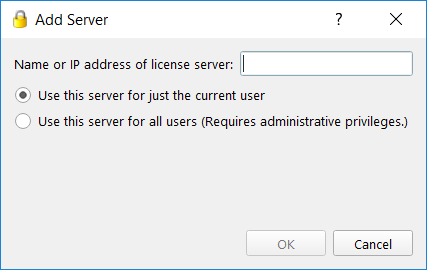
Enter the IP address of the license server and select the appropriate user option and select OK.
Disconnect from server
If a license server has been connected to in the past this option will become available even if the server is offline.
Disconnecting from a server will prompt the user to confirm the requested disconnect. It should be noted that the licenses will remain active until the application is closed.
Set CUSTOM PORTS
It is possible to set the ports used to connect to the server on a case-by-case basis. The default ports used range from 24000 to 24033 at this time, though only ports 24011 to 24033 may actually be used.
In future, lower port numbers (down to 24000) may be used.
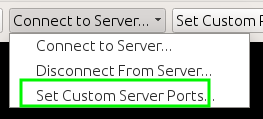
The port used by any product may be changed by selecting the Set Custom Ports menu item from the Connect to Server button menu. Select the product and desired port number, then click Set Port for product.
The port used for licensing for that product (and any other chosen products) will be changed. The default port number for a selected product can be easily restored by clicking on the Reset Default Port button.
Any products that are currently running must be restarted for the changes to take effect.
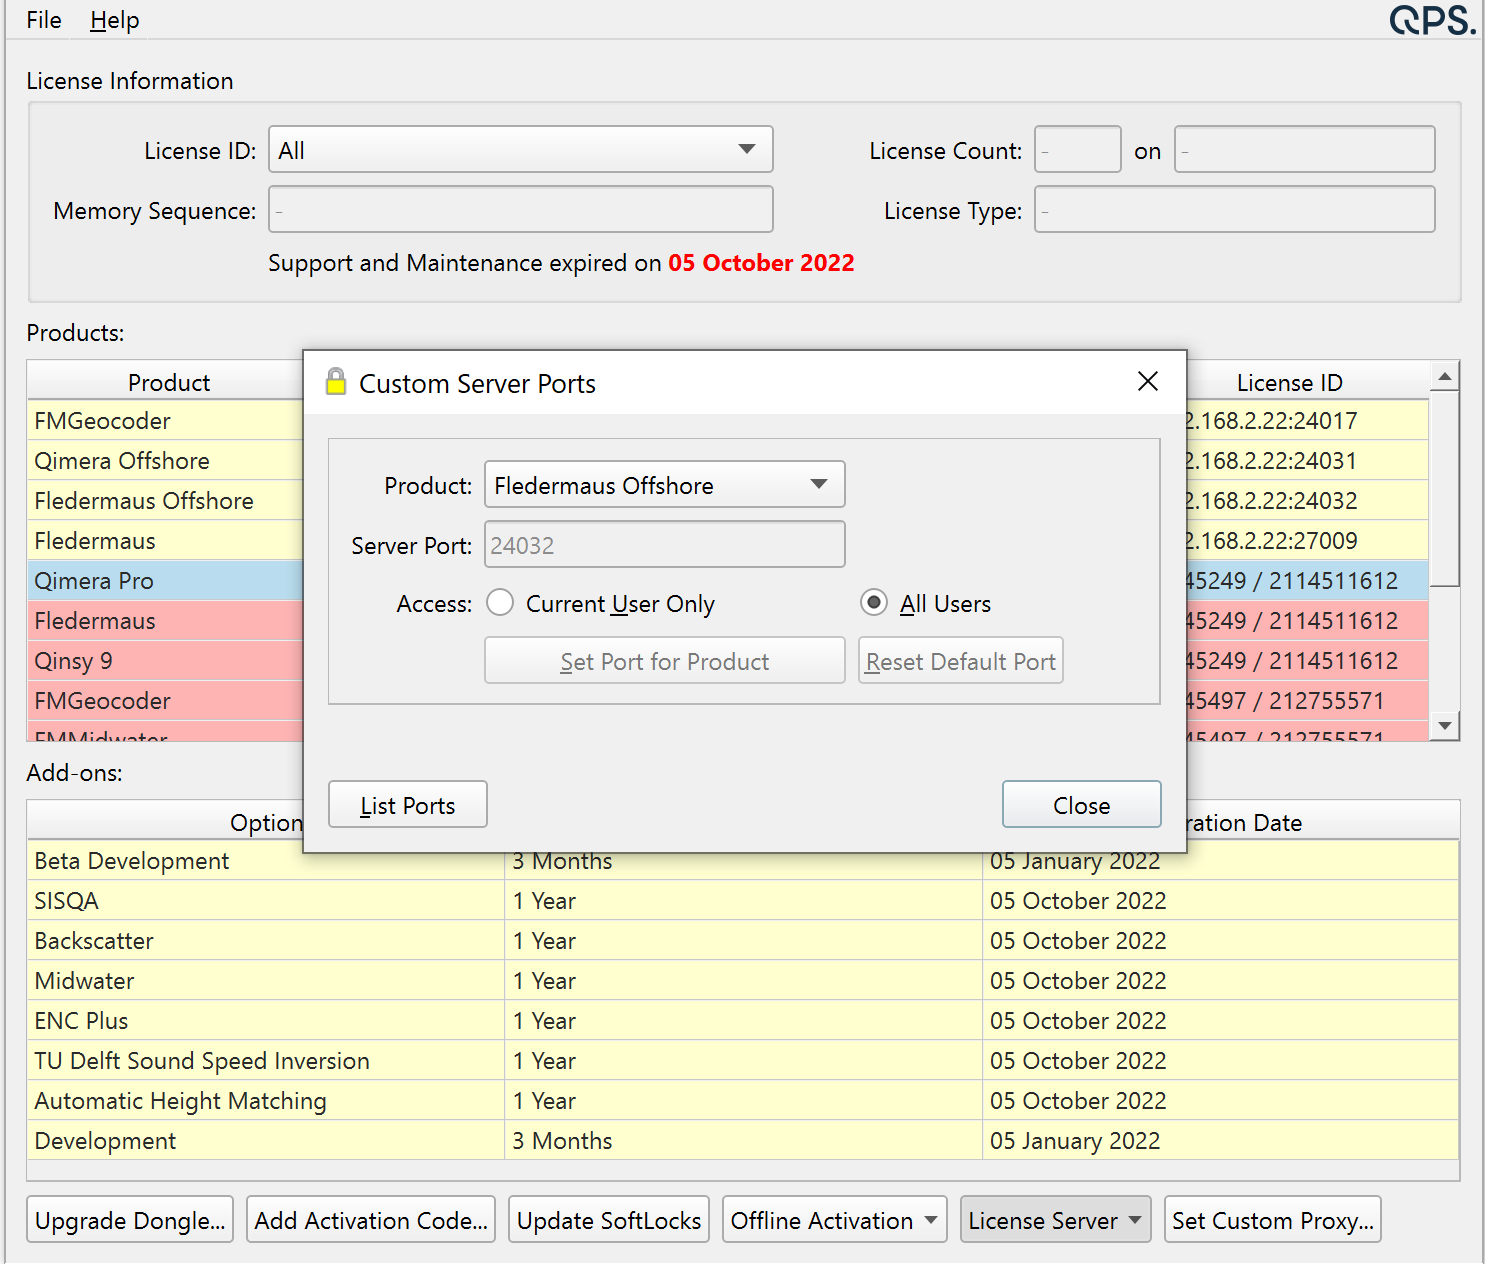
Note: The server port can be changed by any user when using the Current User Only access level. However, only when License Manager is Run As Administrator can the ports be changed for All Users. For regular users, select Current User Only to change the port. Administrators may change the port used for all users on the current machine only by starting License Manager with Run As Administrator. Otherwise, the Server Port field will be read-only and cannot be changed.
A list of ports used by each product can be retrieved by clicking the List Ports button. The port used by each product will be listed next to the applicable product. Custom ports will be highlighted with a star ``*'' next to any product that has a custom port.
In the example attached, note that Fledermaus was assigned port 2222 and a star appears next to the port number.
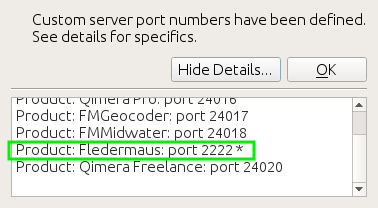
Care should be taken that no two products use the same port. The port number for the product must match the port number set in the matching configuration file for the product, TurboFloatServer-config.xml.
The configuration for the Fledermaus server would in this case be configured as seen here (where the configuration is boxed in green). Note that the port used for both the client and the server are the same.

TurboFloatServer-config.xml
Set Custom Proxy
This option is meant for IT managers.
By default, License Manager uses whatever proxies your users have set for their system. Where License Manager reads these proxy settings from differs between operating systems:
Windows: The proxy settings are read from Internet Explorer.
Mac OS X: The proxy settings are read from the system internet settings.
Linux: The proxy settings are read from the environment variables
http_proxyorall_proxy.
You can overwrite the default system proxy settings by specifying a proxy server address. When using custom proxies they must be in the form Proxy in the form: http://username:password@host:port/
Example 1 (just a host): http://127.0.0.1/
Example 2 (host and port): http://127.0.0.1:8080/
Example 3 (all 3): http://user:pass@127.0.0.1:8080/
Note: If the port is not specified, License Manager will default to using port 1080 for proxies.
To set a custom proxy simply check 'Use Proxy Server' and specify a proxy server address and press OK.
To clear a previously set custom proxy simply uncheck 'Use Proxy Server' and press OK.
License Manager also support NTLM proxies on Windows. To use NTLM proxies you must also specify the domain. For example:
http://DOMAIN\username:password@host:port/

Commandline Activation
The commandline can be used to activate a softlock license in an automated manner. The -silent option in conjunction with the -activate option can be used to activate a single activation code.
It is an error to specify either of these options without the other.
When attempting to connect to a server, the License Manager will first attempt to set a system-wide connection so that all users on the machine may access the license.
If the app does not have enough privileges to set a system-wide connection, it will fall back to licensing only the user that it is running as.
Usage is: license-manager
	[ -silent ]
	[ -activate <activation-code> ]
	[ -licserver <license-server> ]
	[ -licproxy <proxy-server> ]
	[ -clearserver ]
[ -debug ]-silenttells the LicenseManager not to show the GUI.-activate <activation-code>tells the LicenseManager to activate the specified code. Must be used in conjunction with-silent.-licserver <license-server>tells the LicenseManager to connect to the specified license server IP address or hostname. Must be used with-silent.-licproxy <proxy-server>tells the LicenseManager to use the specified proxy server IP address or hostname. May be used in conjunction with-licserver. Must be used with-silent.-clearservertells the LicenseManager to clear any and all connections to a license server. Must be used with-silent. Helpful if the license server is not available or down.-debug tells the LicenseManager to print additional information while in-silentmode to aid in diagnostics. If used, it must be the first option on the command line.-hdisplays the usage information.-verdisplays the version information.The exit code indicates if the activation was successful or not, zero for success, non-zero for failure.
Help
Clicking the Help menu item will give you online and offline options for viewing 'How-to' manuals for the License Manager and HASP Dongles.
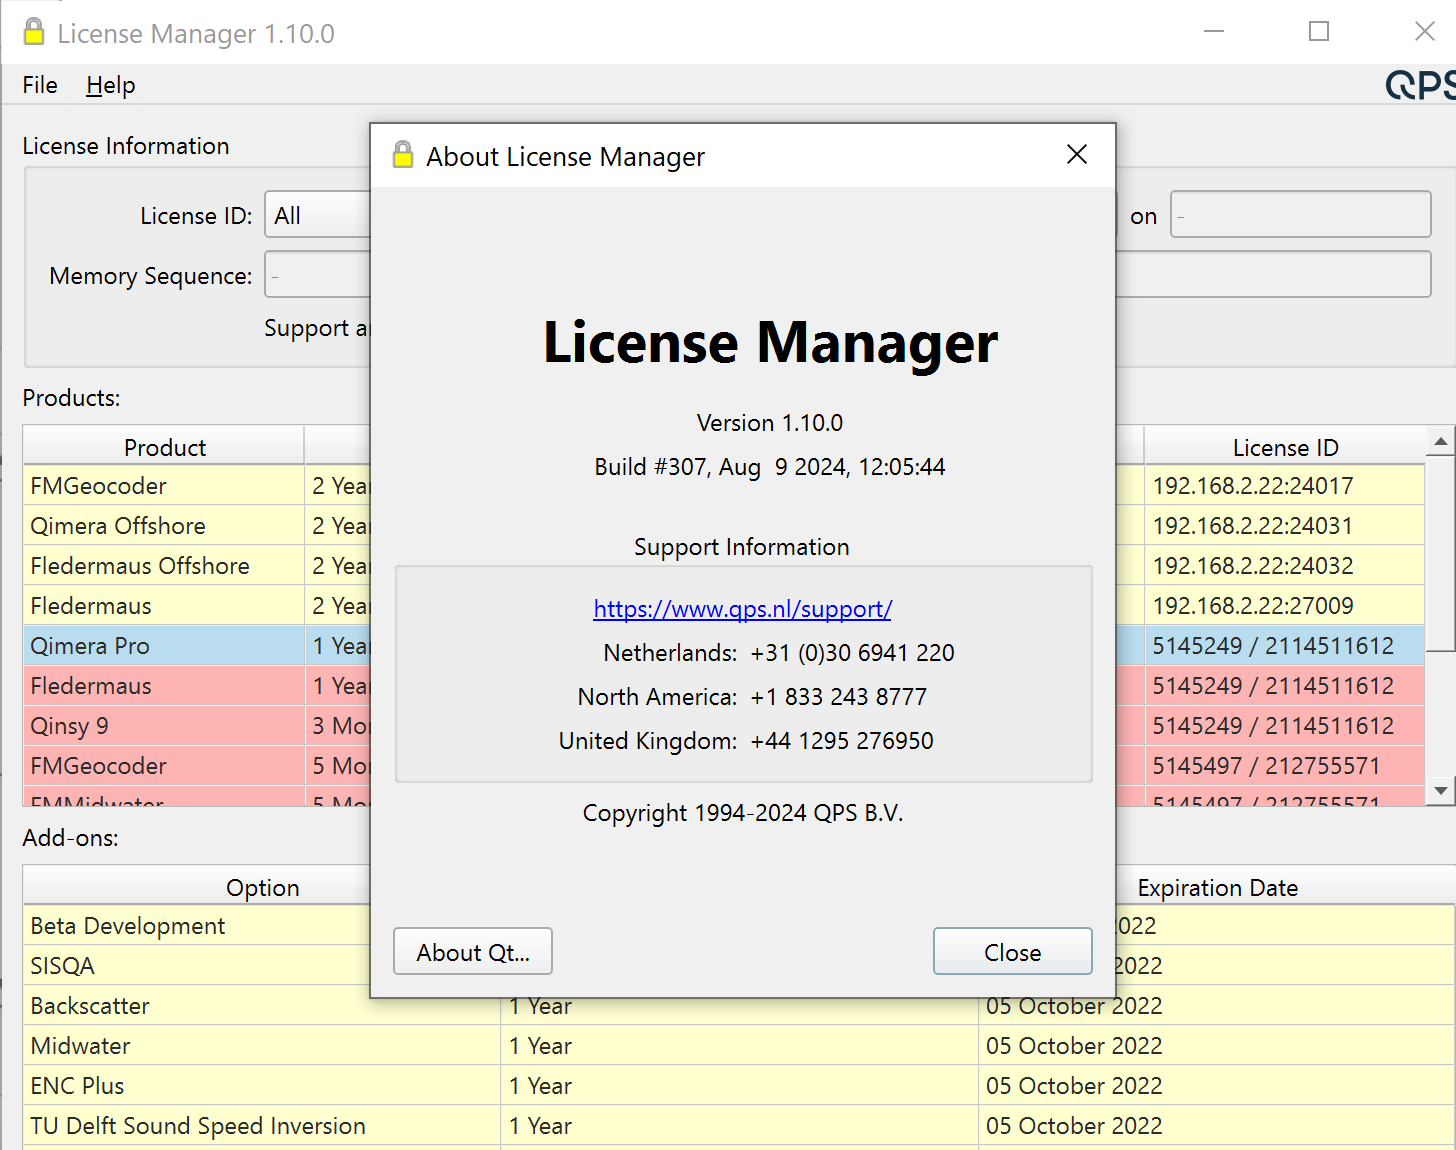
An About dialog option is also available. This will show the version number of the License Manager and some other details.
How-to Articles
Primarily for ICT managers, not for individual Softlock License users.
Troubleshooting
1) Modern Windows operating systems can have something called Hyper-V (or Hyper Visor) turned on. Having this active causes some processes to be run in a virtual machine (VM).
By default, QPS softlocks are restricted and won't work on an OS that is running within a VM or one that has Hyper-V enabled.
If you are unable to use the licensing due to this restriction, QPS may be able change the configuration of your license to enable use on a VM / Hyper Visor based machine.
2) If your license is not activating successfully, ensure that you can view wyday.com in a web browser.
If you cannot see this page (this is the same address that the license software uses to authenticate), it may be necessary to whitelist wyday.com, or perhaps use a proxy if your organization has one in place.
