How-to - Working With Large Data
Introduction
The following information is a descriptive document of how to deal with large datasets with FMGT as a guideline of the considerations in the steps that apply to process large datasets.
Step 1. Project Creation & Importing data considerations
It is recommended to work with source data directly on the local hard drive (i.e. C: drive of your PC) of your unit. Using external hard drives or working with data over the network, will cause bottlenecks of data transmission that can hinder the processing for FMGT and will not be apparent as a bottleneck. You will likely get crashes or errors due to memory allocation warnings, even if your unit has a lot of memory available.
If you are working with paired raw sonar files, once the files are loaded into FMGT and the GSF format is created and loaded in the project, you can remove the raw sonar files from the unit (saving it on an external drive). FMGT converts the paired source data into the GSF format and does not need the original raw sonar pairs once it has converted them to GSF format. Please click here for more information: FMGT Supported Data Formats.
If you are working with single Sonar Files, once the mosaic is created, and you no longer need to create mosaics, you can then remove the data from the local drive and store elsewhere, to save disc space. You are still able to create an ARA and statistics surfaces, and use the editing tools (such as Edit Segment tool, etc on the mosaic).
Do a test run with a reduced number of files, and test scaling it up while adding batch files. In short work in small steps to begin with, and then add more data to make sure everything is working as expected.
Step 2. Processing and Computing power
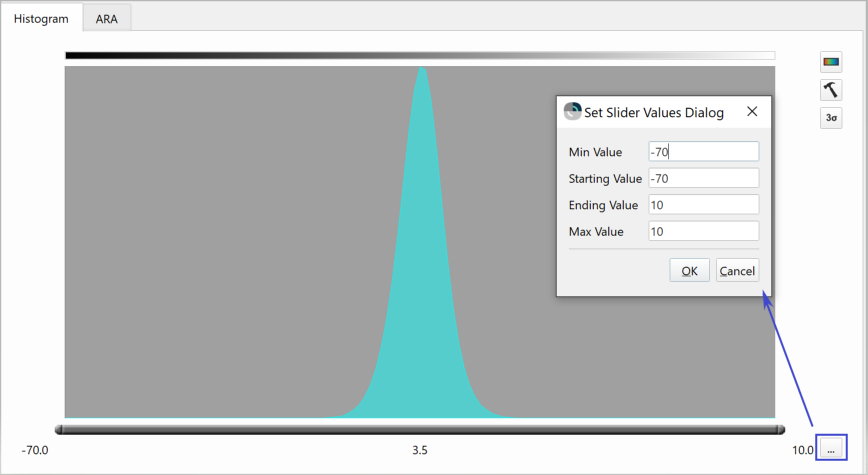
If your project encompasses many days and data sets and will use tiling, a recommended workaround is to compartmentalize the project into smaller daily project loads. At the end of the job, you can merge all the final mosaic GeoTiffs into one. If you do this, it is important to be mindful to use the same histogram data range for each of the daily projects, to give a nice final GeoTIFF with no obvious seams between projects due to different ranges. This can be done by going to the histogram tab, hitting the bottom right button (...), and selecting the range of data here to be the same for each of the daily projects (See Figure 1.). More information on the Histogram Panel can be found here: Histogram Panel

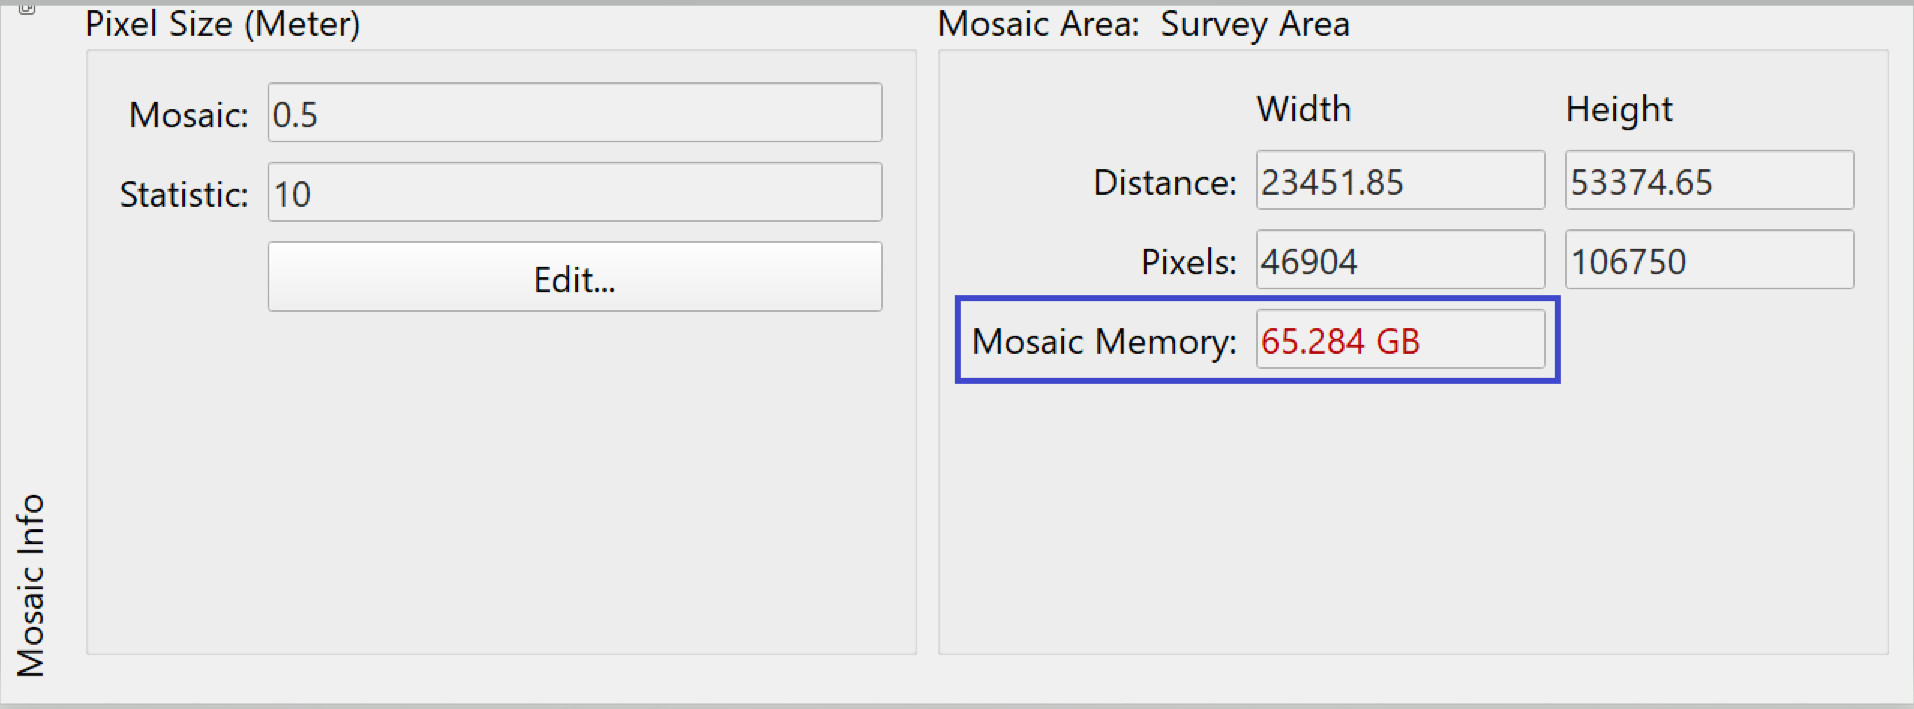
Figure 1. Set Slider Values Dialog for histogram range. Keep the same range if you are working with daily projects.With FMGT Mosaic Memory allocation it is important to be aware that the Pixel Height maximum value is 65535. If this limit is reached, the values on the memory estimate size for the mosaic will turn red (See Figure 2.) and it is possible that continuing will cause memory allocation problems. If you want to maintain the same resolution, and there is not enough memory allocated in the unit to create the mosaic (RAM and Storage) you will then need to use the manual processing mosaic tiling option. For more information about manual processing and tiling please go to the reference manual page of FMGT Mosaic Information Panel.

Figure 2. Mosaic Info Panel showing Mosaic Memory and Pixel Height.
Step 3. Processing Pipeline & Workflow
When working with the manual process, which is recommended for a very large dataset, or if you have to troubleshoot a group of large dataset lines. Work in stages by closing FMGT off between the processing stages and restarting the software and the project. By doing so, it forces a memory release each time it is shut down. Memory allocation for a continual project is cumulative, over time the small memory usage with each of these large files adds up and can result in a memory warning from FMGT. As an example, after adding the source files close FMGT, restart it and go to the Manual Tab and do the Adjust Stage, then close FMGT and restart. Repeat this for the Filter stage and finally when building the final mosaic use the tiling function under the Manual Processing Tab.
For very large surveys, the mosaic size may be too large to fit into memory at full resolution. You have two options:
You may reduce the resolution as demonstrated in Figure 3. More information on FMGT Mosaic Information Panel can be found by clicking on the link.

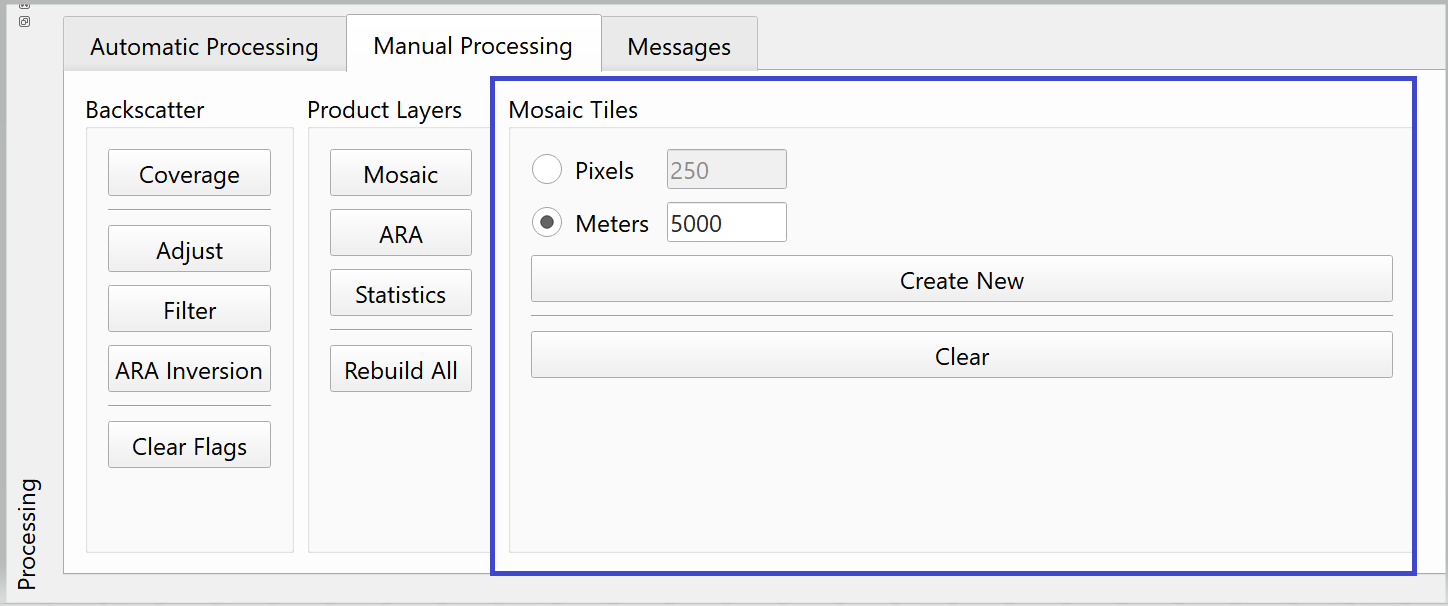
Figure 3. Mosaic Info Panel and the GUI to adjust the resolution.The second option is to create Mosaic Tiles. In order for FMGT to process without tiling, you will need 80% of the memory available in the system (not the total that your unit comes with, but the one available at the moment of creating the mosaic). It is important to be aware of the number given under the Mosaic Area: Survey Mosaic Memory. This Mosaic Memory number is only an initial estimate of the mosaic sd file size that will result. However, the memory needed for FMGT will be more than this, as it will create the file in RAM first. Mosaic Tiles allow the full resolution with using less memory. The Mosaic Tiles is found in the Processing section as depicted in Figure 4, more information on Mosaic Tiles can be found by clicking on the link.

Figure 4. Manual Processing tab with Mosaic Tiles Options
Step 4. Final Product operations options & Troubleshooting
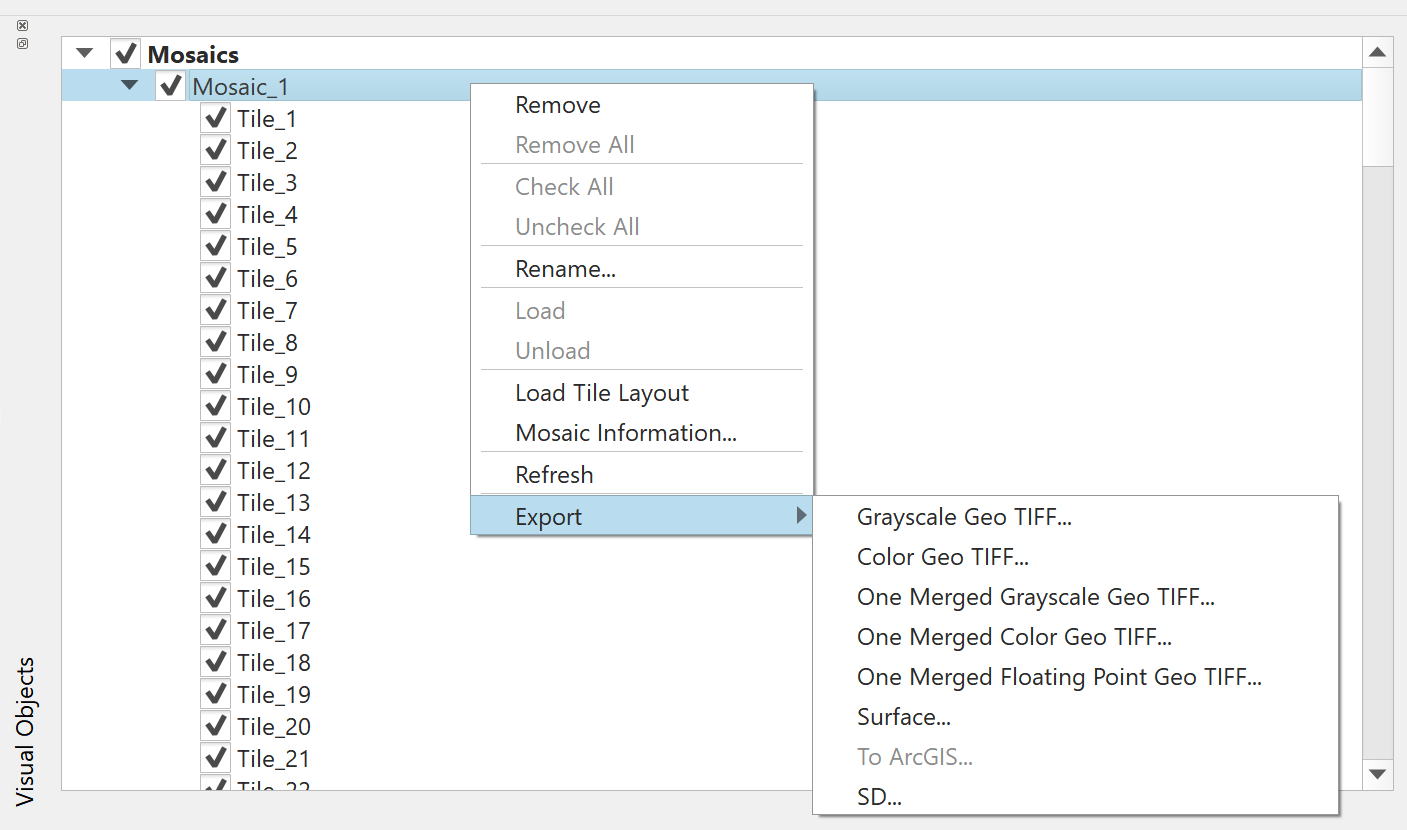
When working with tiling you will be able to have one complete mosaic for export to a final GeoTIFF, if you right-click in the parent Mosaic_1, and choose export One merged Mosaic (Figure 5). More information on Export options of tiled Mosaics can be found here: Visual Objects under Mosaic Context Menu.

Figure 5. Export options are available for tiled mosaics by right-clicking on the Mosaic > Exports.Go by stages when troubleshooting, if you find problems, it is good to test: Load 5-10 lines at a time to find errors before setting up large processing to babysit
Try Small tiles and areas and test processing time, then go bigger.
