How-to - Add a Reference Grid to Improve Backscatter Corrections
A Reference Grid in the Fledermaus DTM SD format can be added to FM Geocoder Toolbox (FMGT) to improve your results. In the case of multibeam sonar source data where corrected bathymetry is present (Kongsberg ALL, fully populated GSF, Qinsy QPD-DB pairs, S7K-GSF pairs, etc.) the Reference Grid will be used to determine topographic slope, while the corrected bathymetry in the source files will continue to be used to geo-reference the snippet trace from a single ping to the correct spot on the seafloor and with the correct scaling. In the case of unpaired XTF files (processed using "Sidescan Solo" mode in FMGT), the Reference Grid can be used to improve sidescan pixel georegistration.
Use of the Reference Grid as part of the corrections for multibeam bathymetry backscatter was implemented in Fledermaus Version 7.4.1.
Earlier versions will not use the grid when processing multibeam backscatter, but will make use of the grid when mosaicing data in Sidescan Solo mode (XTF files without supporting bathymetry).
To view larger versions of the images in any How-to, click on the images.
Step-by-step guide
Open your FMGT project, or create a new project. If you haven't done so already, use File>Add Source/Paired Files to add the backscatter imagery and corrected bathymetry files.
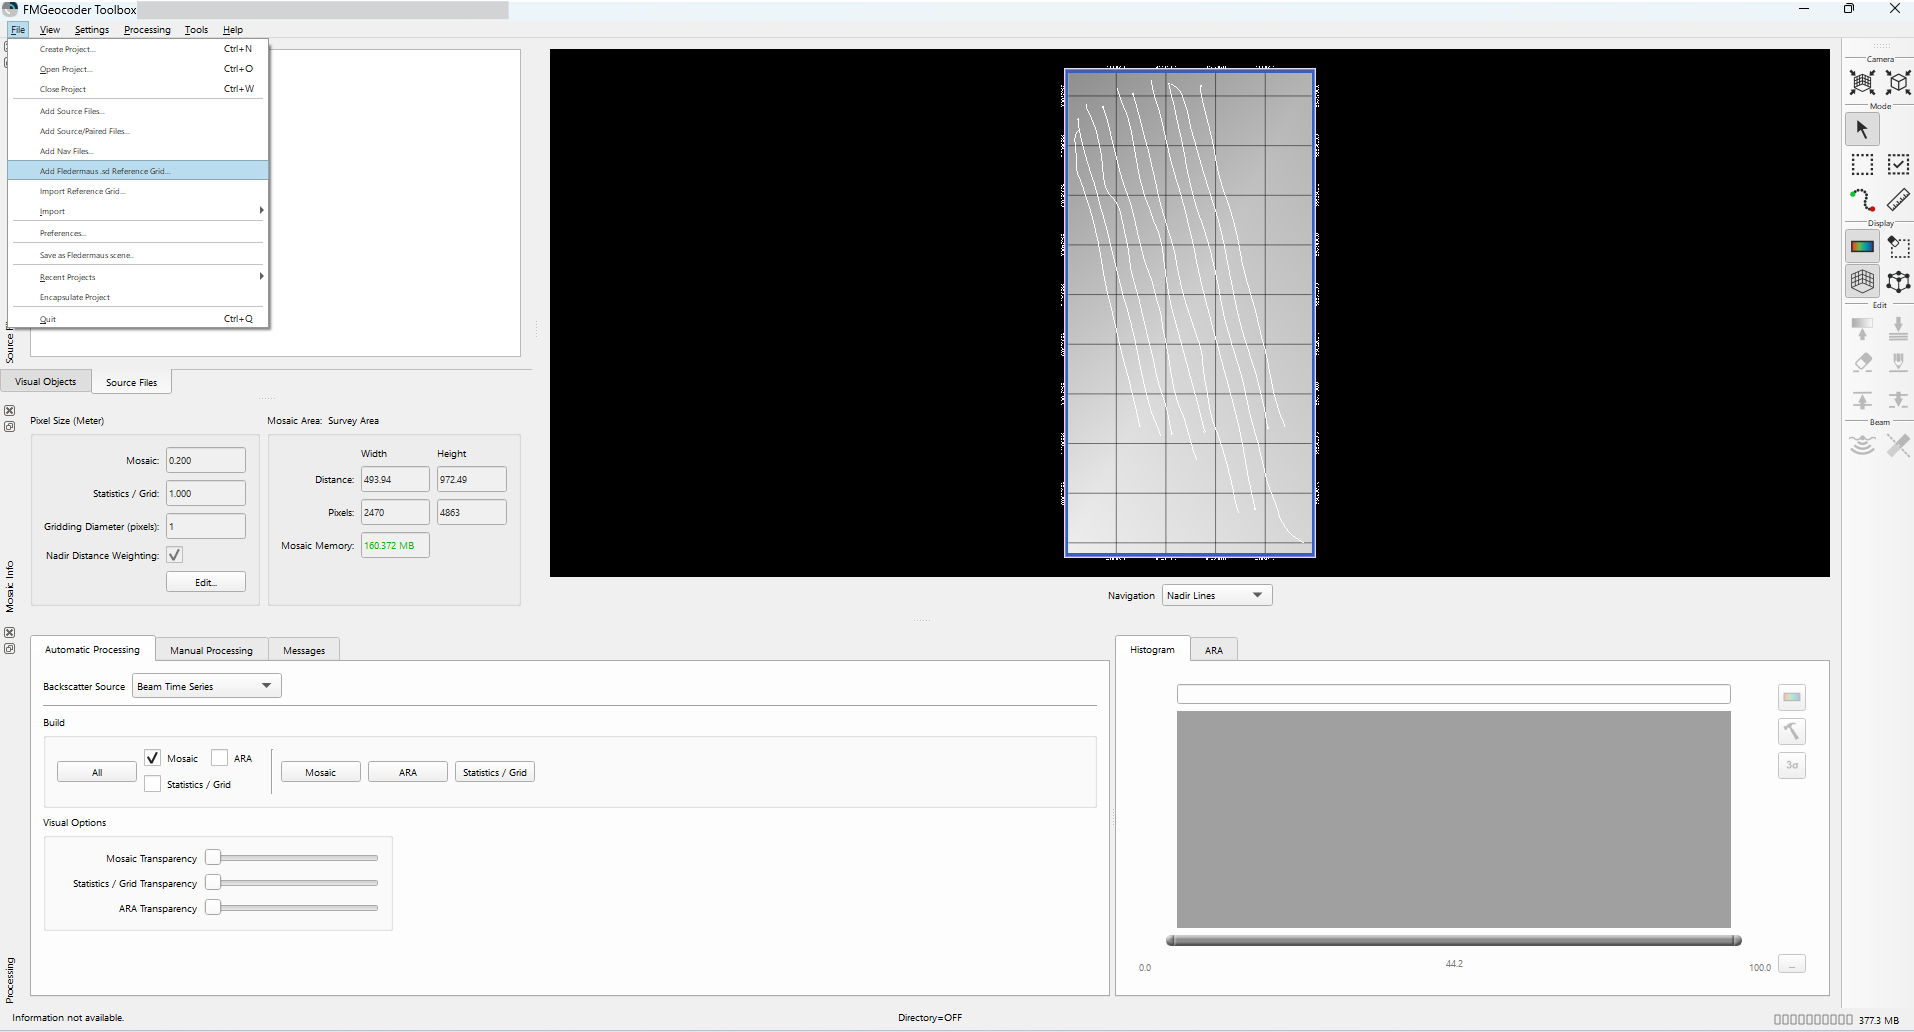
To add the Reference Grid, go to File > Add Reference Grid and choose the correct Fledermaus DTM SD.
For information on creating a DTM SD to use as a Reference Grid from Qimera, including the current Extract Layer as Static Grid… workflow from a Dynamic Grid, please see this https://qpssoftware.scrollhelp.site/qimera/how-to-migrate-a-qimera-project-to-fmgt
When creating a Reference Grid, the recommendation is to grid at the beam footprint resolution of your system, which is typically 1–3% of water depth or altitude (in the case of AUVs) for modern systems.

Add Fledermaus .sd Reference Grid
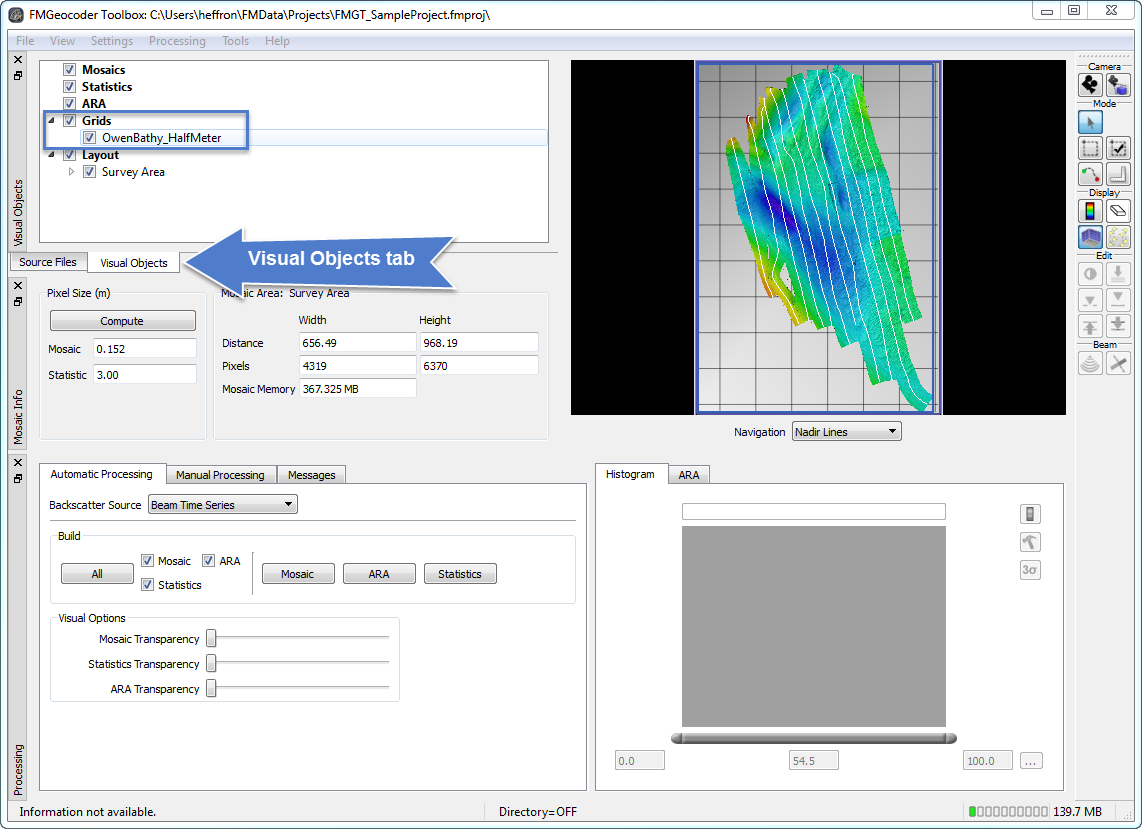
The Reference Grid will be visible in your Map View/Visualization area. The object is listed Visual Objects tab, under Grids. You can control the visibility by checking the object on or off. Note that checking it off will exclude it from being used as part of processing.

With the Reference Grid visible, click Mosaic. This will start the backscatter processing (Adjust and Filter stages) utilizing the Reference Grid and will generate a mosaic.
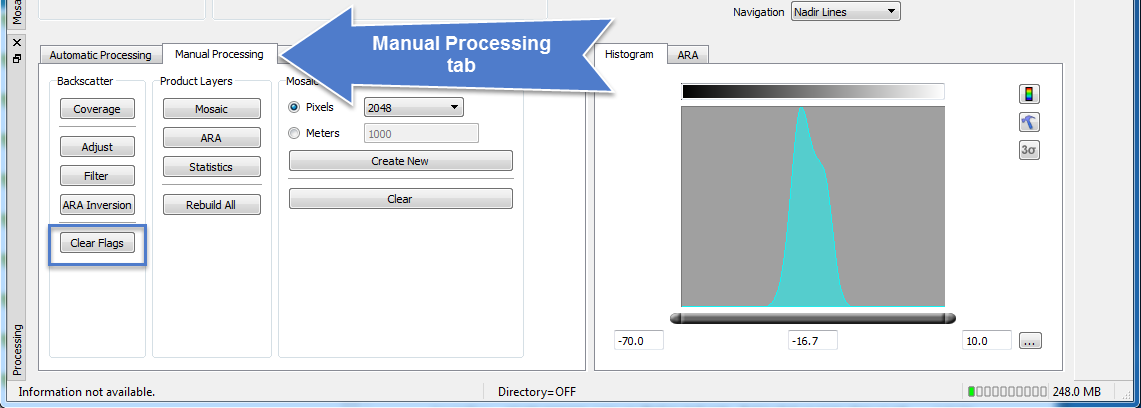
If you already have a mosaic created in your project prior to adding the Reference Grid, you will need to clear the processing flags and re-run the processing to see changes. In the Manual Processing tab, click the Clear Flags button and check the box next to Adjust (see images below; this will also trigger the Filter and ARA stages to reprocess). Then click Mosaic in either the Manual or Automatic Processing tab to re-run the processing utilizing the Reference Grid.


