CUBE Tools
Most options for outputting CUBE PFMs are located on the Tools drop-down menu in the PFM Attributes Panel in Fledermaus (see Figure 152). The three available options are discussed in the next sections.
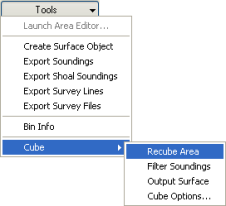
Figure 1 52 - CUBE Tools Menu
Recube Area
Clicking the Tools > Cube > Recube Area will re-run the CUBE hypothesis generation algorithm on the chosen area. This command is useful if soundings that should not contribute to CUBE hypotheses have been deleted and the hypotheses should be re-generated (this option is also available on the right-click menu of the 3D Editor when editing CUBE hypotheses).
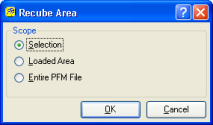
Figure 1 53 - Recube Area Dialog
The Recube algorithm can be run on the current selection box, the extracted area, or the entire PFM file. Choose either the Selection, Loaded Area, or Entire PFM File toggle respectively to select the desired area (see Figure 153). Click the OK button to rerun the algorithm or click Cancel to close the dialog. When the CUBE PFM is generated through PFMDirect, the Cube algorithm is automatically run on the entire file.
Filter Soundings
The Cube Filter Soundings dialog as shown in Figure 154, is used to apply a filter to a set of soundings in the PFM file based on the Cube surface. This option can be used in conjunction with the Tools > Export Soundings option to write out a set of soundings that match the Cube surface within a certain tolerance.
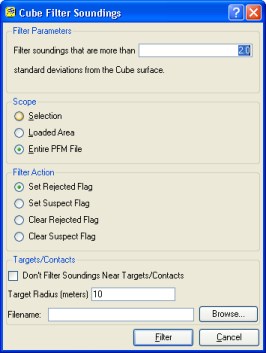
Figure 1 54 - CUBE Filter Soundings Dialog
The filter is applied to all soundings outside of a certain range from the Cube surface. Enter a scale factor in the Filter Parameters box to control how many standard deviations away from the surface the filter is applied. The filter can be run on all soundings inside the current selection box by selecting the Selection toggle, or all soundings in the extracted area by selecting the Loaded Area toggle. Alternately, the filter can be applied to all soundings using the Entire PFM File toggle.
There are four possible outcomes for the filter depending upon which Filter Action is chosen:
- Set Rejected Flag – set the filter rejected flag for all soundings that match the filter.
- Set Suspect Flag – set the suspect flag for all soundings that match the filter.
- Clear Rejected Flag – clear the filter rejected flag for all soundings that match the filter. This operation is the reverse of the Set Rejected Flag filter and should not unreject any soundings rejected manually through the 3DEditor.
- Clear Suspect Flag – clear the suspect flag for all soundings that match the filter. This operation is the reverse of the Set Suspect Flag filter.
The filter can be instructed to not modify soundings around a set of targets by enabling the Don't Filter Soundings Near Targets/Contacts toggle and entering a file in the Filename field. Click the Browse button to select a file using a standard file select dialog box. The target file can either be an XML or ascii file. If an XML file (with a .xml extension) is specified than it will be assumed to be a NAVO formatted XML target file and will be processed accordingly. The filter will extract the target positions from the file and project them as necessary according to the projection information from the CUBE based PFM file. Currently a maximum of 256 targets are supported from an XML target file. If a file does not have the .xml extension then it will be processed as an ASCII file which simply reads the x and y positions from each line of the file. The first two fields of any line must be in the order of x then y. Any extra fields are simply ignored. The program attempts to detect and project geographic coordinates into the UTM space of the PFM (If it is indeed a UTM PFM.) Projected coordinates can be directly supplied in the file as well. In performing the filtering, soundings that are less than the distance specified in the Target Radius field away from a target are not modified. Input the distance in meters.
Output Surface
The current CUBE surface can be output to an ASCII file using the Tools > Cube > Output Surface menu option. For each bin of the PFM that contains a valid CUBE hypothesis, an ASCII XYZ point is outputted representing the center of the bin followed by a value representing the uncertainty of the chosen hypothesis.
The area of the PFM to output can be chosen using the CUBE Output Surface Dialog (see Figure 155). Select the Selection toggle to output the area inside the selection box or select the Loaded Area toggle to output the entire extracted area. If the Entire PFM File toggle is selected, all bins in the file are written.
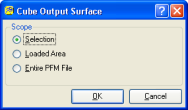
Figure 1 55 - CUBE Output Surface Dialog
Cube Options
Different options for the CUBE surface can be controlled with the Tools > Cube > Cube Options menu option, which displays the Cube Options dialog (see Figure 156). Both the Hypothesis Resolution Algorithm and Capture Distance options affect how the Recube algorithm is run using Tools > Cube > Recube Area.
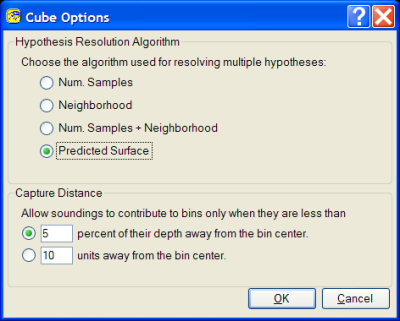
Figure 1 56 – CUBE Options Dialog
When running the CUBE algorithm, sometimes multiple hypotheses are generated. The algorithm must make a best guess on which hypothesis is correct using a Hypothesis Resolution Algorithm. The following algorithms are supported:
- Num. Samples – The hypothesis containing the most soundings will be chosen.
- Neighborhood – The algorithm searches all the neighbors of the cell looking for a cell with only one hypothesis. If a cell is found with one hypothesis, this cell is used as a guide in choosing a hypothesis; otherwise the Num. Samples algorithm is used.
- Num. Samples + Neighborhood – A combination of the two previous algorithms.
- Predicted Surface – The algorithm computes the median surface of the input soundings as uses that surface as a guide in choosing the hypothesis.
Usually the Predicted Surface algorithm performs the best and is the default, although other algorithms may perform well depending upon the type of data.
Internally, the CUBE algorithm has no concept of cells. A sounding may contribute to many different hypotheses depending on how far away the sounding is away from the hypothesis center in the XY plane. The Capture Distance option controls how far the sounding can be to contribute to a hypothesis and the algorithm assumes that deeper soundings will be less accurate. If the distance from the hypothesis center to the sounding is less than the sounding height multiplied by the Capture Distance percentage, the sounding will be included in the hypothesis. Smaller Capture Distance values result in less soundings contributing to a hypothesis and larger values result in more soundings contributing to a hypothesis. If the Capture Distance is too small, holes may appear in the data. The default value is 5 percent. In some cases, this Capture Distance does not make sense so to turn the algorithm off, enter 100 as the Capture Distance value.
The CUBE options menu also allows you to turn any soundings that have been flagged as features, either in the original source files or from within Fledermaus in custom hypothesis. This means that for any feature soundings the final CUBE surface will have a depth at exactly the same location. Figure 157 displays the dialog for setting custom hypothesis from features. The only option is what scope you would like the operation to affect.
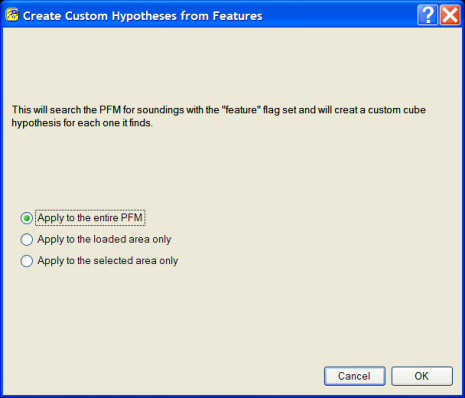
Figure 157 – Create Custom Hypotheses from Features Dialog
Return to: Reference Manual
